Advertisement
Quick Links
Advertisement

Related Manuals for E-Z UP Bungalow


Summary of Contents for E-Z UP Bungalow
-
Page 2: Table Of Contents
THANK YOU... for your purchase of the Bungalow by E-Z UP . For over ® 20 years, E-Z UP ® customers have been thrilled with their E-Z UP ® experience. To ensure your complete satisfaction, take the time to learn how to operate the Bungalow ®... -
Page 3: Intro
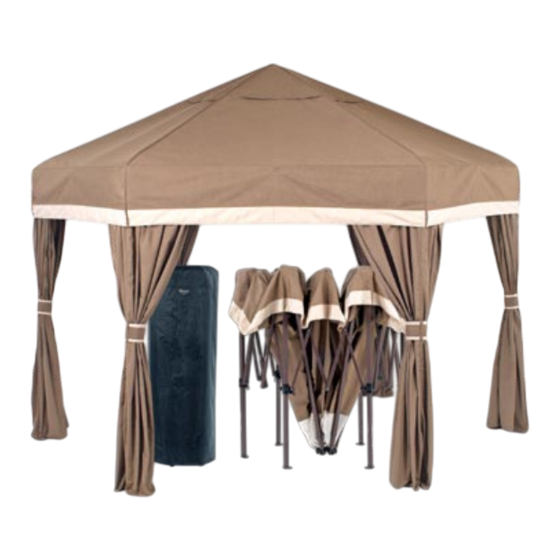
INSTRUCTIONS Please read each step before you attempt to set up. Save these instructions for future reference. NOTE - First time top and frame attachment is required Top and frames are shipped separately to avoid damage. A first time set up requires that the main frame and sub frame be assembled together and the top to be attached to the frame. -
Page 4: Set-Up Instructions
STEP 4 Use the bolts and tools provided to connect the part “B” peak assembly to the part “A” hub in three locations. STEP 5 Place your Bungalow by E-Z UP frame ® ® in the center of area to be shaded. With... - Page 5 STEP 8 Fabric Top Unscrew top attachment nut from bolt. Place grommeted fabric top over the bolt, install top attachment nut and tighten until snug. Top should rotate easily - Do not over tighten. Repeat on remaining grommets. STEP 9 With partner, grasp the bottom of the diamond shaped area of trusses on opposite sides of the shelter.
- Page 6 STEP 10 Engage the Auto Slider ® at each corner by pushing up on trusses with one hand while holding down the top of the leg with other hand. The quick pin will engage the hole. STEP 11 Use peak extension pole to push up center hub, extending top frame structure.
- Page 7 STEP 13 Secure all inner peak tubes with quick release pins. STEP 14 Carefully lift up adjacent outer legs and slide out the inner legs until snap button locks. Repeat on opposite legs. Be sure to adjust two legs at a time to avoid frame damage.
-
Page 8: Care And Maintenance
Use caution when handling the Bungalow ® folding frame. Avoid pinching hands or fingers as frame opens or closes. Always stake or weight down your Bungalow . Do not ® use in any potentially windy or rainy weather. Wind, rain and... -
Page 9: Take Down Instructions
TAKE DOWN INSTRUCTIONS STEP 1 With partner, disengage quick release pins. Depress snap button toggle on legs and telescope inner legs into outer legs. Repeat on other legs, making sure to do two legs at a time. STEP 2 Stand under shelter and locate center hub. - Page 10 ACCESSORIES SUN SCREEN VENT TOP SCREEN ROOM DELUXE STAKE KITS CONVERTIBLE SIDEWALLS DELUXE ACCENTED WEIGHT TIE-BACKS BAGS...
- Page 11 • Always stake or weight down your Bungalow® Pavilion. Do not use in any potentially windy or rainy weather. Wind, rain and snow can dam- age the Bungalow® Pavilion and may also result in injury to you or others. Therefore, do not rely on shelter for protection in heavy or prolonged weather storms.
- Page 12 95-704390; 94/2354; 91461; 132167; 95/0693; 95/6140; 95/6141; 84107895; 684,978; 2123096; 190486; 289754; 701077; 2128935; 2949648; 48648; DE 695 10 919 T2; WO96/03561.International Design Registration No. DM/009515 Benelux Design Registration No. 16959-04. Other US and foreign patents pending. Sunbrella® is a registered trademark of Glen Raven, Inc. © Copyright 2007 International E-Z UP, Inc. USA. All rights reserved.
- Page 13 Important Information: • Always stake or weight down your Bungalow ® Pavilion. Do not use in any potentially windy or rainy weather. Wind, rain and snow can dam- age the Bungalow® Pavilion and may also result in injury to you or others. Therefore, do not rely on shelter for protection in heavy or prolonged weather storms.
- Page 14 6,439,251; 6,601,599; 95-704390; 94/2354; 91461; 132167; 95/0693; 95/6140; 95/6141; 84107895; 684,978; 2123096; 190486; 289754; 215344; 701077; 2128935; 2949648; 48648; DE 695 10 919 T2; WO96/03561.International Design Registration No. DM/009515 Benelux Design Registration No. 16959-04. Other US and foreign patents pending.© Copyright 2006 International E-Z UP, Inc. USA. All rights reserved. IN.HDSK.0306...
- Page 15 Key Tip: If also installing an insect screen, the full sidewall or corner curtains should be placed on the outside of the screen. Continued to next page © Copyright 2007 International E-Z UP, Inc. USA. All rights reserved.
- Page 16 Important Information: • Always stake or weight down your Bungalow ® Pavilion. Do not use in any potentially windy or rainy weather. Wind, rain and snow can dam- age the Bungalow® Pavilion and may also result in injury to you or others. Therefore, do not rely on shelter for protection in heavy or prolonged weather storms.
- Page 17 Important Information: • Always stake or weight down your Bungalow ® Pavilion. Do not use in any potentially windy or rainy weather. Wind, rain and snow can dam- age the Bungalow® Pavilion and may also result in injury to you or others. Therefore, do not rely on shelter for protection in heavy or prolonged weather storms.
- Page 18 695 10 919 T2; WO96/03561. International Design Registration No. DM/009515 Benelux Design Registration No. 16959-04. Other US and foreign patents pending. © Copyright 2006 International E-Z UP, Inc. USA. All rights reserved. Sunbrella is a registered trademark of Glen Raven, Inc. BNG OM_13&16.0206...
- Page 19 AuthenTEAK Outdoor Furniture 1094 Hu Rd Atlanta, GA 30318 404-525-1995 info@authenteak.com authenteak.com...
Need help?
Do you have a question about the Bungalow and is the answer not in the manual?
Questions and answers
Do you make hexagon replacement tops for the Bungalow?