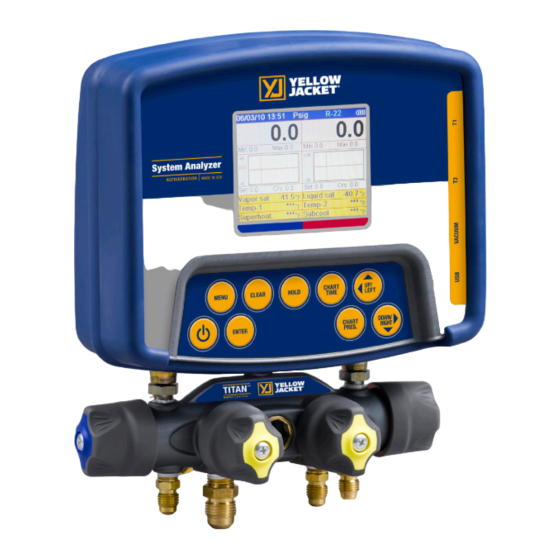
yellow jacket 40813 User Manual

yellow jacket 40813 User Manual

Refrigeration system analyzer. versions 1.06 and higher

Advertisement

99 Washington Street
Melrose, MA 02176
Phone 781-665-1400
Toll Free 1-800-517-8431
Visit us at www.TestEquipmentDepot.com
YELLOW JACKET
®
Refrigeration System Analyzer
Users Manual
UPC# 40812, 40813 and 40815
(Versions 1.06 and higher)
Note: These instructions do not cover the manifold
attached to the instrument.

Advertisement

Table of Contents
loading
Need help?

Need help?

Do you have a question about the 40813 and is the answer not in the manual?

Questions and answers

Summary of Contents for yellow jacket 40813

  • Page 1 Melrose, MA 02176 Phone 781-665-1400 Toll Free 1-800-517-8431 Visit us at www.TestEquipmentDepot.com YELLOW JACKET ® Refrigeration System Analyzer Users Manual UPC# 40812, 40813 and 40815 (Versions 1.06 and higher) Note: These instructions do not cover the manifold attached to the instrument.
  • Page 2: Table Of Contents

    Table of Contents Chapter Title Chapter Title Features and Specifications Before You Start Instrumentation Specifications Contact and Safety Information Warranty Policy Getting Acquainted Turning the Instrument On List of Tables and Off Battery Considerations Table Title Keyboard Keys Safety Information Understanding the Displays Symbols Using the Temperature and...
  • Page 3: Before You Start

    Do not open the instrument other than open- To order accessories, receive assistance, or ing the battery door. Have the instrument locate the nearest YELLOW JACKET distributor. serviced only by Ritchie Engineering Co. or authorized service centers. ●...
  • Page 4: Getting Acquainted

    Chapter 2 Table 1-1. Safety Information Getting Acquainted Caution To avoid damage to equipment, follow these Introduction guidelines: This instrument will clearly and accurately report ● Do not allow pressures beyond the specifi- critical information needed to properly service re- cations listed in this manual.
  • Page 5: Keyboard Keys

    Maximizing Battery Life The illustration below shows three bars that indi- cate a fresh or well-charged battery pack. When the battery weakens, the bars will disappear one- Battery life decays fastest when the DIGITAL by-one as the battery power decays. When one MANIFOLD display is selected, the vacuum sen- bar remains, the symbol will turn yellow.
  • Page 6: Understanding The Displays

    Understanding the Displays Figure 2-7. Vacuum Gauge Display Figure 2-4. Menu Display (See Chapter 3) Use the ▲ or ▼ keys to scroll through the menu. Press the “Enter” key to make a selection. Figure 2-8. Data Logging Start-Up Display Figure 2-5.
  • Page 7: Using The Temperature And Vacuum Sensors

    Chapter 3 Using the Temperature and Vacuum Sensors Getting the Job Done To use the external temperature and vacuum sen- Temperature and sors, plug them into the connectors located on the side of the instrument. The use of rubber connec- Pressure Mode tor boots is optional.
  • Page 8: First System Analyzer Display

    While using any of the digital manifold or vacuum gauge display screens, press the UP/LEFT key to activate a pop-up screen where options can be changed using the UP/LEFT and DOWN/RIGHT keys. Press the MENU key to save the selections and exit the pop-up screen.
  • Page 9: Vacuum Mode

    Pressure units. While using any of the digital manifold or vacuum gauge display screens, press the UP/LEFT key to activate a pop-up screen where options can be changed using the UP/LEFT and DOWN/ RIGHT keys. Press the MENU key to save the selections and exit the pop-up screen.
  • Page 10: Vacuum Sensor Calibration

    Vacuum Sensor Calibration Utility Before data logging, verify that the units (tem- perature, pressure, vacuum) are set to the desired Whenever a new vacuum sensor is used, the six- values. They cannot be changed when data digit calibration number printed on the side of the logging is active.
  • Page 11: Playback And Usb Functionality

    Chapter 5 Playback and USB Functionality Settings Saved data log files can be viewed using the Introduction “Playback” option. In Playback mode, the digital manifold screen will appear just as it did during the logging process. Use the <> buttons to scroll This following display presents the instrument through the recorded data.
  • Page 12: Temperature Unit

    key. After setting each component, the values are Warning accepted by, once again, pressing the “Enter” key. The changes may be discarded by pressing the The refrigerant database in this unit may “Menu” key while the pop-up window is active. include refrigerants classified as flammable.
  • Page 13: Zero Pressure

    Chapter 6 Maintenance Introduction Basic operator maintenance is covered in this chapter. For more extensive maintenance and for repair, contact Ritchie Customer Service. See Chapter 1 for contact information. General Maintenance Figure 5-4. Refrigerant Favorites Screen Since this instrument may be used in the pres- Zero Pressure ence of a wide range of chemical liquids and va- pors, it is recommended that the case be cleaned...
  • Page 14: Replacing The Batteries

    Replacing the Batteries Turn the unit off. Rotate the hook (1) out of the way of the battery door. Unscrew the battery door thumbscrew (2) and remove the battery door. Lift The main batteries will need to be replaced on the battery pack out somewhat to allow access to a routine basis.
  • Page 15: Further Assistance

    When Further Assistance Features is Needed Display Digital/analog redundancy for Graphics pressure values; adjustable If this manual does not include information need- chart resolutions to display ed to resolve any difficulty you may experience: more or less data; three screen layouts to facilitate various Examine the instrument for any cracks viewing distances...
  • Page 16: Instrumentation Specifications

    Inc. is guaranteed to be free from material and workmanship defects for a period of two years. High side: 1500 psi All other YELLOW JACKET® products included in this package are guaranteed to be free from Temperature -100°F to 600°F...

This manual is also suitable for:

4081540812

Table of Contents