Table of Contents
Advertisement
Potential for Fire, Smoke and Asphyxiation Hazards
Incorrect installation, adjustment, or misuse of this burner could result in death, severe
personal injury, or substantial property damage.
To the Homeowner or Equipment Owner:
Please read and carefully follow all instructions
provided in this manual regarding your
responsibilities in caring for your heating
equipment.
Contact a professional, qualifi ed service agency for
installation, start-up or service work.
Save this manual for future reference.
COMMERCIAL PRODUCTS
To the Professional, Qualifi ed Installer or Service Agency:
Please read and carefully follow all instructions provided
in this manual before installing, starting, or servicing this
burner or heating system.
The Installation must be made in accordance with all state
and local codes having jurisdiction.
Advertisement
Table of Contents

Related Manuals for Beckett CF800


Summary of Contents for Beckett CF800
- Page 1 Potential for Fire, Smoke and Asphyxiation Hazards Incorrect installation, adjustment, or misuse of this burner could result in death, severe personal injury, or substantial property damage. To the Homeowner or Equipment Owner: Please read and carefully follow all instructions provided in this manual regarding your responsibilities in caring for your heating equipment.
-
Page 3: Table Of Contents
READ THESE INSTRUCTIONS AND SAVE FOR REFERENCE Your Beckett burner will provide years of effi cient operation if it is professionally installed and maintained by a qualifi ed service technician. If at any time the burner does not appear to be operating properly, immediately contact your qualifi... -
Page 4: General Information
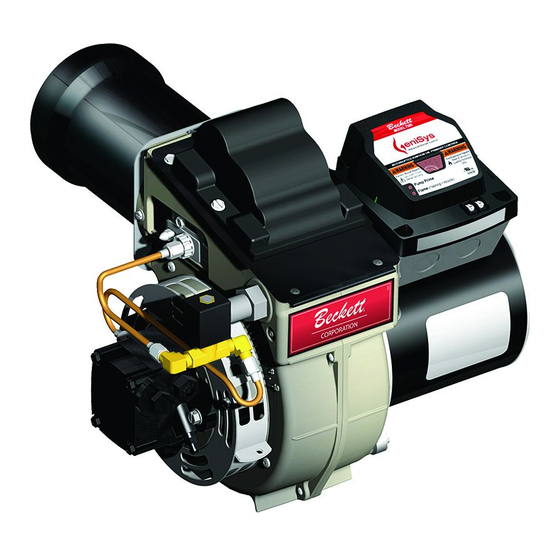
U.S. #1 or #2 Fuel Oil only (ASTM D396) Canada #1 Stove Oil or #2 Furnace Oil only CF500: 1.75 to 5.50 GPH Firing range CF800: 3.00 to 8.00 GPH 1/3 HP 3450 RPM Motor 120/60 hz standard 4.8 amps @ 120 VAC Igniter... -
Page 5: Owner's Responsibility
Clearances With the burner installed in the appliance, there must be adequate space in front of and on the sides of the burner to allow access and operation. Verify that the clearance dimensions comply with all local codes and with the appliance manufacturer’s recommendations. -
Page 6: Nozzle Pressure
If fuel supply is below the fuel unit — Use a two-pipe oil system when the fuel unit must lift the oil more than 8 feet if burner is equipped with a B fuel unit. The return line provided by the two-pipe system is needed to purge the air from the fuel lines and minimize the likelihood of air-related problems during operation. -
Page 7: Verify Firing Rate
fi ring rate for the burner depends on the length of the fi ring chamber and the distance from the burner center to the chamber fl oor. Verify that the chamber dimensions are at least as large as the minimum values given in Figure 2. If the appliance dimensions are smaller than recommended, reduce the fi... -
Page 8: Stray Light
Figure 3a - Firebox Pressure: CF500 with no Reserve Air Firebox Pressure in Inches Water Column (W.C.) Figure 3b - Firebox Pressure: CF800 with no Reserve Air Firebox Pressure in Inches Water Column (W.C.) Stray Light Failure to follow these instructions could cause... -
Page 9: Mount Fl Ange(S) On Air Tube
Figure 4 - Mount fl ange(s) on air tube Mount air tube to burner Insert the air tube into the burner housing. Carefully align the the four screw holes. Attach the air tube to the burner using the four provided screws. CF500/CF800 Burner Manual Section: Mount the Burner Install nozzle Install the oil nozzle in the nozzle adapter. -
Page 10: Set Dimension Z
The burner is shipped without the by-pass plug installed. Intall the by-pass plug in two-pipe oil supply systems ONLY. ○ The CF500 and CF800 burners are shipped without the by-pass plug installed in the fuel line. ○ The by-pass plug must NOT be installed when using with a one-pipe oil system. -
Page 11: Burner Fuel Fl Ow
fi ring rate. Do not change this pressure unless directed to do so by the appliance manufacturer. CF500/CF800 Burner Manual Wire the Burner Electrical shock can cause severe personal injury or death. Disconnect electrical power before installing or servicing the burner. - Page 12 Section: Wire the Burner Figure 10. – Typical Wiring (7505P) LINE VOLTAGE SERVICE 120V 60Hz FROM FUSED DISCONNECT SWITCH LIMITS OPERATOR DETECTOR 7505P EQUIP TERMINAL SUPPLIED BY INSTALLER TRANS MOTOR Legend Line 1 Power (Hot) Line 2 Power (Neutral) Limit control Terminal...
-
Page 13: Fire Or Explosion Hazard
Figure 11 - 7505 Control Reset Button with Red Light Yellow Light Green Light Thermostat Terminals CF500/CF800 Burner Manual Fire or Explosion Hazard Can cause severe injury, death, or property damage. The control can malfunction if it gets wet, leading to accumulation of oil or explosive oil vapors. -
Page 14: Typical Burner Sequence Of Operation - 7505 Control
Delay, if applicable, or it is shut down and sent to Standby. Recycle: If the fl ame is lost while the burner is fi ring, the control shuts down the burner, enters a 60 second recycle delay, and repeats the ignition sequence. -
Page 15: Typical Burner Wiring - 7505 Control
Green (Could be stray light during standby) Control is in Pump Prime mode or Yellow Reset button currently held for 15+ seconds. CF500/CF800 Burner Manual Pushing the reset button will: Button Click Button Hold (press < 1 second) (press > 1 second) -
Page 16: Typical Burner Sequence Of Operation - R7184P Control
RUN. The burner runs until the call for heat is satifi ed. The burner is then sent to burner motor off delay, if applicable, or it is shut down and sent to standby. -
Page 17: Prepare The Burner For Start-Up
Fused disconnect Limit controls If any of these items are not clear or are unavailable, call Beckett at 1-800-645-2876 for assistance. Operating controls Oil primary controls Flame sensor, CAD cell type Ignition transformer... -
Page 18: Initial Air Settings (Table 5)
fi ring rate settings given in Table 8. ○ These initial settings should be adequate for starting the burner. Once the burner is in operation, the air settings will be adjusted for best performance as discussed later in this manual. -
Page 19: Start The Burner
fi re and asphyxiation hazards. Do not attempt to start the burner when excess oil has accumulated in the appliance, the appliance is full of vapor, or when the combustion chamber is very hot. -
Page 20: Cad Cell Resistance Measurement
Section: Start the Burner Cad Cell Resistance Measurement ○ If the Beckett 7505 control is equipped with the GeniSys Display Module, part 52067U, the cad cell resistance can be selected and read on the LCD screen. Also, the GeniSys Contractor Tool, part 52082U, can be used for this purpose. -
Page 21: Maintenance And Service
Clean and inspect the electrodes for damage, replacing any that are cracked or chipped. □ Check electrode tip settings. Replace electrodes if tips are rounded. CF500/CF800 Burner Manual Section: Maintenance and Service □ Inspect the igniter spring contacts. □ Clean the cad cell lens surface, if necessary. -
Page 22: Replacement Parts
Section: Replacement Parts Replacement parts Figure 13 - Adjustable mounting plates for CF500 and CF800... -
Page 23: Parts List
Control Air Band Air Shutter Fuel Pump Fuel lines Head Assembly: CF500 - KK CF800 - KH (Tube A) CF800 - KJ (Tube B) Electrode Assembly Nozzle Line Assembly Motor - 1/3 PSC Blower Wheel: CF500 - 5-19/32” x 2-13/32”... -
Page 24: Limited Warranty Information
The R. W. BECKETT CORPORATION (“Beckett”) warrants to persons who purchase its “Products” from Beckett for resale, or for incorporation into a product for resale (“Customers”), that its equipment is free from defects in material and workmanship. To qualify for warranty benefi ts, products must be installed by a qualifi...
Need help?
Do you have a question about the CF800 and is the answer not in the manual?
Questions and answers