Table of Contents
Advertisement
Quick Links
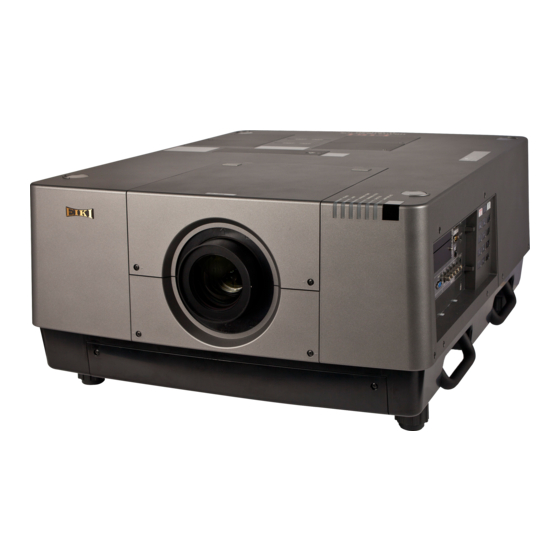
Model No. LC-XT6
US, Europe
SERVICE MANUAL
Multimedia Projector
* Projection lens is optional.
FOREWORD
For your convenience, all service parts, identified in this manual are available through Eiki's normal distribution channels.
In addition to service part number, the generic descriptions have been given, where possible, to allow your service
technicians to substitute equivalent components which might be available from other sources.
All orders for service parts will be honored. However, in instances where generic components are considered to be
available from several common sources, as would be the case with an industry standard fuse, resistor, or semicon-
ductor, it may be more economical and expeditious to purchase the part locally.
REFERENCE NO. SMA1211008E-00
(2012-11)
Advertisement
Table of Contents

Related Manuals for Eiki LC-XT6


Summary of Contents for Eiki LC-XT6
-
Page 1: Service Manual
* Projection lens is optional. FOREWORD For your convenience, all service parts, identified in this manual are available through Eiki’s normal distribution channels. In addition to service part number, the generic descriptions have been given, where possible, to allow your service technicians to substitute equivalent components which might be available from other sources. -
Page 2: Table Of Contents
Contents SERVICE MANUAL ........... 1 Chassis Description ..........158 Contents ................ 2 Chassis over view............158 Safety Instructions ............3 Boards connection ............159 Safety Precautions ............3 Troubleshooting ............160 Product Safety Notice .............3 No picture ..............160 Service Personnel Warning ..........3 No Power .............. -
Page 3: Safety Instructions
Safety Instructions Safety Precautions WARNING: The chassis of this projector is isolated (COLD) from AC line by using the converter transformer. Primary side of the converter and lamp power supply unit circuit is connected to the AC line and it is hot, which hot circuit is identified with the line ( ) in the schematic diagram. - Page 4 <PT-FW430U/PT-FW430E/PT-FW430EA/PT-FX400U/PT-FX400E/PT-FX400EA> Safety Instructions 1. Safety Precautions 1.1. General Guidelines - For continued safety, no modification of any circuit must be attempted. - Unplug the power cord from the power outlet before disassembling this projector. - Use correctly the supplied power cord and must ground it. - It is advisable to use an isolation transformer in the AC power line before the service.
-
Page 5: Specifications
Specifications The following table describes the specifications of the projector. Model No. LC-XT6 Power supply AC 200 V - 240 V 50 Hz/60 Hz 200 V - 240 V 11 A 1 850 W Power consumption When [Lamp power] in the [Setting] menu is set to eco-mode: 1 450 W... - Page 6 Specifications Model No. LC-XT6 Power cable length 3.0 m (118-1/8”) Outer case Molded plastic Width: 650 mm (25-5/8”) Height: 349 mm (13-3/4”) (feet fully retracted) Dimensions Depth: 815 mm (32-1/8”) (feet fully retracted, not including lens) Weight Approx. 46.5 kg (102.5 lbs.) Operating environment temperature* 1 : 5°C (41°F) to 40°C (104°F)
- Page 7 Specifications ■...
- Page 8 Specifications...
- Page 9 Specifications ■...
-
Page 10: Circuit Protections
Circuit Protections This projector provides the following circuit protections to operate in safety. If the abnormality occurs inside the pro- jector, it will automatically turn off by operating one of the following protection circuits. Fuses (F601, F602, F603) Fuses are located inside of the projector. If all the indicators are not lighting, the fuse (F602) may be opened. -
Page 11: Thermal Fuses (Sw903, Sw904, Sw905, Sw906)
Circuit Protections Thermal fuses (SW903, SW904, SW905, SW906) There are the thermal fuses (SW903, SW904, SW905 and SW906) inside of the projector to detect the internal temperature rising abnormally. When the internal temperature around lamps reaches near 99˚C, the thermal fuse will open to cut off the power supply to the lamp power circuit. -
Page 12: Temperature Sensors, Wind Sensors
Circuit Protections Temperature sensors, wind sensors The projector provides 2 temperature sensor ICs, 1 sensor on the main board and 1 sensor on the ex temp board, and 1 wind sensor on the intake duct. The sensor ICs monitor surrounding temperature of the panels/prism, and surrounding temperature of the intake duct, and the wind sensor monitors airflow passed through the air filter in the intake duct. -
Page 13: Power Failure, Fan Lock And Filter Error Detection
Circuit Protections Power failure, fan lock and filter error detection The projector provides the detection circuits of the power failure and the fan lock. When the detection circuit detects an error at the power supply line or at the fan operation circuit, the projector will turn into the standby mode to protect the other circuits defective. -
Page 14: Maintenance
Maintenance Before replacing the unit When maintaining or replacing the unit, always turn off the power and remove the power plug from the outlet. Maintenance n Outer case Wipe off dirt and dust with a soft, dry cloth. • If the dirt is persistent, soak the cloth with water and wring it thoroughly before wiping. Dry off the projector with a dry cloth. - Page 15 Maintenance 2) Remove the holder. • Loosen the three screws on the holder (A, B), slide the holder in the direction shown by the arrow in the im- age, and lift up to remove the holder. Holder B Screws Holder A 3) Remove the air filter.
- Page 16 Maintenance n Resetting the filter counter Filter counter Be sure to reset the filter counter after replacing the filters. Press the MENU button to display the On-Screen Menu. Use the Point ed buttons to select [Setting] and then press the Point 8 button or the SELECT button.
-
Page 17: Lamp Unit
Maintenance Lamp unit The lamp unit is a consumable component. Check the lamp usage duration with “[Information] menu” and perform regular replacement. If the replacement message is displayed on the screen and the lamp indicators <LAMP 1 REPLACE> to <LAMP 4 REPLACE> turn on, replace the lamp units. Replacement lamp POA-LMP147. - Page 18 Maintenance n Replacing the lamp unit Attention • Turn off the UV lamp before opening the lamp cover. • When the projector is mounted on the ceiling, do not put your face near the lamp unit. • Attach the lamp unit securely. •...
- Page 19 Maintenance 4) Use a Phillips screwdriver to turn the lamp unit fixing screws (two screws) until they turn freely, and then holding the handle, slowly pull out the lamp unit from the projector. Lamp unit Screw 5) Insert the new lamp unit taking note of its direction, and use a Phillips screwdriver to firmly tighten the lamp unit fixing screws (two screws).
- Page 20 Maintenance n Checking the projector used time and lamp used time The LAMP REPLACE indicator will light yellow when the total lamp used time (Corresponding value) reaches 2,000 hours. This is to indicate that lamp replacement is required. The total lamp used time is calculated by using the below expression, Total lamp used time (Corresponding value) = eco x 0.67 + normal...
-
Page 21: Quick Maintenance
Maintenance Quick maintenance This projector provides a cabinet front cover and PBS cover on the cabinet top to enhance the service maintenance. This enables service personnel to align the optical adjustment or replace the optical parts without disassembly the cabinet top. n Quick access to the Projection lens unit, LCD panel/prism assy, Polarized glass assy. -
Page 22: Cleaning The Optical Parts
Maintenance Cleaning the optical parts After long periods of use, dust and other particles will accumulate on the LCD panel, prism, mirror, polarized glass, lens, etc., causing the picture to darken or color to blur. If this occurs, clean the inside of optical unit. Remove dust and other particles using air spray. -
Page 23: Security Function Notice
Security Function Notice This projector provides security functions such as "Key lock", "PIN code lock" and "Logo PIN code lock". When the projector has set these security function on, you are required to enter correct PIN code to use the projector. If you do not know the correct PIN code to the projector, the projector can no longer be operated or started. -
Page 24: Lens Mounting
Ultra-Long Zoom Lens Manual Manual AH-32581 ONLY THE OPTIONAL LENSES LISTED ABOVE ARE APPLICABLE FOR LC-XT6. LENS INSTALLATION PRECAUTIONS Lens installation and replacement should be made by a qualified service personnel. Be sure to install the lens by following this procedure precisely. - Page 25 Lens Mounting LENS REPLACEMENT AND INSTALLATION PROCEDURE The installation procedure and needed parts for lens installation varies on Optional Lens. Check the Part No. of the Optional Lens and be sure to install or replace the lens by following the procedure below. Remove the safety lens cap on the front and Turn off the projector, press the Main On/Off rear of the lens (mounting side).
- Page 26 Lens Mounting Remove the Cover Plate by lifting upwards. Insert the lower Light-Block Plate. (See Fig. 5.) (See Fig. 4) Cover Plate Fig. 5 Grasp (release lock) the Lens Lock Lever and Fig. 4 turn it fully upward. (See Fig. 6) Install the Lens into the projector.
- Page 27 Lens Mounting Adjust focus of the Projection Lens. (AH-32022 only.) Set up the projector and project image on a screen. Loosen the Focus Lens Lock Screw and rotate the Projection Lens to obtain proper focus. After adjusting focus, be sure to lock the Projection Lens with the Focus Lens Lock Screw securely.
- Page 28 Lens Mounting Install the Upper Light-Block Plate into Replace and fix the Top Cover with two (2) the guide of Lower Light-Block Plate. screws A. (See Fig. 10) (See Fig. 9) Top Cover Note: When installing the Upper Light-Block Plate, the Lower Light-Block Plate should be lifted upward with your hand.
- Page 29 Lens Mounting FOCUS ADJUSTMENT AH-32581 AH-32022 Set up the projector and project image on the screen. Adjust zoom first and then adjust focus. 1. Loosen the Focus Lock Screw on the lens. Rotate this part of 2. Rotate the lens to obtain proper focus on center the lens to obtain area of the screen.
- Page 30 Lens Mounting FOCUS CORRECTION When the lens is attached to the projector and images are being projected onto the screen, the peripheral focus may be out of focus in some localized areas. If this happens, insert the one, of three sizes of spacers, in between the Lens Attachment and the lens to adjust the focus.
- Page 31 Lens Mounting ■ ■ Lens shift Lens shift Lens shift Lens shift (Uppermost) (Downmost) (Leftmost) (Rightmost) -31-...
-
Page 32: Mechanical Disassembly
Mechanical Disassembly Mechanical disassembly should be made by following procedures chart. Following steps show the basic procedures, therefore unnecessary step may be ignored. Screws Expression Caution: (Type ) mm Diameter x Length The parts and screws should be placed exactly the same position as the origi- T type M Type nal otherwise it may cause loss of performance and product safety. - Page 33 Mechanical Disassembly 1 Cabinet front cover removal 1 Loosen 2 screws-A, and pull the cabinet front cover-A forward. 2 Remove the projection lens assy. See item "Lens Mounting" for further informa- tion. Cabinet front cover-A Light block plate upper 2 Cabinet front removal 1 Remove 14 screws-A (M4x10) and pull the cabinet top upward off.
- Page 34 Mechanical Disassembly 2-1 Lamp cover and PBS cover removal 1 Loosen 1 screw-A and open the Lamp cover. 2 Loosen 1 screw-B and remove the PBS cover. Lamp cover PBS cover Note on removing the Lamp cover Note on mounting the Lamp cover To avoid the scratch on the cabinet top, put a protec- Set the guide groove ends of the lamp cover onto the tive sheet between the edge of the lamp cover and the...
- Page 35 Mechanical Disassembly 2-2 LED board removal 1 Remove 2 screws-A (T3x12) and remove the LED board, RC front window. RC front window LED board 3 Filter unit removal 1 Loosen 2 screws-A on the filter unit and pull it to remove. Filter unit -35-...
- Page 36 Mechanical Disassembly 3-1 Filter unit disassembly 1 Loosen 3 screws-A (M3x8) and remove the filter holders upward. Remove the elec- trostatic pleat filter upward off. 2 Remove the spacer and remove 3 screws-B (T4x10) and remove the filter front cov- Filter holders Cushion spacer Electrostatic pleat filter...
- Page 37 Mechanical Disassembly 4 Main, RC rear board and Shutter removal 1 Remove 8 screws-A (M3x6) to remove the main board. 2 Remove 2 screws-B (M4x6) to remove the shutter assy. 3 Remove 1 screw-C (T4x10) to remove the RC rear board Main board RC rear board Shutter assy...
- Page 38 Mechanical Disassembly 5 AV panel assy removal 1 Remove 2 screws-A (M4x10), 1 screw-B (T4x10) to remove the AV panels assy. 2 Remove 2 screw-C (M4x6) to release the grounding wires. (T3x8)x5 RS232C board Bridge board (M3x6) Mounting connector (M3x8)x4 Mother board AV panel assy -38-...
- Page 39 Mechanical Disassembly 5-1 AV panel assy disassembly (T3x8)x4 Control board Control button (T3x8)x4 AV board assy (M3x6) (M3x8)x4 (T3x8)x2 Light board (T3x8)x3 (Hex nut)x4 (M3x6)x4 AV board (M3x6)x4 -39-...
- Page 40 Mechanical Disassembly 6 PFC-2 & Ballast-3/4 box removal 1 Remove 3 screws-A(M3x6) to remove the shield case cover 2 Remove 4 screws-B(M4x6) to remove the PFC-2 & Ballast-3/4 box. PFC-2 & Ballast-3/4 box Ballast 4 board (T3x8)x4 (M3x6)x4 Black connector White connector PFC-2 board (T3x8)x4...
- Page 41 Mechanical Disassembly 7 PFC-1 & Ballast-1/2 box removal 1 Remove 3 screws-A(M3x6) to remove the shield case cover 2 Remove 4 screws-B(M4x6) to remove the PFC-1 & Ballast-1/2 box. PFC-1 & Ballast-1/2 box Ballast 1 board (T3x8)x4 (M3x6)x4 Black connector (M3x6)x2 White connector PFC-1 board...
- Page 42 Mechanical Disassembly 8 Power box assy removal 1 Remove 2 screws-A(M4x6), 2 screw-B(T4x10) and remove power box assy. (M3x6)x3 (M3x6)x3 (M3x6)x3 DC Power board Power box assy (M3x8)x4 AC-DC Power board 9 Lamp sign, Ex temp boards removal 1 Remove 4 screws-A(T3x8) to remove the lamp sign board. 2 Remove 2 screws-B (T3x8) to remove the RGB fannet board, remove 1 screw-C (T3x8) to remove the Ex.
- Page 43 Mechanical Disassembly 10 AC filter board assy removal 1 Remove 4 screws-A (M4x6) to remove the AC filter assy. AC filter board assy SW901 (M3x8)x4 (M3x6)x2 (M3x10)x2 AC filter board AC inlet (M4x6) Wiring of Mains switch and AC Inlet Brown K6D (White con- nector): from...
- Page 44 Mechanical Disassembly 11 Rear fans assy removal 1 Remove 2 screws-A (T3x8) to remove fans(FN910,FN911) assy. 2 Remove 2 screws-B (T3x8) to remove fan(FN914) assy. 3 Remove 2 screws-C (T3x8) to remove fans(FN912,FN913) assy. (M4x45)x4 (M4x45)x4 (M4x45)x4 FN913 FN914 FN912 (M4x45)x4 (M4x45)x4 FN911...
- Page 45 Mechanical Disassembly 12 Lens shift assy removal (Before disassembling, move the lens to the position where the screws D can be removable.) 1 Remove 2 screws-A (T3x8) to remove the motor board. 2 Remove 3 screws-B (T4x10) to remove the lens shift cover. 3 Remove 4 screws-C (M4x10) and 4 screws-D (M4x10) to remove the lens shift assy.
- Page 46 Mechanical Disassembly 13 Lamps and ID IF boards and peripheral parts removal 1 Loosen each 2 screws on the lamp and pull it upward of. 2 Remove each 1 screw-A (T3x8) to remove the ID IF board. LP904 LP903 LP902 LP901 ID IF boards ID IF boards...
- Page 47 Mechanical Disassembly 14 Optical unit assy removal 1 Remove 9 screws-A (T4x10) to remove the optical unit assy. Optical unit assy (T3x8)x2 (T3x8)x2 (T3x8)x5 (T3x8)x2 (T3x8)x2 Wiring of fans To: K36U To: K36T Hook Tape FN915 To: 36W (M4x30)x2 To: 36V (M4x30)x2 FN916 FN917...
- Page 48 Mechanical Disassembly 15 Duct top removal 1 Remove 8 screws-A (M4x6) to remove the duct top. Wiring of fans Label side (Behind) Label side Duct top Hook 16 Fans removal 1 Remove fans on the cabinet bottom. FN903 with screws-A(M4x40) FN906 with screws-B(M4x40) FN904 with screws-C(M4x40) FN905 with screws-D(M4x40)
- Page 49 Mechanical Disassembly 17 Handles removal 1 Remove each 2 screws-A (M8x25) to remove handles. Handles Handles 18 Cabinet bottom frame and stand legs removal 1 Remove 22 screws-A (T4x10) to remove the cabinet bottom frame. 2 Remove 4 stand legs to turn it counter-clockwise. A A A Cabinet bottom frame Stand legs...
- Page 50 Mechanical Disassembly 19 Filter unit rails removal 1 Remove 2 screws-A (T4x10) and 2 screws-B (M4x20) on each rail and remove the filer unit rails. Rail Rail Mount rails as the chop marking on the rail comes upward. -50-...
-
Page 51: Optical Parts Disassembly
Optical Parts Disassembly Disassembly requires a 2.0mm or 2.5mm hex wrench and a screwdriver. Order of optical parts disassembly 1 Shutter assy removal 2 Panel/Prism assy removal 2-1 Polarized glasse(OUT)/pre-polarized glasses removal 2-2 LCD panels removal 3 Polarized glass(IN)/Optical filter assy removal 3-1 Polarized glass(IN)/Optical filter mounting 4 Optical filter (LC-CS) removal 5 Integrator assy removal... - Page 52 Optical Parts Disassembly 2 Panel/Prism assy removal Remove 4 hex screws-A (M2.5x8) to remove the panel/prism assy upward. Panel/Prism assy LCD panel/prism top view -52-...
- Page 53 Optical Parts Disassembly 2-1 Polarized glasses(OUT)/pre-polarized glasses(OUT) removal Remove 1 screw-B (M2.5x4) on each stopper and take the polarized glasses up- ward off. (Green) Pre-polarized glass(OUT)R Blue Marker (Behind) Polarized glass(OUT/R)2 Polarized glass (OUT/G)1 Polarized glass (OUT/G)2 (Blue) (Red) Polarized glass (OUT/B)2 * When removing the outer polar- ized glass(OUT/B)1, remove the...
- Page 54 Optical Parts Disassembly 2-2 LCD panels removal Remove 3 screws-C (M2x6) on each LCD panel and remove the LCD panel. G-LCD panel R-LCD panel B-LCD panel LCD panel type check There are 2 types combination of the LCD panel/prism assembly and the optical parts, named Type-R and Type-L. Since both have no compatibility, each type should be combined with the same type, and the specific parts should be used.
- Page 55 Optical Parts Disassembly 3 Polarized glass(IN)/Optical filter assy removal Remove 2 screws-A (M2.5x6) on each stopper and take the polarized glasses up- ward off. Polarized glass(IN)/ Optical filter assy * Note on handling the polarized glass (IN) assy Care the Polarized glass (IN) assy to maintain with the follow- Never touch or wipe ing points.
- Page 56 Optical Parts Disassembly 3-1 Polarized glass(IN)/Optical filter mounting There are 2 types combination of the LCD panel/prism assembly named Type-R and Type-L. Mount the polarized glasses and optical filters according to the type of the LCD panel assembly as shown in the figure below TYPE-L Polarized glass Assy for Red Film side...
- Page 57 Optical Parts Disassembly TYPE-R Polarized glass Assy for Red Film side (M2x2) Film side (M2x2) Pre-Polarized glass-(IN/R) Marking (Red) (M3x6) Polarized glass-(IN/R) (M2x2) (M2x2) Prism side Optical filter-(ICV) Film side Marking (Behind) (M2x2) Polarized glass Assy for Green Film side Polarized glass-(IN/G)1* (M2x2) Marking...
- Page 58 Optical Parts Disassembly Remove the cabinet top assy and main board before taking the following disassembly. 4 Optical filter (LC-CS) removal Remove 2 screws-B(M3x6) and YE LCD cover, and remove the optical filter (LC- CS) upward off. YE LCD cover Optical filter (LC-CS) QR code Prism side...
- Page 59 Optical Parts Disassembly 6 PBS/Integrator(OUT) assy removal Remove 3 screws-A (M3x6) and remove the PBS/Integrator(OUT) assy upward off. Integrator(OUT) Notch PBS/Integrator assy (M3x6) Stopper (M3x4)x2 Bumpy surface comes this side. (M3x4)x2 Marker Film 7 Condenser lens assy removal Remove 2 screws-A (M3x6) and remove the mirror assy upward off. Condenser lens assy Condenser lens (M3x4)x2...
- Page 60 Optical Parts Disassembly 8 Relay lens(OUT) assy removal Remove 2 screws-A(M3x6) and remove the relay lens(OUT) assy upward off. Relay lens assy Relay lens(OUT) (M2x4)x4 Side View 9 Optical unit top removal Remove 11 screws-A(T3x12) and remove the optical unit top. Optical unit top -60-...
- Page 61 Optical Parts Disassembly 9-1 Optical parts locations in the optical unit When mounting the optical parts in the optical unit, the parts must be mounted in the specified location and direction as shown in the figure below. Parts Name Parts Name MIRROR(R) MIRROR(B-COLD) LENS, CONDENSER(R-FIL)
- Page 62 Optical Parts Disassembly 10 Optical lamp unit top removal 1 Remove 4 screws-A(T3x8) and remove the optical lamp unit top. Optical lamp unit top 10-1 Optical parts locations in the optical lamp unit When mounting the optical parts in the optical lamp unit, the parts must be mounted in the specified location and direction as shown in the figure below.
- Page 63 Optical Parts Disassembly 10-2 Mirror assy removal 1 Remove 2 screws-A(M3x6) on each mirror assy and remove the mirror assy up- ward. (M3x6)x7 Marker Mirror Mirror Marker Mirror assy Mirror right Mirror left 10-3 Optical filters assy removal 1 Take the optical filte upward. 2 Remove 2 screws-A(T3x8) on each optical filter assy and remove the optical filter assy upward.
- Page 64 Optical Parts Disassembly 11 Optical lamp assy removal 1 Remove 6 screws-A(M6x18) to take the optical lamp assy from the optical unit assy. Optical lamp assy Optical unit assy -64-...
-
Page 65: Servicing Notice
Model no. chanking Data Model no. Model no. set- Group Data ting Not defined [ (refer t table right) LC-XT6 Not defined 0 -> 10 LC-XT6i [ (refer t table right) LC-XT6K LC-XT6 0 -> 10 [ (refer t table right) LC-XT6i 0 ->... -
Page 66: Adjustments
Adjustments Adjustments after parts replacement ● : Adjustment necessary ❍ : Check necessary Disassembly / Replaced Parts PFC / LCD/ Ye Device Power Optical Main AC-DC Sensor Prism LCD Panel (Optical (DC) Parts board Power (S901) Ass’y filter) board board Optical center adjustment ●... -
Page 67: Optical Adjustments
Optical Adjustments Optical adjustment location WARNING : USE UV RADIATION EYE AND SKIN PROTECTION DURING SERVICING. CAUTION: To prevent suffer of UV radiation, those adjustments must be completed within 25 minutes. Back focus adjust- Convergence ment adjustment Condenser lens Relay lens adjustment adjustment Contrast adjustment... -
Page 68: Before Adjustment
Optical Adjustment Before adjustment 1. Each adjustment requires hex wrenches and slot screwdrivers. 2. Set the motorized lens shift to the center position (horizontal and vertical) with LENS SHIFT Button. Press and hold the LENS SHIFT button for more than 5 seconds, the lens will move to the center position auto- matically. - Page 69 Optical Adjustment Optical adjustment tool installation When performing the optical center adjustment, the optical adjustment tools are needed. 1. Remove each polarized glass/optical filter assy for Red, Green and Blue. Remove 2 screws-A on each polarized glass assy. 2. Replace the optical filter units. Remove 1 screw-B and remove the optical filter unit.
-
Page 70: Optical Center Adjustment
Optical Adjustment 1. Optical center adjustment Take step-z to step-v for the optical center adjustment. Disconnect the FPC cables of the panels and replace each polarized glass/optical filter assy with the adjustment tool. Set the main board into the groove on the optical unit top. (See the previous pages) Blue band Color edge z Integrator &... - Page 71 Optical Adjustment x Relay lens adjustment Same color-offset band width Move the relay lens to make the same width of yellow and blue color-offset on the top/bottom and left/right of the screen. 1) To adjust the image vertically as shown in Fig.2-1, loosen 2 screws , and move the slots by using a slot screwdriver.
- Page 72 Optical Adjustment c Condenser lens adjustment Move the condenser lens to make the same width of yellow and blue color-offset on the top/bottom and left/right of the screen. 1) To adjust the image vertically as shown in Fig.3-1, loosen 2 screws , and move the slots by using a slot screwdriver.
- Page 73 Optical Adjustment v Integrator and PBS adjustment-2 Move the integrator-(OUT)/PBS and integrator(IN) to remove the color bands on the top/bottom or left/right of the screen. 1) To adjust the image horizontally as shown in Fig.4-1, move the slot by using a slot screwdriver. 2) To adjust the image vertically as shown in Fig.4-2, turn the screw by using a hex driver.
-
Page 74: Pbs Adjustment
Optical Adjustment 2. PBS adjustment Select the internal test pattern signal "All white" from the projector's menu "Menu -> Setting -> Test pattern". Loosen 2 screws on the integrator(OUT)/PBS unit. Insert a slot screwdriver into the slots and turn it as the brightness on the screen is to be the maximum. Tighten screws to fix the integrator(OUT) unit. -
Page 75: Contrast Adjustment
Optical Adjustment 3. Contrast adjustment Before adjustment : Remove the shutter assy on the prism/LCD panel assy. Select the internal test pattern signal "All black" from the projector's menu "Menu -> Setting -> Test pattern". Adjustment : Loosen 1 screw on the polarized glass mounting base and 1 screw on the optical filter(HCP) mounting base. -
Page 76: Back Focus Adjustment
Optical Adjustment 4. Back focus adjustment LCD panel/prism top view Slot B Before adjustment : Remove the shutter assy on the prism/LCD panel assy. Select the internal test pattern signal "Cross" from the projector's menu "Menu -> Setting -> Test pattern". Adjust the focus by pressing the Focus U V buttons on the projector or remote control unit. -
Page 77: Convergence Adjustment
Optical Adjustment 5. Convergence adjustment Before adjustment : Remove the shutter assy on the prism/LCD panel assy. When adjusting the convergence of LCD panels, Convergence Adjustment Tool is required. This tool can be ordered as a service parts. Parts No. is shown below. Mount the Adjustment Tool on the LCD panel and adjust each panel convergence. -
Page 78: Adjustment Tool Installation
Optical Adjustment Adjustment tool installation Note; Before mounting the Adjustment tool, set adjustment screws of Adjustment tool in center of the adjustment range. Refer to Screw setting. Loosen 2 screws-A of Prism/LCD panel unit. CAUTION: When loosening the screws-A, do not touch the other mechanical part or give it shock. Fully loosen 2 screws-B on the Adjustment tool. -
Page 79: Adjustment Tool Removal
Optical Adjustment Adjustment tool The figure is an installation figure for the adjustment of the Red LCD panel. Adjustment tool removal After completing the adjustment, remove the Adjustment tool as follows. Loosen 2 screws-B and release LCD panel bracket. Remove 2 screws-C, then remove Adjustment tool. Slide the Adjustment tool, and release from the LCD panel bracket. -
Page 80: Adjustment
Optical Adjustment Adjustment For convergence adjustment, use Green as the reference standard. Align Red and Blue with Green by adjusting the position and angle of the Red and Blue LCD panel. Screws X, Y and Z are for convergence adjustment. When adjusting the Green reference LCD panel, both on Red and Blue LCD panel should be adjusted with Green LCD panel. -
Page 81: Electrical Adjustments
Electrical Adjustments Service adjustment menu operation To enter the service mode To enter the “Service Mode”, press and hold the MENU and SELECT button for more than 3 seconds, or press and hold the MENU button on the remote control for more than 20 seconds. The service menu appears on the screen as follows. -
Page 82: Circuit Adjustments
Electrical Adjustment Circuit adjustments CAUTION: The each circuit has been made by the fine adjustment at factory. Do not attempt to adjust the following adjustments except requiring the readjustments in servicing otherwise it may cause loss of performance and product safety. Before taking these adjustments, turn the projector for more than 10 minutes to sta- bilize the operation. - Page 83 Electrical Adjustment LCD panel L/R setting z Output voltage adjustment There are two type( Type L, Type R) for the LCD/Prism Equipment Digital voltmeter Assy. The adjustment data is stored in the memory IC on Input AC Voltage 230V the main board. As the used type is indicated on the optical unit and Connect a digital voltmeter to test points and adjust the LCD/Prism assy, perform this adjustment to match to its...
- Page 84 Electrical Adjustment n Auto calibration (Component) Color shading correction adjustment ⁄0 Input mode Input 2 [Y,Pb/Cb,Pr/Cr] Software PROJECTOR SERVICE TOOL v4.21 Input signal Component video signal Signal pattern 5%, 10%, 15%, 20%, 30%, 50%, Signal pattern 8-color bar 60%, 80% whole gray 1.
- Page 85 Electrical Adjustment White balance adjustment ⁄1 Advanced color mode: Input mode Adjusted input mode (for checking) Group-No. Data (Initial value) Input Adjustment Mode (X, Y) Signal pattern 16-step gray scale 982 - 1 Advanced color-Auto: PC Standard -X Advanced color Auto and Off 982 - 2 Advanced color-Auto: PC Standard -Y Lamp mode...
-
Page 86: Test Points And Locations
Electrical Adjustment Test points and locations PFC BOARD K16C VR1651 VR1601 K16B K16E K16D DC POWER BOARD K36Z -86-... -
Page 87: Service Adjustment Data
Electrical Adjustment Service adjustment data The adjustment items indicated with “[” are required to read- just following to the “Electrical adjustments”. Other items should be used with the initial data value. Grp / No. Item Function Range Initial Note AD Converter A (ADV7842) PC - On Board / Slot 950 / 950 Component - On board / Slot... - Page 88 Electrical Adjustment Grp / No. Item Function Range Initial Note 13 Alpha Contrast 0 - 1000 60/60/60/60/60/60/60/60/60/60/60 14 Alpha Brightness 0 - 1000 90/90/90/90/90/90/90/90/90/90/90 140/140/140/140/140/140 15 Alpha Color 0 - 1000 /140/140/140/140/140 16 Alpha Tint 0 - 1000 10/10/10/10/10/10/10/10/10/10/10 17 Alpha Sharpness 0 - 1000 10/10/10/10/10/10/10/10/10/10/10 18 Alpha WB Red...
- Page 89 Electrical Adjustment Grp / No. Item Function Range Initial Note 20 DAC_MAX Not used 0 - 255 21 DAC_MIN Not used 0 - 255 22 DAC_UseMin DAC Level at Power Off 0 - 255 23 YE_FX_VAL PC-Standard 0 - 255 24 YE_FX_VAL PC-Rear 0 - 255...
- Page 90 Electrical Adjustment Grp / No. Item Function Range Initial Note 0: Blending Mode (NORMAL) Layered Disable 1: Blending Mode (BLANKINK)Layered Disable 0 BKMOD 0 - 3 2: Blending Mode (NORMAL)Layered Enable 3: Blending Mode (BLANKING)Layered Enable 1 BLD_I_SIZE_H Inner Frame Width H 0 - 255 2 BLD_I_SIZE_V Inner Frame Width V...
- Page 91 Electrical Adjustment Grp / No. Item Function Range Initial Note 12 G SID Control A 0 - 255 13 B SID Control A 0 - 255 14 R SID Control A 0 - 255 15 G SID Control B 0 - 255 16 B SID Control B 0 - 255 17 R SID Control B...
- Page 92 Electrical Adjustment Grp / No. Item Function Range Initial Note 2 USR_B_GAIN 0 - 1023 3 USR_R_BRIGHT 0 - 8191 4 USR_G_BRIGHT 0 - 8191 5 USR_B_BRIGHT 0 - 8191 6 FRM_DAT 0 - 255 7 SEL_MODE 0 - 7 8 RLR_DUM_PIX 0 -127 CXD3548_GAM...
- Page 93 Electrical Adjustment Grp / No. Item Function Range Initial Note 10 SHAD_GDAT3 0 - 255 11 SHAD_BDAT1 0 - 255 12 SHAD_BDAT2 0 - 255 13 SHAD_BDAT3 0 - 255 14 SHAD_COFF 0 - 4095 1358 CXD3548_VS 0 VS_GSEL 0 - 3 1 VS_R_RGT 0 - 1 2 VS_G_RGT...
- Page 94 Electrical Adjustment Grp / No. Item Function Range Initial Note 14 CSC_G_GP5 0 - 511 15 CSC_G_GP6 0 - 511 16 CSC_G_GP7 0 - 511 17 CSC_G_GP8 0 - 511 18 CSC_B_GP1 0 - 511 19 CSC_B_GP2 0 - 511 20 CSC_B_GP3 0 - 511 21 CSC_B_GP4...
- Page 95 Electrical Adjustment Grp / No. Item Function Range Initial Note Option 0 Logo Display Prohibition 0:Menu 1:Forced 0 - 1 1 RS232C Baud rate 0: 19200bps 1: 9600bps 0 - 1 4 CABLE SW Long Cable 0: Disable 1: Enable 0 - 1 6 Device Refresh Disable 0: Enable 1: Disable...
- Page 96 Electrical Adjustment Grp / No. Item Function Range Initial Note Flow Ideal Data (Value will be set after calibration) 0 Flow Ideal Data 1 Flow Sensor Theory Value No.1 Corresponding to Fan Volt No.1 0 - 1023 1 Flow Ideal Data 2 Flow Sensor Theory Value No.2 Corresponding to Fan Volt No.2 0 - 1023 2 Flow Ideal Data 3...
- Page 97 Electrical Adjustment Grp / No. Item Function Range Initial Note 3 Fan 1 Manual Voltage 0 - 255 Manual Adjustment Mode (0.1V) *Effective only when Manual SW is 1. 4 Fan 2 Manual Voltage 0 - 255 5 Fan 3 Manual Voltage 0 - 255 6 Fan 4 Manual Voltage 0 - 255...
- Page 98 Electrical Adjustment Grp / No. Item Function Range Initial Note 55 Silent Mode Offset Normal Fan 2 Max 0 - 255 56 Silent Mode Offset Normal Fan 3 Min 0 - 255 57 Silent Mode Offset Normal Fan 3 Max 0 - 255 58 Silent Mode Offset Normal Fan 4 Min 0 - 255...
- Page 99 Electrical Adjustment Grp / No. Item Function Range Initial Note 0 Fan 1 Initial Volt Fan Start Voltage (Duty) 0 - 255 1 Fan 2 Initial Volt 0 - 255 2 Fan 3 Initial Volt 0 - 255 3 Fan 4 Initial Volt 0 - 255 4 Fan 5 Initial Volt 0 - 255...
- Page 100 3: LC-XT6K 1 Model No. Setting Model No. si set when the value is seto to 10. 0 - 10 Model No. Setting [LC-XT6] 0 Display Model No. Setting Reger to Group 430-0 1 Model No. Setting Model No. si set when the value is seto to 10.
- Page 101 Electrical Adjustment Grp / No. Item Function Range Initial Note 1 Disp Dots 0 - 4095 2 H Back Porch 0 - 4095 3 V Back Porch 0 - 4095 4 Disp Line 0 - 4095 5 Clamp Position 0 - 4095 6 Clamp Width 0 - 4095 8 VSBEG...
- Page 102 Electrical Adjustment Grp / No. Item Function Range Initial Note 5 Clamp Position 0 - 4095 6 Clamp Width 0 - 4095 8 VSBEG 0 - 15 9 Filed Enable 0 - 1 10 FLDBEG 0 - 15 11 FLDEND 0 - 15 12 PHASE 0 - 63...
- Page 103 Electrical Adjustment Grp / No. Item Function Range Initial Note 10 FLDBEG 0 - 15 11 FLDEND 0 - 15 12 PHASE 0 - 63 22 (Sub) H Back Porch 0 - 4095 23 (Sub) V Back Porch 0 - 4095 25 (Sub) Clamp Position 0 - 4095 26 (Sub) Clamp Width...
- Page 104 Electrical Adjustment Grp / No. Item Function Range Initial Note 23 (Sub) V Back Porch 0 - 4095 25 (Sub) Clamp Position 0 - 4095 26 (Sub) Clamp Width 0 - 4095 28 (Sub) VSBEG 0 - 15 29 (Sub) Filed Enable 0 - 1 30 (Sub) FLDBEG 0 - 15...
- Page 105 Electrical Adjustment Grp / No. Item Function Range Initial Note 30 (Sub) FLDBEG 0 - 15 31 (Sub) FLDEND 0 - 15 32 (Sub) PHASE 0 - 63 RGB Video (1080P-25) [ON-Board (DVI-Dsub-HDMI)] 0 Total Dots 0 - 4095 2640 1 Disp Dots 0 - 4095 1920...
- Page 106 Electrical Adjustment Grp / No. Item Function Range Initial Note RGB Video (1080-25psf) 0 Total Dots 0 - 4095 2640 1 Disp Dots 0 - 4095 1920 2 H Back Porch 0 - 4095 3 V Back Porch 0 - 4095 4 Disp Line 0 - 4095 1080...
- Page 107 Electrical Adjustment Grp / No. Item Function Range Initial Note 3 V Back Porch 0 - 4095 4 Disp Line 0 - 4095 5 Clamp Position 0 - 4095 6 Clamp Width 0 - 4095 8 VSBEG 0 - 15 9 Filed Enable 0 - 1 10 FLDBEG...
- Page 108 Electrical Adjustment Grp / No. Item Function Range Initial Note 8 VSBEG 0 - 15 9 Filed Enable 0 - 1 10 FLDBEG 0 - 15 11 FLDEND 0 - 15 12 PHASE 0 - 63 22 (Sub) H Back Porch 0 - 4095 23 (Sub) V Back Porch 0 - 4095...
- Page 109 Electrical Adjustment Grp / No. Item Function Range Initial Note 12 PHASE 0 - 63 22 (Sub) H Back Porch 0 - 4095 23 (Sub) V Back Porch 0 - 4095 25 (Sub) Clamp Position 0 - 4095 26 (Sub) Clamp Width 0 - 4095 28 (Sub) VSBEG 0 - 15...
- Page 110 Electrical Adjustment Grp / No. Item Function Range Initial Note 26 (Sub) Clamp Width 0 - 4095 28 (Sub) VSBEG 0 - 15 29 (Sub) Filed Enable 0 - 1 30 (Sub) FLDBEG 0 - 15 31 (Sub) FLDEND 0 - 15 32 (Sub) PHASE 0 - 63 YCbCr (1035i)
- Page 111 Electrical Adjustment Grp / No. Item Function Range Initial Note 31 (Sub) FLDEND 0 - 15 32 (Sub) PHASE 0 - 63 YCbCr (1080P-30) 0 Total Dots 0 - 4095 1 Disp Dots 0 - 4095 1872 2 H Back Porch 0 - 4095 3 V Back Porch 0 - 4095...
- Page 112 Electrical Adjustment Grp / No. Item Function Range Initial Note 0 Total Dots 0 - 4095 1 Disp Dots 0 - 4095 2 H Back Porch 0 - 4095 3 V Back Porch 0 - 4095 4 Disp Line 0 - 4095 5 Clamp Position 0 - 4095 6 Clamp Width...
- Page 113 Electrical Adjustment Grp / No. Item Function Range Initial Note 4 Disp Line 0 - 4095 5 Clamp Position 0 - 4095 6 Clamp Width 0 - 4095 8 VSBEG 0 - 15 9 Filed Enable 0 - 1 10 FLDBEG 0 - 15 11 FLDEND 0 - 15...
- Page 114 Electrical Adjustment Grp / No. Item Function Range Initial Note 9 Filed Enable 0 - 1 10 FLDBEG 0 - 15 11 FLDEND 0 - 15 12 PHASE 0 - 63 22 (Sub) H Back Porch 0 - 4095 23 (Sub) V Back Porch 0 - 4095 25 (Sub) Clamp Position 0 - 4095...
- Page 115 Electrical Adjustment Grp / No. Item Function Range Initial Note 22 (Sub) H Back Porch 0 - 4095 23 (Sub) V Back Porch 0 - 4095 25 (Sub) Clamp Position 0 - 4095 26 (Sub) Clamp Width 0 - 4095 28 (Sub) VSBEG 0 - 15 29 (Sub) Filed Enable...
- Page 116 Electrical Adjustment Grp / No. Item Function Range Initial Note 28 (Sub) VSBEG 0 - 15 29 (Sub) Filed Enable 0 - 1 30 (Sub) FLDBEG 0 - 15 31 (Sub) FLDEND 0 - 15 32 (Sub) PHASE 0 - 63 RGB Video (1080P-24) 0 Total Dots 0 - 4095...
- Page 117 Electrical Adjustment Grp / No. Item Function Range Initial Note 32 (Sub) PHASE 0 - 63 RGB Video (1080-24psf) 0 Total Dots 0 - 4095 2750 1 Disp Dots 0 - 4095 1920 2 H Back Porch 0 - 4095 3 V Back Porch 0 - 4095 4 Disp Line...
- Page 118 Electrical Adjustment Grp / No. Item Function Range Initial Note Digital (1080P-25) 7 OverScan Over Scan Rate (0 - 25.5% : 0.1% Step) 0 - 255 8 VSBEG 0 - 15 Digital (1080P-24) 7 OverScan Over Scan Rate (0 - 25.5% : 0.1% Step) 0 - 255 8 VSBEG 0 - 15...
- Page 119 Electrical Adjustment Grp / No. Item Function Range Initial Note 6 Clamp Width 0 - 4095 8 VSBEG 0 - 15 9 Filed Enable 0 - 1 10 FLDBEG 0 - 15 11 FLDEND 0 - 15 12 PHASE 0 - 63 22 (Sub) H Back Porch 0 - 4095 23 (Sub) V Back Porch...
- Page 120 Electrical Adjustment Grp / No. Item Function Range Initial Note 11 FLDEND 0 - 15 12 PHASE 0 - 63 22 (Sub) H Back Porch 0 - 4095 23 (Sub) V Back Porch 0 - 4095 25 (Sub) Clamp Position 0 - 4095 26 (Sub) Clamp Width 0 - 4095...
- Page 121 Electrical Adjustment Grp / No. Item Function Range Initial Note 25 (Sub) Clamp Position 0 - 4095 26 (Sub) Clamp Width 0 - 4095 28 (Sub) VSBEG 0 - 15 29 (Sub) Filed Enable 0 - 1 30 (Sub) FLDBEG 0 - 15 31 (Sub) FLDEND 0 - 15...
- Page 122 Electrical Adjustment Grp / No. Item Function Range Initial Note 30 (Sub) FLDBEG 0 - 15 31 (Sub) FLDEND 0 - 15 32 (Sub) PHASE 0 - 63 RGB Video (1080P-50) [DVI-Dsub Card] 0 Total Dots 0 - 4095 2640 1 Disp Dots 0 - 4095 1920...
- Page 123 Electrical Adjustment Grp / No. Item Function Range Initial Note RGB Video (1080P-24) [DVI-Dsub Card] 0 Total Dots 0 - 4095 2750 1 Disp Dots 0 - 4095 1920 2 H Back Porch 0 - 4095 3 V Back Porch 0 - 4095 4 Disp Line 0 - 4095...
- Page 124 Electrical Adjustment Grp / No. Item Function Range Initial Note 3 V Back Porch 0 - 4095 4 Disp Line 0 - 4095 1080 5 Clamp Position 0 - 4095 6 Clamp Width 0 - 4095 8 VSBEG 0 - 15 9 Filed Enable 0 - 1 10 FLDBEG...
- Page 125 Electrical Adjustment Grp / No. Item Function Range Initial Note 8 VSBEG 0 - 15 9 Filed Enable 0 - 1 10 FLDBEG 0 - 15 11 FLDEND 0 - 15 12 PHASE 0 - 63 22 (Sub) H Back Porch 0 - 4095 23 (Sub) V Back Porch 0 - 4095...
- Page 126 Electrical Adjustment Grp / No. Item Function Range Initial Note 12 PHASE 0 - 63 22 (Sub) H Back Porch 0 - 4095 23 (Sub) V Back Porch 0 - 4095 25 (Sub) Clamp Position 0 - 4095 26 (Sub) Clamp Width 0 - 4095 28 (Sub) VSBEG 0 - 15...
- Page 127 Electrical Adjustment Grp / No. Item Function Range Initial Note 26 (Sub) Clamp Width 0 - 4095 28 (Sub) VSBEG 0 - 15 29 (Sub) Filed Enable 0 - 1 30 (Sub) FLDBEG 0 - 15 31 (Sub) FLDEND 0 - 15 32 (Sub) PHASE 0 - 63 YCbCr (1080i-50)
- Page 128 Electrical Adjustment Grp / No. Item Function Range Initial Note 31 (Sub) FLDEND 0 - 15 32 (Sub) PHASE 0 - 63 YCbCr (1080P-50) [5BNC - Video Card] 0 Total Dots 0 - 4095 2640 1 Disp Dots 0 - 4095 1874 2 H Back Porch 0 - 4095...
- Page 129 Electrical Adjustment Grp / No. Item Function Range Initial Note 0 Total Dots 0 - 4095 2750 1 Disp Dots 0 - 4095 1872 2 H Back Porch 0 - 4095 3 V Back Porch 0 - 4095 4 Disp Line 0 - 4095 1052 5 Clamp Position...
- Page 130 Electrical Adjustment Grp / No. Item Function Range Initial Note 4 Disp Line 0 - 4095 5 Clamp Position 0 - 4095 6 Clamp Width 0 - 4095 8 VSBEG 0 - 15 9 Filed Enable 0 - 1 10 FLDBEG 0 - 15 11 FLDEND 0 - 15...
- Page 131 Electrical Adjustment Grp / No. Item Function Range Initial Note 9 Filed Enable 0 - 1 10 FLDBEG 0 - 15 11 FLDEND 0 - 15 12 PHASE 0 - 63 22 (Sub) H Back Porch 0 - 4095 23 (Sub) V Back Porch 0 - 4095 25 (Sub) Clamp Position 0 - 4095...
- Page 132 Electrical Adjustment Grp / No. Item Function Range Initial Note 22 (Sub) H Back Porch 0 - 4095 23 (Sub) V Back Porch 0 - 4095 25 (Sub) Clamp Position 0 - 4095 26 (Sub) Clamp Width 0 - 4095 28 (Sub) VSBEG 0 - 15 29 (Sub) Filed Enable...
- Page 133 Electrical Adjustment Grp / No. Item Function Range Initial Note 28 (Sub) VSBEG 0 - 15 29 (Sub) Filed Enable 0 - 1 30 (Sub) FLDBEG 0 - 15 31 (Sub) FLDEND 0 - 15 32 (Sub) PHASE 0 - 63 RGB Video (1080P-25) [5BNC - Video Card] 0 Total Dots...
- Page 134 Electrical Adjustment Grp / No. Item Function Range Initial Note 32 (Sub) PHASE 0 - 63 RGB Video (1080-25psf) [5BNC - Video Card] 0 Total Dots 0 - 4095 2640 1 Disp Dots 0 - 4095 1920 2 H Back Porch 0 - 4095 3 V Back Porch 0 - 4095...
- Page 135 Electrical Adjustment Grp / No. Item Function Range Initial Note 1 Disp Dots 0 - 4095 2 H Back Porch 0 - 4095 3 V Back Porch 0 - 4095 4 Disp Line 0 - 4095 5 Clamp Position 0 - 4095 6 Clamp Width 0 - 4095 8 VSBEG...
- Page 136 Electrical Adjustment Grp / No. Item Function Range Initial Note 5 Clamp Position 0 - 4095 6 Clamp Width 0 - 4095 8 VSBEG 0 - 15 9 Filed Enable 0 - 1 10 FLDBEG 0 - 15 11 FLDEND 0 - 15 12 PHASE 0 - 63...
- Page 137 Electrical Adjustment Grp / No. Item Function Range Initial Note 10 FLDBEG 0 - 15 11 FLDEND 0 - 15 12 PHASE 0 - 63 22 (Sub) H Back Porch 0 - 4095 23 (Sub) V Back Porch 0 - 4095 25 (Sub) Clamp Position 0 - 4095 26 (Sub) Clamp Width...
- Page 138 Electrical Adjustment Grp / No. Item Function Range Initial Note 23 (Sub) V Back Porch 0 - 4095 25 (Sub) Clamp Position 0 - 4095 26 (Sub) Clamp Width 0 - 4095 28 (Sub) VSBEG 0 - 15 29 (Sub) Filed Enable 0 - 1 30 (Sub) FLDBEG 0 - 15...
- Page 139 Electrical Adjustment Grp / No. Item Function Range Initial Note 29 (Sub) Filed Enable 0 - 1 30 (Sub) FLDBEG 0 - 15 31 (Sub) FLDEND 0 - 15 32 (Sub) PHASE 0 - 63 RGB Video (1080P-25) [DVI - HDCP Card] 0 Total Dots 0 - 4095 2640...
- Page 140 Electrical Adjustment Grp / No. Item Function Range Initial Note RGB Video (1080-25psf) [DVI - HDCP Card] 0 Total Dots 0 - 4095 2640 1 Disp Dots 0 - 4095 1920 2 H Back Porch 0 - 4095 3 V Back Porch 0 - 4095 4 Disp Line 0 - 4095...
- Page 141 Electrical Adjustment Grp / No. Item Function Range Initial Note 2 H Back Porch 0 - 4095 3 V Back Porch 0 - 4095 4 Disp Line 0 - 4095 5 Clamp Position 0 - 4095 6 Clamp Width 0 - 4095 8 VSBEG 0 - 15 9 Filed Enable...
- Page 142 Electrical Adjustment Grp / No. Item Function Range Initial Note 6 Clamp Width 0 - 4095 8 VSBEG 0 - 15 9 Filed Enable 0 - 1 10 FLDBEG 0 - 15 11 FLDEND 0 - 15 12 PHASE 0 - 63 22 (Sub) H Back Porch 0 - 4095 23 (Sub) V Back Porch...
- Page 143 Electrical Adjustment Grp / No. Item Function Range Initial Note 11 FLDEND 0 - 15 12 PHASE 0 - 63 22 (Sub) H Back Porch 0 - 4095 23 (Sub) V Back Porch 0 - 4095 25 (Sub) Clamp Position 0 - 4095 26 (Sub) Clamp Width 0 - 4095...
- Page 144 Electrical Adjustment Grp / No. Item Function Range Initial Note 25 (Sub) Clamp Position 0 - 4095 26 (Sub) Clamp Width 0 - 4095 28 (Sub) VSBEG 0 - 15 29 (Sub) Filed Enable 0 - 1 30 (Sub) FLDBEG 0 - 15 31 (Sub) FLDEND 0 - 15...
- Page 145 Electrical Adjustment Grp / No. Item Function Range Initial Note 30 (Sub) FLDBEG 0 - 15 31 (Sub) FLDEND 0 - 15 32 (Sub) PHASE 0 - 63 RGB Video (720P-50) [5BNC Card] 0 Total Dots 0 - 4095 1980 1 Disp Dots 0 - 4095 1280...
- Page 146 Electrical Adjustment Grp / No. Item Function Range Initial Note RGB Video (1035i) [5BNC Card] 0 Total Dots 0 - 4095 2200 1 Disp Dots 0 - 4095 1920 2 H Back Porch 0 - 4095 3 V Back Porch 0 - 4095 4 Disp Line 0 - 4095...
- Page 147 Electrical Adjustment Grp / No. Item Function Range Initial Note 3 V Back Porch 0 - 4095 4 Disp Line 0 - 4095 1080 5 Clamp Position 0 - 4095 6 Clamp Width 0 - 4095 8 VSBEG 0 - 15 9 Filed Enable 0 - 1 10 FLDBEG...
- Page 148 Electrical Adjustment Grp / No. Item Function Range Initial Note 8 VSBEG 0 - 15 9 Filed Enable 0 - 1 10 FLDBEG 0 - 15 11 FLDEND 0 - 15 12 PHASE 0 - 63 22 (Sub) H Back Porch 0 - 4095 23 (Sub) V Back Porch 0 - 4095...
- Page 149 Electrical Adjustment Grp / No. Item Function Range Initial Note 12 PHASE 0 - 63 22 (Sub) H Back Porch 0 - 4095 23 (Sub) V Back Porch 0 - 4095 25 (Sub) Clamp Position 0 - 4095 26 (Sub) Clamp Width 0 - 4095 28 (Sub) VSBEG 0 - 15...
- Page 150 Electrical Adjustment Grp / No. Item Function Range Initial Note 26 (Sub) Clamp Width 0 - 4095 28 (Sub) VSBEG 0 - 15 29 (Sub) Filed Enable 0 - 1 30 (Sub) FLDBEG 0 - 15 31 (Sub) FLDEND 0 - 15 32 (Sub) PHASE 0 - 63 RGB Video (720P-60)
- Page 151 Electrical Adjustment Grp / No. Item Function Range Initial Note 31 (Sub) FLDEND 0 - 15 32 (Sub) PHASE 0 - 63 RGB Video (1080i-50) [D-Sub15 Card] 0 Total Dots 0 - 4095 2640 1 Disp Dots 0 - 4095 1920 2 H Back Porch 0 - 4095...
- Page 152 Electrical Adjustment Grp / No. Item Function Range Initial Note 0 Total Dots 0 - 4095 2640 1 Disp Dots 0 - 4095 1920 2 H Back Porch 0 - 4095 3 V Back Porch 0 - 4095 4 Disp Line 0 - 4095 1080 5 Clamp Position...
- Page 153 Electrical Adjustment Grp / No. Item Function Range Initial Note 4 Disp Line 0 - 4095 1080 5 Clamp Position 0 - 4095 6 Clamp Width 0 - 4095 8 VSBEG 0 - 15 9 Filed Enable 0 - 1 10 FLDBEG 0 - 15 11 FLDEND...
- Page 154 Electrical Adjustment Grp / No. Item Function Range Initial Note 9 Filed Enable 0 - 1 10 FLDBEG 0 - 15 11 FLDEND 0 - 15 12 PHASE 0 - 63 22 (Sub) H Back Porch 0 - 4095 23 (Sub) V Back Porch 0 - 4095 25 (Sub) Clamp Position 0 - 4095...
- Page 155 Electrical Adjustment Grp / No. Item Function Range Initial Note 28 Ye Auto: PC Dynamic :CAL_CONT Result Contrast 29 Ye Auto: PC Dynamic :CONT_USE [Unit] 0.001 100 - 5000 1000 30 Ye Auto: AV Standard : LVL_USE [Unit] 0.01 1 - 999 31 Ye Auto: AV Standard :W_SXY_0 [Unit] 0.001 0 - 999...
- Page 156 Electrical Adjustment Grp / No. Item Function Range Initial Note 39 Ye Off: AV Standard :CONT_USE [Unit] 0.001 100 - 5000 40 Ye Off: AV Cinema : LVL_USE [Unit] 0.01 1 - 999 41 Ye Off: AV Cinema :W_SXY_0 [Unit] 0.001 (x) 0 - 999 42 Ye Off: AV Cinema :W_SXY_1 [Unit] 0.001 (y)
- Page 157 Electrical Adjustment Grp / No. Item Function Range Initial Note 50 Ye Off: Av Dynamic : LVL_USE [Unit] 0.01 1 - 999 51 Ye Off: AV Dynamic :W_SXY_0 [Unit] 0.001 (x) 0 - 999 52 Ye Off: AV Dynamic :W_SXY_1 [Unit] 0.001 (y) 0 - 999 53 Ye Off: AV Dynamic :B_SXY_0...
-
Page 158: Chassis Description
Chassis Description Chassis over view -158-... -
Page 159: Boards Connection
Chassis Description Boards connection K19A K28B K28A K68A K88E K38F SLOT2 SLOT1 K87F K87H K87K K87M AC INPUT LAMP LAMP LAMP LAMP ID 1 IF ID 2 IF ID 3 IF ID 4 IF K87E K87G K87J K87L K16C K16B K16C K16B K16E... -
Page 160: Troubleshooting
Troubleshooting No picture Check the signals (RGB signals, H/V Check the AV board sync signals, Component signals and vide signals) at connector "K80A". IC1051 RGB (10bit) RGB (10bit) DVI EQUALIZER <DS16EV5110> IC8001 IC4001 DVI_SCL/DVI_SDA DVI/HDMI LVDS SW RECEIVER <XC3S200A> <SII9127> SI_HS SCART_SW SI_VS... - Page 161 Troubleshooting No picture Check the signals (RGB signals, H/V sync signals, Component signals and Check the main board. vide signals) at connector "K22A". IC1301, IC1331 RAM DDR2 X 2 IC201,IC211,IC221 5BNC_R BNC_RGB 5BNC_G 5BNC_B IC1251 CVBS/SCART_AD IC231,IC241,IC251 SLOT_R SLOT_RGB SLOT_G SCX_AD[0-16] SLOT_B AD_RO[0-9]...
- Page 162 Troubleshooting MAIN BOARD 1, IC1331 IC2351 TP561 DDR2 X 2 IC561 OUT_B1/B2 SAMPLE & HOLD <CXA7009R> B-LCD PANEL IC1561 SAMPLE & HOLD <CXA7009R> SCX_AD[0-16] SCX_DQ[0-15] PIC_RSIG KEY_RSIG PT531 PIC_GSIG KEY_GSIG SCX_RO[0-9] PIC_BSIG KEY_BSIG SCX_GO[0-9] OUT_G1/G2 IC531 SCX_BO[0-9] SAMPLE & HOLD <CXA7009R>...
- Page 163 Troubleshooting No Picture Check the signals (RGB signals, H/V sync signals, Component signals and Check the mother board vide signals) at connector "K90E". SLOT1 THS_SLOT TCLK1_SLOT TVS_SLOT TCLK2_SLOT IC9001 TA2_SLOT TA1_SLOT TB2_SLOT TB1_SLOT LVDS SW TC2_SLOT TC1_SLOT TD2_SLOT TD1_SLOT <XC3S200A > SLOT2 THS_AV TCLK1_AV...
-
Page 164: No Power
Troubleshooting No Power Pages to refer n LED indicators Are the STAND-BY indicator (red) and POWER indicator (green) lighting? AC-DC Board If the STAND-BY and POWER indicators are not lighting, check the primary circuit, Fuse (F602) and S6V of standby power supply circuit. n Fuses Are the fuse (F601, F602, F603) on the AC filter board blown? When all the indicators are not lighting, the fuse (F602) may be opened. -
Page 165: Power Supplies To Boards
Troubleshooting Power supplies to boards K19A K28B K68A K88E K38F K28A SLOT2 SLOT1 K87F K87H K87K K87M AC INPUT LAMP LAMP LAMP LAMP ID 1 IF ID 2 IF ID 3 IF ID 4 IF K87E K87G K87J K87L K16C K16B K16C K16B... -
Page 166: Ac Filter, Ac-Dc Power Board
Troubleshooting AC filter, AC-DC power board F602 D647 24.5V SW901 F601 IC632 MAINS T632 SWITCH POWER CONVERTER CONTROL F603 TRANSFORMER Power-On:H AC FILTER Standby: L PC631 VR631 Q641/Q642 Q647 PC632 PFC_SW D648 IC631 SWITCHING D649 IC633 S9.6V T633 POWER D652 CONVERTER CONTROL S-6V... -
Page 167: Dc Power Board
Troubleshooting DC power board RGB FANNET K67G 11 9 K36A K36E 24VFAN1 S24.5V_IN Q3611 FAN_SW_24V1 24VFAN2 Q3612 K36C 24VFAN3 Q3614 S16V_IN Q3616 FAN_SW_24V2 S9.6V_IN 24VFAN4 Q3615 S6.3V_IN S4.3V1 24VFAN5 IC5621 Q3617 Q3618 FAN_SW_24V3 S4.3V2 IC35631 24VFAN6 Q3619 K36D -5.5V Q3620 Q3604 FAN_SW_24V4 PFC_SW... -
Page 168: Pfc-1 & Pfc-2 Board
Troubleshooting PFC-1 & PFC-2 board K16A RL1601 K16B PFC1 LAMP1 CIRCUIT BALLAST1 PFC12V1 Q1607 RL1651 K16C PFC2 LAMP2 CIRCUIT BALLAST2 PFC12V2 IC1601 Q1657 IC1651 PC1601 PC1651 PFC1_SW_PFC2_SW Lamp-On: H Q1608 Q1658 PF_PFC1/PF_PFC2 Error: L PFC-1 K16E 4,10 4,10 K47B MAIN IC1801 PF_PFC2 I/O EXP. -
Page 169: Power Supply And Power Failure Detection
Troubleshooting Power supply and power failure detection Error Information is listed by the serial command. See the chapter "Diagnosis of power failure with serial port" and "Power failure detection system ". MAIN ERROR INFO. K66A Q6601 Q6602 MAIN, S16V PF_S16V Q7434 Q7436 S16V... - Page 170 3.3V2FF 3.3V3FF 3.3VFFAUX Troubleshooting IC3331 S3.3V_SCX Q3331 Q3332 SCX_PLL Q6661 Q6662 S4.3V2 MAIN, S3.3V IC6661 S3.3V PF_S3.3V S3.3V_SCX Q6406 Q6407 IC6403 S2.5V_PIC1A Q6401 Q6402 IC6401 S3.0V_PIC1 Q4441 Q4442 Q4451 Q4452 IC4441 3.3V_KEY IC4451 2.5V_KEY KEY_POW_ON KEY_POW_ON Q1451 Q1452 IC1451 3.3V_DI GAM3.3V_ON 3.3V_DDA Q1453...
- Page 171 IC9571 SLOT2 SLOT_2_ON IC9561 Troubleshooting S6V_AV S-5V MOTHER K80B Q4071 Q4072 PF_AV Q4091 Q4092 S6V_AVD IC4071 S3.3VAV IC4091 1.2VAF 3.3V1AF 3.3V2AF 3.3V3AF 3.3VAFAUX 3.3V0AF Q8081 Q8082 Q8051 Q8052 IC8081 S5V_AVD IC8051 S3.3VSI Q8061 Q8062 IC8061 S1.2VSI D8093 S5V_DDC 5VDDCD D8094 5VDDCA Q1081 Q1082...
-
Page 172: Power Drive And Power Failure Signals
Troubleshooting Power drive and power failure signals Error Information is listed by the serial command. See the chapter "Diagnosis of power failure with serial POWER DRIVE SIGNALS AND POWER FAILUER DETECTION SIGNALS port" and "Power failure detection system ". FAN_DAC_SCL FAN_DAC_SDA ERROR INFO. -
Page 173: Fan Control System
Troubleshooting Fan control system K67A K67G 24VFAN1 PF_B1 Q9701 PWM_B1 FAN_B1 K67B 24VFAN2 Error: L PF_B2 Q9702 K67H PWM_B2 FAN_B2 K67C 24VFAN5 PF_R1 Q9703 PWM_R1 FAN_R1 K67D 24VFAN3 PF_G1 Q9704 PWM_G1 FAN_G1 K67E 24VFAN4 PF_G2 Q9706 PWM_G2 FAN_G2 K67F 24VFAN6 PF_PBS Q9707 PWM_PBS... -
Page 174: Motor Control System
Troubleshooting Motor control system Check the focus and zoom drive signals referring to the logic table below. K65A K65Q FOCUS FOCUS+ IC5531 FOCUS DRIVE <LB1645N> FOCUS- ZOOM Check the lens shift drive ZOOM+ IC5551 signals referring to the ZOOM logic table below. DRIVE <LB1645N>... -
Page 175: Temperature Abnormality
Troubleshooting Temperature abnormality n Temperature monitor operation The temperature monitor system is provided to prevents damage of optical com- ponents (the LCD panel and polarization film etc.) inside a projector from over- heat. Two protection systems are provided. Each system operation as follows : The temperature monitor -1: ●... -
Page 176: Lamp Abnormality
Troubleshooting Lamp abnormality Check that the lamp on/off signals n Lamps (BALAST1_SW, BALAST2_SW, - At first, the high-voltage pulse (about 8KVp-p) is generated between the BALAST3_SW, BALAST4_SW) lamp electrodes to generate glow discharge. Then dielectric breakdown are correct. occurs, finally glow discharge comes to arc discharge. Lamp-On: 3V, Off: 5V - After projector turned on, 30 seconds are required until the light output stabilizes. -
Page 177: Lamp Control System
Troubleshooting Lamp control system BLST1_5V LAMP1_RX LAMP1_TX BALAST_SW1 BLST2_5V LAMP2_RX LAMP2_TX BALAST_SW2 LAMP1_RX_EX LAMP2_RX_EX LAMP3_RX_EX LAMP4_RX_EX LAMP1_TX_EX PFC12V1 PFC12V1 LAMP2_TX_EX PFC2-SW PFC_SW2 LAMP3_TX_EX LAMP4_TX_EX PFC1-SW PFC_SW1 PFC12V2 PFC12V2 LAMP1_COVER_SW LAMP2_COVER_SW LAMP3_COVER_SW LAMP4_COVER_SW PFC_SW1_EX PFC_SW2_EX PFC_SW3_EX PFC_SW4_EX BALAST_SW1_EX BALAST_SW2_EX BALAST_SW3_EX BALAST_SW4_EX BLST3_5V LAMP3_RX LAMP3_TX... -
Page 178: Power Failure Detection System
Troubleshooting Power failure detection system Detection of power failure Projector provides a protection circuit to prevent the secondary failure when the power failure, fans failure or tem- perature failure occurs on the projector. The power failure detection lines "PF_AV", "PF_S3.3V", etc. are connected to the power supply lines and fans. -
Page 179: Error History Log
Troubleshooting Error history log This projector provides the error history log function. To Item Data Group (Error Code) check the logs, you need to enter the service mode and <- Latest Error select group no. " " and item no. " "... -
Page 180: Diagnosis Of Power Failure With Serial Port
Troubleshooting Diagnosis of power failure with serial port This projector provides a function to get the error information of the projector by using the serial port for the power failure diagnosis. The further error information of the power failure and fan failure can be found out by using this function. Diagnosis procedure Connect a serial cross cable to SERIAL PORT IN on the projector and serial port on the PC. -
Page 181: Indicators And Projector Condition
Troubleshooting Indicators and projector condition If a problem occurs within the projector, it will be notified with the temperature indicator <WARNING TEMP.>, the filter indicator <WARNING FILTER>, the shutter indicator <SHUTTER>, and the lamp indicator <LAMP REPLACE>. Check the status of the indicators and take the following action. Attention •... - Page 182 Troubleshooting ■ � � � � � � � � � � � � � � � � � � � � � � -182-...
- Page 183 Troubleshooting ■ � � � � � � � � � � ■ � � � � � � � � � � *1: The indicator will turn on or flash under certain conditions, regardless of the status of other indicators. *2: When [Display] is set to [On], the freeze function or shutter function will not be displayed on the screen during operation.
- Page 184 Troubleshooting ■ � � � � � � � � � � � � � � � � � � � � � � Note • The status of each lamp can be checked as the lamp indicators (<LAMP 1 REPLACE> to <LAMP 4 REPLACE>) at the top of the projector turn on or flash.
-
Page 185: Serial Control
Serial Control Serial control interfaces ■ <Connecting terminals on projector> Computer D-Sub 9-pin (male) D-Sub 9-pin (female) Transmission cable ■ -185-... - Page 186 Serial Control This projector provides a function to control and monitor the projector's operations by using the RS-232C serial port. n Operation Connect a RS-232C serial cross cable to SERIAL Baud rate : 9600 / 19200 bps PORT IN on the projector and serial port on the PC. Parity check : none Stop bit...
- Page 187 Serial Control n Status Read Command Format The command is sent from PC to the projector with the format below; 'CR' [Command] 'CR' Command: one character (refer to the command table below. The projector decodes the command and returns the 'Character string' with the format below;...
-
Page 188: Control Port Functions
Control Port Functions ● Scaler (IC301, IP00C811) PIN NO. NAME FUNCTION NAME FUNCTION POLARITY POWER_ON_SW Power On FILTER_COUNT Filter Count (Not used) YE_MUTE_SW YE Control ACCELE_SENS1 Accelerator Sensor 1 ACCELE_TEMP1 Accelerator Sensor 1 ACCELE_SENS2 Accelerator Sensor 2 ACCELE_TEMP2 Accelerator Sensor 2 R/C_SCX Remote Control (Not used) PRESS_SENS... - Page 189 Control Port Functions ● I/O Expander (IC1801, TE7783) PIN NO. NAME FUNCTION NAME FUNCTION POLARITY LENS_SENSE_U Lens Sensor Top LENS_SENSE_D Lens Sensor Bottom LENS_SENSE_L Lens Sensor Left LENS_SENSE_R Lens Sensor Right LENS SENSE_VC Lens Sensor Vertical Center LENS_SENSE_HC Lens Sensor Horizontal Center AD_SCL IIC Bus Clock AD_SDA...
- Page 190 Control Port Functions ● Ye & Color Management FPGA (IC3401, EP3C80F484) PIN NO. NAME FUNCTION NAME FUNCTION POLARITY 4LCD_SW_NIOS 4LCD Drive Switch POSITION_DET2 Shutter Position Detection 2 POSITION_DET1 Shutter Position Detection 1 SHUTTER_SW1 Shutter Switch 1 SHUTTER_SW2 Shutter Switch 2 LAMP3_RX Lamp 3 RXD LAMP4_RX...
-
Page 191: Ic Block Diagrams
IC Block Diagrams ● AD8183 <RGB-SW & Amp. , IC3071, IC9071> AD8183/AD8185 IN0A DGND SELECT IN1A SEL A/B DISABLE OUT0 IN2A OUT1 IN2B OUT2 IN1B DVCC IN0B ● BA7078AF <Sync Separator, IC5302, IC6301> HSCTL POLH C/HSYNC IN H Sync det. EXIH POLV VIDEO IN... - Page 192 IC Block Diagrams ● CXA7009 <S/H, IC501, IC531, IC561, IC1501, IC1531, IC1561> ● CXD3548 <Gamma, IC401> -192-...
- Page 193 IC Block Diagrams ● FA5501 <PFC, IC1601, IC1651> ● HIN202 <RS232C Driver, IC3801> -193-...
- Page 194 IC Block Diagrams ● LB1645N <Motor Drive, IC5531, IC5551, IC6501, IC6502, IC6551> ● M62320 <I/O Expander, IC4801, IC4811> I�C BUS Interface Shift Register Output Data Input/Output Output Data Input Data Register Latch Latch Reset Input Data Power on Reset I/O Port -194-...
- Page 195 IC Block Diagrams ● AX11005 <Network, IC8301> ● TE7783 <I/O Expander, IC1801> -195-...
- Page 196 IC Block Diagrams -196-...
-
Page 197: Exploded Views & Parts List
LC-XT6 Exploded Views & Parts List Exploded Views Parts List Models LC-XT6 Important safety notice Components identified by the International symbol have special characteristics important for safety. When replacing any of these components, use only the manufacturer's specified parts. Before ordering the service parts, confirm the parts number with the Ref. No in the parts list and the exploded view. - Page 198 LC-XT6 Exploded Views Cabinet top assembly C01-1 C01-1 C01-1 C01-1 C02-1 A6593 RC-LED BOARD Cabinet bottom-1 assembly S901 AA6596 EX TEMP BOARD AA6591 RGB FANNET BOARD FN906 FN904 FN903 FN905 * Accessory FN902 FN901 AA6501 MOTOR BOARD SPL-2...
- Page 199 LC-XT6 Exploded Views Cabinet bottom-2 assembly AA6592 RC REAR BOARD Filter unit Cabinet bottom-3 assembly SPL-3...
- Page 200 LC-XT6 Exploded Views Filter unit assembly C03-2 C03-1 C03-4 * C03 includes C03-1 to C03-4. C03-3 AV panel assembly AA6800 CONTROL BOARD AA8740 AA3800 BRIDGE BOARD RS232C BOARD AA9000 MOTHER BOARD AA1050 AV BOARD AA6594 LIGHT BOARD SPL-4...
- Page 201 LC-XT6 Exploded Views Main board, shutter assembly AA9700 AA200 LAMP SIGN BOARD MAIN BOARD PFC-1 box assembly (For LAMP1/LAMP2) BALAST1 BALAST2 AA680 PFC1 BOARD FN907 SPL-5...
- Page 202 LC-XT6 Exploded Views PFC-2 box assembly (For LAMP3/LAMP4) BALAST3 BALAST4 AA680 PFC2 BOARD FN909 Power box assembly AA3610 DC POWER BOARD AA620 AC-DC BOARD SPL-6...
- Page 203 LC-XT6 Exploded Views AC filter and AC inlet assembly AA610 AC FILTER BOARD SW901 * Accessory K901 Lens shift and optical unit * Accessory * Optional SPL-7...
- Page 204 LC-XT6 Exploded Views Lens shift assembly M01-2 M01-5 M01-4 M01-1 M01-3 SPL-8...
- Page 205 LC-XT6 Exploded Views Optical lamp unit assembly LP904 (LAMP4) LP903 (LAMP3) FN913 FN912 FN914 FN911 A8720 ID3 IF BOARD FN910 A8730 ID4 IF BOARD LP902 LP901 (LAMP2) (LAMP1) SW906 SW905 A8710 ID2 IF BOARD A8700 ID1 IF BOARD FN918 FN916...
- Page 206 LC-XT6 Exploded Views Panel/Prism assembly-1 L01L L01R * L01 includes R, G, B LCD Panels and L01-R1 to L01-B2. (Green) L01-G1 L01-R1 L01-R2 L01-G2 (Red) L01-B2 L01-B1 (Blue) SPL-10...
- Page 207 LC-XT6 Exploded Views Panel/Prism assembly-2 (Blue) (Green) L01L-G, L01R-G L01L-R, L01R-R Note: L01L-B, L01R-B Parts for L01-R, L01-G and L01-B differ accord- (Blue) ing to type of LCD panel/prism assembly. SPL-11...
- Page 208 LC-XT6 Exploded Views Polarized glass (IN) assembly For Red L04-R L03-R L02L-R / L02R-R Prism side For Green L04-G L03-G L02L-G / L02R-G Prism side For Blue L04-B L03-B Note: Parts for L02 differ according to type of LCD L02L-B / L02R-B panel/prism assembly.
- Page 209 LC-XT6 Exploded Views Optical filter (LC-CS) Integrator assembly SPL-13...
- Page 210 LC-XT6 Exploded Views Integrator (OUT) /PBS assembly Condenser lens (OUT) assembly SPL-14...
- Page 211 LC-XT6 Exploded Views Relay lens (OUT) assembly SPL-15...
- Page 212 LC-XT6 Exploded Views In the Optical unit SPL-16...
- Page 213 LC-XT6 Exploded Views Mirror assembly Optical filters assembly SPL-17...
- Page 214 LC-XT6 Exploded Views Labels SPL-18...
- Page 215 LC-XT6 Exploded Views Accessories (see accessories parts list) REMOTE CONTROL MANUAL CD-ROM VGA CABLE AC COARD SPACER COVER LNS LARGE COVER LNS SMALL COVER LNS W03 MOUNTING LENS A-01 STOPPER CLAMP LNS SHIFT STOPPER CLAMP AC CORD SPL-19...
-
Page 216: Mechanical Parts List
LC-XT6 Mechanical Parts List Ref. Part No. Description Note Ref. Part No. Description Note C01-1 T1SAS0976-A SPACER SHEET STAND-KL8B T0CAM0514-A2 ASSY CAB FRONT-KL8B PACKING MATERIALS C02-1 T1SAX1248-- SPACER FRNT A ACOUSTIC-KL8A T0FTM0016--3 COMPL FILTER UNIT A-K2A T6K2C1104QA CARTON CASE TOP EKU... - Page 217 LC-XT6 Mechanical Pats List Ref. Part No. Description Note Ref. Part No. Description Note L01L* TXZEC01SARZA ASSY,PNL/PSML-KT2A L01L-R L5BDAYY00215 LCD(LCX086AAB-7R) L01L-G L5BDAYY00216 LCD(LCX086ABB-8G) L01L-B L5BDAYY00217 LCD(LCX086AAB-6B) TYPE-R LCD PANEL/PRISM ASSY L01R* TXZEC01SARZB ASSY,PNL/PSMR-KT2A L01R-R L5BDAYY00218 LCD(LCX086ABB-7R) L01R-G L5BDAYY00219 LCD(LCX086AAB-8G) L01R-B L5BDAYY00220 LCD(LCX086ABB-6B) COMMON * Key No.
- Page 218 LC-XT6 Mechanical Pats List SPL-22...
-
Page 219: Electrical Parts List
LC-XT6 Electrical Parts List Product safety should be considered when a component replacement is made in any area of a projector. Components indicated by a mark in this parts list and the circuit diagram show components whose value have special significance to product safety. It is particularly recommended that only parts specified on the following parts list be used for components replacement pointed out by the mark. - Page 220 LC-XT6 Electrical Parts List Ref. Part No. Description Note Ref. Part No. Description Note Z90J&FG T01CZCW180K STANDARD WIREASSY Z38G&FG T01CZCW380K STANDARD WIREASSY ASSEMBLED BOARDS Z6C&6E T02AVCS4006 STANDARD WIREASSY Z19B&19A T03AYBZ400W STANDARD WIREASSY AA685 T0B10C875B01 ASSY,PWB,PFCKT2A Z8H&S901 T03BFCA180K STANDARD WIREASSY AA680...
- Page 221 LC-XT6 Electrical Parts List Ref. Part No. Description Note Ref. Part No. Description Note IC1651 C0DBCZG00004 IC FA5502M R1612 ERJ1TYJ823 MT-GLAZE 82K JA 1W R1613 ERJ1TYJ823 MT-GLAZE 82K JA 1W CAPACITOR R1614 ERJ1TYJ823 MT-GLAZE 82K JA 1W C1601 F0C3A105A043 MT-POLYEST 1U K 310V...
- Page 222 LC-XT6 Electrical Parts List Ref. Part No. Description Note Ref. Part No. Description Note R1692 D0GB102JA057 MT-GLAZE 1K JA 1/10W D1666 B0BC01200047 ZENER DIODE 02DZ12Y(TPH3) R1693 ERJ3GEYJ472 M 4.7K OHM,J,1/16W DB1601 B0FBBR000006 DIODE RBV-1506 LF035-40 R1694 D0GB102JA057 MT-GLAZE 1K JA 1/10W...
- Page 223 LC-XT6 Electrical Parts List Ref. Part No. Description Note Ref. Part No. Description Note Q4452 B1GBCFYY0113 TR RN1111 TE85L IC211 C0ABAB000193 IC AD8057ARTZ-REEL7 Q4461 B1GBCFYY0113 TR RN1111 TE85L IC2201 C1AB00003349 IC ADV7842KBCZ-5 Q4462 B1GBCFYY0113 TR RN1111 TE85L IC221 C0ABAB000193 IC AD8057ARTZ-REEL7...
- Page 224 LC-XT6 Electrical Parts List Ref. Part No. Description Note Ref. Part No. Description Note CAPACITOR C1373 F1G1C104A077 CERAMIC 0.1U K 16V C1374 F1G1C104A077 CERAMIC 0.1U K 16V C1201 F1G1H3R0A795 CERAMIC 3P C 50V C1376 F1G1C104A077 CERAMIC 0.1U K 16V C1202...
- Page 225 LC-XT6 Electrical Parts List Ref. Part No. Description Note Ref. Part No. Description Note C1564 F1H1E1050001 CERAMIC 1U K 25V C2211 F1G1C104A077 CERAMIC 0.1U K 16V C1565 F1G1A1050002 CERAMIC 1U K 10V C2212 F1G1H103A706 CERAMIC 22U M 6.3V C1566 F2G1E100A255...
- Page 226 LC-XT6 Electrical Parts List Ref. Part No. Description Note Ref. Part No. Description Note C2318 F1G1C104A077 CERAMIC 0.1U K 16V C2394 F1G1C104A077 CERAMIC 0.1U K 16V C2319 F1G1C104A077 CERAMIC 0.1U K 16V C2395 F1G1C104A077 CERAMIC 0.1U K 16V C232 F1G1C104A077 CERAMIC 0.1U K 16V...
- Page 227 LC-XT6 Electrical Parts List Ref. Part No. Description Note Ref. Part No. Description Note C328 F1G1C104A077 CERAMIC 0.1U K 16V C3438 F1G1A1050002 CERAMIC 1U K 10V C329 F1G1C104A077 CERAMIC 0.1U K 16V C3439 F1G1A1050002 CERAMIC 1U K 10V C3301 F1J1A106A024...
- Page 228 LC-XT6 Electrical Parts List Ref. Part No. Description Note Ref. Part No. Description Note C373 F1G1C104A077 CERAMIC 0.1U K 16V C454 F1G1A1050002 CERAMIC 1U K 10V C374 F1G1C104A077 CERAMIC 0.1U K 16V C456 F2G0J1010058 ELECT 100U M 6.3V C376 F1G1C104A077 CERAMIC 0.1U K 16V...
- Page 229 LC-XT6 Electrical Parts List Ref. Part No. Description Note Ref. Part No. Description Note C5228 F1G1C104A077 CERAMIC 0.1U K 16V C594 F1H1H104A913 CERAMIC 0.1U K 50V C5229 F1G1C104A077 CERAMIC 0.1U K 16V C595 F1G1A1050002 CERAMIC 1U K 10V C5231 F1G1C104A077 CERAMIC 0.1U K 16V...
- Page 230 LC-XT6 Electrical Parts List Ref. Part No. Description Note Ref. Part No. Description Note R1223 ERJ2GE0R00 MT-GLAZE 0.000 ZA 1/16W R1462 ERJ2RKF2701 MT-GLAZE 2.7K FA 1/16W R1241 ERJ2GE0R00 MT-GLAZE 0.000 ZA 1/16W R1463 ERJ2RKF3001 MT-GLAZE 3K FA 1/16W R1251 ERJ2GE0R00 MT-GLAZE 0.000 ZA 1/16W...
- Page 231 LC-XT6 Electrical Parts List Ref. Part No. Description Note Ref. Part No. Description Note R1815 ERJ2GEJ102 MT-GLAZE 1K JA 1/16W R2213 ERJ2GEJ103 MT-GLAZE 10K JA 1/16W R1816 ERJ2GEJ220 MT-GLAZE 22 JA 1/16W R2214 ERJ3EKF5100 MT-GLAZE 510 FA 1/10W R1817 ERJ2GEJ100...
- Page 232 LC-XT6 Electrical Parts List Ref. Part No. Description Note Ref. Part No. Description Note R2318 ERJ2GE0R00 MT-GLAZE 0.000 ZA 1/16W R2538 ERJ2GEJ1R0 MT-GLAZE 1 JA 1/16W R2319 ERJ2GEJ103 MT-GLAZE 10K JA 1/16W R2539 ERJ2GEJ1R0 MT-GLAZE 1 JA 1/16W R2321 ERJ2GE0R00 MT-GLAZE 0.000 ZA 1/16W...
- Page 233 LC-XT6 Electrical Parts List Ref. Part No. Description Note Ref. Part No. Description Note R331 ERJ2GE0R00 MT-GLAZE 0.000 ZA 1/16W R3439 ERJ2GE0R00 MT-GLAZE 0.000 ZA 1/16W R332 ERJ2GE0R00 MT-GLAZE 0.000 ZA 1/16W R344 ERJ2GE0R00 MT-GLAZE 0.000 ZA 1/16W R3322 ERJ2GEJ103...
- Page 234 LC-XT6 Electrical Parts List Ref. Part No. Description Note Ref. Part No. Description Note R361 ERJ2GE0R00 MT-GLAZE 0.000 ZA 1/16W R439 ERJ2GEJ220 MT-GLAZE 22 JA 1/16W R362 ERJ2GE0R00 MT-GLAZE 0.000 ZA 1/16W R441 ERJ2GE0R00 MT-GLAZE 0.000 ZA 1/16W R363 ERJ2GEJ220...
- Page 235 LC-XT6 Electrical Parts List Ref. Part No. Description Note Ref. Part No. Description Note R4803 ERJ2GEJ103 MT-GLAZE 10K JA 1/16W R533 ERJ2GE0R00 MT-GLAZE 0.000 ZA 1/16W R4811 ERJ2GE0R00 MT-GLAZE 0.000 ZA 1/16W R534 ERJ2GE0R00 MT-GLAZE 0.000 ZA 1/16W R4812 ERJ2GE0R00 MT-GLAZE 0.000 ZA 1/16W...
- Page 236 LC-XT6 Electrical Parts List Ref. Part No. Description Note Ref. Part No. Description Note R5779 ERJ2GEJ103 MT-GLAZE 10K JA 1/16W R6437 ERJ2GEJ680 MT-GLAZE 68 JA 1/16W R5781 ERJ2GEJ100 MT-GLAZE 10 JA 1/16W R6438 ERJ2GEJ680 MT-GLAZE 68 JA 1/16W R5782 ERJ2GEJ103...
- Page 237 LC-XT6 Electrical Parts List Ref. Part No. Description Note Ref. Part No. Description Note R6719 ERJ2GE0R00 MT-GLAZE 0.000 ZA 1/16W R8885 D1BA3304A014 MT-GLAZE 3.3M FA 1/16W R6851 ERJ2GE0R00 MT-GLAZE 0.000 ZA 1/16W R8888 D1BA3304A014 MT-GLAZE 3.3M FA 1/16W R6852 ERJ2GE0R00 MT-GLAZE 0.000 ZA 1/16W...
- Page 238 LC-XT6 Electrical Parts List Ref. Part No. Description Note Ref. Part No. Description Note RB2318 EXB28V470J R-NETWORK 47X4 RB501 EXB28VR000 R-NETWORK 0X4 RB2319 EXB28V470J R-NETWORK 47X4 RB502 EXB28VR000 R-NETWORK 0X4 RB2321 EXB28V470J R-NETWORK 47X4 RB503 EXB28VR000 R-NETWORK 0X4 RB2322 EXB28V470J...
- Page 239 LC-XT6 Electrical Parts List Ref. Part No. Description Note Ref. Part No. Description Note L4452 ERJ6GEY0R00 MT-GLAZE 0.000 ZA 1/10W K19B K1KA03AA0104 PLUG PWB 3P L4461 ERJ6GEY0R00 MT-GLAZE 0.000 ZA 1/10W K22A K1KYA0AA0622 PLUG PWB-PWB 100P L4462 G1C150MA0188 INDUCTOR 15U M...
- Page 240 LC-XT6 Electrical Parts List Ref. Part No. Description Note Ref. Part No. Description Note R6836 ERJ2GE0R00 MT-GLAZE 0.000 ZA 1/16W Q9502 B1GBCFYY0113 TR RN1111 TE85L R6837 ERJ2GE0R00 MT-GLAZE 0.000 ZA 1/16W Q9511 B1GBCFYY0113 TR RN1111 TE85L R6838 ERJ2GEJ103 MT-GLAZE 10K JA 1/16W...
- Page 241 LC-XT6 Electrical Parts List Ref. Part No. Description Note Ref. Part No. Description Note C9093 F2G1C471A250 ELECT 470U M 16V R9067 ERJ2GEJ102 MT-GLAZE 1K JA 1/16W C9094 F2G1C471A250 ELECT 470U M 16V R9068 ERJ2GEJ102 MT-GLAZE 1K JA 1/16W C9171 F1G1C104A077 CERAMIC 0.1U K 16V...
- Page 242 LC-XT6 Electrical Parts List Ref. Part No. Description Note Ref. Part No. Description Note R9516 ERJ2RKF2200 MT-GLAZE 220 FA 1/16W D9093 B0BC01200019 ZENER DIODE UDZS-TE-1712B R9517 ERJ2RKF8201 MT-GLAZE 8.2K FA 1/16W D9094 B0BC01200019 ZENER DIODE UDZS-TE-1712B R9518 ERJ2GEJ512 MT-GLAZE 5.1K JA 1/16W...
- Page 243 LC-XT6 Electrical Parts List Ref. Part No. Description Note Ref. Part No. Description Note IC3021 C0ABAB000193 IC AD8057ARTZ-REEL7 C2058 F1J1A106A024 CERAMIC 10U K 10V IC3031 C0JBAB000430 IC SN74AHCT1G14DBVR C2081 F1G1H3R0A795 CERAMIC 3P C 50V IC3061 C3EBCC000071 IC 24LC21AT/SN C2082 F1G1H100A541...
- Page 244 LC-XT6 Electrical Parts List Ref. Part No. Description Note Ref. Part No. Description Note C4028 F1G1C104A077 CERAMIC 0.1U K 16V C8033 F1G1C104A077 CERAMIC 0.1U K 16V C4029 F1G1C104A077 CERAMIC 0.1U K 16V C8034 F1G1C104A077 CERAMIC 0.1U K 16V C4072 F1G1A1050002...
- Page 245 LC-XT6 Electrical Parts List Ref. Part No. Description Note Ref. Part No. Description Note R1087 ERJ2RKF2202 MT-GLAZE 22K FA 1/16W R3046 ERJ2GEJ102 MT-GLAZE 1K JA 1/16W R1088 ERJ2RKF1002 MT-GLAZE 10K FA 1/16W R3048 ERJ2GE0R00 MT-GLAZE 0.000 ZA 1/16W R1089 ERJ2RKF1002...
- Page 246 LC-XT6 Electrical Parts List Ref. Part No. Description Note Ref. Part No. Description Note R5309 ERJ2GEJ101 MT-GLAZE 100 JA 1/16W R8057 ERJ2GEJ512 MT-GLAZE 5.1K JA 1/16W R5311 ERJ2GEJ102 MT-GLAZE 1K JA 1/16W R8058 ERJ2RKF1002 MT-GLAZE 10K FA 1/16W R5312 ERJ2GEJ102...
- Page 247 LC-XT6 Electrical Parts List Ref. Part No. Description Note Ref. Part No. Description Note D2041 B0ACDJ000007 DIODE 1SS352-(TPH3) C8307 F1G1C104A077 CERAMIC 0.1U K 16V D2051 B0BC01200019 ZENER DIODE UDZS-TE-1712B C8308 F1G1C104A077 CERAMIC 0.1U K 16V D3031 B0ACDJ000007 DIODE 1SS352-(TPH3) C8311...
- Page 248 LC-XT6 Electrical Parts List Ref. Part No. Description Note Ref. Part No. Description Note R8359 ERJ2GE0R00 MT-GLAZE 0.000 ZA 1/16W C5552 F1H1H103A219 CERAMIC 0.01U K 50V R8361 ERJ2GE0R00 MT-GLAZE 0.000 ZA 1/16W C5555 F1H1H103A219 CERAMIC 0.01U K 50V R8362 ERJ2GEJ331...
- Page 249 LC-XT6 Electrical Parts List Ref. Part No. Description Note Ref. Part No. Description Note D6505 B0BC01200019 ZENER DIODE UDZS-TE-1712B R1722 ERJ3GEY0R00 MT-GLAZE 0.000 ZA 1/10W D6552 B0BC5R600003 ZD UDZS-TE-175.6B R1794 ERJ3GEY0R00 MT-GLAZE 0.000 ZA 1/10W D6576 B0ACDJ000007 DIODE 1SS352-(TPH3) R1796 ERJ3GEY0R00 MT-GLAZE 0.000 ZA 1/10W...
- Page 250 LC-XT6 Electrical Parts List Ref. Part No. Description Note Ref. Part No. Description Note L7712 J0JYC0000069 IMPEDANCE 330 OHM P R601 ERJ12ZYJ474 MT-GLAZE 470K JA 1/2W L7713 J0JYC0000069 IMPEDANCE 330 OHM P R602 ERJ12ZYJ474 MT-GLAZE 470K JA 1/2W L7714 J0JYC0000069...
- Page 251 LC-XT6 Electrical Parts List Ref. Part No. Description Note Ref. Part No. Description Note K67D K1KA05AA0150 PLUG 5P Q3606 B1GDCFYY0064 TR RN2102 TE85L K67E K1KA05AA0150 PLUG 5P Q3611 B1DHCD000023 TR RSQ025P03-TR K67F K1KA04AA0104 ZH SIDE 4P Q3612 B1DHCD000023 TR RSQ025P03-TR...
- Page 252 LC-XT6 Electrical Parts List Ref. Part No. Description Note Ref. Part No. Description Note C3632 F1H1H104A913 CERAMIC 0.1U K 50V C4633 F2G1E101A185 ELECT 100U M 25V C3633 F1H1H104A913 CERAMIC 0.1U K 50V C4634 F1H1H104A913 CERAMIC 0.1U K 50V C3634 F1H1H104A913 CERAMIC 0.1U K 50V...
- Page 253 LC-XT6 Electrical Parts List Ref. Part No. Description Note Ref. Part No. Description Note R3615 ERJ3GEY0R00 MT-GLAZE 0.000 ZA 1/10W R4615 ERJ3EKF4701 MT-GLAZE 4.7K FA 1/10W R3616 ERJ3EKF1502 MT-GLAZE 15K FA 1/10W R4616 ERJ3EKF1002 MT-GLAZE 10K FA 1/10W R3617 ERJ3EKF1003...
- Page 254 LC-XT6 Electrical Parts List Ref. Part No. Description Note Ref. Part No. Description Note D4621 B0ACDJ000007 DIODE 1SS352-(TPH3) R5668 K5H1523A0019 PROTECTOR IC 3.8A 72V D4622 B0ACDJ000007 DIODE 1SS352-(TPH3) R5669 ERJ3GEY0R00 MT-GLAZE 0.000 ZA 1/10W D4631 B0ACDJ000007 DIODE 1SS352-(TPH3) R5671 ERJ3GEY0R00 MT-GLAZE 0.000 ZA 1/10W...
- Page 255 LC-XT6 Electrical Parts List Ref. Part No. Description Note Ref. Part No. Description Note MISCELLANEOUS C677 F1H1H6810005 CERAMIC 680P K 50V C681 F1B3A101A008 CERAMIC 100P K 1K K88E K1KA06AA0104 PLUG PWB 6P C682 F0C2J563A124 POLYPRO 0.056U J 630V C684 F1B3A471A008...
- Page 256 LC-XT6 Electrical Parts List Ref. Part No. Description Note Ref. Part No. Description Note R714 ERJ3GEYJ301 MT-GLAZE 300 JA 1/10W D646 B0JCME000012 DIODE RB160L-40-TE25 R716 ERJ12ZYJ330 MT-GLAZE 33 JA 1/2W D647 B0JBSL000044 DIODE FMEN-220A R717 ERJ3GEYJ101 MT-GLAZE 100 JA 1/10W...
- Page 257 LC-XT6 Electrical Parts List Ref. Part No. Description Note Ref. Part No. Description Note D2813 B0BC6R100010 ZD UDZS-TE-176.2B D2814 B0BC6R100010 ZD UDZS-TE-176.2B D2815 B0BC6R100010 ZD UDZS-TE-176.2B D2816 B0BC6R100010 ZD UDZS-TE-176.2B D2817 B0BC6R100010 ZD UDZS-TE-176.2B D2818 B3AAB0000144 LED SML-512UW T86 D2819...
- Page 258 LC-XT6 Electrical Parts List SPL-62...
-
Page 259: Schematic Diagram & Circuit Board Diagram
LC-XT6 Schematic Diagram & Circuit Board Diagram Schematic Diagram Circuit Board Diagram Models LC-XT6 Important Safety Notice Components identificated by the International symbol ! have special characteristics important for safety. When replacing any of these components, use only the manufacturer's specified parts. - Page 260 LC-XT6 Schematic Diagram & Circuit Board Diagrams Pin description of diode, transistor and IC ● Diode Diode K: Cathode A: Anode Transistor/FET ● Transistor/FET C: Collector D: Drain B: Base G: Gate Index E: Emitter S: Source C1 C2 C1 C2 ●...
- Page 261 - NO POWER when one of those signals has a failure. Z47E&16E 1AA9W0BAY003A PFC2 CONTROL Switch Signals [AV switch, Mute, etc] - NO PICTURE or NO SOUND when one of those signals WHITE a failure. Z47F&N2D 1AA9W05CF003C LAMP BALST4 KT2A-01 LC-XT6 DIA-3...
- Page 262 5VAV IC2052 D0GA101JA042 IC6303 CPSEL VDRV S6V_AVA R3080 AD8057ARTK C0JBAZ002262 R3083 POWER_ON_SW D0GA561ZA033 R3082 R6322 C6326 CPWID D0GA392ZA033 D0GA103JA042 R3084 F1G1C104A077 C3081 C6323 D0GA153ZA033 F1G1H101A541 5BNC_V F1G1A105A047 AV-1 R3086 SYNC SEP. D0GA512JA042 5BNC_V R6326 D0GAR00ZA031 IC6303 TC7SZ125FUK KT2A-02 DIA-4 LC-XT6...
- Page 263 K38D-3 W_RC R3862 R3857 D3868 RS232C D0GA D0GA K38D-GND D3867 R00ZA031 331JA042 B0BC AV-2 B0BC IC3802 6R100025 R3854 D3869 6R100025 B3PAA0000601 W_RC_SW K38DA CHASIS 1AA2EAA0008-- _EARTH C3861 D3866 R3866 R3867 F1G1C104A077 B0BC D0GA512JA042 D0GA103JA042 6R100025 K38G K4ZZ01000291 KT2A-03 LC-XT6 DIA-5...
- Page 264 D0GA390JA042 A_G2 C9074 CG2-G R9189 R9084 F1G1C104A077 D0GAR00ZA031 D0GA750JA042 K80A K80B M_IDC2_IN C9066 R9181 F1G1C104A077 D0GA101JA042 R9086 SLOT1 SLOT1_IN D0GA390JA042 A_B2 C9067 SLOT2_IN CG2-B SLOT2 R9087 F1G1C104A077 R9182 D0GA750JA042 MOTHER TO AV BOARD D0GA101JA042 C9069 RGB-SW CV1A101MADANG KT2A-04 DIA-6 LC-XT6...
- Page 265 D0GDR00ZA038 1.8V_AD 3.3VAD 1.8VAD L2282 D0GDR00ZA038 R2283 1.8CV_AD R2282 3.3V2FF D0GA103JA042 D0GA621JA042 TO IC301(SCALER) X5201 R5256 L2283 D0GDR00ZA038 H1A8205B0002 C2282 R2284 C5233 D0GA680 MAIN-1 PLL_AD D0GA392ZA033 JA042 TO IC301(SCALER) F1G1C104A077 L2284 D0GDR00ZA038 1.8VA_AD R2286 R5257 R5254 D0GA103ZA033 KT2A-05 LC-XT6 DIA-7...
- Page 266 R5701 ZA031 D0GA103JA042 SLOT1_SDA SLOT1_SDA_S5V S3.3VA_SCX R1314 D0GA100JA042 SLOT1SDA R5704 D0GA103JA042 D0GA100JA042 Q333 RB332 B1ZBZ0000067 POWER_ON_SW D1HY4724A005 SLOT2_SCL SLOT2_SCL_S5V SLOT2SCL MAIN-2 IC5701 SLOT1_SCL Q334 C0JBAA000356 B1ZBZ0000067 R5703 SLOT1_SDA SLOT2_SDA SLOT2_SDA_S5V D0GA103JA042 D1HYR004A005 SLOT2SDA R5702 SLOT2_SCL RB333 SLOT2_SDA KT2A-06 DIA-8 LC-XT6...
- Page 267 D0GA101JA042 NIOS_ADR[10] NIOS_ADR[8] R/C_FRONT W_R/C_PIC1 A10/AP R3450 D0GA101JA042 R3437 D0GAR00ZA031 NIOS_ADR[0] NIOS_ADR[7] R/C_FRONT_PIC1 R/C_REAR NIOS_ADR[1] NIOS_ADR[6] R3438 D0GA101JA042 R/C_REAR_PIC1 POSITION_DET2_EX R3456 D0GA101JA042 NIOS_ADR[2] NIOS_ADR[5] POSITION_DET2 POSITION_DET1_EX R3455 D0GA101JA042 NIOS_ADR[3] NIOS_ADR[4] POSITION_DET1 IC3411 C5806 F1G1C104A077 MAIN-3 EP3C80F484 INVERTER KT2A-07 LC-XT6 DIA-9...
- Page 268 DB_IN4 SIG_OUT11 DB_IN3 SIG_OUT12 DB_IN2 PVCC C1507 F1H1E1050001 C1505 F1G1A105A047 RET_R R1510 D0GA100JA042 <FROM: SCAN REF_R 3.3V_DI GAMMA> <FROM: GAN_SCL IC501> *R1506 *R1508 R1502 D0GAR00ZA031 C1503 GAN_SDA R1503 D0GAR00ZA031 F1H1E1050001 TC_XCLR R1504 D0GAR00ZA031 *R1507 R1509 D0GAR00ZA031 MAIN-4 KT2A-08 DIA-10 LC-XT6...
- Page 269 Q5501 B1GBCF YY0113 B1GBCF R5519 YY0113 D0GA393ZA033 R5517 C5505 D0GA332JA042 F1G1H103A706 Iout:1A IC5502_6 S16V S12V R5514 D0GA103JA042 R5513 D0GA562ZA033 C5503 R5512 F2G1E101A182 D0GA152ZA033 R5511 D0GA202ZA033 TE101 TE104 TE106 TE107 TE108 TE109 TE110 MAIN-5 TE111 TE112 TE113 TE115 KT2A-09 LC-XT6 DIA-11...
- Page 270 J0JHC0000075 KEY04 R6893 K67F_1 FN906(0.9A) D0GAR00ZA031 24VFAN6 R6838 R6839 RGB FANNET C9712 R6841 R6842 F2G1H101A238 Unauthorized substitutions may result D0GA103JA042 D0GA103JA042 D0GA103JA042 D0GA103JA042 PWM SIGNAL C9711 F1H1H104A913 PALSE SENS. POWER in fire or accident. KT2A-10 DIA-12 LC-XT6...
- Page 271 PWM_B2 RB5659 FAN_IN_L1 C3662 :D1HY1034A004 F1H1H104A913 Q5662 B1GBCFYY0005 FAN CONTROL & Output signals of Open Collector FAN_* Q5663 B1GBCFYY0005 FAILURE DET. S3.0V_PWR S1.8V_PWR Q5664 B1GBCFYY0005 Duty of PWM signals PWM_* increase decrease DC POWER decrease increase FAN_* KT2A-11 LC-XT6 DIA-13...
- Page 272 S9.6V PFC12V_0 SW77H_3 K0KABA000021 D2HW-BL201DR PFC12V4 K77J_3 L7738 1AV4S10B8740N S9.6V J0JYC0000069 C7744 R7719 F1H1H1010005 D0GB331ZA063 MOTHER MAIN K77H D7709 K7702 K1KA08AA0104 R7722 S6V_AV D0GBR00ZA061 PFC12V_0 K77H_1 S6V_AV PFC12V_TH C7733 K77H_3 L7739 J0JYC0000069 S-5V S-5V LAMP SIGN BRIDGE KT2A-12 DIA-14 LC-XT6...
- Page 273 SW6824 D6802 D6807 D6812 INPUT MENU RC-LED (SIDE:B) KEY04 R6893 R6842 SW6826 SW6814 SW6813 D6803 D6813 D6808 LEFT SELECT RIGHT A2821 SW6803 R6801 SW6816 SW6804 KEY14 D6804 D6809 D6814 A2822 AUTO PC ADJ. DOWN INFORMATION. R6816 SOLDER SIDE LC-XT6 DIA-15...
- Page 274 CONTROL R583 R4732 R4748 R4737 R1951 R6639 R6637 RC REAR C1952 KEYVSYNC K3491_17 R1310 SIGN "K36C" K19B K3491 "K36D" "CN2" Q581 K47C K66C Q581 R582 R581 " K68A " R3492 "K28A" "K77A" K19B K66C K3491 WHITE LIGHT "K19A" DIA-16 LC-XT6...
- Page 275 K47B_9 C2318 R3455 3.0VPIC1 L6401 PIC1_F13 PIC1_D20 PIC1_K22 K28D_1 K28D_2 C2364 PIC1_P20 R3475 R3437 C2359 R6855 L6401 PIC1_K18 PIC1_K22 IC3411 C2371 C6637 K19B_1 K66C_11 K66C_1 K66C_4 K66C_6 K66C_8 R4731 K19B_2 K66C_3 K66C_5 K66C_7 K66C_9 K66C_10 K66C_12 K19B_3 C6636 LC-XT6 DIA-17...
- Page 276 K77D Q7702 R7747 R7739 R7746 R7738 ID3 IF "K87K" K16B RB1704 K77C K16C K77E BLACK WHITE ID2 IF ID1 IF "K87F" "K87H" PFC-1: PFC-1: LAMP BALLAST2 LAMP BALLAST1 "CN1" "CN1" PFC-2: PFC-2: LAMP BALLAST4 LAMP BALLAST3 "CN1" "CN1" DIA-18 LC-XT6...
- Page 277 R1679 C1619 R1616 R1628 R2604 C1624 Q1656 R1637 R1629 R1684 R1697 R1615 C1630 R2621 R1686 R2611 Q1611 C1631 R2623 R1618 Q1613 R1617 R2605 R2601 Q1661 R2602 R2603 R2624 D1666 C1680 R2625 C1681 R2631 R2626 K16B Q1663 K16C R1678 LC-XT6 DIA-19...
- Page 278 C4013 C4024 C4029 2.5V C4017 5VAV R4029 R4009 R4044 S5VAVD R4007 R4028 1.2VAF C4007 C4026 C8038 C8031 3.3VSI S3.3VAV 1.2VSI S3.3VTME C2087 C2082 R2091 R2088 R2092 R2096 R2087 C2084 R2095 C1052 C1053 C1054 C1056 K20A K30A K10A K20B DIA-20 LC-XT6...
- Page 279 D6577 R6502 LENS R6557 K67C K67E K67F R6501 R6503 R6504 R6556 L6553 SHIFT D6576 TP_M-GND D6552 R6565 R6500 R6560 FN906 FN903 FN905 MOTOR (SIDE:B) RGB FANNET (SIDE:B) K65L K65N IC5531 IC5551 SOLDER SIDE IC6502 K65Q IC6501 IC6551 K65P LC-XT6 DIA-21...
- Page 280 K90D PWB,MOTHER KT2A 1AA4B10C7020A R9520 K90C R9536 R9524 R9516 C9531 R9537 R9526 C9501 R9517 2nd REFLOW R9532 C9532 R9527 C9502 R9538 R9518 SLOT2 "K80A" "K80B" EX TEMP (SIDE:A) MAIN "K88F" PWB,EX TEMP SENSOR KT2A 1AA4B10C7040C K88E 2nd REFLOW DIA-22 LC-XT6...
- Page 281 R9053 C9024 R9052 R9037 C9026 C9028 K90B RB9009 R9047 K38C K38D R9046 C9012 9001_P13 C9021 R9008 R9004 RB9012 C9011 R9009 R9003 C9031 C9029 R9043 RB9011 K38G 1st REFLOW K90J K90H R9027 1st REFLOW EX TEMP (SIDE:B) 1st REFLOW LC-XT6 DIA-23...
- Page 282 "K77C" "K87A" "K77D" "K87B" ID3 IF (SIDE:A) ID4 IF (SIDE:A) K87M K87K R8774 R8768 R8767 R8773 PARTS SIDE PARTS SIDE K87J K87L B10C7030H B10C7030G PWB,IF4 KT2A PWB,IF3 KT2A LAMP LAMP LAMP LAMP SIGN SIGN "K87C" "K77E" "K87D" "K77F" DIA-24 LC-XT6...
- Page 283 K36U RB555 R3638 Q5656 Q5653 C5629 C3698 IN_1 IN_2 IC3651 C3697 L4681 R3639 K36T C4685 K36C TO MAIN PWB,DC POWER KT2A Q5661 R4683 R4688 1AA4B10C7040A Q5662 Q5663 C4684 L4686 C4689 2nd Reflow Q5664 C3658 FN918 FN916 FN915 FN917 LC-XT6 DIA-25...
- Page 284 R4618 C5646 R3686 R3652 R3687 R5659 R5648 C4649 R3683 C3626 R3656 R3684 C5647 R3657 IC5662 C3621 Q3603 Q3643 IC5664 R3608 R3646 D4692 D4697 C4698 R3612 C3665 C3654 C5638 R3643 C5628 R3642 C4641 R4686 R3603 R3602 C4601 1st Reflow DIA-26 LC-XT6...
- Page 285 C619 AC FILTER (SIDE:B) L601 F601 C609 L603 SOLDER SIDE F602 C606 C607 C626A C626 C608 LAMP BALLAST1: L604 C618 F603 LAMP UNIT1 LAMP BALLAST2: LAMP UNIT2 C628A C628 C619 LAMP BALAST3: LAMP UNIT3 LAMP BALAST4: LAMP UNIT4 LC-XT6 DIA-27...
- Page 286 R649 C645 C641 R642 C642 R643 C643 R644 C635 R634 R634 C644 R645 R646 R652 R636 R638 D632 D633 DB631A R635 R637 C711 R632 C712 R633 DB631A L633 D631 D631 C634 C633 C632 C639 C634 AC FILTER "K6C" DIA-28 LC-XT6...
Need help?
Do you have a question about the LC-XT6 and is the answer not in the manual?
Questions and answers