
Related Manuals for Mitsubishi MELSEC-WS0-CPU0


Summary of Contents for Mitsubishi MELSEC-WS0-CPU0
- Page 1 Safety Controller User's Manual -WS0-CPU0 -WS0-CPU1 -WS0-CPU3 -WS0-XTDI -WS0-XTIO -WS0-4RO...
- Page 3 This document is protected by the law of copyright, whereby all rights established therein remain with the company Mitsubishi Electric Corporation. Reproduction of this document or parts of this document is only permissible within the limits of the legal determination of Copyright Law. Alteration or abridgement of the document is not permitted without the explicit written approval of the company Mitsubishi Electric Corporation.
-
Page 4: Safety Precautions
SAFETY PRECAUTIONS (Read these precautions before using this product.) Before using this product, please read this manual and the relevant manuals carefully and pay full attention to safety to handle the product correctly. In this manual, the safety precautions are classified into two levels: " WARNING"... - Page 5 CAUTION Ensure that an entire system using the MELSEC-WS safety controller meets the requirements for the corresponding safety category. The life of safety relays in the safety relay output module depends on the switching condition and/or load. Configure a system satisfying the number of switching times of the safety relays in the module.
- Page 6 [Installation Precautions] WARNING Do not use the MELSEC-WS safety controller in flammable gas atmosphere or explosive gas atmosphere. Doing so may result in a fire or explosion due to such as an arc caused by switching the relays. CAUTION ...
- Page 7 Prevent foreign matter such as dust or wire chips from entering the module. Such foreign matter can cause a fire, failure, or malfunction. Mitsubishi MELSEC-WS safety controllers must be installed in control cabinets. Connect the main power supply to the MELSEC-WS safety controller through a relay terminal block.
- Page 8 [Startup and Maintenance Precautions] WARNING Do not touch any terminal while power is on. Doing so will cause electric shock. Shut off the external power supply (all phases) used in the system before cleaning the module or retightening the terminal screws. Failure to do so may result in electric shock. Tighten the terminal screw within the specified torque range.
- Page 9 Do not disassemble or modify the modules. Doing so may cause failure, malfunction, injury, or a fire. Mitsubishi does not warrant any products repaired or modified by persons other than Mitsubishi or FA Center authorized by Mitsubishi. Shut off the external power supply (all phases) used for the MELSEC-WS safety controller before mounting or removing the module.
-
Page 10: Conditions Of Use For The Product
CONDITIONS OF USE FOR THE PRODUCT (1) Although MELCO has obtained the certification for Product's compliance to the international safety standards IEC61508, ISO13849-1 from TUV Rheinland, this fact does not guarantee that Product will be free from any malfunction or failure. The user of this Product shall comply with any and all applicable safety standard, regulation or law and take appropriate safety measures for the system in which the Product is installed or used and shall take the second or third safety measures other than the Product. -
Page 11: Revisions
This manual confers no industrial property rights or any rights of any other kind, nor does it confer any patent licenses. Mitsubishi Electric Corporation cannot be held responsible for any problems involving industrial property rights which may occur as a result of using the contents noted in this manual. -
Page 12: Table Of Contents
CONTENTS SAFETY PRECAUTIONS ................... 1 CONDITIONS OF USE FOR THE PRODUCT ............7 REVISIONS ........................ 8 CONTENTS ........................ 9 GENERIC TERMS AND ABBREVIATIONS .............. 13 1. About this document ..................... 14 1.1 Function of this document ................14 1.2 Target group ....................15 1.3 Depth of information .................. - Page 13 3.8.5 Extended fault detection time for cross-circuits on the outputs Q1 to Q4 on the WS0-XTIO for switching loads with high capacitance .. 38 3.8.6 Single channel usage of WS0-XTIO outputs ..........39 3.9 WS0-XTDI safety input module ............... 40 3.9.1 Description ....................
- Page 14 10.2 Error displays of the status LEDs, error messages and rectification measures ................... 81 10.3 Additional error displays of SICK EFI-compatible devices ......88 10.4 Mitsubishi support ..................88 10.5 Extended diagnostics ..................88 11. Maintenance ....................... 89 11.1 Regular inspection of the protective device by qualified safety personnel ................
- Page 15 12.3.2 WS0-XTIO module, WS0-XTDI module, and WS0-4RO module ..111 13. Ordering information ..................112 13.1 Available modules and accessories ............112 13.2 Recommended products ................112 14. Annex ....................... 113 14.1 EC declaration of conformity ................ 113 14.2 Manufacturers checklist ................115 14.3 Wiring examples...................
-
Page 16: Generic Terms And Abbreviations
GENERIC TERMS AND ABBREVIATIONS Generic Description term/abbreviation WS0-MPL0 The abbreviation for the WS0-MPL000201 MELSEC-WS safety controller memory plug WS0-MPL1 The abbreviation for the WS0-MPL100201 MELSEC-WS safety controller memory plug WS0-CPU0 The abbreviation for the WS0-CPU000200 MELSEC-WS safety controller CPU module WS0-CPU1 The abbreviation for the WS0-CPU130202 MELSEC-WS safety controller CPU module... -
Page 17: About This Document
Chapter 1 About this document About this document Please read this chapter carefully before working with the documentation and the MELSEC-WS system. Function of this document For the MELSEC-WS system there are three sets of manuals with clearly defined application as well as user’s manuals (hardware) for each module. ... -
Page 18: Target Group
When operating the MELSEC-WS safety controller, the national, local and statutory rules and regulations must be observed. Note For the acquisition of Setting and Monitoring Tool, please contact your local Mitsubishi representative. The SICK EFI-compatible devices and SICK configuration and diagnostics software CDS are the products of SICK. -
Page 19: Scope
Chapter 1 About this document Scope These operating instructions are original operating instructions. This manual is valid for all modules of the MELSEC-WS safety controller with the exception of the network modules. This document is the original manual. To configure and undertake diagnostics on these devices you will need version V1.7.0 or later of the Setting and Monitoring Tool. - Page 20 Chapter 1 About this document visible or invisible radiation a combination of several risks and hazards...
-
Page 21: On Safety
Chapter 2 On safety On safety This chapter deals with your own safety and the safety of the equipment operators. Please read this chapter carefully before working with the MELSEC-WS safety controller or with the machine protected by the MELSEC-WS safety controller. Qualified safety personnel The MELSEC-WS safety controller must be mounted, commissioned and serviced only by qualified safety personnel. -
Page 22: Correct Use
MELSEC-WS manuals. All warranty claims against Mitsubishi Electric Corporation are forfeited in the case of any other use, or alterations being made to the software or to devices, even as ATTENTION part of their mounting or installation. - Page 23 Chapter 2 On safety UL/CSA applications Only use the following cables: – for spring clamp terminals: 24 to 16 AWG, copper, suitable for temperatures of 60 to 75 °C – for plug-in terminals: 30 to 12 AWG, copper, suitable for temperatures of 60 to 75 °C ...
-
Page 24: General Protective Notes And Protective Measures
Chapter 2 On safety General protective notes and protective measures Observe the protective notes and measures! Please observe the following items in order to ensure proper use of the MELSEC- ATTENTION WS safety controller. When mounting, installing and using the MELSEC-WS safety controller, observe Note the standards and directives applicable in your country. -
Page 25: Environmental Protection
Chapter 2 On safety Environmental protection The MELSEC-WS safety controller has been designed to minimize environmental impact. It uses only a minimum of power and natural resources. At work, always act in an environmentally responsible manner. 2.5.1 Disposal Disposal of unusable or irreparable devices should always occur in accordance with the applicable country-specific waste-disposal regulations (e.g. -
Page 26: Product Description
2 EFI interfaces on the WS0-CPU1 and WS0-CPU3 modules, see Section - 3.6 The Setting and Monitoring Tool is available for configuring the control tasks. For the acquisition of Setting and Monitoring Tool, please contact your local Mitsubishi representative. -
Page 27: System Configuration
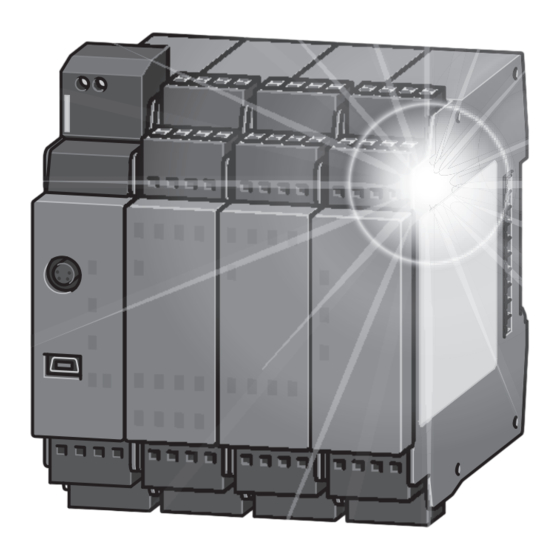
Chapter 3 Product description System configuration A MELSEC-WS safety controller consists of the following modules: a memory plug CPU module up to 2 network modules up to 12 additional safety I/O modules. in addition up to 4 WS0-4RO safety relay output modules (meaning a max. of 16 safe relay outputs). -
Page 28: Version, Compatibility And Features
Chapter 3 Product description Version, compatibility and features For the MELSEC-WS series several firmware versions and function packages exist that allow different functions. This section gives an overview which firmware version, which function package and/or which version of the Setting and Monitoring Tool is required to use a certain function or device. - Page 29 About. For the acquisition of the newest version of the Setting and Monitoring Tool, please contact your local Mitsubishi representative. The function package (Revision 1.xx or Revision 2.xx) must be selected in the Setting and Monitoring Tool hardware configuration. Function package Revision 2.xx is available with Setting and Monitoring Tool 1.3.0 and higher.
-
Page 30: Memory Plug
Chapter 3 Product description Memory plug On each CPU module there is a memory plug. The system configuration for the entire MELSEC-WS safety controller is only saved in the memory plug. On the replacement of modules this situation has the advantage that it is not necessary to re-configure that the MELSEC-WS safety controller. -
Page 31: Display Elements And Terminal Description
Chapter 3 Product description 3.5.2 Display elements and terminal description Figure 4: Display elements WS0- CPU0... - Page 32 Chapter 3 Product description Table 6: MS LED Meaning Notes Displays of the MS LED on Supply voltage is outside Switch on the supply voltage and check WS0-CPU0 range it at the terminals A1 and A2. Red/Green (1 Hz) A self test is being carried Please wait …...
-
Page 33: Cpu Module Ws0-Cpu1
Chapter 3 Product description RS-232 interface The CPU module furthermore has an RS-232 interface with the following functions: Transferring the configuration from the Setting and Monitoring Tool to the memory plug Uploading the configuration from the memory plug to the Setting and Monitoring Tool ... -
Page 34: Display Elements And Terminal Description
Chapter 3 Product description 3.6.2 Display elements and terminal description The displays of the MS and CV LEDs as well as the pin assignment of the RS-232 interface are identical with those of the WS0-CPU0, see Section 3.5.2. Figure 5: Display elements WS0-CPU1 Table 10:... -
Page 35: Cpu Module Ws0-Cpu3
Chapter 3 Product description CPU module WS0-CPU3 3.7.1 Description The CPU module WS0-CPU3 has the same functions as the CPU module WS0- CPU1.Please observe the notes in Section 3.7. In addition this module has a Flexi Line interface that permits the safe networking of up to 32 MELSEC-WS stations (see Section 4.8). -
Page 36: Display Elements And Terminal Description
Chapter 3 Product description 3.7.2 Display elements and terminal description The indications on the MS and CV LEDs as well as the terminal assignment for the RS-232 interface are identical to the CPU module WS0-CPU3 (see section 3.5.2). The indications on the EFI1 and EFI2 LEDs are identical to the CPU module WS0- CPU1 (see section 3.6.2). -
Page 37: Ws0-Xtio Safety I/O Combined Module
Chapter 3 Product description WS0-XTIO safety I/O combined module 3.8.1 Description The WS0-XTIO module is an input/output extension with 8 safe inputs and 4 safe outputs. It has two test signal generators: One for test output X1 and one for test output X2. -
Page 38: Display Elements And Terminal Description
Chapter 3 Product description 3.8.2 Display elements and terminal description Figure 7: Display elements WS0-XTIO Table 12: Terminal Assignment Terminal assignment X1/X2 Test outputs 1 and 2 WS0-XTIO I1…I4 Safe inputs 1 to 4 24 V I5…I8 Safe inputs 5 to 8 Q1…Q4 Outputs 1 to 4 MS LED... -
Page 39: Internal Circuits
Chapter 3 Product description Table 14: Input LEDs (I1…I8) Meaning Displays of the input/output Output LEDs (Q1…Q4) LEDs on WS0-XTIO Input/output is inactive. Green Input/output is active. Green (1 Hz) synchronous with the Input/output is inactive and there is a correctable red MS LED error. -
Page 40: Disabling The Test Pulses Of Ws0-Xtio Outputs Q1 To Q4
Chapter 3 Product description 3.8.4 Disabling the test pulses of WS0-XTIO outputs Q1 to Q4 It is possible to disable the test pulses on one or several outputs of WS0-XTIO modules with firmware version V2.00.0 and higher. Disabling the test pulses of any output reduces the safety parameters of all outputs! ATTENTION Disabling the test pulses of one or more outputs of an WS0-XTIO module will reduce... -
Page 41: Extended Fault Detection Time For Cross-Circuits On The Outputs
Chapter 3 Product description 3.8.5 Extended fault detection time for cross-circuits on the outputs Q1 to Q4 on the WS0-XTIO for switching loads with high capacitance From firmware version V3.10 it is possible to configure an extended fault detection time for cross-circuits for the outputs Q1 to Q4 on WS0-XTIO modules. This configuration can be necessary for switching loads on which there is a cross- circuit fault immediately after switching off (change from high to low) with a normal fault detection time because the voltage at the load does not drop to the low level as... -
Page 42: Single Channel Usage Of Ws0-Xtio Outputs
Chapter 3 Product description How to activate the option for switching loads with high capacitance on output Q1 to Q4 on the WS0-XTIO: Connect an output element to the WS0-XTIO module. Double-click the output element using the left mouse button. ... -
Page 43: Ws0-Xtdi Safety Input Module
Chapter 3 Product description WS0-XTDI safety input module 3.9.1 Description The WS0-XTDI module is the input extension with 8 safe inputs. It offers the following functions: monitoring of the connected sensor equipment, also refer to Chapter 4. passing the input information to the CPU module The WS0-XTDI module cannot be used alone and always requires a main CPU module. -
Page 44: Display Elements And Terminal Description
Chapter 3 Product description 3.9.2 Display elements and terminal description The displays of the MS LED as well as the input LEDs I1…I8 are identical with those of the WS0-XTIO, see Section 3.7.2. Figure 10: Display elements WS0-XTDI Table 16: Terminal Assignment Terminal assignment... -
Page 45: Ws0-4Ro Safety Relay Output Module
Chapter 3 Product description 3.10 WS0-4RO safety relay output module 3.10.1 Description The WS0-4RO safety relay output module provides dual-channel contact-based outputs with positively guided relay contacts. The WS0-4RO safety relay output module cannot be used independently, but need to be switched via a WS0-XTIO module. -
Page 46: Display Elements And Terminal Description
Chapter 3 Product description two safe enabling circuits (33/34, 43/44), dual-channel and potential-free, a signaling circuit (Y24), dual-channel and connected to internal 24 V DC, a feedback EDM (Y3/Y4), dual-channel and potential-free. Figure 13: Internal configuration WS0-4RO 3.10.2 Display elements and terminal description Figure 14:... - Page 47 Chapter 3 Product description Table 18: Assignment Description WS0-4RO terminals Connecting relay K1/K2 Connecting relay K3/K4 13/14 and 23/24 Safety contacts for switch-off circuit outputs K1/K2 33/34 and 43/44 Safety contacts for switch-off circuit outputs K3/K4 Y1/Y2 Feedback EDM K1/K2, NC contact Y3/Y4 Feedback EDM K3/K4, NC contact NO safety contact K1/K2, current-limited...
-
Page 48: Connecting Devices
Chapter 4 Connecting devices Connecting devices This chapter describes the connection of safety sensors and actuators to the MELSEC-WS safety controller and provides configuration information for the selected functions. The MELSEC-WS safety controller supports applications up to Performance Level (PL) e (in accordance with EN/ISO 13849-1) and up to Safety Integrity Level SILCL3 (in accordance with IEC 62061). - Page 49 Chapter 4 Connecting devices Protect single channel inputs against short circuits and cross circuits! If a stuck-at-high error occurs on a single channel input with test pulses that was ATTENTION previously inactive, the logic may see a pulse for this signal. The stuck-at-high first causes the signal to become Active (High) and then after the error detection time back to Inactive (Low) again.
- Page 50 Chapter 4 Connecting devices Figure 15: Example extract of the documentation in the Setting and Monitoring Tool...
-
Page 51: Safety Command Devices And Electro-Mechanical Safety Switches
Chapter 4 Connecting devices Safety command devices and electro-mechanical safety switches 4.1.1 Emergency stop pushbuttons (e.g. SICK ES21) Table 19: Electrical connection: Example from Setting and Monitoring Tool with WS0-XTIO Connection of emergency Single-channel, Contact between 24 V and I1 stop pushbuttons connected to 24 V Single-channel,... -
Page 52: Electro-Mechanical Safety Switches With And Without Interlock
Chapter 4 Connecting devices 4.1.2 Electro-mechanical safety switches with and without interlock The contact symbols in this chapter show the switching status while the door is closed. Note Table 21: Electrical connection: Example from Setting and Monitoring Tool with WS0-XTIO Connection of electro- Single-channel, Contact between 24 V and I1... -
Page 53: Enabling Switch (E.g. Sick E100)
Chapter 4 Connecting devices 4.1.3 Enabling switch (e.g. SICK E100) Table 24: Electrical connection: Example from Setting and Monitoring Tool with WS0-XTIO Connection of enabling 2 positions, Channel 1: Contact E31 between 24 V and I1 switches connected to 24 V Channel 2: Contact E41 between 24 V and I2 2 positions, Channel 1: Contact E31 between X1 and I3... -
Page 54: Two-Hand Control
Chapter 4 Connecting devices 4.1.4 Two-hand control Note The contact symbols in this chapter show the switching status while both two-hand buttons are not pressed. Table 26: Electrical connection: Example from Setting and Monitoring Tool with WS0-XTIO Connection of two-hand Type IIIA Channel 1: Contact between 24 V and I1 control... -
Page 55: Safety Mats And Bumpers
Chapter 4 Connecting devices Type IIIC At Type IIIC two pairs of antivalent inputs (NO/NC contact pairs of the two two-hand buttons) are monitored. A valid input signal is only generated if the ON state (High/Low level) exists at both inputs within a period of 0.5 s (synchronous change, both two-hand buttons pressed) and if both were in the OFF state (Low/High level) beforehand. -
Page 56: User Mode Switches
Chapter 4 Connecting devices 4.1.6 User mode switches Table 31: Electrical connection: Example from Setting and Monitoring Tool with WS0-XTIO Connection of user mode Channel 1: Contact between 24 V and I1 switches Mode switch (1 of 2) connected to 24 V Channel 2: Contact between 24 V and I2 Channel 1: Contact between X1 and I1 Mode switch (1 of 2) -
Page 57: Non-Contact Safety Sensors
Chapter 4 Connecting devices Non-contact safety sensors 4.2.1 Magnetic safety switches (e.g. SICK RE) The contact symbols in this chapter show the switching status while the switch is Note actuated (e.g. while the door is closed). Magnetic safety switches with equivalent inputs (e.g. SICK RE13, RE27) Table 34: Electrical connection: Example from Setting and Monitoring Tool with WS0-XTIO Connection of magnetic... -
Page 58: Transponder (E.g. Sick T4000 Compact And T4000 Direct)
Chapter 4 Connecting devices 4.2.3 Transponder (e.g. SICK T4000 Compact and T4000 Direct) Table 39: Electrical connection: Example from Setting and Monitoring Tool with WS0-XTIO Connection of transponders T4000 Compact 24 V at +LA, I1 at LA (connected to 24 V) 24 V at +LB, I2 at LB T4000 Compact X1 at +LA, I3 at LA... -
Page 59: Testable Type 4 Single-Beam Photoelectric Safety Switches
Chapter 4 Connecting devices Table 42: Function Notes Functions of testable Type 2 Testing Possible single-beam photoelectric safety switches Series connection/ SICK Wx12/18/24/27, Vx18: cascading max. 2 pairs per input can be cascaded with test gap = 4 ms (standard element) ... -
Page 60: Customized Testable Single Beam Photoelectric Safety Switches
Chapter 4 Connecting devices 4.3.3 Customized testable single beam photoelectric safety switches For information on how to create customized elements please see the Safety Controller Setting and Monitoring Tool Operating Manual. Note In the Settings dialog for the customized element, select the minimum value for the desired test gap. - Page 61 Chapter 4 Connecting devices Figure 17: Minimum distance “a” as a factor of the distance “D” for testable single-beam photoelectric safety switches with a field of view of 10° (e.g. SICK Wx12/18/24/27, Vx18) Note Diagrams for SICK L21 and L41 are available in the respective manual. Avoiding mutual influence at single-beam photoelectric safety switches and between cascades ...
-
Page 62: Electro-Sensitive Protective Equipment (Espe)
Chapter 4 Connecting devices Electro-sensitive protective equipment (ESPE) Table 45: Electrical connection: Example from Setting and Monitoring Tool with WS0-XTIO Connection of ESPE SICK C2000, C4000, M2000, M4000, OSSD1 (receiver) at I1 S300, S3000, V300, MiniTwin OSSD2 (receiver) at I2 Note Further information is available in the manual of the corresponding SICK ESPE or in the manuals of devices used. -
Page 63: Flexi Link
Chapter 4 Connecting devices EMC measures To increase the EMC resistance of the EFI communication, it is recommended to connect the EFI cable shield on one or both sides to functional earth. Connect this shield to the same DIN mounting rail to which the functional earth (FE) of the MELSEC-WS safety controller is connected in order to minimize interferences on the EFI cable. -
Page 64: System Requirements And Restrictions For Flexi Link
Chapter 4 Connecting devices 4.7.2 System requirements and restrictions for Flexi Link For Flexi Link the following system requirements must be met as a minimum: Table 47: System component Version System requirements for Hardware WS0-CPU1 with firmware version V2.01.0 or higher, or WS0-CPU3 Flexi Link Software WS0-CPU1: Setting and Monitoring Tool version 1.3.0 or higher... - Page 65 Chapter 4 Connecting devices Figure 19: Connection of Flexi Link stations via EFI1 and EFI2 No external termination resistor is required for EFI connections on the CPU. Note Stub lines or star-shaped wiring are not permitted. The max. permitted overall cable length (all stations) for EFI1 and EFI2 is 100 m each.
- Page 66 Chapter 4 Connecting devices Flexi Link cable The Flexi Link stations can be connected using CAN cables (shielded, twisted pair). Table 49: Cable length Type Possible cable lengths and Up to 40 m 2 × 2 × 0.25 mm² (23 AWG) types for Flexi Link connections Up to 100 m...
-
Page 67: Flexi Line
Chapter 4 Connecting devices Flexi Line 4.8.1 Flexi Line overview Flexi Line enables you to reliably network up to 32 MELSEC-WS stations. Only WS0-CPU3 modules can be used in a Flexi Line system. The connection of all the other CPU modules (WS0-CPU0, WS0-CPU1) is not possible. A uniform process image is defined for the entire Flexi Line system. - Page 68 Chapter 4 Connecting devices Figure 20: Connection of a Flexi Line system An external terminator is not required for the Flexi Line connections on the CPU Notes module. Stub lines or star-shaped wiring are not permitted. Unused conductors must be connected to FE on both ends. ...
-
Page 69: Emc Measures For Flexi Link And Flexi Line
Chapter 4 Connecting devices EMC measures for Flexi Link and Flexi Line Flexi Link or Flexi Line cables are used to transmit communication signals. Electromagnetic influences may disturb the signal transfer and interrupt the communication. In order to minimize electromagnetical interference, the following measures are required: ... -
Page 70: Special Functions
Chapter 5 Special functions Special functions Enhanced Function Interface - EFI The WS0-CPU1 and WS0-CPU3 CPU modules have 2 EFI interfaces each. This section describes the properties, the functions and the benefits of these interfaces. The general EFI function description and the possibilities for combining SICK products with regard to EFI are available in the corresponding manuals of SICK products. -
Page 71: Functions
Chapter 5 Special functions 5.1.3 Functions In addition to the product-specific functions of the respective SICK EFI-compatible devices the following functions are available: General functions Status information (process data) of the SICK EFI-compatible devices are available in the MELSEC-WS safety controller and at the sensor ... -
Page 72: Muting
Chapter 5 Special functions Muting Muting is the automatic temporary bypassing of safety-oriented functions of the control system or of the safety device. Muting is used when certain objects, such as pallets with material, may be moved into the hazardous area. During this transportation through electro-sensitive protective equipment (ESPE), such as a safety light curtain, the muting function inhibits monitoring by the ESPE. -
Page 73: Mounting/Dismantling
Chapter 6 Mounting/Dismantling Mounting/Dismantling This chapter describes the mounting of the modules of the MELSEC-WS safety controller. Steps for mounting the modules The MELSEC-WS safety controller must be mounted in a control cabinet with at least IP 54 enclosure rating! ATTENTION ... - Page 74 Chapter 6 Mounting/Dismantling Figure 22: Mounting the module onto the DIN mounting rail Make sure that the voltage supply of the MELSEC-WS safety controller is switched off. Hang the device onto the DIN mounting rail (1)). Ensure that the earthing spring contact is positioned correctly (2)). The earthing spring contact of the module must contact the DIN mounting rail securely to allow electrical conductivity.
-
Page 75: Steps For Dismantling The Modules
Chapter 6 Mounting/Dismantling Steps for dismantling the modules Figure 24: Removing the plug-in terminals Remove plug-in terminals with the wiring and the end clips. Figure 25: Disconnecting the plug connections If there are several modules, slide the modules away from each other individually in the direction of the arrow until the side plug connection is separated. -
Page 76: Electrical Installation
Note with the basic specification IEC 61000-6-2 for industrial use. Mitsubishi industrial safety devices are designed for local DC supply applications only. If the device is used in power supply networks, e.g. according to IEC 61326- 3-1, additional protective measures have to be taken. - Page 77 Chapter 7 Electrical installation Avoid ground loops between the GND of the RS-232 interface and the connection A2 of the CPU module, e.g. by using optocouplers. Depending on the external loads, especially for inductive loads, additional external protective elements, e.g. varistors or RC elements may be necessary in order to protect the outputs.
-
Page 78: Internal Circuit Power Supply
Chapter 7 Electrical installation Internal circuit power supply Figure 27: Safety controller power supply internal circuit... -
Page 79: Configuration
Chapter 8 Configuration Configuration Check the safety function before commissioning and after every change! If you change the configuration, you must check the effectiveness of the safety ATTENTION function. Please observe the test notes in the manuals of the connected protective devices. -
Page 80: Commissioning
Chapter 9 Commissioning Commissioning Do not commission without a check by qualified safety personnel! Before initial commissioning of a system using a MELSEC-WS safety controller, it ATTENTION must be checked and released by qualified safety personnel. Check the hazardous area! Ensure that no one is located in the hazardous area before commissioning. -
Page 81: Tests Before The Initial Commissioning
Chapter 9 Commissioning Tests before the initial commissioning A report that provides the configuration can be created with the Setting and Monitoring Tool. The purpose of the initial commissioning tests is to confirm the safety requirements specified in the national/international rules and regulations, especially in the Machine and Work Equipment Directive (EC Conformity). -
Page 82: Diagnostics
Chapter 10 Diagnostics Diagnostics 10.1 In the event of faults or errors Cease operation if the cause of the malfunction has not been clearly identified! Stop the machine if you cannot clearly identify or allocate the error and if you cannot ATTENTION safely remedy the malfunction. - Page 83 Chapter 10 Diagnostics How to place the device back in operation: Rectify the cause of the malfunction in accordance with the display of the MS and CV LEDs. In the case of critical faults, switch the voltage supply of the MELSEC-WS safety controller off for at least 3 seconds and back on again.
-
Page 84: Error Displays Of The Status Leds, Error Messages And Rectification Measures
Chapter 10 Diagnostics 10.2 Error displays of the status LEDs, error messages and rectification measures This section lists and describes the most important error codes, possible causes and potential rectification measures. These error messages can be displayed in the Diagnostics view of the Setting and Monitoring Tool if you are connected to the MELSEC-WS safety controller. - Page 85 Chapter 10 Diagnostics LED indication on module Possible error CPU module Safety I/O module Possible reasons Possible measures codes (WS0-CPU0, WS0- (WS0-XTIO or CPU1 or WS0-CPU3) WS0-XTDI) MS = Red (1 Hz) One or more safety I/O CPU module: If WS0-CPU1: EFI device address ...
- Page 86 Chapter 10 Diagnostics LED indication on module Possible error CPU module Safety I/O module Possible reasons Possible measures codes (WS0-CPU0, WS0- (WS0-XTIO or CPU1 or WS0-CPU3) WS0-XTDI) MS = Green One or more safety WS0-XTIO: Short circuit to 24 V or cross circuit in ...
- Page 87 Chapter 10 Diagnostics LED indication on module Possible error CPU module Safety I/O module Possible reasons Possible measures codes (WS0-CPU0, WS0- (WS0-XTIO or CPU1 or WS0-CPU3) WS0-XTDI) MS = Green One or more safety WS0-XTIO/ Discrepancy error or sequence error at ...
- Page 88 Chapter 10 Diagnostics LED indication on module Possible error CPU module Safety I/O module Possible reasons Possible measures codes (WS0-CPU0, WS0- (WS0-XTIO or CPU1 or WS0-CPU3) WS0-XTDI) MS = Red or MS = Red CPU module: Follow on error for other critical ...
- Page 89 Chapter 10 Diagnostics LED indication on module Possible error CPU module Safety I/O module Possible reasons Possible measures codes (WS0-CPU0, WS0- (WS0-XTIO or CPU1 or WS0-CPU3) WS0-XTDI) MS = Green All safety I/O modules: CPU module: Function block error with dual channel ...
- Page 90 Chapter 10 Diagnostics Table 52: Error codes and error messages of the MELSEC-WS safety controller and possible rectification measures After one of the dual channel inputs is set to ON and another is OFF, when the discrepancy time passes, “Discrepancy error at dual channel input Ii” should occur. This discrepancy can be cleared when both inputs turn OFF (the left side figure below).
-
Page 91: Additional Error Displays Of Sick Efi-Compatible Devices
10.4 Mitsubishi support If you cannot remedy a malfunction using the information in this chapter, please contact your local Mitsubishi representative. Note When you send in a WS0-MPL0 or WS0-MPL1 memory plug for repair or analysis, it is returned in the state of delivery, i.e. with an empty configuration. Therefore save your configuration(s) to project files with the Setting and Monitoring Tool. -
Page 92: Maintenance
The following sections inform about regular tests and the exchange of MELSEC-WS modules. Do not try to dismantle, repair or modify the MELSEC-WS modules. This can lead to a loss of the safety function(s). In addition Mitsubishi accepts no claims for liability. 11.1 Regular inspection of the protective device by qualified safety personnel ... -
Page 93: Device Replacement
Observe the following safety measures when replacing MELSEC-WS modules: Do not try to dismantle or repair the MELSEC-WS modules. Not only does Mitsubishi accept no claims for liability, but it is also dangerous as it makes verifying the original safety functions impossible. -
Page 94: Technical Data
Chapter 12 Technical data Technical data 12.1 Response times of the MELSEC-WS safety controller In order to calculate the response times of a MELSEC-WS safety controller, all paths have to be taken into consideration. Figure 28: Response times within a MELSEC-WS safety controller Fast Shut Off... -
Page 95: Calculation Of The Response Times
Chapter 12 Technical data 12.1.1 Calculation of the response times The following table can be used to calculate the response times of corresponding paths within the MELSEC-WS safety controller. Evaluation Response time of the considered input in the In1 or In2 or In3 or In4 (from table below) 1. - Page 96 Chapter 12 Technical data The update interval between the CPU and a network module depends on the amount of data to be transferred and the number of network modules used in the system. Take the values from the Setting and Monitoring Tool report. The update interval amounts to a multiple of 4 ms for each 10 bytes to be transferred to or from the network module if the system contains one network module.
- Page 97 Chapter 12 Technical data Example 1: Calculation of the response time for a MELSEC-WS safety controller consisting of a WS0-CPU1 and a WS0-XTIO: Figure 29: Example of a MELSEC-WS safety controller Digital inputs: WS0-XTIO[1].I5I6.C4000: One C4000 safety light curtain Digital outputs: WS0-XTIO[1].Q3Q4.Robot: Robot, dual-channel Input from EFI device: WS0-CPU1[0].EFI1.1.OSSD [OSSD]: one C4000...
- Page 98 Chapter 12 Technical data Figure 30: Response times within a MELSEC-WS safety controller Occurrence In1: Digital inputs Out1: Digital outputs General C4000 response time 14.0 ms Robot response time 40.0 ms General Input processing time 6.5 ms Output processing time 4.5 ms When On/Off filter 8.0 ms...
- Page 99 Chapter 12 Technical data Example 2: Calculation of the response time for a MELSEC-WS safety controller: Figure 31: Response times within a MELSEC-WS safety controller Flexi Link Station A Logic execution time = 4 ms Occurrence In1: Digital inputs Occurrence Out2: Output to EFI device General Tactile sensor...
-
Page 100: Min. Switch Off Time
Chapter 12 Technical data 12.1.2 Min. switch off time The minimum switch-off time (e.g. of connected sensors) is the minimum time for which a switch-off condition must be present in order to be detected so that error- free switching is possible. The min. switch-off time must be … ... -
Page 101: Data Sheet
Chapter 12 Technical data 12.2 Data sheet 12.2.1 CPU modules: WS0-CPU0, WS0-CPU1 and WS0-CPU3 Safety-related parameters This information relates to an ambient temperature of +40 °C, which is normally used for the statistical calculation of the values. Table 57: WS0-CPU0 WS0-CPU1/3 Data sheet WS0-CPU0, WS0-CPU1 and... - Page 102 Chapter 12 Technical data WS0-CPU0 WS0-CPU1/3 Cross-section of connecting wires Single-core or finely stranded: 1 × 0.14 … 2.5 mm² (26 to 13 AWG) or 2 × 0.14 … 0.75 mm² (26 to 18 AWG) Finely stranded with ferrules 1 × 0.25 … 2.5 mm² (23 to 13 AWG) or 2 × 0.25 … 0.5 mm²...
-
Page 103: Ws0-Xtio Safety Input/Output Combined Module
Chapter 12 Technical data 12.2.2 WS0-XTIO safety input/output combined module Safety-related parameters This information relates to an ambient temperature of +40 °C, which is normally used for the statistical calculation of the values. Table 58: Safety Integrity Level SIL3 (IEC 61508) Data sheet WS0-XTIO SIL claim limit SIL CL3 (IEC 62061) - Page 104 Chapter 12 Technical data General data Protection class III (IEC 61140) Enclosure rating Terminals: IP 20 (IEC 60529) Housing: IP 40 (IEC 60529) Ambient temperature in operation –25 … +55 °C Storage temperature –25 … +70 °C Humidity 10 … 95 %, non-condensing Climatic conditions 55 °C, 95 % relative.
- Page 105 Chapter 12 Technical data Power supply unit (A1, A2) Supply voltage 24 V DC (16.8 V DC … 30 V DC) Supply voltage 24 V DC UL/CSA applications Type of supply voltage PELV or SELV The current of the power supply unit for the module has to be limited to a maximum of 4 A –...
- Page 106 Chapter 12 Technical data Test outputs (X1, X2) Number of outputs 2 (with 2 test pulse generators) Output type PNP semiconductor, short-circuit protected, short- circuit monitoring (selectable) Output voltage High 15 … 30 V DC (max. 1.8 V drop to terminal A1 of CPU module) Output resistance Low ≤33 Ω...
-
Page 107: Ws0-Xtdi Safety Input Module
Chapter 12 Technical data In the case of a fault (0 V cable open circuit) with a load resistance of min. 2.5 kΩ, maximally the leakage current flows from the safe output. For smaller load resistors the leakage current may be greater but in this case the output voltage will be <... - Page 108 Chapter 12 Technical data General Data Protection class III (IEC 61140) Enclosure rating Terminals: IP 20 (IEC 60529) Housing: IP 40 (IEC 60529) Ambient temperature in operation –25 … +55 °C Storage temperature –25 … +70 °C Humidity 10 … 95 %, non-condensing Climatic conditions 55 °C, 95 % relative.
- Page 109 Chapter 12 Technical data Test outputs (X1 … X8) Number of outputs 8 (with 2 test pulse generators) Output type PNP semiconductor, short-circuit protected, cross- circuit monitoring Output voltage 15 … 30 V DC (max. 1.8 V drop to terminal A1 of CPU module) Output resistance Low ≤33 Ω...
-
Page 110: Ws0-4Ro Safety Relay Output Module
Chapter 12 Technical data 12.2.4 WS0-4RO safety relay output module Table 60: Supply circuit (via WS0-CPUx) Data sheet WS0-4R0 Power consumption Max. 3.2 W Input circuit B1, B2 Input voltage ON 18 V DC … 30 V DC Output circuit (13-14, 23-24, 33-34, 43-44, Y1-Y2, Y3-Y4) Number of N/O contacts 4 (13-14, 23-24, 33-34, 43-44) Number of N/C contacts... - Page 111 Chapter 12 Technical data Figure 32: DC load breaking capacity safety relay output module WS0-4RO Figure 33: Electrical endurance safety relay output module WS0-...
- Page 112 Chapter 12 Technical data Output circuit (Y14, Y24) Type of output N/O contact, connected to internal 24 V DC, positively guided, current-limited Number of N/O contacts Y14/24 Output voltage 24 V DC (16 … 30 V DC) Output current Max. 75 mA Load capacity 200 nF General data...
- Page 113 Chapter 12 Technical data Safety specific characteristics All these data are based on an ambient temperature of +40 °C. Safety integrity level SIL3 (IEC 61508) SIL claim limit SILCL3 (IEC 62061) Category Category 4 (EN/ISO 13849-1) Performance Level PL e (EN/ISO 13849-1) 1.6 ×...
-
Page 114: Dimensional Drawings
Chapter 12 Technical data 12.3 Dimensional drawings 12.3.1 WS0-CPUx module with memory plug Figure 34: Dimensional drawing WS0-CPUx (mm) 12.3.2 WS0-XTIO module, WS0-XTDI module, and WS0-4RO module Figure 35: Dimensional drawing WS0-XTIO, WS0-XTDI, WS0-4RO (mm) -
Page 115: Ordering Information
Chapter 13 Ordering information Ordering information 13.1 Available modules and accessories Table 62: Device type Part Device types of MELSEC- WS series WS0-MPL000201 Memory plug for WS0-CPU0 or WS0-CPU1 WS0-MPL100201 Memory plug for WS0-CPU3 CPU module WS0-CPU000200 Dual level spring clamp terminals WS0-CPU130202 CPU module 2 EFI connections, dual level spring clamp terminals... -
Page 116: Annex
Chapter 14 Annex Annex 14.1 EU declaration of conformity Figure 36: EU declaration of conformity for MELSEC-WS safety controller... - Page 117 Annex Chapter 14...
-
Page 118: 14.2 Manufacturers Checklist
Chapter 14 Annex 14.2 Manufacturers checklist Table 66: Example of the checklist for Checklist for the manufacturer/installer for installation installation of the MELSEC- of the MELSEC-WS safety controller WS safety controller The specifications for the following items listed must be available at least for the initial commissioning. -
Page 119: 14.3 Wiring Examples
Annex Chapter 14 14.3 Wiring examples (1) Wiring of the emergency stop pushbuttons, start switches, stop switches, and reset switches a) Dual-channel wiring (with test pulse outputs) Connect emergency stop pushbuttons to the MELSEC-WS safety controller as shown below. Figure 37: Wiring example of emergency stop pushbuttons... - Page 120 Chapter 14 Annex b) Single-channel wiring (without test pulse outputs) Connect start switches, stop switches, and reset switches to the MELSEC-WS safety controller as shown below. Figure 38: Wiring example of start switches, stop switches, and reset switches...
- Page 121 Annex Chapter 14 (2) Wiring of safety switches Connect a safety switch to the MELSEC-WS safety controller as shown below. Figure 39: Wiring example of safety switches * Use the following terminal combinations for dual-channel input wiring. WS0-XTIO: ((I1 and X1) (I2 and X2)), ((I3 and X1) (I4 and X2)), ((I5 and X1) (I6 and X2)), ((I7 and X1) (I8 and X2)) WS0-XTDI: ((I1 and X1) (I2 and X2)), ((I3 and X3) (I4 and X4)) to ((I7 and X7) (I8 and X8))
- Page 122 Chapter 14 Annex (3) Wiring of light curtains and laser scanners Connect a light curtain and a laser scanner to the MELSEC-WS safety controller as shown below. Figure 40: Wiring example of light curtain and laser scanner * The light curtain is connected to the WS0-XTIO and the laser scanner is connected to the WS0-XTDI in the above example.
- Page 123 Annex Chapter 14 (4) Wiring of contactors Connect a contactor to the MELSEC-WS safety controller as shown below. Figure 41: Wiring example of contactor...
- Page 124 Chapter 14 Annex (5) Wiring of contactors (Category 3/4) The system meets the requirements of Category 3 even when the output of WS0-XTIO (Q1 to Q4) is a single-channel structure. When the output is a dual-channel structure, the system meets the requirements of Category 4.
- Page 125 Annex Chapter 14 <Application example> Simultaneous protection from danger (Use of a laser scanner) Figure 43: Application example [Function] Two independent robots are protected with one laser scanner (S3000). An operator can access the dangerous area through the protective area or the side gates.
- Page 126 Chapter 14 Annex (1) Wiring Figure 44: Wiring of an application example * The WS0-4RO cannot be used alone. The WS0-4RO performs the ON/OFF control via the WS0-XTIO. Connect the output terminals (Q1 to Q4) of the WS0-XTIO to the input terminals (B1 and B2).
- Page 127 Annex Chapter 14 (2) Configuration in the Setting and Monitoring Tool a) Hardware configuration Figure 45: Hardware configuration of an application example b) Logic Figure 46: Logic of an application example...
-
Page 128: 14.4 Troubleshooting
Chapter 14 Annex 14.4 Troubleshooting This section describes errors that may occur during system operation, how to locate the errors, and measures against the errors. Check the LEDs of the module during troubleshooting. Note 14.4.1 Basics of troubleshooting In order to increase the reliability of the system, resuming the system operation promptly after correcting a problem is one of the important factors as well as using reliable devices. -
Page 129: Troubleshooting Flowchart (For Cpu Module)
Annex Chapter 14 14.4.2 Troubleshooting flowchart (for CPU module) This section describes how to identify errors and measures to eliminate the errors. (1) Troubleshooting flowchart The following shows the error description according to the types of events. Figure 47: Troubleshooting flowchart for CPU module... - Page 130 Chapter 14 Annex (2) When the MS LED has turned off Refer to the following flowchart when the MS LED of the CPU module has turned off at power-on or during operation of the MELSEC-WS safety controller. Figure 48: Flowchart when the MS LED has turned off...
- Page 131 Annex Chapter 14 (3) When the MS LED has turned on (red) Refer to the following flowchart when the MS LED of the CPU module has turned on (red) at power-on or during operation of the MELSEC-WS safety controller. Figure 49: Flowchart when the MS LED has turned on (red)
- Page 132 Chapter 14 Annex (4) When the MS LED is flashing (red) or flashing (red and green) Refer to the following flowchart when the MS LED of the CPU module is flashing (red) or flashing (red and green) at power-on or during operation of the MELSEC-WS safety controller.
- Page 133 Annex Chapter 14 (5) When the CPU module cannot communicate with Setting and Monitoring Tool Refer to the following flowchart when communication with a peripheral device is disabled when connecting the CPU module with Setting and Monitoring Tool. Figure 51: Flowchart when the CPU module cannot communicate with Setting...
- Page 134 Chapter 14 Annex...
-
Page 135: Troubleshooting Flowchart (For Safety I/O Module)
Annex Chapter 14 14.4.3 Troubleshooting flowchart (for safety I/O module) This section describes how to identify errors and measures to eliminate the errors. (1) Troubleshooting flowchart The following shows the error description according to the types of events. Figure 52: Troubleshooting flowchart for safety I/O module... - Page 136 Chapter 14 Annex (2) When the MS LED has turned off Refer to the following flowchart when the MS LED of the safety I/O module has turned off at power-on or during operation of the MELSEC- WS safety controller. Figure 53: Flowchart when the MS LED has turned off...
- Page 137 Annex Chapter 14 (3) When the MS LED has turned on (red) Refer to the following flowchart when the MS LED of the safety I/O module has turned on (red) at power-on or during operation of the MELSEC-WS safety controller. Figure 54: Flowchart when the MS LED has turned on (red)
- Page 138 Chapter 14 Annex (4) When the MS LED is flashing (red) Refer to the following flowchart when the MS LED of the safety I/O module is flashing (red) at power-on or during operation of the MELSEC- WS safety controller. (a) For safety I/O modules (firmware V1.xx.0) Figure 55: Flowchart when the MS LED is flashing (red)
- Page 139 Annex Chapter 14 (b) For safety I/O modules (firmware V2.00.0 or later) Figure 56: Flowchart when the MS LED is flashing (red) (firmware V2.00.0 or later)
- Page 140 Chapter 14 Annex (5) When the MS LED is flashing (red and green) Refer to the following flowchart when the MS LED of the safety I/O module is flashing (red and green) at power-on or during operation of the MELSEC-WS safety controller. (a) For safety I/O modules (firmware V1.xx.0) Figure 57: Flowchart when the MS...
- Page 141 Annex Chapter 14 (b) For safety I/O modules (firmware V2.00.0 or later) Figure 58: Flowchart when the MS LED is flashing (red and green) (firmware V2.00.0 or later)
-
Page 142: Troubleshooting Flowchart (For Safety Relay Output Module)
Chapter 14 Annex 14.4.4 Troubleshooting flowchart (for safety relay output module) This section describes how to identify errors and measures to eliminate the errors. (1) Troubleshooting flowchart The following shows the error description according to the types of events. Figure 59: Troubleshooting flowchart for safety output relay module... - Page 143 Annex Chapter 14 (2) When the PWR LED has turned off Refer to the following flowchart when the PWR LED of the safety relay output module has turned off at power-on or during operation of the MELSEC-WS safety controller. Figure 60: Flowchart when the PWR LED has turned off...
- Page 144 Chapter 14 Annex (3) When the K1/2 or K3/4 LED has turned off Refer to the following flowchart when the K1/2 or K3/4 LED of the safety relay output module has turned off at power-on or during operation of the MELSEC-WS safety controller.
-
Page 145: Example For The Calculation Of The Response Time Of Flexi Line
Annex Chapter 14 14.5 Example for the calculation of the response time of Flexi Line Calculation of the response time for a MELSEC-WS safety controller: Figure 62: Response times within a MELSEC-WS safety controller Flexi Line Station A Logic execution time = 4ms Flexi Line update rate = 2ms Occurrence In1: Digital inputs... - Page 146 Chapter 14 Annex Flexi Line Station E Logic execution time = 8ms Occurrence Input: Input from Flexi Line Occurrence Out1: Digital outputs Flexi Line connections Response time in the 14.5ms General Response time of the 40.0ms through 4 stations station with the remote actuator (Robot response input time)
-
Page 147: 14.6 Sick Contact
Annex Chapter 14 14.6 SICK contact More representatives and agencies in all major industrial nations at www.sick.com Australia Norge Phone +61 3 9497 4100 Phone +47 67 81 50 00 1800 33 48 02 – tollfree E-Mail austefjord@sick.no E-Mail sales@sick.com.au Österreich Belgium/Luxembourg Phone +43 (0)22 36 62 28 8-0... - Page 148 Products from date of Customer's purchase, whichever is less, may be incorporated, including any safety, fail-safe Mitsubishi Safety Controller (the "Products") will be and shut down systems using the Products. free from defects in material and workmanship.
- Page 149 h. These terms and conditions constitute the entire damages as well as damages of a pecuniary nature, agreement between Customer and MELCO with the disclaimers and limitations contained in these respect to warranties, remedies and damages and terms shall apply to all three types of damages to the supersede any other understandings, whether written fullest extent permitted by law.
- Page 150 The company names, system names and product names mentioned in this manual are either registered trademarks or trademarks of their respective companies. In some cases, trademark symbols such as '™' or ' ® ' are not specified in this manual. SH(NA)-080855ENG-I...
- Page 152 SICK AG www.sick.com SH(NA)-080855ENG-I(1811)MEE MODEL: WS-CPU-U-E MODEL CODE: 13JZ32 HEAD OFFICE : TOKYO BUILDING, 2-7-3 MARUNOUCHI, CHIYODA-KU, TOKYO 100-8310, JAPAN NAGOYA WORKS : 1-14 , YADA-MINAMI 5-CHOME , HIGASHI-KU, NAGOYA , JAPAN When exported from Japan, this manual does not require application to the Ministry of Economy, Trade and Industry for service transaction permission.
Need help?
Do you have a question about the MELSEC-WS0-CPU0 and is the answer not in the manual?
Questions and answers