ABB CalMaster2 Instruction Manual

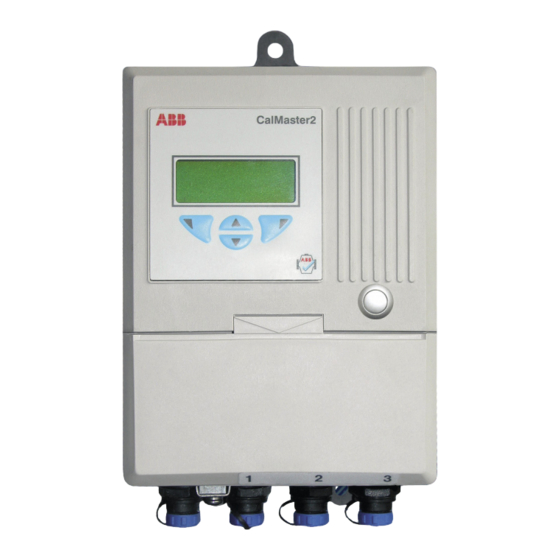
Tests the integrity of a flow metering system by altering a number of flow measurement parameters and measuring the values returned from the flow measuring system.
Hide thumbs Also See for CalMaster2:

Advertisement

Instruction Manual
Field and Software Tools
IM/VCM2 Issue 6
CalMaster2 and CheckMaster

Advertisement

Table of Contents
loading

Summary of Contents for ABB CalMaster2

  • Page 1 Instruction Manual Field and Software Tools IM/VCM2 Issue 6 CalMaster2 and CheckMaster...
  • Page 2 Cert. No. Q 05907 As a part of ABB, a world leader in process automation technology, we offer customers application expertise, service and support worldwide. EN 29001 (ISO 9001) We are committed to teamwork, high quality manufacturing, advanced technology and unrivalled service and support.
  • Page 3: Table Of Contents

    Connecting an AquaMaster with a Sensor Adaptor Box to a CalMaster2 ..................18 AquaMaster Explorer Connection ................19 3.4.1 Connecting an AquaMaster Explorer to a CalMaster2 ........ 19 Testing ......................20 Testing a Flow Metering System ................20 Connecting CalMaster2 to a Computer ..............22 Downloading Verifications ..................
  • Page 4 Names Tab ....................37 5.8.3 Statistics Tab ..................... 38 5.8.4 Data Filter Tab ................... 38 CalMaster2 Database ....................39 Recharging CalMaster2 ...................40 Registration ......................41 Registering Flowmeters .................... 43 Downloading Fingerprint Files ................... 44 Appendix A CalMaster2/CheckMaster Clock Utility ..........46 Notes IM/VCM2 Issue 6...
  • Page 5: Introduction

    CalMaster IRIS and CheckMaster are stand-alone verification and validation tools within the CalMaster2 Verification Suite. CalMaster2 tests the integrity of a flow metering system by altering a number of flow measurement parameters and measuring the values returned from the flow measuring system. A report is displayed that verifies the performance of the system.
  • Page 6: Calmaster2 Options

    CalMaster2 and CheckMaster 1 Introduction 1.1 CalMaster2 Options There are two options of CalMaster2 available: CalMaster IRIS Enables the printing of service reports and certification to within 1% of factory calibration (fingerprinted flow meters) or 2% (non-fingerprinted flow meters). Predictive diagnostics are also provided to provide early warning of a possible system failure, enabling maintenance engineers to anticipate problems and take planned remedial action in advance.
  • Page 7: Preparation

    5 MagMaster adaptor kits (Part no. ) — see Fig. 2.1. WADX0089 Connection Leads — see Section 2.1.1, page 6. Note. Recharge the CalMaster2 before first use – see Section 6, page 40. MagMaster VKE Adaptor Board Sensor Cable Plug Fig. 2.1 MagMaster Adaptor Kit...
  • Page 8: Checkmaster Leads

    Field and Software Tools CalMaster2 and CheckMaster 2 Preparation 2.1.1 CheckMaster Leads: AquaMaster Communications Leads (Red and Yellow numeric sleeves) Communications Lead 1 RS232 Serial Communications Lead Communications Lead 3* WEBC0221 WEBC2000 WEBC0221/T *for units with pulsed output socket with serial communications – not supplied with CalMaster 2 as standard.
  • Page 9: Installation

    Follow the on-screen instructions to install. 3.1.1 Register CalMaster2 IRIS Software The first time the CalMaster2 IRIS software is used, a registration screen appears: To register the CalMaster2 IRIS software: Type the 'User name', 'Company name' and 'Customer identification number'.
  • Page 10: Unlocking Calmaster2

    Copy the registration number provided and start the CalMaster2 IRIS software. The Registration dialog box appears: Paste the registration number into the text box and click 'Next'. The CalMaster2 IRIS software is unlocked with an appropriate licence. IM/VCM2 Issue 6...
  • Page 11: Magmaster Connection

    3 Installation 3.2 MagMaster Connection To enable a MagMaster system to be tested by the CalMaster2 it may be necessary to fit a small adaptor board (see Section 3.2.1, page 10) to the MagMaster. Note. The newer series VKH MagMaster does not need to have this adaptor board fitted as one is already incorporated into its design.
  • Page 12: Fitting An Adaptor Board To A Magmaster

    Field and Software Tools CalMaster2 and CheckMaster 3 Installation 3.2.1 Fitting an Adaptor Board to a MagMaster Note. The newer series (VKH) MagMaster does not need to have this adaptor board fitted as one is already incorporated into its design.
  • Page 13: Connecting A Magmaster To A Calmaster2

    Field and Software Tools CalMaster2 and CheckMaster 3 Installation 3.2.2 Connecting a MagMaster to a CalMaster2 Connect the communication lead to the appropriate terminals: FOUTA= Red FOUTB= Blue PLS0V= Black IC+= Yellow IC-= Green Red 1 Yellow 1 Fig. 3.4 Fitting Communications Leads Yellow 2 Fig.
  • Page 14: Aquamaster Connection

    3.3.1 AquaMaster with Hard-wired Sensor Leads To enable a hard-wired AquaMaster system to be tested by the CalMaster2 it may be necessary to fit a socket to the AquaMaster (see Section 3.3.3, page 13) and a small adaptor box to the end of the sensor cable (see Section 3.3.6, page 16).
  • Page 15: Fitting An Aquamaster Sensor Socket

    Field and Software Tools CalMaster2 and CheckMaster 3 Installation 3.3.3 Fitting an AquaMaster Sensor Socket Pin 1 Brown Pin 2 Pin 3 Orange Pin 4 Yellow Pin 5 Green Pin 6 Blue Pin 7 Violet Fig. 3.8 Fitting an AquaMaster Sensor Socket To fit an AquaMaster sensor socket: Turn off the power to the AquaMaster and remove the covers –...
  • Page 16: Fitting An Aquamaster Pulsed Output Socket

    Field and Software Tools CalMaster2 and CheckMaster 3 Installation 3.3.4 Fitting an AquaMaster Pulsed Output Socket O/P3 Brown O/P2 O/P1 Orange O/P COM Yellow Violet Green DATA Blue Fig. 3.9 Fitting an AquaMaster Pulsed Output Socket To fit an AquaMaster pulsed output socket: Turn off the power to the AquaMaster and remove the covers –...
  • Page 17: Fitting An Aquamaster Pulsed Output Socket With Serial Communications

    Field and Software Tools CalMaster2 and CheckMaster 3 Installation 3.3.5 Fitting an AquaMaster Pulsed Output Socket with Serial Communications O/P COM Grey/Blue O/P1 Orange O/P2 Blue Green Yellow Yellow/Red Red/Black Brown Violet/Red Fig. 3.10 Fitting an AquaMaster Pulsed Output Socket with Serial Communications To fit an AquaMaster pulsed output socket with serial communications: Turn off the power to the AquaMaster and remove the covers –...
  • Page 18: Fitting An Adaptor Box To The Sensor Cable

    Field and Software Tools CalMaster2 and CheckMaster 3 Installation 3.3.6 Fitting an Adaptor Box to the Sensor Cable WABC2029 Belden 8777 Pin 1 Brown Black Pin 2 Green Pin 3 Orange Black Pin 4 Yellow Pin 5 Green Sleeved Grounds...
  • Page 19: Connecting An Aquamaster With Mil Connectors To A Calmaster2

    Field and Software Tools CalMaster2 and CheckMaster 3 Installation 3.3.8 Connecting an AquaMaster with MIL Connectors to a CalMaster2 7-way MIL 19-way MIL Green 12 Red 11 Red 1 Yellow 1 Red 1 Yellow 1 Fig. 3.13 Fitting Communications Leads...
  • Page 20: Connecting An Aquamaster With A Sensor Adaptor Box To A Calmaster2

    Field and Software Tools CalMaster2 and CheckMaster 3 Installation 3.3.9 Connecting an AquaMaster with a Sensor Adaptor Box to a CalMaster2 7-way MIL 19-way MIL Green 12 Red 11 Red 1 Yellow 1 Red 1 Yellow 1 Fig. 3.16 Fitting Communications Leads...
  • Page 21: Aquamaster Explorer Connection

    Field and Software Tools CalMaster2 and CheckMaster 3 Installation 3.4 AquaMaster Explorer Connection 3.4.1 Connecting an AquaMaster Explorer to a CalMaster2 AquaMaster Red 11 Red 12 Yellow 12 Red 1 Red 1 Yellow 1 Fig. 3.19 Fitting Communications Leads AquaMaster Red 2 Fig.
  • Page 22: Testing

    The contrast of the LCD screen can be adjusted by pressing the  and  buttons. Note. If there is insufficient battery charge to completely a test, CalMaster2 does not start the test. Recharge the CalMaster2 – see Section 6, page 40.
  • Page 23 10. Select 'Ok'. CalMaster2 starts the AutoTest sequence: Note. The first time CalMaster2 tests a flow meter that does not have an associated fingerprint file, it must find a valid test that can be used as a reference. A screen appears stating that CalMaster2 is searching for a reference test.
  • Page 24: Connecting Calmaster2 To A Computer

    To switch on, disconnect the mains adaptor, press the 'On' button and then reconnect the mains adaptor. Connect the CalMaster2 to the computer using the RS232 cable provided – see Fig. 4.1. It is recommended that the CalMaster2 is connected to the power supply while downloading – see Section 6, page 40.
  • Page 25: Downloading Verifications

    Follow the instructions for processing records – see Section 5.4.1, page 28. Note. Once the verifications have been downloaded, the CalMaster2 does not need to be connected to be able to use it to view, organize and print reports of the verifications.
  • Page 26: Calmaster2 Iris Software

    ABB Flow Meters. The program communicates with the CalMaster2 via an RS232C serial cable. A CalMaster2 Certificate is produced when further analysis has been carried out on the test results. This includes Initial and/or FingerPrint comparison analysis using Fuzzy Logic routines. In order to generate a certificate, a software password is required.
  • Page 27 5 CalMaster2 IRIS Software Header Bar Displays the title of the current view. Menu Bar Provides access to all the menus for the CalMaster2 application – see Section 5.3, page 26. Toolbar The toolbar buttons provide quick access to the CalMaster2 functions: Icons Install Factory Files.
  • Page 28: Calmaster2 Iris Menus

    5 CalMaster2 IRIS Software 5.3 CalMaster2 IRIS Menus Menu Description File Factory Files… CalMaster2 verification can be made to within 1% of the original factory test results – see Section 5.6, page 34. Exit Closes CalMaster2. Tools Device Wizard… Used to configure the connection to the CalMaster2 –...
  • Page 29: Calmaster2 Wizard

    Process Records — download verifications from a CalMaster2. Review Records — examine verifications that have already been downloaded. Edit CalMaster2 Database — lists/edits the flow meters and CalMaster2s used. To open the CalMaster2 Wizard: Either select 'Tools | CalMaster2 Wizard…' or click the button.
  • Page 30: Process Records

    At the Reset CalMaster2 task, a prompt appears asking whether the CalMaster2 is to be reset. Select either 'Yes' to delete all verifications held in the CalMaster2 or 'No' to leave the verifications in place. Note. The CalMaster2 can hold the test results of up to 100 flow meters.
  • Page 31: Review Records

    'Next'. Records can be sorted in either alphabetical or date order. The Review Records dialog box has two tabs – CheckMaster and CalMaster2. Depending on your licence, one of these tabs may be disabled. The right-hand toolbar has three buttons. Depending on your licence, one or more of these buttons...
  • Page 32 Field and Software Tools CalMaster2 and CheckMaster 5 CalMaster2 IRIS Software CheckMaster This tab is available only if you have a licence for CheckMaster. Verifications are listed in the left-hand pane. To print a conformance report click the button – see Section 5.7, page 35.
  • Page 33 CalMaster2 and CheckMaster 5 CalMaster2 IRIS Software CalMaster2 This tab is available only if you have a licence for CalMaster2. Icons If a flow meter's factory file has been installed (see Section 5.6, page 34), the first test in the list is the Factory file. This lists all the parameters at the time that the flow meter was manufactured.
  • Page 34: Transmitter Wizard

    CalMaster2 and CheckMaster 5 CalMaster2 IRIS Software 5.5 Transmitter Wizard The transmitter wizard is used to configure the connection to the CalMaster2. To open the Transmitter Wizard: Either select 'Tools | Transmitter Wizard…' or click the down arrow next to the...
  • Page 35: New/Edit Configuration

    Field and Software Tools CalMaster2 and CheckMaster 5 CalMaster2 IRIS Software 5.5.1 New/Edit Configuration This is used to configure the associated serial port connection for the CalMaster2. IM/VCM2 Issue 6...
  • Page 36: Factory Fingerprint Files

    2%. A flow meter's fingerprint file needs to be installed once only. It is stored within CalMaster2 IRIS software database so that it is available whenever a verification is processed for that flow meter.
  • Page 37: Print A Conformance Report Or Verification Certificate

    5.7 Print a Conformance Report or Verification Certificate To print a Conformance Report or Verification Certificate: Click the button to start the CalMaster2 wizard, select 'Review Records' and click 'Next'. On the right-hand side of the Review Records dialog box, click the report button certificate button .
  • Page 38: Trend Analysis

    To start trend analysis: Click the button to start the CalMaster2 wizard, select 'Review Records' and click 'Next'. On the right-hand side of the Review Records dialog box, click the button. The trend...
  • Page 39: Scale Tab

    Field and Software Tools CalMaster2 and CheckMaster 5 CalMaster2 IRIS Software 5.8.1 Scale Tab Controls the default scale for the graph. 5.8.2 Names Tab Controls the color and labelling for the graph. IM/VCM2 Issue 6...
  • Page 40: Statistics Tab

    Field and Software Tools CalMaster2 and CheckMaster 5 CalMaster2 IRIS Software 5.8.3 Statistics Tab Displays basic statistics of the selected flowmeter. 5.8.4 Data Filter Tab Forces the results to ignore any zero values. IM/VCM2 Issue 6...
  • Page 41: Calmaster2 Database

    Field and Software Tools CalMaster2 and CheckMaster 5 CalMaster2 IRIS Software 5.9 CalMaster2 Database The CalMaster2 database enables data to be recorded about each CalMaster2 and flowmeter. To open the CalMaster2 database: Click the button to start the CalMaster2 wizard.
  • Page 42: Recharging Calmaster2

    The unit switches automatically from high current to low current charge mode when the required battery voltage is reached. CalMaster2 must be recharged after use for at least four hours. With a full charge, CalMaster2 can verify a minimum of six flow meters before needing to be recharged.
  • Page 43: Registration

    Field and Software Tools CalMaster2 and CheckMaster 7 Registration 7 Registration In order to download fingerprint files to the CalMaster2, each flow meter must be registered. To register: Open a web browser and type http://www.abbregister.com in the address bar. The ABB log-in page appears.
  • Page 44 Field and Software Tools CalMaster2 and CheckMaster 7 Registration Complete the form and press 'Next'. An e-mail response is sent containing the Username and Password. The registration for the selected product appears: Type the Serial number and Date of Purchase. A confirmation appears: Note.
  • Page 45: Registering Flowmeters

    Field and Software Tools CalMaster2 and CheckMaster 7 Registration 7.1 Registering Flowmeters Each flow meter must be registered with ABB – see Section 7, page 41. To register a flow meter: Open the web browser and type http://www.abbregister.com in the address bar. The ABB log-in page appears: Type the 'Username' and 'Password' and click 'Submit'.
  • Page 46: Downloading Fingerprint Files

    When a flow meter is manufactured it is tested extensively and calibrated. The calibration results are stored as a fingerprint file. Fingerprint files are available for all registered flow meters. To download fingerprint files the flow meter(s) must be registered with ABB – see Section 7, page 41.
  • Page 47 Field and Software Tools CalMaster2 and CheckMaster 7 Registration Click the link for the required flow meter. A File Download dialog box appears. Click 'Save'. A file browser appears prompting for a location for the download. Browse to: 'C:\Program Files\CalMaster2\Factory Files\Fingerprints'.
  • Page 48: Appendix A Calmaster2/Checkmaster Clock Utility

    CalMaster2 and CheckMaster Appendix A CalMaster2/CheckMaster Clock Utility Appendix A CalMaster2/CheckMaster Clock Utility Included with the CalMaster2 IRIS software is a utility that enables the CalMaster2 or CheckMaster clock to be synchronized with a PC. To run the utility: Connect the CalMaster2 to the PC – see section 4.2, page 22.
  • Page 49: Notes

    Field and Software Tools CalMaster2 and CheckMaster Notes Notes IM/VCM2 Issue 6...
  • Page 50 Field and Software Tools CalMaster2 and CheckMaster Notes IM/VCM2 Issue 6...
  • Page 51 – Food & Beverage Repair Centre. – Manufacturing United Kingdom – Metals and Minerals ABB Limited – Oil, Gas & Petrochemical Tel: +44 (0)1453 826661 – Pulp and Paper Fax: +44 (0)1453 829671 Drives and Motors United States of America •...
  • Page 52 ABB has Sales & Customer Support expertise The Company’s policy is one of continuous product in over 100 countries worldwide improvement and the right is reserved to modify the information contained herein without notice. www.abb.com Printed in UK (10.07) © ABB 2007 ABB Limited ABB Inc.

This manual is also suitable for:

Checkmaster

Table of Contents