A&D TM-2441 Instruction Manual
For ambulatory blood pressure monitor
Hide thumbs
Also See for TM-2441:
- Instruction manual (120 pages) ,
- Quick start manual (9 pages) ,
- Quick start manual (5 pages)

Related Manuals for A&D TM-2441


Summary of Contents for A&D TM-2441
- Page 1 English (Original) Recorder for Ambulatory Blood Pressure Monitor Ambulatory Blood Pressure Monitor 1WMPD4003500B 1712...
- Page 2 2017 A&D Company, Limited. All rights reserved. No part of this publication may be reproduced, transmitted, transcribed, or translated into any language in any form by any means without the written permission of A&D Company, Limited. The contents of this manual and the specifications of the instrument covered by this manual are subject to change for improvement without notice.
-
Page 3: Compliance
Compliance with the Australian EMC Framework The device conforms to the following requirements: EMC Emission standard for industrial, Scientific & Medical equipment AS/ NZS 2064:1997, EMC Generic Immunity standard AS/ NZS 4252. 1:1994. The above is evidenced by the C-Tick label. TM-2441 Instruction manual... - Page 4 ® Bluetooth Transmission This device is equipped with a Bluetooth wireless function and can connect to the Bluetooth device that is Bluetooth wireless technology enabled medical devices. Applications and devices that are compatible with Bluetooth 4.1. Each device needs an application to receive data.
-
Page 5: Warning Definitions
Warning Definitions To prevent accidents due to inappropriate handling, this product and its manual contain the following warning signs and marks. The meaning of these warning signs and marks are as follows. Warning Definitions An imminently hazardous situation that will result in death or serious injury, if not avoided. -
Page 6: Precautions For Use
Precautions for Use In order to use the TM-2441 (the recorder for ambulatory blood pressure monitor) safely and correctly, carefully read the following precautions before using the monitor. The following content summarizes general matters regarding the safety of patients and operators, in addition to safe handling of the monitor. - Page 7 Transport and storage conditions : Temperature : - 20 °C to +60 °C, 10 %RH to 95 %RH (no condensation). Humidity : 2. Precautions Before Using the Recorder. Confirm that the recorder operates safely and correctly. When the recorder is used in conjunction with other devices, it may cause an incorrect diagnosis or safety problems.
- Page 8 Device Use the recorder for diagnosis and countermeasures only. Confirm that the air hose and cuff are worn correctly. (Example : kink and tension of the air hose, position and direction of the cuff) Instructions for Patient Wearing the Device Inform the patient how to turn the AUTO switch "OFF"...
- Page 9 4. Precautions During Use. Do not use the recorder while operating automobiles or other vehicles. Example : The recorder may inhibit motion of body or arms when operating vehicle. etc. This medical device can be only operated by doctor, authorized person by the law.
- Page 10 Hold the connector housing when connecting and removing the cable. Do not pull the cable. Note Precautions After Using the Recorder (TM-2441) Be sure to process measurement data immediately using dedicated peripheral after finishing measurement. Backup Lithium Rechargeable Battery The recorder is built with a backup lithium battery.
- Page 11 How to Extend the Life of the Backup Battery When first using after purchase or after storing for a month or more, replace batteries and charge the backup battery. It is enough if the backup battery is charged for 48 hours or more. (The backup battery is always charged by AA batteries.) Replace with two new AA batteries when the battery indicator displays When...
- Page 12 7. Precautions of Maintenance Confirm correct performance and safety of the recorder when it not used for a long period of time. To maintain correct measurement and safety, perform inspection and maintenance before use. The user (hospital, clinic, etc.) is responsible for management of the medical equipment.
- Page 13 obstructions, or in other locations where signal strength is weak. Doing so may result in frequent loss of connection, very slow communication speeds and errors. The following examples are general causes of malfunction and countermeasures. Use of mobile phones Radio waves may cause unexpected malfunctions. Wireless communication devices, home networking devices such as walkie-talkies mobile phones, cordless phones and these types of communication devices can...
-
Page 14: Precautions For Safe Measurement
Precautions For Safe Measurement The section describes precautions concerning the measurement and sensor. Always consult with a doctor for evaluation of the results and treatment. Self-diagnosis and self-treatment based on results can be dangerous. Blood Pressure Measurement Ensure the tube is not bent excessively and that air flows properly. - Page 15 Wear the cuff at the same level as heart. ( If the level is different, it occurs an error of the measurement value.) The recorder corresponds to artifact and shock. If there are any doubts in the measurement value, measure blood pressure by auscultation or palpation.
-
Page 16: Cuff
Cuff Dispose of cuffs contaminated by blood to prevent infectious disease from spreading. Avoid manner storing the folded cuff or twisted air hose in a tightly for extended periods of time. Such treatment may shorten the life of the components. Measurement of Pulse Rate Do not use the displayed pulse rate for the diagnosis of the irregular heartbeat. -
Page 17: Packing List
Packing List The recorder is a precision instrument so use with caution. Excessive shock may cause failure and malfunction. Note The recorder is shipped out using a special packing box designed to keep it from damage during transport. When you open this box, make sure you have everything on the packing list. -
Page 18: Blood Pressure Recorder
Adult cuff for left arm Blood pressure Recorder Large cuff for left arm Carrying holder Clip Adult cuff cover Large cuff cover Belt Activity record sheet (10 sheets) Analysis software CD USB cable This instruction manual... -
Page 19: Table Of Contents
Contents Compliance .......................i Warning Definitions..................iii Precautions for Use ..................iv Precautions For Safe Measurement............xii Blood Pressure Measurement ............xii Cuff ......................xiv Measurement of Pulse Rate...............xiv Packing List ....................xv Introduction ..................5 ... - Page 20 Blood pressure measurement Functions........26 6.1. Automatic Blood Pressure Measurement (A-BPM)....26 6.1.1. A-BPM Waiting Mode............28 6.1.2. Sleep Function and Interval time..........28 6.1.3. Stopping Measurement............29 6.2. Self Blood Pressure Measurement (S-BPM)......30 ...
- Page 21 Operations ..................44 8.1. Operation Flowchart ...............44 8.2. Initial Settings ................46 8.2.1. Factory Settings ..............46 8.2.2. The Clock and the Monitor Function of Measurement ..47 8.2.3. Initial Pressurization Value ............49 ...
- Page 22 Maintenance ..................78 9.1. Product Storage, Inspection and Safety Management..78 9.2. Cleaning the Product ..............78 9.3. Periodic Inspection..............80 9.3.1. Battery Pre-installation Inspection ........80 9.3.2. Battery Post-installation Inspection........81 9.4.
-
Page 23: Introduction
1. Introduction Thank you for your Purchase! The TM-2441 ambulatory blood pressure recorder enables to accurate measurement of patient blood pressure automatically for preset times (e.g. 24-hours continuously). This manual explains the settings, operations, modes and programs of blood pressure measurement as well as communication to dedicated peripheral, maintenance, specifications and warning. - Page 24 Self blood pressure measurement ( S-BPM ) As principal use, this mode is used at home health care that patient measures and records self blood pressure using the device operated by self. This mode can use five types of the programs in accordance with usefulness.
-
Page 25: Abbreviations & Symbols
3. Abbreviations & Symbols Symbols Meaning Systolic blood pressure Diastolic blood pressure Pulse rate Pulse pressure PP = SYS - DIA Unit of blood pressure mmHg /minute /min Unit of pulse rate Blood pressure measurement Automatic blood pressure measurement A-BPM 24-hours blood pressure recorder. - Page 26 Symbols Meaning Bluetooth is being used. Memory full, Delete data to start the measurement. A-BPM sleep mark The mark is displayed during configuration. Symbol for small cuff SMALL Arm circumference 15 to 22 cm 5.9" to 8.7" Symbol for adult cuff ADULT Arm circumference 20 to 31 cm 7.8"...
- Page 27 Symbols Meaning Manufacturer of the CE Marking. Date of manufacture. Refer to the instruction manual or booklet. Symbol for "Keep dry" and "Keep away from rain". Symbol for "Handle with care". The symbol of waste electrical and electronic equipment directive. Symbols Meaning Sleep, Cycle, Hour,...
- Page 28 I.H.B. The I.H.B. ( Irregular Heartbeat ) symbol appears when the recorder detects an irregular heartbeat that differs ±15 % from the average pulse rate. The principal factors of appearance for the I.H.B. symbol are physiological factors along with heart, disease and other factors. Examples include body motion, an increase in body temperature, aging, physiological properties and emotional changes.
- Page 29 Waiting mode A-BPM waiting mode is a state that blood pressure is not being measured during the interval time. Start time Start time Blood pressure measurement Time T : Interval time Section Section S-BPM waiting mode is a state that blood pressure is not being measured during the interval time and between the last "1 scope"...
-
Page 30: Specifications
4. Specifications 4.1. Recorder Items Descriptions Measurement method Oscillometric measurement method Pressure detection Semiconductor pressure sensor method 0 to 299 mmHg Pressure display range (299 mmHg or more is hidden ) Pressure : ±3 mmHg Measurement accuracy Pulse rate : ±5 % 1 mmHg Minimum... - Page 31 Items Descriptions 200 times or more. It varies due to Measurement count measurement conditions. Measurement data : 600 data max. Memory With the same type of batteries : 2 x 1.5V batteries (LR6 or AA size) Alkaline battery or Nickel-hydrogen battery Power supply (Ni-MH) 1900 mAh or more Backup battery for built-in clock : Lithium...
- Page 32 Items Descriptions The certification trademark registered to the C-Tick Marking ACA by the Trademark office. Approx. 95 (L) × 66 (W) × 24.5 (H) mm Dimensions Approx. 135 g (excluding batteries) Mass Recorder : 5 years. Self-authentication with internal data. Proper operation and Useful life maintenance in the best conditions.
-
Page 33: Dimensions
4.2. Dimensions 24.5 Unit : mm... -
Page 34: Component Names
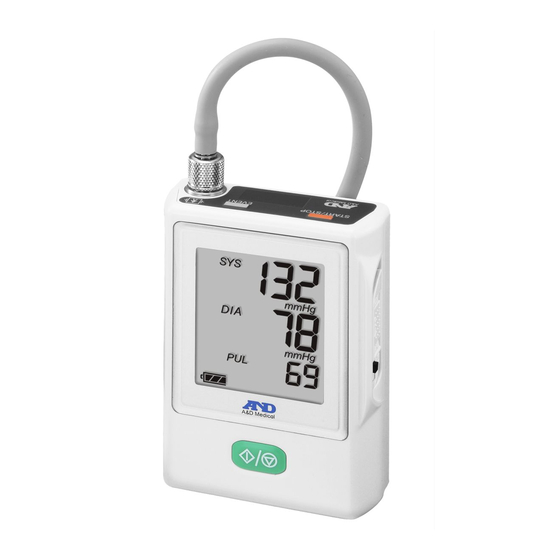
5. Component Names 5.1. Recorder Artery position mark Adult cuff and large cuff for left Air hose Air plug Air socket EVENT switch for A-BPM OLED display for A-BPM START switch STOP for A-BPM switch : AUTO LCD panel Exchange switch between A-BPM START and S-BPM... -
Page 35: Display
5.2. Display Note To get accurate diagnosis, take care to accurately read the data displayed on the recorder and interpret it properly. 5.2.1. Liquid Crystal Display Panel ( LCD panel ) Upper figures Middle figures Lower figures The following values can be displayed in each mode : Measurement A-BPM S-BPM... -
Page 36: Oled Display
5.2.2. OLED Display The state of A-BPM is indicated on the OLED display. Clock time. The state of settings and operation. The measurement value of A-BPM. Systolic blood pressure. Diastolic blood pressure. Pulse rate. mmHg Unit for blood pressure value. /min Unit for the pulse rate. -
Page 37: Principal Switch Operations
5.3. Principal Switch Operations 5.3.1. A-BPM Operations To start or suspend A-BPM. To switch between A-BPM and S-BPM Step 1. Store the preset program (of start times and intervals) for A-BPM. Step 2. Set the AUTO switch for the following operations. "ON"... - Page 38 To Stop during A-BPM When the START/STOP switch is pressed during the blood pressure measurement, the air is exhausted immediately and the current measurement is stopped. However, A-BPM is continued. The next blood pressure measurement is performed in accordance with A-BPM settings. To set the program for A-BPM.
- Page 39 To adjust the clock. To set the monitor function of A-BPM. Step 1. Set the AUTO switch to "OFF". Step 2. If the indication of the display is hidden, press the START/STOP or EVENT switch to return to the display of waiting mode. Step 3.
-
Page 40: S-Bpm Operations
5.3.2. S-BPM Operations To start S-BPM. Step 1. Select the S-BPM program and store its parameters. Step 2. Set the AUTO switch to "OFF". Step 3. Operations are as follows: S-BPM Programs Operations Office blood pressure Press the switch to start the preset program Automated office blood pressure AOBP during waiting mode. - Page 41 To set the program for S-BPM. Step 1. Set the AUTO switch to "OFF". Step 2. While holding the switch, hold the START/STOP switch for 3 seconds or more. is displayed on the LCD. Step 3. Operations are as follows: Refer to "8.4.
-
Page 42: Other Operations
5.3.3. Other Operations To return from waiting mode and show the monitor. If the indication of the OLED display or LCD panel is hidden, press the START/STOP or EVENT switch to return to the display of waiting mode. Deleting measurement data Step 1. - Page 43 ® To pair for Bluetooth communication. Step 1. Set the AUTO switch to "OFF". Step 2. If the indication of the display is hidden, press the START/STOP or EVENT switch to return to the display of waiting mode. Step 3. Press and hold the EVENT switch for 6 seconds or more. The buzzer sounds and Pairing is displayed on the OLED display.
-
Page 44: Blood Pressure Measurement Functions
6. Blood pressure measurement Functions The recorder is equipped with automatic blood pressure measurement (A-BPM) and self blood pressure measurement (S-BPM) and can store measurement states and measurement results. 6.1. Automatic Blood Pressure Measurement (A-BPM) When A-BPM is suspended or is not used, set the AUTO switch to "OFF". - Page 45 mark is displayed on the LCD panel while A-BPM is used. Blood pressure is measured automatically at the A-BPM start time. An initial pressurization value can be set beforehand. 160, 180, 210, 240, 270, AUTO [mmHg] If AUTO is specified to the initial pressurization value, the pressurization value is selected automatically.
-
Page 46: A-Bpm Waiting Mode
6.1.1. A-BPM Waiting Mode Items to monitor measurement state can be displayed on the LCD panel while waiting time of A-BPM. In waiting mode, the indicators are automatically hidden. Press any switch to show items. A-BPM waiting mode is a state that blood pressure is not measured during the interval time. -
Page 47: Stopping Measurement
6.1.3. Stopping Measurement When the START/STOP switch is pressed during the blood pressure measurement, the air is exhausted immediately and the current measurement is stopped. However, A-BPM is continued. The next blood pressure measurement is performed in accordance with A-BPM settings. Note When measurement is stopped, the stop code E07 is displayed on the OLED display and is stored in the memory. -
Page 48: Self Blood Pressure Measurement (S-Bpm)
6.2. Self Blood Pressure Measurement (S-BPM) Set the AUTO switch changes to "OFF" to use S-BPM programs. The recorder is equipped with the S-BPM five types of programs in accordance with varying measurement environment conditions. Parameters and measurement results can be stored in the memory. Name Descriptions &... -
Page 49: S-Bpm Programs
6.2.1. S-BPM Programs Office blood pressure When the switch is pressed, blood pressure is measured once and is stored in the memory. Blood pressure measurement Time Press the switch to start the measurement. Automated office blood pressure AOBP When the switch is pressed, AOBP is started. - Page 50 Home blood pressure When the switch is pressed, HBP is started. The HBP performs a "1 scope". "1 scope" consists of a set of blood pressure measurements and interval times which are repeated to the number of the measurement count. The last interval time is omitted. switch is pressed during the "1 scope", the "1 When the scope"...
- Page 51 Automated night blood pressure ANBP The ANBP can specify up to six preset start time a day. When parameters for the ANBP program are stored, the ANBP is started and a "1 scope" is performed for each start time. "1 scope" consists of a set of blood pressure measurements and interval times which are repeated to the number of the measurement count.
- Page 52 Automated self blood pressure ASBP The ASBP can specify up to six preset start time for the alarm. When parameters for the ASBP program are stored, the ASBP is started and the buzzer sounds at each Start time. Press the switch to perform a "1 scope"...
-
Page 53: S-Bpm Waiting Mode
1 scope 1 scope Not measured Time switch to stop "1 scope". Press the switch to start "1 scope". Press the Start time of alarm T : Interval time 6.2.2. S-BPM Waiting Mode Operation mode and pressure value are displayed on the LCD panel during S-BPM waiting mode. -
Page 54: Stopping And Suspending Measurement
6.2.3. Stopping and Suspending Measurement Note When A-BPM is stopped, the stop code E07 is displayed on the LCD panel and is stored in the memory. S-BPM Programs Operations Office blood pressure Automated office Press the switch to stop blood blood pressure AOBP pressure measurement. -
Page 55: Measurement Result
6.3. Measurement Result 6.3.1. Displaying Measurement Results The monitor function can select "Display ON" or "Display OFF" command of the measurement result of A-BPM. This function cannot use for S-BPM. The content of "Display ON" command includes "Pressure value during the measurement", "measurement result" and "Error code for the measurement result". -
Page 56: Outputting Measurement Results
6.3.3. Outputting Measurement Results The measurement data stored in the memory can be output to the peripheral using USB data transfer. Refer to "8.8 Connecting the Recorder to Dedicated Peripheral". Note When the battery indicator displays , data transfer cannot be used. -
Page 57: Preparing The Recorder
7. Preparing the Recorder 7.1. Installing Batteries (Replacing Batteries) Install two new batteries in accordance with the correct "+" and "-" direction inside the battery compartment before attaching the recorder. Replace both batteries at the same time. Remove batteries from the recorder if it is not used for a long period of time. - Page 58 Procedure Install batteries. Step 1. Open the battery cover. Step 2. Remove used batteries. Step 3. Refer to the direction symbol ( ) inside of the battery compartment. Insert two new batteries in the proper "+" and "-" Step 1. Open. direction.
-
Page 59: How To Replace Batteries
7.1.1. How to Replace Batteries Measurement results and setting parameters are saved when batteries are removed. When the built-in battery runs out charge, the date is reset to 01/01/2017 00:00. Check and adjust the current time when batteries are replaced. Refer to "8.2.2. -
Page 60: Preparing The Carrying Holder
7.2. Preparing the Carrying Holder Note When the carrying holder is attached, use the accessory belt. We recommend to use a belt to fit the recorder to the patient. Use accessory carrying holder when the recorder is used. To attach the carrying holder, put the carrying holder through accessory belt or the belt of the clothes wearing. -
Page 61: Inspection For Use
7.3. Inspection for Use Inspect the recorder to maintain the performance, safety, effectively before use. Confirm the following checklist before / after installing batteries. If a problem is found, stop to use the recorder and put the message of "Malfunction" or "Not use". Contact your local dealer to repair it. -
Page 62: Battery Post-Installation Checklists
7.3.2. Battery Post-installation Checklists Portion Description Check that there is no fire, smoke and offensive smells. Battery Check that there is no strange sound. Display Check that there is no strange display. Operation Check that the recorder operates correctly. Check that the measurement operation can be Measurement performed correctly. - Page 63 Installing the batteries. The initial settings of the built-in clock, measurement monitor function and pressurization value. A-BPM S-BPM (For 24 hours) (At home health care) Save S-BPM preset program. Save A-BPM preset program. Attach the recorder and cuff. Attach the recorder and cuff. Move the AUTO switch Move the AUTO switch to "OFF".
-
Page 64: Initial Settings
8.2. Initial Settings 8.2.1. Factory Settings The factory settings (initial settings) are described bellow : Common items of the settings Item Factory setting Monitor function ON (is indicates them) Year, Month, Day, Hour, Minute Date of shipment Items of A-BPM Item Factory setting Sleep mode... -
Page 65: The Clock And The Monitor Function Of Measurement
Items of S-BPM Item Factory setting Program selection Office blood pressure (OBP) Office blood pressure N.A. Measurement count 2 counts Automated office blood pressure AOBP Interval time 5 minutes Measurement count 2 counts Home blood pressure HBP Interval time 1 minute Start time of section 2 hour Automated night blood... - Page 66 Procedure of operation using switches Step 1. Set the AUTO switch to "OFF". Step 2. If the indication of the display is hidden, press the START/STOP or EVENT switch to return to the display of waiting mode. Step 3. While holding the START/STOP switch, press and hold the EVENT switch for 6 seconds or more.
-
Page 67: Initial Pressurization Value
8.2.3. Initial Pressurization Value An initial pressurization value can be set beforehand. 160, 180, 210, 240, 270, AUTO [mmHg] If AUTO is specified as the initial pressurization value, a proper pressurization value is selected automatically. Factory setting is 180 mmHg. Step 1. - Page 68 Procedure of operation using switches Step 1. Set the AUTO switch to "OFF". Step 2. If the indication of the display is hidden, press the START/STOP or EVENT switch to return to the display of waiting mode. Step 3. While holding START/STOP switch, press and hold the EVENT switch for 3 seconds or more.
-
Page 69: A-Bpm Items And Parameters
8.3.1. A-BPM Items and Parameters The preset program for A-BPM is as follows : Item OLED Parameter Sleep Sleep mode xx xx = ON, OFF Interval Cycle = OFF, 5, 10, 15, 20, 30 , 60, 120 minutes xx xx time Start time Hour = 0 to 23 hour... - Page 70 : When the sleep mode is set to "ON", A-BPM is used the Start time and Operation time of the automated measurement. The Interval time of these sections (1 to 6) cannot use. : When sleep mode is set to "OFF", the Interval time is not displayed. : Example for automated measurement.
-
Page 71: A-Bpm Program Examples
8.3.2. A-BPM Program Examples Example Start times and intervals. Simplified input. 24:00 Double sections 00:00 22:00 Section 2 The start time of section 1 = 7:00 The interval time of section 1 = 18:00 6:00 7:00 The start time of section 2 = 22:00 The interval time of section 2 = Section 1... - Page 72 Example 2 Automatic measurement The start time of the automated measurement = 7:00, The operation time of the automated measurement = OFF. When the AUTO switch is set to "ON", A-BPM is started at 7:00. A-BPM is continued according to the start time and interval of each section until the AUTO switch is set to "OFF".
-
Page 73: S-Bpm Programs
8.4. S-BPM Programs The initial settings can be configured using the following methods. The method to use switches on the recorder. The method to use dedicated peripheral that is connected to the recorder using the USB cable. Procedure of operation using switches Step 1. -
Page 74: S-Bpm Items And Parameters
8.4.1. S-BPM Items and Parameters Program Item Parameter S-BPM program Program OBP , AOBP, HBP, ANBP, ASBP Office blood pressure N.A. N.A. Automated office blood pressure 1 to 5 counts Measurement count AOBP 3 to 10 minutes Interval time Home blood pressure 1 to 5 counts Measurement count 1 to 5 minutes... -
Page 75: S-Bpm Display Examples
8.4.2. S-BPM Display Examples Office blood pressure display OBP has no settings to configure. Automated office blood pressure display AOBP AOBP uses preset measurement count and interval time. AOBP performs a "1 scope" after a waiting mode to relax. Refer to "6.2.1. S-BPM Programs" for the "1 scope". Measurement count Interval time Home blood pressure display... - Page 76 Automated night blood pressure display ANBP The ANBP can specify up to six preset start times for the "1 scope". Refer to "6.2.1. S-BPM Programs" for the "1 scope". When last start time is the same as first start time, the settings of start time is finished.
- Page 77 Automated self blood pressure display ASBP The ASBP can specify up to six preset start times for the alarm. When the switch is pressed, the ASBP is started. The buzzer sounds at each Start time. Press the switch to perform the "1 scope"...
-
Page 78: Deleting Measurement Data
8.5. Deleting Measurement Data Purpose of operation and explanation of function Measurement data is deleted but settings are not deleted. The initial settings can be configured using the following methods. The method to use switches on the recorder. The method to use dedicated peripheral that is connected to the recorder using the USB cable. -
Page 79: Attaching The Product To The Patient
8.6. Attaching the Product to the Patient 8.6.1. Information for Patients Explain the following to the patient so that they can use the recorder safely. Precautions during the blood pressure measurement Relax the arm and stay quiet when inflation begins. Keep the same position throughput the measurement. - Page 80 How to stop or suspend the measurement Press the START/STOP switch to stop blood pressure measurement. An error code is stored in the memory. Blood pressure is measured again after 120 seconds. Concerning of A-BPM and ANBP and ASBP mode of S-BPM, only the current blood pressure measurement can be suspended and the "1 scope"...
-
Page 81: Cuff Cover
Precautions when wearing the recorder The recorder is precision instrument. Do not drop or shock the recorder. The recorder and cuff are not waterproof (water resistant). Prevent the product from contacting rain, sweat and water. Do not put anything on the product. When the cuff is moved by excessive motion and exercise, attach the cuff again. -
Page 82: Attaching The Cuff, Carrying Holder And Recorder
8.6.3. Attaching the Cuff, Carrying holder and Recorder Do not attach the cuff if the patient has dermatitis, external wounds, etc. Remove the cuff and stop use if dermatitis or other symptom appear to the patient. Prevent air hose from coiling around neck and body. Take care when using around infants, as there is a danger of suffocation. - Page 83 How to put on the cuff, recorder and holder Step 1. Pass the end of the cuff through the ring and make the shape of bracelet. Step 2. Find the brachial artery of left arm using palpation. Step 3. Attach the cuff directly against the skin so that the white mark is directly over the brachial artery and the lower edge of the cuff is put on approximately 1 - 2 cm above the inside of the elbow.
- Page 84 Step 5. Air hose Step 5. Tape Step 5. Clip Air hose Step 5. Cuff Step 7. Belt Step 7. Carrying holder Step 8. Air plug Step 8. Air socket Step 9. Insert Carrying holder Step 6. Belt...
-
Page 85: Blood Pressure Measurement Operations
8.7. Blood Pressure Measurement Operations 8.7.1. A-BPM Operations When A-BPM is started, blood pressure is measured in accordance with the preset parameters. Note Set the built-in clock and initial pressurization value before measurement because A-BPM uses them. Refer to "8.2.2. The Clock and the Monitor Function of Measurement"... - Page 86 To suspend A-BPM Step 1. Set the AUTO switch to "OFF". Step 2. The mark is hidden. A-BPM is suspended. To Stop during A-BPM When the START/STOP switch is pressed during the blood pressure measurement, the air is exhausted immediately and the current measurement is stopped.
-
Page 87: S-Bpm Operations
8.7.2. S-BPM Operations Note Set the built-in clock and initial pressurization value before measurement because they are used for S-BPM. Refer to "8.2.2. The Clock and the Monitor Function of Measurement" and "8.4. S-BPM Programs". Remove batteries when the patient removes the recorder and cuff when ANBP or ASBP is used (even during the waiting mode). - Page 88 To measure blood pressure during S-BPM immediately. ( Manual blood pressure measurement of S-BPM ) Step 1. If the indication of the LCD panel is hidden, press the START/STOP or EVENT switch to return to the display of S-BPM waiting mode. Step 2.
-
Page 89: Manual Measurement
8.7.3. Manual Measurement Use the manual blood pressure measurement for a tentative test measurement and immediate blood pressure measurement. Note Manual blood pressure measurement can start immediately in a waiting mode. The measurement result is stored in the memory. To measure blood pressure during A-BPM immediately. ( Manual blood pressure measurement of A-BPM ) Step 1. -
Page 90: Stopping And Suspending Measurements
8.7.4. Stopping and Suspending Measurements Ongoing A-BPM, S-BPM and manual blood pressure measurement can be stopped or suspended immediately. Note When S-BPM is stopped, the stop code E07 is displayed on the OLED display and is stored in the memory. To suspend A-BPM Step 1. - Page 91 To stop or suspend S-BPM Operations are as follows: S-BPM Programs Operations Office blood pressure Press the switch to stop blood Automated office pressure measurement. blood pressure AOBP Home blood pressure Press the switch to stop blood Automated night pressure measurement. At next start time, blood blood pressure ANBP pressure is measured or the buzzer sounds.
-
Page 92: Connecting The Recorder To Dedicated Peripheral
Cable may become wrapped around the body or neck. Preparation of dedicated peripheral Remove the recorder and cuff from the patient before connecting the recorder (TM-2441) to dedicated peripheral. : We recommend to use the product that is complied with the IEC60601-1-2: 2007. - Page 93 To start data communication with dedicated peripheral Step 1. Connect the micro USB cable between the recorder and dedicated peripheral. Step 2. The buzzer will sound and will display on the LCD panel. Connect the micro USB The state of data communication enters standby mode.
-
Page 94: Using Bluetooth Communication
® 8.8.2. Using Bluetooth Communication A Bluetooth device needs to be paired with a device in order to communicate with the device. Once the recorder is paired with a device, devices can automatically communicate. Note Be sure to power off all other Bluetooth devices when pairing. Multiple devices cannot be paired at the same time. -
Page 95: Suspending Bluetooth
® 8.8.3. Suspending Bluetooth Communication (Airplane mode) The airplane mode can suspend Bluetooth communication. Using airplane mode Step 1. Set the AUTO switch to "OFF". Step 2. If the indication of the display is hidden, press the START/STOP or EVENT switch to return to the display of waiting mode. -
Page 96: Maintenance
9. Maintenance 9.1. Product Storage, Inspection and Safety Management Medical instruments such as this recorder must be managed so that they function properly when necessary and to reliably maintain the safety of the patient and operator. As basic rule, it is necessary that the patient inspects this instrument with daily checks such as the "Inspection before use". - Page 97 Check after Cleaning Confirm that the cuff bladder is correctly inserted inside the cuff cloth. If it is not correctly inserted, damage or explosion may occur during inflation. Cleaning the recorder Wipe the dirt and dust on the exterior of the recorder using soft dry cloth.
-
Page 98: Periodic Inspection
9.3. Periodic Inspection Perform the daily periodic inspection to use recorder correctly. The inspection is described bellow : 9.3.1. Battery Pre-installation Inspection Items Description No damage or deformation from drops. Exterior No dirt, rust and scratches on any part. No cracking or rattling of the panel. Operation No damage for rattling of switches and buttons. -
Page 99: Battery Post-Installation Inspection
9.3.2. Battery Post-installation Inspection Item Description No fire, smoke or offensive smells. Exterior No strange sounds. No trouble with functioning of switches and Operation buttons. Measurement values are closely in usual value. Measurement No strange sounds or actions during Cuff measurement. -
Page 100: Disposal
9.4. Disposal Concerning the disposal and recycle of the product, for environment protection, follow the laws of the local government. Disposal of the cuff The cuff worn on the patient is medical waste. Dispose of it properly as medical waste. Disposal of the rechargeable built-in battery Remove and properly dispose of the lithium battery inside the recorder when the recorder is disposed. -
Page 101: Troubleshooting
9.5. Troubleshooting Cosult the following checklist and error code list before contacting your local dealer. If this measures do not improve the problem or the problem occurs again, contact your local dealer. Problem Main cause Treatment No display after Battery power has been Replace to new batteries. -
Page 102: Error Codes
9.6. Error Codes Measurement error codes Code Meaning Cause and treatment Pressure zero error Release the air left in the cuff. Low battery Replace with new batteries. Inflation does not reach the target pressure. Confirm the cuff connection. Failure of If there are no problems with the cuff pressurization connection, the recorder may have... - Page 103 Code Meaning Cause and treatment Excessive body Relax and keep silent during the motion. measurement. Out of range, 30 ≦ PUL ≦ 200 If these errors occur multiple times, try Out of range, another blood pressure measurement. 30 ≦ DIA ≦ 160 PP = SYS - DIA SYS : Systolic blood pressure Out of range,...
- Page 104 Code Meaning Cause and treatment Body motion may be detected at the pressurization. Relax and do not move while the measurement. Safety circuit detects over load pressure. If this error occurs even when relaxed and not moving, contact your dealer for inspection. Hardware error codes of the recorder Code Meaning...
-
Page 105: Optional Items (Requiring Order)
10. Optional Items (requiring order) Cuffs Name Description Order code Small cuff Arm circumference TM-CF202A 15 to 22 cm 5.9" to 8.7" for left arm Adult cuff Arm circumference TM-CF302A 20 to 31 cm 7.8" to 12.2" for left arm Large cuff Arm circumference TM-CF402A... - Page 106 Data analysis Name Description Order code USB cable AS-KSUSB4C Others Name Description Order code 10 sheets Activity record sheet AX-PP181-S Carrying holder AX-133025995 Belt AX-00U44189 Ni-MH type, AA size, Rechargeable battery AS-3UTG-2BP 2 pieces Adaptor to charge battery AS-NC-M58 5 pieces Clips AX-110B-20-S...
-
Page 107: Appendix
11. Appendix 11.1. Principle of Blood Pressure Measurement Measurement procedure : Wrap the cuff around the upper arm. Inflate the cuff to a pressure exceeding the systolic blood pressure. Then, exhaust the air from the cuff gradually. While the pressure is detected in the cuff in the air exhaustion stage, the pulse waveform appears in synchronization with the heartbeat. - Page 108 Cuff pressure (Left arm) Direct method (Left arm) Time Cuff pressure (Left arm) Direct method (Left arm) Time Systolic blood pressure Average blood pressure Diastolic blood pressure Microphone method Oscillometric measurement method Blood pressure measurement Error factors The pulse graph can be an objective indicator of the reliability of the measurement accuracy.
-
Page 109: Emc Information
Proper cuff size Use a cuff of adequate size. If the size is too small or too big, a measurement error occurs. Measurements with too small a cuff tend to be evaluated as high blood pressure, regardless of the proper blood pressure and normal artery. - Page 110 Accessories compliant with EMC standards The accessories and options for this recorder accord with the condition of IEC60601-1-2:2007. Use accessories designated by the A&D company. Unauthorized accessories may be influenced by electromagnetic emission and have reduced immunity against disturbances. RF electromagnetic emissions Emissions test Compliance Electromagnetic environment...
- Page 111 Electromagnetic immunity IEC60601-1-2 Compliance Electromagnetic Immunity test test level level environment Floors should be wood, ±6 kV ±8 kV Electrostatic concrete or ceramic tile. contact contact If floors are covered discharge with synthetic material, (ESD) ±8 kV ±15 kV IEC61000-4-2 the relative humidity in air in air...
- Page 112 IEC60601-1-2 Compliance Electromagnetic Immunity test test level level environment Recommended separation distance : 3 V/m 10 V/m d = 1.2 Radiated RF 80 MHz to 80 MHz to 80 MHz to 800 MHz IEC61000-4-3 2.5 GHz 2.6 GHz d = 2.3 800 MHz to 2.5 GHz <5 % U (>95 % dip in U...
- Page 113 Electromagnetic environment of Conducted RF and Radiated RF We recommend that the mobile and portable RF communication instruments are spaced from the transmitter by the recommended separation distance meters (m) or more. This is calculated with the frequency of the transmitter. Where is the maximum output power rating of the transmitter in watts (W) according to the transmitter manufacturer.
- Page 114 Recommended separation distances The recorder is intended for use in an electromagnetic environment in which radiated RF disturbances are controlled. Electromagnetic interference can be prevented by maintaining a minimum distance between portable or mobile RF communications equipment (transmitters) and the recorder as recommended below, according to the maximum output power of the communications equipment.
- Page 116 http://www.aandd.jp 1-243 Asahi , Kitamoto-shi, Saitama 364-8585, JAPAN Telephone: [81] (48) 593-1111 Fax: [81] (48) 593-1119 A&D INSTRUMENTS LIMITED http://www.andmedical.co.uk/ Unit 24/26 Blacklands Way, Abingdon Business Park, Abingdon, Oxfordshire OX14 1DY United Kingdom Telephone: [44] (1235) 550420 Fax: [44] (1235) 550485 A&D ENGINEERING, INC.
Need help?
Do you have a question about the TM-2441 and is the answer not in the manual?
Questions and answers