Table of Contents
Advertisement
Quick Links
Advertisement
Table of Contents

Subscribe to Our Youtube Channel
Related Manuals for Liesegang dv475


Summary of Contents for Liesegang dv475
- Page 1 Bedienungsanleitung User Manual dv475 Liesegang Unternehmensgruppe...
-
Page 2: Table Of Contents
Table of contents Before use Scope of Delivery Disposal of packing material Parts Name of the Projector Quick Setting Up Setting up and connecting the projector Projection distance and image size Connections Connecting a computer or a notebook pc Connecting video equipments Starting Up the Projector First Steps Adjustment... -
Page 3: Before Use
Before use Before use – Please read the user manual The following notes are intended to be a help for handling the product in accordance with its designated purpose. Attention: A person could be killed or injured if the wrong operation is done by ignoring this indication. __________________________________________________________________ Do not install this unit in an unstable place. - Page 4 Before use If any abnormality occurs. It there is abnormal smell or smoke, if you use this unit as it is, this could cause a fire or an electric shock, etc. Immediately turn off the power switch and pull out the power plug. Contact your dealer to repair the unit.
- Page 5 Before use Caution ! Non-observance can lead to injury or damage. ___________________________________________________________________ Caution when carrying the unit. When the unit is to be moved, be sure to disconnect the power plug and check that all external con- nection cords are removed before moving it. If not, the cord may be damaged and it may cause a fire, an electric shock, etc.
- Page 6 Before use Temperature between 5°C and 35°C. Do not use the unit while the temperature is high or varies greatly. The unit must be used at between 5°C (41°F) and 35°C (95°F). Set the caster stoppers. When this unit is installed on a table with casters, set the caster stoppers. If the table moves, it may fall over, causing an injury.
- Page 7 Before use When inserting batteries in this unit, pay attention to the direction of the + and - polarities and insert the batteries correctly. If the polarities are confused, it may cause injury or damage near the unit due to burst batteries, liquid leakage, etc. User Manual Data Video Projector...
-
Page 8: Scope Of Delivery
Scope of Delivery / Disposal of Packing Material Scope of Delivery Your projector should come with the items shown below. Check to make sure that all the items are included. Contact your dealer if anything is missing. Projector POWER SOURCE MENU LASER ENTER... -
Page 9: Parts Name Of The Projector
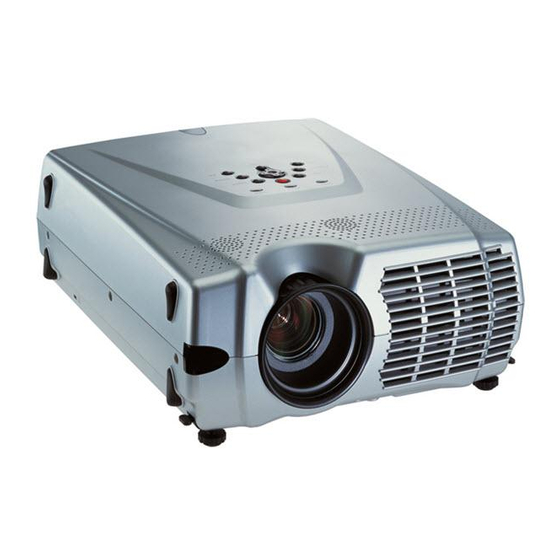
Parts Name of the Projector Parts Name of the Projector Front, side and top Speaker Zoom Ring Control Panel and Indicators Focus Ring Power Lamp Temp Remote Sensor ( Front ) Menu Source Keystone Volume Auto Enter Handle Lens Lens Cover Power Input Socket (AC IN) Adjuster Leg Main Power Switch... -
Page 10: Quick Setting Up
The maximum image size is about 8 – 10m diagonally at a distance of 15 meter. Please refer to the table below for the image size projected. For further information about image size calculator please have a look on our website: www.Liesegang.com. Projection Distance (L=m) „Wide“... -
Page 11: Connections
Connections Connections Connecting a computer or a notebook PC Desktop PC or Notebook PC DVI cable (not supplied) VGA cable Monitor (Accessory) DVI-D Video RGB in 1 * You can use the remote contro as the PC mouse. RGB out Cb/Pb S-Video RGB in 2... - Page 12 Connections 4.2.2 S-Video images Connecting a VCD/DVD player, digital camcorder by using a S-Video cable. S-Video cable (Accessory) DVI-D S-VIDEO Video RGB in 1 Audio VCD/DVD player RGB out Cb/Pb Digital camcorder S-Video RGB in 2 Audio Cr/Pr Rs232 Audio cable (not supplied) 4.2.3 Component images: YCbCr / YPbPr...
-
Page 13: Starting Up The Projector
Starting Up The Projector Starting Up the Projector First steps Read the important safeguards before operating the projector. During operation, keep the air vents clear of obstructions to allow proper cooling. Note: Allow a projector that has been stored in a cold place to warm up to room tempera- ture before applying power. -
Page 14: Adjustment
Starting Up the Projector Adjustment 5.2.1 Projection angle Lift the projector and press the adjuster buttons to adjust the projection angle. Then, release the buttons to lock the extended adjuster legs. Adjuster Button down Adjuster Legs 5.2.2 Image size and focus Turn the focus/zoom ring to adjust the image focus and size. -
Page 15: Standby Mode
Starting Up The Projector Standby mode When the projector is not being used, place it into standby mode. 1. Press the Power button : keep button depressed for about two seconds. Message: “Power OFF? Please press<power> key again!” appears on screen. Press the Standby button again. -
Page 16: Using System Menus
Using System Menus Using System Menus On-Screen menu You can use the ON-SCREEN MENU to make various adjustments and settings. 1. Press the MENU button to display Input Source Main Menu Item the On-screen Menu ▲▼◄► 2. Use ▲▼ to select a main menu item, and then press ►... - Page 17 Using System Menus 6.2.2 Setting SETTING Sub-menu Function Freeze animated image. FREEZE SOURCE Select the input source. Display the images in the Picture-in-Picture mode. PIP MODE * PIP SIZE: Open or close the sub-screen and select its size. * PIP SOURCE: Select the input source of the sub-screen. * PIP POSITION: Select the position of the sub-screen.
- Page 18 Using System Menus 6.2.5 Installation INSTALLATION Sub-menu Function Set the aspect ratio for projected images. IMAGE ASPECT KEYSTONE Correct the vertical or horizontal keystone distortion. ORIENTATION Make the projected images reverse vertically or horizontally according to the installation mode of the projector. USER'S LOGO Enable or disable the user's logo function.
-
Page 19: Infrared Remote Control
Infrared Remote Control Infrared Remote Control How to use the infrared remote control Aim the remote control toward the projection screen or at the sensor. Press desired re- mote button to send a signal to the projector. Caution! Do not point LASER pointer to anyone's eyes or stare into beam. -
Page 20: Battery Replacement
Cleaning and Replacing the Air Filter Battery replacement The remote control uses two AAA batteries. The battery cover is located on the back of the remote control. 1. Press the locking button (1) to release door. 2. Move the door (2) to remove it and set it to the side. 3. -
Page 21: Replacing Projection Lamp
Replacing Projection Lamp Replacing Projection Lamp The metal halide lamp of the projector has a limited lifetime of approximately 1500 hours. If the projected image appears darker you should change the lamp and the air filter. Important Note: This lamp contains mercury. Consult your local hazardous waste regulations and dispose of this lamp in a proper manner. -
Page 22: Troubleshooting Problems And Solutions
Troubleshooting Problems and Solutions Troubleshooting Problems and Solutions Power Lamp Temp You can check the status of the projector using the indicators on the projector's control panel. Refer to the table below for the cause Indicators of problems. : Lighting : Flashing Status Cause &... -
Page 23: Service Hotline
Liesegang at +49 1805 390145 (12 EURO Cent/min). In case of technical problems please feel free to call Liesegang at +49 1805 390144 (12 EURO Cent/min) Fax-Hotline +49 211 39 01 227 Further information about Liesegang: www.Liesegang.com... -
Page 24: Glossary Of Terms
Glossary of Terms Glossary of Terms Hz, KHz, MHz (Hertz, Kilohertz, Megahertz) Hertz is a unit of measurement used to express the frequency, in cycles per second, of an electrical signal or event. (Megahertz = 1 million cycles per second) Lumens A measure of light output on a screen or other surface. -
Page 25: Specifications
Specification Specifications 17.1 Optical Native Resolution : XGA (1024 x 768) Resolution Supported : VGA - SXGA Display Technology : 0.9" Poly-silicon LCD Brightness Uniformity : >90% Lamp Power : 250W Lens Type/Focussing : Manual focus and zoom : 1.7 ~ 2.0 Image Size : 25"... -
Page 26: Warranty Terms
Where your claim is met directly by us, this shall at the same time be deemed to be the performance of the liabilities of your dealer towards you. The above obligation is assumed by: Liesegang Unternehmensgruppe Volmerswerther Str. 21 D- 40221 Düsseldorf Düsseldorf, 27 March 2003...
Need help?
Do you have a question about the dv475 and is the answer not in the manual?
Questions and answers