
Related Manuals for Delta Electronics RT Series


Summary of Contents for Delta Electronics RT Series
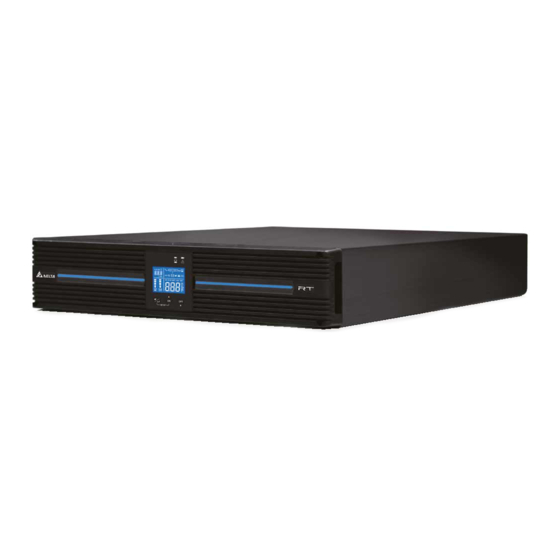
- Page 1 The power behind competitiveness Delta UPS - Amplon Family RT Series, Single Phase 1/ 2/ 3 kVA User Manual www.deltapowersolutions.com...
- Page 2 Failure to heed these instructions and warnings will void the warranty. Copyright © 2018 by Delta Electronics Inc. All Rights Reserved. All rights of this User Manual (“Manual”), including but not limited to the contents, information, and figures are solely owned and reserved by Delta Electronics Inc.
-
Page 3: Table Of Contents
Table of Contents Table of Contents Chapter 1 : Important Safety Instructions --------------------------- 1 Safety Instructions ------------------------------------------------------1 Standard Compliance --------------------------------------------------6 Storage --------------------------------------------------------------------6 Chapter 2 : Introduction --------------------------------------------------- 7 General Overview ------------------------------------------------------7 Package Inspection ----------------------------------------------------7 Functions & Features ----------------------------------------------- 11 Exterior & Dimensions ----------------------------------------------- 12 Operation Panel ------------------------------------------------------- 13 2.5.1 LED Indicators --------------------------------------------------------- 14... - Page 4 Chapter 8 : Internal Battery Replacement --------------------------48 Chapter 9 : Optional Accessories -------------------------------------52 Chapter 10 : Maintenance ------------------------------------------------53 10.1 UPS ---------------------------------------------------------------------- 53 10.2 Batteries ----------------------------------------------------------------- 53 10.3 Fan ----------------------------------------------------------------------- 54 Chapter 11 : Troubleshooting -------------------------------------------55 -------------------------------58 Appendix 2 : Warranty ----------------------------------------------------61 Amplon RT Series...
-
Page 5: Chapter 1 : Important Safety Instructions
Chapter 1 Important Safety Instructions Chapter 1 : Important Safety Instructions 1.1 Safety Instructions Intended Use 1. The unit serves as a single-phase on-line uninterruptible power supply (UPS) for its connected loads. 2. Do not connect laser printers or scanners to the UPS. This may cause damage to the unit. - Page 6 2. Even when all switches and/ or circuit breakers are open, dangerous voltage is present within the unit. 3. Forbid opening or removing the cover of the UPS to avoid high voltage electric shock. There are no user-serviceable parts inside. Amplon RT Series...
- Page 7 Chapter 1 Important Safety Instructions 4. Maintenance service must be performed by qualified service personnel. panels to be opened and/or removed. charges or unsafe electrical conditions. 6. Do not use extension cords to connect the UPS to an AC outlet. 7.
- Page 8 UPS needs to be stored for an extended period of time. Whenever you recharge the batteries (internal and external), please fully charge them until the Battery Level Bar Graph shown on the UPS’s LCD is fully on. Amplon RT Series...
- Page 9 Chapter 1 Important Safety Instructions 8. Since new batteries often do not provide full capacity after an initial charge, it may be necessary to carry out a number of discharge/ recharge cycles before optimum performance is achieved. 9. Servicing of batteries and battery packs should be performed or supervised the required precautions.
-
Page 10: Standard Compliance
UPS’s LCD is fully on. NOTE : After storage and before start-up of the UPS, you must allow the UPS to adjust to room temperature (20°C~25°C) for at least two hours to avoid moisture condensing inside the UPS. Amplon RT Series... -
Page 11: Chapter 2 : Introduction
Chapter 2 : Introduction 2.1 General Overview The RT series UPS, available in 1kVA, 2 kVA and 3 kVA, is an advanced on-line and double-conversion UPS providing reliable and consistent sine-wave quality power to your equipment. It supports personal computers, networks, servers, telecommunica- tion equipment and a variety of other facilities. - Page 12 1 PC Input Cable 16A 1 PC Software CD-UPSentry 2012 1 PC User’s Manual 1 PC USB Cable 1 PC Output Cable 10A 1 PC Output Cable 16A 1 PC Bracket Ear 1 Set Rail Kit 1 Set Amplon RT Series...
- Page 13 Chapter 2 Introduction For Models: 1kVA: UPS102R2RT2B0BB 2kVA: UPS202R2RT2B0BB 3kVA: UPS302R2RT2B0BB × × × × × No. Item Q’ty 1 kVA 2/ 3 kVA 1 PC Input Cable 10A 1 PC Input Cable 15A 1 PC Software CD-UPSentry 2012 1 PC User’s Manual 1 PC USB Cable...
- Page 14 4. If there is any damage or anything missing, please immediately contact the dealer from whom you purchased the unit. 5. If the UPS needs to be returned, carefully repack the UPS and all of the accessories using the original packing material that came with the unit. Amplon RT Series...
-
Page 15: Functions & Features
Chapter 2 Introduction 2.3 Functions & Features User-friendly LCD and LED indicators Output power factor up to 0.9 Cold start REPO function Input circuit breaker protection Generator compatible Hot swappable internal batteries Hot swappable Delta external battery pack (optional) Battery deep discharging protection Intelligent monitoring software connectivity through RS-232 port or USB port Provides the following functions via configuration of UPSentry 2012 software (included in the provided CD), SNMP card (optional) or ModBus card (optional):... -
Page 16: Exterior & Dimensions
2.4 Exterior & Dimensions 89mm 89mm Amplon RT Series... -
Page 17: Operation Panel
Chapter 2 Introduction 89mm 2.5 Operation Panel 2.5.1 LED Indicators RUN TIME 2.5.3 LCD Display LOAD 1 LOAD 2 SET IN OUT BATT LOAD TEST 2.5.4 7-Segment Display °C 2.5.5 16-Segment Display 2.5.2 Multi-function Buttons SETUP... -
Page 18: Led Indicators
The button has two functions. Please refer to the following for detailed information. When the buzzer is on, press the button for 0.1 second to for 0.1 second to turn on the buzzer. In setup mode, press the button for 0.1 second to enter into setup. Amplon RT Series... - Page 19 Chapter 2 Introduction Multi-func- Description tion Button The button has multi-function. Please refer to the following for detailed information. 1. Turn-on: In standby mode, press and hold the button for 3 sec- onds, release it after you hear one beep and the UPS will run in on-line mode.
- Page 20 Exiting from the Setup Mode In setup mode, press these two buttons simultaneously for 3 SETUP seconds to exit from the setup mode. NOTE : For more information, please refer to can perform setup action. Amplon RT Series...
-
Page 21: Lcd Display
Chapter 2 Introduction NOTE : above to wake up the display and enable each button function. 2.5.3 LCD Display RUN TIME LOAD 1 LOAD 2 SET IN OUT BATT LOAD TEST °C Icon Naming Description Indicates the input source status. 1. - Page 22 Illuminates when the UPS is in ECO mode. 1. ON: ECO function is enabled and the conn- ected loads are feed by the utility AC power. ECO Icon 2. Flashing: ECO function is enabled and the connected loads are feed by the double conversion. Amplon RT Series...
-
Page 23: 7-Segment Display
Chapter 2 Introduction Icon Naming Description Site Wiring Reserved. This function is only applicable to Fault Icon 120Vac model. Buzzer Icon Illuminates when the buzzer is disabled. Reserved. This function is only applicable to Parallel Icon 5-10kVA Model. Load Level ON: Total capacity (%) of the connected loads* Bar Graph Battery... - Page 24 The combination of the three categories (left-hand TEST Test side) presents relevant information such as input Ampere hour voltage, output voltage, output frequency, load Voltage capacity etc. Percentage Frequency Unit Minute The UPS’s inter- °C nal temperature. Amplon RT Series...
-
Page 25: 16-Segments Display
Chapter 2 Introduction 2.5.5 16-Segments Display RUN TIME LOAD 1 LOAD 2 SET IN OUT BATT LOAD TEST °C Display Meaning Category Number/ Error code (For error code 16-segment information, please display refer to The combination of the three catego- ries (left-hand side) presents relevant Input... -
Page 26: Error Code Information
0.1 second to view the next screen. Any No., diagram, icon, text, etc. shown in the LCD diagrams presented below are for reference only. Actual display depends on the operation of the UPS. Amplon RT Series... - Page 27 Chapter 2 Introduction RUN TIME LOAD 1 LOAD 2 BATT LOAD TEST Scrolling UP/Down, T < 0.1sec RUN TIME RUN TIME LOAD 1 LOAD 1 LOAD 2 LOAD 2 BATT LOAD TEST IN OUT BATT LOAD TEST Scrolling UP/Down, T < 0.1sec Scrolling UP/Down, T <...
-
Page 28: Rear Panel
UPS302R2RT2B0BB/ UPS302R2RT2B0BC TOTAL OUTPUT Imax. 13.5A 250Vac SMART SLOT INPUT BREAKER LOAD 1 LOAD 2 72V DC WARNING : CONNECT 72 VDC BATTERY SYSTEMS ONLY CONNECTING OTHER SYSTEMS WILL VOID WARRANTY REPO RS-232 INPUT OUTPUT Imax. 13.5A Amplon RT Series... - Page 29 Chapter 2 Introduction Item Functions Input Protects the utility power from further damage when the UPS Breaker fails. Please see for detailed information. Cools and ventilates the UPS. Accepts SNMP, Relay I/O or ModBus card (optional). Please Smart Slot for detailed information.
-
Page 30: Chapter 3 : Installation
3kVA: 440 x 610 x 89 mm Operating temperature 0°C~40°C Relative Humidity (non-condensing) 5%~95% Max. altitude (without de-rating) 1,000 meters above sea level Input power connection Rear Output power connection Rear Battery power connection Rear Air inlet Front Air outlet Rear Amplon RT Series... -
Page 31: Rack Mounting Procedures For The Ups And The Delta External Battery Pack (Optional)
Chapter 3 Installation 3.2 Rack Mounting Procedures for the UPS and the Delta External Battery Pack (Optional) You can rack-mount the UPS and the Delta external battery pack (optional) in a four-post frame. The UPS and the Delta external battery pack (optional) use identical mounting kits and their mounting procedures are the same. - Page 32 Use the provided eight screws and eight washers to attach the rails to your rack. See Insert the UPS into the rack and tighten the provided four screws. See . Please note that there will be extra four screws left after installation. The four screws are spare parts. Amplon RT Series...
-
Page 33: Tower Mounting Procedures For The Ups And The Delta External Battery Pack (Optional)
Chapter 3 Installation 3.3 Tower Mounting Procedures for the UPS and the Delta External Battery Pack (Optional) You can mount the UPS and the Delta external battery pack (optional) in an upright position by following the procedures below. The UPS and the Delta external battery pack (optional) use identical mounting kits and their mount- ing procedures are the same. - Page 34 . Replace the front plastic panel and make sure the . See Assemble the tower stands (optional) by inserting the tenons into the grooves according to the size of the UPS. See Amplon RT Series...
- Page 35 Chapter 3 Installation Carefully lift the UPS upright (at least two people are required) with the Delta logo shown on the operation panel facing up. See OF F SET UP Place the UPS inside the tower stands (at least two people are required). SETU OF F SET UP...
-
Page 36: Chapter 4 : Connections
2. Before connecting the Delta external battery pack (optional) to the UPS, check whether the rating voltage of the battery pack is suitable for the UPS. the correct rating of the battery pack for your UPS. Amplon RT Series... - Page 37 Chapter 4 Connections DC BREAKER 48V DC 40A MAX. Battery Delta External Breaker Cable Battery Pack Set the battery pack’s DC breaker to the OFF position. Remove the cover of the external battery pack connector located on the rear side of the UPS. Connect the battery cable attached to the Delta external battery pack (optional) to the UPS’s battery pack connector.
-
Page 38: Communication Interface Connection
4. Please follow your loads to select proper cables to connect the UPS output outlets and the loads. 5. Plug the power cord of the equipment into the output receptacles located at the rear of the UPS. WARNING: Do not connect laser printers or scanners to the UPS. Amplon RT Series... -
Page 39: Utility Power Connection
Chapter 4 Connections 4.5 Utility Power Connection 1. Please read before connection. 2. Use the provided input cable to connect the UPS and a wall socket that has an earthing-contact function. If the wall socket does not have an earthing connection, please ground the UPS via the ground terminal. -
Page 40: Chapter 5 : Operation Modes
AC power failure. For more information about the SNMP card (optional) or the ModBus card (optional), please refer to its user manual. NOTE : You can only enable ‘SHUTDOWN AFTER’ function in battery mode. For information about ‘SHUTDOWN AFTER’ function, please contact service personnel. Amplon RT Series... -
Page 41: Eco Mode
Chapter 5 Operation Modes 5.5 ECO Mode You can manually set the UPS to run in ECO mode. For setup information, please refer to In ECO mode, when the utility input voltage and frequency are within the range of rating voltage ±10% and rating frequency ±5Hz, the connected loads are supplied by the utility power;... - Page 42 Frequency Setup Standby On-line Bypass Battery converter Item Mode Mode Mode Mode Mode mode Inverter Voltage Setup Inverter Frequency Setup Frequency Converter Setup ECO Setup Standby Bypass Setup Overload Alarm Setup Amplon RT Series...
- Page 43 Chapter 5 Operation Modes Frequency Setup Standby On-line Bypass Battery converter Item Mode Mode Mode Mode Mode mode Buzzer Setup Bypass Range Setup AutoStart to On-line Setup Restore Default Setup Maintenance Bypass Box Setup External Battery Pack Setup NOTE : action.
- Page 44 T= 0.1 T= 0.1 T > 0.1 s T > 0.1 s Standby Bypass Setup Overload Alarm Setup Buzzer Setup Bypass Range Setup AutoStart to On-line Setup Restore Default Setup Maintenance Bypass Box Setup External Battery Pack Setup Amplon RT Series...
-
Page 45: Chapter 6 : Operation
Chapter 6 Operation Chapter 6 : Operation NOTE : 1. Please refer to to learn how to operate the operation panel and understand the display meaning. 2. Please refer to to understand how to use the UPS interfaces. 6.1 Start-up Procedures After the UPS is connected to the AC utility, the AC utility supplies power to the UPS. -
Page 46: Battery Test
3 seconds and release it after you hear one beep) to clear the alarm. 6.7 De-rating Power When the input voltage range is between 100Vac and 160Vac, the UPS’s load capacity will decrease. This function provides a wider operating power voltage range. Amplon RT Series... -
Page 47: Input Breaker
Chapter 6 Operation 1. When the UPS is 105% ~125% overloaded either in online mode or in battery mode, the Load Level Bar Graph the UPS will completely shut down within 1 minute. 2. When the UPS is 125% ~150% overloaded either in online mode or in battery mode, the Load Level Bar Graph the UPS will completely shut down within 15 seconds. -
Page 48: Chapter 7 : Communication Interfaces
The pin follows: RS-232 Pin Assignment Description UPS TXD (Typical RS-232 level) UPS RXD (Typical RS-232 level) Communication Setting for RS-232 Port Baud Rate 2400 Data Length 8 bits Stop Bit 1 bit Parity None Amplon RT Series... - Page 49 Chapter 7 Communication Interfaces RS-232 Other Pin Applications: Alarm Signal & Remote Shutdown Condition Action The signal activates when the battery capacity is below Low Battery 1 & 5 the threshold. The signal activates when the UPS runs in battery On Battery 8 &...
- Page 50 REPO port and a user-supplied switch. If the user-supplied switch is a normally-closed one, please short pin 3, pin 4 and pin 5 for approximately 1 second to shut down the UPS. Please refer to the Normally-closed Switch REPO Port Amplon RT Series...
- Page 51 Chapter 7 Communication Interfaces If the user-supplied switch is a normally-open one, please short pin 4 and pin 5 for approximately 1 second to shut down the UPS. Please refer to the following Normally-open Switch REPO Port WARNING: Do not connect a telephone line to the REPO port.
-
Page 52: Chapter 8 : Internal Battery Replacement
7. Please read stated in before replacing batteries. The 1kVA, 2kVA and 3kVA UPSs contain two, four, and six internal batteries respectively. Below, we take 1kVA model as an example to describe the internal battery replacement procedures. Amplon RT Series... - Page 53 Chapter 8 Internal Battery Replacement Remove the UPS’s front plastic panel (there are four screws). From the back of the front panel, carefully push the backside of the operation panel until it slides out of the front plastic panel. Please handle with care to avoid damaging the cable connecting the operation panel and the UPS’s internal connector.
- Page 54 Put the front plastic panel aside. Disconnect the battery cables. Battery Cables SE TU OF F SE TU OF F Amplon RT Series...
- Page 55 Chapter 8 Internal Battery Replacement Pull out the tab carefully to take out the internal batteries. SE TU OF F Insert the new batteries and reverse the procedures mentioned above to complete battery replacement.
-
Page 56: Chapter 9 : Optional Accessories
Quick Guide, User Guide, or Installation & Operation Guide included in the package of the relevant optional accessory. 2. If you want to buy any accessory mentioned above, please contact your local dealer or customer service. Amplon RT Series... -
Page 57: Chapter 10 : Maintenance
Chapter 10 Maintenance Chapter 10 : Maintenance 10.1 UPS UPS Cleaning Regularly clean the UPS, especially the slits and openings, to ensure that the to clean the slits and openings to prevent any object from blocking or covering these areas. UPS Regular Inspection Regularly check the UPS every half year and inspect: 1. -
Page 58: Fan
UPS. If not, contact service personnel. NOTE : Please ask your local dealer or customer service for more maintenance information. Do not perform maintenance if you are not trained for it. Amplon RT Series... -
Page 59: Chapter 11 : Troubleshooting
Chapter 11 Troubleshooting Chapter 11 : Troubleshooting 1. When a problem occur, please check if the following situation exists before contacting Delta service personnel: Is the main input voltage present? 2. Please have the following information ready if you would like to contact the Delta service personnel: Unit information including model, serial number, etc. - Page 60 When the total load is too small or when there is no load connected ‘Battery to the UPS, ‘Battery Contact service personnel. Save’ Shut- Save’ shutdown will be down enabled after the UPS has run in battery mode for 30 minutes. Amplon RT Series...
- Page 61 Chapter 11 Troubleshooting Error Meaning Possible Cause Solution Code The UPS transfers to 1. Check the main AC source run in battery mode Battery and the main power cord’s due to AC utility abnor- Low Shut- status. mality; however, the down battery power is almost 2.
- Page 62 50/60 Hz ± 0.05 Hz Output vTHD < 3% (linear load) < 105%: Continuous Overload 105% ~ 125%: 1 minute; Capability 125% ~ 150%: 15 seconds Cress Factor IEC C13x3x2, IEC C13x3x2, Output Connection IEC C13x3x2 IEC C19x1 IEC C19x1 Amplon RT Series...
- Page 63 Appendix 1 Model RT-1K RT-2K RT-3K Online Mode Up to 94% ECO Mode Up to 97% Battery Voltage 24 Vdc 48 Vdc 72 Vdc Battery Type 12V/9 Ah Sealed lead-acid battery Battery & Backup Time 6.5 minutes 7 minutes Charger (Typical) * Charge Current 1.5A...
- Page 64 Dimension (W x D x H) 89 mm 89 mm 89 mm Weight 15 Kg 27 Kg 44 Kg Nominal Voltage 24Vdc 48Vdc 72Vdc Type NOTE : 1. Refer to the rating label for the safety rating. Amplon RT Series...
-
Page 65: Appendix 2 : Warranty
Appendix 2 Warranty Appendix 2 : Warranty Seller warrants this product, if used in accordance with all applicable instructions, to be free from original defects in material and workmanship within the warranty period. If the product has any failure problem within the warranty period, Seller will repair or replace the product at its sole discretion according to the failure situation. - Page 66 5013258001...
Need help?
Do you have a question about the RT Series and is the answer not in the manual?
Questions and answers