Table of Contents
Advertisement
Quick Links
Advertisement
Table of Contents

Summary of Contents for Predator VX360
- Page 2 1 PVR Control Case The Quick Reference Guide describes how to prepare the VX360 for use along with instructions on 1 Control Case strap mounting bracket how to wear and operate the unit and maintain its waterproof integrity correctly. On the reverse of 1 Neoprene Armstrap the Quick Reference Guide there are detailed Warnings &...
-
Page 3: License, Product Registration & Warranty Information
Product Registration Get better support, upgrades and advice! By registering your VX360 you can be assured of a better and more prompt service plus many other benefits. Have your serial number to hand and log onto www.predatorworld.co.uk. Look for the product registration link and fill in your details. - Page 4 License, Product Registration & Warranty Information The Predator VX360 is warranted to be free from defects in materials or workmanship for one year from the date of purchase. Within this period, Predator Technology Ltd will at its sole option repair or replace any components that fail in normal use.
-
Page 5: Safety
Attempt to control the equipment whilst PRECAUTION: Indemnity concerning recording content engaged in sporting or recreational Predator Technology Ltd shall in no event be liable for the loss of recordings due to malfunction or defect activities DON’T of this unit, its accessories or recordable media. - Page 6 Water Resistance (IMPORTANT) The Predator VX360 is designed and tested to remain water tight to a depth of 3m for over an hour and dust tight indefinitely with the lid closed & locked. It is also designed and tested to remain water tight if dropped into water from up to 1.5m, however the success of the product in these tests...
-
Page 7: Care
Use a lint free cloth or a clean, dry finger. Warning Check the lid gasket for cracks or breaks. If found do not use unit. Contact Predator When connecting the A/V cable, be careful Technology Ltd directly. - Page 8 Wipe moisture from the camera lens filter with a clean soft lens cloth. Storing the Predator VX360 o Ensure that the VX360 is stored in a dry environment away from direct and prolonged exposure Grit, sand and salt crystals can cause to sunlight or heat as this will result in irreversible damage.
-
Page 9: Table Of Contents
Contents INTRODUCTION Welcome Box Contents License, Product Registration & Warranty Information Safety Care OVERVIEW Predator VX360 Controls Charging and Installation Product Setup OPERATION Predator Technology Ltd PO Box 6792 Recording Dorset. UK Playback BH18 0AS Downloading Tel: (UK) 08446 360720 APPENDIX email: support@predatortechnology.co.uk... -
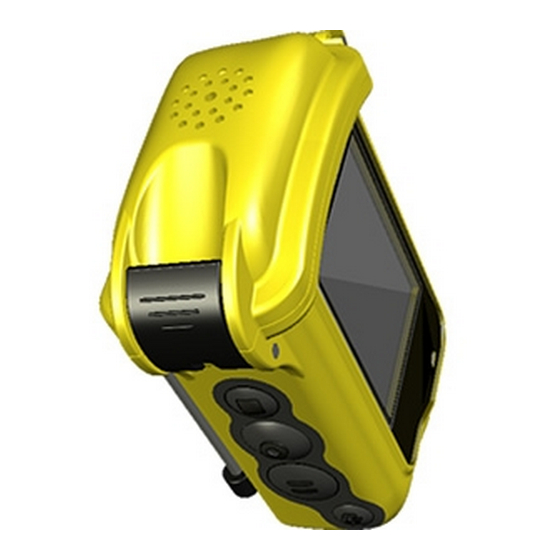
Page 10: Predator Vx360
Predator VX360 Predator VX360 Your wearable, waterproof VX360 digital video system is built to capture the most exciting footage from the most adventurous of sports. With a convenient strap and headband, the VX360 keeps you hands free whilst it gets on with the job of recording the ultimate in video footage. - Page 11 Camera and Mounting Bracket Personal Video Recorder (PVR)
-
Page 12: Controls
Controls Video Control Buttons POWER ON/OFF button: o Firmly press and hold for 2 seconds then release the button to switch the unit on o Firmly press and hold to turn the unit off RECORD button: o Press and release to start or resume recording o If the LCD backlight is off before pressing, press any button and release to turn the backlight on then press record to start recording o The recording indicator on the LCD Viewing Panel will glow red when recorder is... - Page 13 Controls Setup and Review Buttons SETUP button: Press and release to enter or exit the Program Settings of the recording device from the main menu, the Video Settings when in video mode or the Playback Settings when in playback mode. PLAY/PAUSE button: Use to confirm selection on pages and menus Use to play or pause footage in video playback mode...
-
Page 14: Charging And Installation
Charging & Installation Installing the Battery & Charging the VX360 The Predator VX360 uses a single lightweight Lithium Ion battery located in the back of the PVR. Disposal of waste batteries and end- The battery is removable after installation but it is recommended that it is left in the PVR unless a of-life electrical and electronic Predator external rapid battery charger is to be used or it is swapped out or replaced. - Page 15 Prevent water, dirt and foreign matter from contacting with the terminals. The following SD cards can be used in the VX360: 256MB, 512MB, 1GB, 2GB (Class 2 or higher) After use return the SD card to its case The following SDHC cards can be used in the VX360: 4GB & 8GB and never leave exposed to heat, light, Format SD cards to work with this unit only otherwise media may become unusable.
-
Page 16: Product Setup
Attaching the Camera Cable to the Control Case Video Connector Before using the VX360 it is essential that the camera cable is connected correctly to the video connector on the waterproof control case. The connection can only be made in a particular orientation as the male and female components are asymmetric. - Page 17 Setting up the Arm Strap The VX360 Control Case with inserted PVR can be worn on the upper arm to enable you to carry it whilst keeping your hands free for other activities. The arm strap in conjunction with the strap mounting bracket allows for the control case to be attached and removed from the arm without the need for detaching the arm strap or mounting bracket at the same time.
- Page 18 Product Setup Attaching the arm strap to your arm o Create a loose loop by threading the curved end of the strap through the D-ring on the opposite end o Slide the loop up the left arm ensuring that the mounting bracket catch is facing down the o Position the strap above the bicep muscle with the mounting bracket on the top or outer side of the arm and the curved end of the arm strap and the D-ring on the inner side of the o To secure the strap;...
- Page 19 Product Setup Attaching and Removing the Control Case from the Arm Strap The control case can be attached and removed independently of the arm strap due to the inclusion of the mounting rail. This facilitates camera angle set up, reviewing footage and changing settings without having to remove the arm strap.
- Page 20 Attaching the Eyeball Camera to the Socket Mounting Bracket The VX360 Eyeball Camera can be worn on the head to enable you to carry it whilst keeping your hands free for other activities. The Head Strap in conjunction with the Socket Mounting Bracket provides a secure, rugged and lightweight method of shooting video without impacting on personal performance.
- Page 21 ‘grind’ the fastening surfaces together to increase the strength of the bond. This provides a small amount of slack that o Rotate the camera within the mount until the top of the camera (where the Predator logo is prevents the camera rotating away from the imprinted into the rubber) is pointing up.
- Page 22 Attaching the Stick-on Mounting Pads to a helmet or other surface The Predator VX360 is supplied with two self adhesive Mounting Pads. These are specifically for enabling the user to attach the camera and mounting bracket to a helmet or other surface.
-
Page 23: Recording
The VX360 can be powered up and recording in seconds with a one touch record function when the adventure really starts. - Page 24 Recording Pausing, Resuming, Stopping and Power Off Almost identical in function to any standard camcorder, the VX360 recording function can be paused, resumed and stopped to ensure just the essential footage is captured. The system can even be powered down to preserve battery life when recording is not required. All of these functions have been designed to be easily accessible and simple to activate as attention to control of the unit should always be secondary to the activity.
- Page 25 Power Off Once the recording has been stopped the VX360 can be switched off. Do not attempt to switch off during recording as this may corrupt the footage. o Press the POWER ON/OFF button and hold for two seconds.
- Page 26 The preview mode can be accessed from the Main Menu by the following method: Preview Mode shows the live image Turn on the VX360 and ensure the camera is connected correctly. from the camera whilst the VX360 is Using the UP/DOWN buttons to highlight the Recorder Settings from the Main not recording.
- Page 27 Recording Recording Setup The Predator VX360 has a number of settings that can be altered to change the way in which it records video. The default settings of the unit have been carefully chosen to match the user’s typical requirements so it is unlikely that these will require changing, but for certain applications there may be a more suitable setup than the default.
-
Page 28: Playback
Please note that the recorded audio accompanying the video footage does The video footage on the Predator VX360 is stored as a file much the same as on a computer. To not play back when reviewing the video access video footage you need to access the Main Menu. The Main Menu appears when the unit... - Page 29 Playback Managing Video Files The VX360 allows you to delete or protect video files to enable you to make the most of the recording media you have available and reduce the risk of accidental removal of valuable footage. To delete a video file(s):...
- Page 30 Once the PVR is out of the Control Case its functions can be controlled using the supplied PVR Remote Control Unit. The majority of the buttons on the remote control unit replicate the functions of the VX360’s Control Case. However there are a number of additional functions that the remote control unit is able to...
- Page 31 Connecting the PVR directly to a TV allows the footage to be played back on a larger screen without the need for a computer. The VX360 is supplied with an RCA cable for this purpose. Please refer to the television manufacturer’s specification to ensure your television is compatible.
-
Page 32: Downloading
After use return the SD card to its case and never leave exposed to If you are using SDHC media in your VX360 you must have an SDHC compatible reader using the heat, light, static electricity or ejection method. If your reader is only SD compatible please revert to the PVR direct connection electromagnetic waves as this can method as described above. -
Page 33: System Settings
System Settings Program Setting The VX360 default Program Setting have been carefully chosen to match the user’s typical requirements so it is unlikely that most of these will require changing, but for certain applications and in certain countries there may be a more suitable setup than the default. - Page 34 Program Settings Menu Options Menu Option Default Effect Alternate Effect Setting Settings *TV Format A/V Output to TV is in PAL format NTSC A/V Output to TV is in NTSC format TV Out Adjustment Position Function Disabled Zoom Function Disabled Display Menu is displayed on unit LCD screen Menu is displayed on a connected TV screen...
-
Page 35: Product Specification
Product Specification Predator VX360 Specification Dimensions Camera (mm) 43 x 45 (W x L) Mount (mm) 44 x 114 (W x L) Case (mm) 104 x 68 x 46 (W x H x D) Weights Camera Case + PVR + Battery... - Page 36 Predator Splitscene 3 Warranty 12 Months Limited Warranty Specifications are correct at time of publication. Predator Technology Ltd reserves the right to alter specification at any time. Amendments will be posted at the discretion of the company. INFORMATION The Predator VX360 complies with Part 15 of the FCC regulations for Class B digital The IP rating is an international devices.
Need help?
Do you have a question about the VX360 and is the answer not in the manual?
Questions and answers