
Related Manuals for Torklift C2213


Summary of Contents for Torklift C2213
- Page 1 IMPORTANT OWNER-OPERATOR INSTALLATION INSTRUCTIONS C2213 / C2220 REVISED vers7 BY: JL 8/5/2015 TECH SUPPORT (800) 246-8132 AFTER INSTALL, PLEASE GIVE THIS BOOKLET TO YOUR CUSTOMER...
- Page 2 Warnings Truck Bed and Camper Protection Torklift does not recommend installing your camper on top of a plastic bed liner (or other compressible material such as foam). These materials can act as a spring, causing increased vertical truck camper movement independent of the vehicle. Plastic bed liners can slide on the truck bed surface, and the truck camper can slide on top of the bed liner.
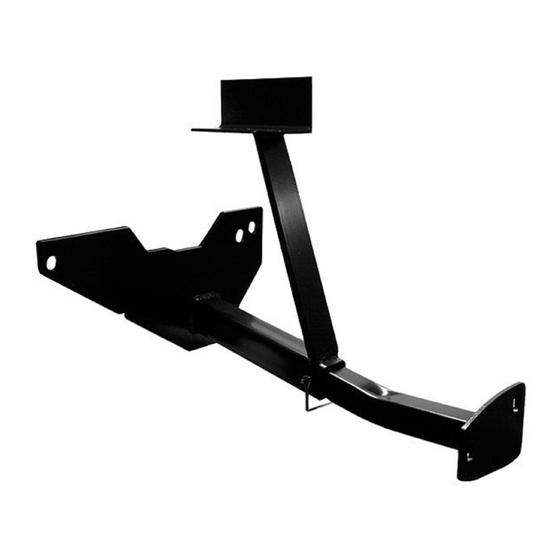
- Page 3 C2213/C2220 PARTS INVENTORY 2- 1-1/2” X 3/16” X 17-7/8”(45cm) BENT INSERT 6- 1/2” GR5 FLAT WASHER 1- 1/2” BOLT FISHER 2- 1/4” X 1” X 2” PLATE WASHER 2- 1/2” GR5 STAR WASHER 2- TIE DOWN FRAME PLATE 2- 1/2” -13 X 1-1/2” GR5 HEX BOLT 2- SPRING PERCH PLATE 6- 1/2”...
- Page 4 PHOTO 1.1 PHOTO 1.2...
- Page 5 PHOTO 2.1 PHOTO 2.2 STEP 3...
- Page 6 Locate the driver’s side front bed cross member perch. Remove the factory bolt from the perch and bed cross member (keep the factory bolt handy). SEE PHOTO 3.1 PHOTO 3.1 STEP 4 Locate the driver’s side tie down and insert the bolt fisher end through the left hole in the tie down.
- Page 7 PHOTO 4.1 PHOTO 4.2...
- Page 8 STEP 5 Locate the supplied spring perch plate and install underneath the spring perch. Threading the previously installed 1/2” -13 x 1-1/2” square bolt though the offset hole on the spring perch plate. Install and hand tighten one 1/2” GR5 flat washer, one 1/2” GR5 lock washer and one 1/2”...
- Page 9 PHOTO 5.2 STEP 6 Repeat previous steps on passenger side. STEP 7 Tighten all fasteners to 60 ft-lbs.(81nm) with a torque wrench. PHOTO 7.1...
- Page 10 PHOTO 7.1...
- Page 11 TORKLIFT’S BOLT FISHING GUIDE Your guide to understanding the installation of our frame mounted tie downs. Note: The hardware may vary as to -Coiled End of Bolt Fisher- what is being fished along with the bolt. In this instance a 1” X 2” plate washer is being fished along with the hex bolt.
- Page 12 On one end of each of your tie down inserts is a triangular plate referred to by Torklift as a bullet plate. Your tie down inserts should be installed with the shorter side of the bullet plate facing away from each other, i.e.. The shorter side of the front insert should point to the front of the truck and the shorter side of the rear insert should point towards the rear of the truck.
- Page 13 Due to the extreme, harsh, undercar environment that your Torklift products live in, (consistently sprayed with corrosive road chemicals such as salt, and road debris), Torklift does not warranty the power coated finish.
- Page 14 Some states do not allow the exclusion or limitation of incidental or consequential damages, so the above limitation or exclusion may not apply to you. Any damage to Torklift products as a result of misuse, abuse, neglect, accident, improper installation or any use violation of instructions furnished by Torklift or WHEN USED IN ANY COMMERCIAL APPLICATION WILL VOID THE WARRANTY.
- Page 15 Thank you for making TorkLift your choice for truck, camper packages and accessories for your vehicle. By choosing TorkLift products, you have chosen a company that has been serving the RV industry for nearly 40 years and whose name has become synonymous with strength, quality and advanced design and installation.
- Page 16 They are designed for each make and model to fit tight to the frame so as not to compromise ground clearance. TorkLift tie downs are not universal ‘one size fits all’ therefore all the problems with correct fit for each particular application have been eliminated.
- Page 17 OFFICIAL WARRANTY REGISTRATION CARD PLEASE FILL OUT THIS FORM COMPLETELY AND RETURN TO TORKLIFT WITHIN 30 DAYS OF PURCHASE ACCOMPANIED BY A COPY OF YOUR ORIGINAL RECEIPT TODAY’S DATE: _________________________ 1. PART(S) PURCHASED PART#: ___________________ PART#: _______________________ PART#: ___________________ PART#: _______________________ 2.
Need help?
Do you have a question about the C2213 and is the answer not in the manual?
Questions and answers