Table of Contents
Advertisement
Advertisement
Table of Contents

Related Manuals for Sangean HD Radio HDR-14


Summary of Contents for Sangean HD Radio HDR-14
- Page 1 HDR-14 Version 1...
- Page 2 HD Radio technology manufactured under license from iBiquity DigitalCorporation. U.S. and Foreign Patents. HD Radio™ and the HD, HD Radio and “Arc” logos are proprietary trademarks of iBiquity Digital Corp. For United States: Cautions to the user The changes or modifications not expressly approved by the party responsible for compliance could void the users authority to operate the equipment.
- Page 3 VERY IMPORTANT PLEASE READ Sangean suggest that you keep your AC Adapter at least 12 inches away from the radio while listening to the AM Band. Your Sangean Radio is powered by an AC adapter which is a “switching” or “switch-mode” type. The DOE (Department Of Energy) has a Federal mandate;...
- Page 4 Cautions Do not allow this radio to be exposed to water, steam or sand. Do not leave your radio where excessive heat could cause damage such as in a parked car where the heat from the sun can build up even though the outside temperature may not seem too high.
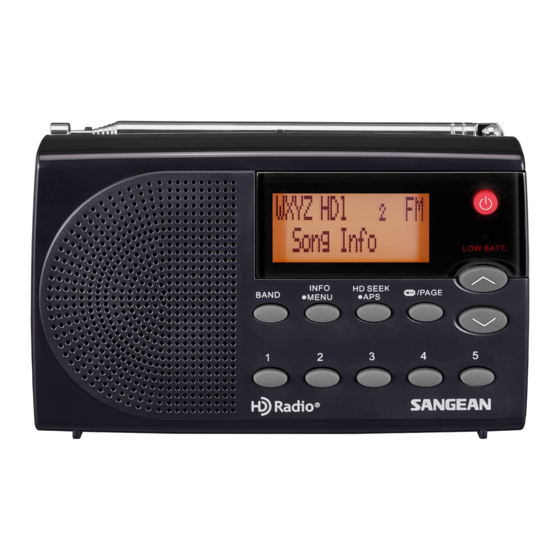
- Page 5 Controls 1. Speaker 8. Preset 1-5 2. LCD display 9. Info/Menu button 3. Power button 10. Band button 4. Low battery indicator 11. Volume control 5. Tuning up/down button 12. Headphone socket 6. Select/Page button 13. DC IN socket 7. HD Seek/APS button...
- Page 6 Controls 14. Telescopic antenna 15. Battery compartment 16. Lock switch...
- Page 7 Controls 17. Swivel stand If needed, when the antenna is fully extended you can stabilize the radio using the swivel stand located on the bottom of your radio by following the above diagram.
-
Page 8: Battery Operation
Battery operation Using the AC power adaptor 1. Open the battery cover on the rear of the unit by 1. The AC power adaptor required for this unit should pushing the latch downward. be 5 volts DC at 0.8A center pin positive. Insert the 2. -
Page 9: Setting The Clock Manually
Auto clock set mode Setting the clock manually 1. Press the Power button to switch on your radio. When choosing manual setting as the clock time setting 2. Press the Band button to select FM radio mode. of your radio, the “RBDS Auto CT” function will be 3. -
Page 10: Setting The Time Format
Setting the time format Scan tuning FM/AM 1. Press and hold the Menu button to enter the menu 1. Make sure the telescopic antenna is fully extended in setting and then press the Tuning up/down button to advance. select “12/24 hour”. 2. -
Page 11: Manual Tuning - Fm/Am
Manual tuning – FM/AM 1. Press the Power button to switch on your radio. 2. Press the Band button repeatedly to select the desired frequency band. 3. Press and release the Tuning up/down button to tune to a station. The frequency will change in steps of 50kHz/100kHz/200 kHz in FM or 9 kHz/10 kHz in AM. -
Page 12: Recalling A Preset Station
Recalling a preset station 1. Press the Power button to switch on your radio. 2. Select the required operating mode using the Band button. 3. Press the Page button to select the required preset page and momentarily press the required Preset button, your radio will tune to the station stored in the selected preset memory. - Page 13 Tuning region Receiving HD Radio stations Your radio can be configured for any one of the four When the radio is tuned to an HD Radio station, the international tuning regions. HD Radio logo will flash in the display, indicating that 1.
- Page 14 HD Radio (APS) Auto Preset System Emergency alert (EA) This system will automatically scan and preset the Emergency Alerts (EA) is a warning system used received stations in the order of signal strength, .i.e. by broadcasters to notify listeners about potential best reception station will be preset at Preset 1 of Page hazardous situations related to extreme weather, 1 and so on.
- Page 15 If you choose “Off”: all the alerts that are broadcast If State/County was selected: within the radio’s range will be received. The default 1) Press the Tuning up/down button to change the setting is “Off”. Press the Select button to confirm the State and press the Select button to confirm the setting.
- Page 16 If Off was selected: the current Location preset will be Emergency Alerts History disabled. Press the Select button to confirm the setting. Once the radio detects an alert, it will sound an alert Press the Tuning up/down button to select “Save” or tone, display the alert category (e.g, Weather, “Back”.
- Page 17 Snooze an EA: Press and release any button other Indicators for Emergency alerts than the Power button will snooze the EA for 10 Your radio may display various EA indicators on the minutes. Before the “snooze” time has expired, no display.
-
Page 18: Display Options
Display options a. RDS (Radio Data System) status Your radio has a range of display options when in FM mode. RDS clock Press and release the Info button to cycle through the time indicator various options. Time Note: The radio only provides displays when there is information available. - Page 19 b. HD Radio status Press and release the Info button to cycle through the various options. Date Plus (+) indicator: additional HD Radio stations are available Current station supports Multicast set index Emergency Alerts HD Radio indicator Preset page (1-4) Station name Preset number (1-5) Frequency band...
-
Page 20: Setting The Alarm Clock
Setting the alarm clock Your radio has 2 separate alarms which can be set “Weekdays”-the alarm will sound on weekdays only to wake you to FM, AM or buzzer. Each alarm can be “Once”- the alarm will sound only once Press the Tuning up/down button to select your set to sound once, daily, on weekdays or weekends. -
Page 21: When The Alarm Sounds
When the alarm sounds Sleep timer To cancel a sounding alarm, press the Standby button Your radio can be set to turn off after a preset time has elapsed. The sleep timer setting can be adjusted to cancel a sounding alarm. between 15 and 180 minutes. -
Page 22: Headphone Socket
Contrast Headphone socket The contrast of the display can be adjusted. A 3.5mm Headphone socket located on the left hand 1. Press and hold the Menu button to enter the menu side of your radio is provided for use with headphones. setting. -
Page 23: Reset The Radio
Reset the radio Specifications If your radio fails to operate correctly or some digits on Power requirements the display are missing or incomplete, please carry out Power Supply: AC 100~240 volts, 50 Hz-60 Hz ,DC 5V the following procedure. 0.8A only (switching adaptor) 1. - Page 24 5V/0.8A center pin positive Operating temperature range: 0°C to +40°C Sangean reserves the right to amend the specifications without notice. If at any time in the future you should need to dispose of this product please note that: Waste electrical prod- ucts should not be disposed of with household waste.