Table of Contents
Advertisement
Available languages
Available languages
Advertisement
Table of Contents

Subscribe to Our Youtube Channel
Related Manuals for ThermoPro TP-20


Summary of Contents for ThermoPro TP-20
- Page 1 Cook Like A Pro Every Time! Remote Food Thermometer with Dual Probe Model No.: TP-20 Instruction Manual Page 2 Manuel d'Utilisation Page 15 Bedienungsanleitung Seite 31 Istruzioni per l’uso Pagina 46 Manual de instrucciones Página 61 V20180514 EN DE FR IT ES...
-
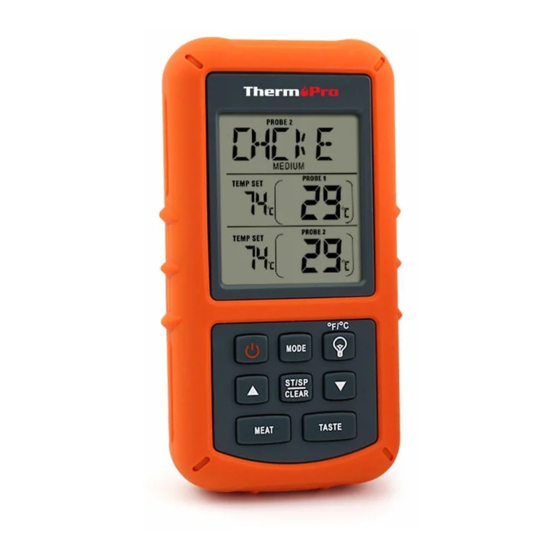
Page 2: Receiver Features
Belt clip/Stand – Belt clip allows you to be mobile. Clip the receiver Introduction unit to belt. Swings out and allow you to stand the receiver on tabletop Congratulations on your purchase of the Professional Remote Food as well. Thermometer, a programmable radio frequency food thermometer. You will now be able to remotely monitor the temperature of cooking food and the temperature inside your grill, oven or smoker from anywhere in Buttons... -
Page 3: Installing Batteries
LCD Screen Installing batteries Open the battery compartment of the receiver and insert two “AAA” Thermometer mode Timer mode batteries with correct polarity. Open the battery compartment of the Timer transmitter and insert two “AAA” batteries with correct polarity. Meat type Taste level Turn On/Off Unit Probe 1 Temp... - Page 4 Loss link alert doneness level, the receiver will beep and the LCD backlight will be turned on. Press any button to stop the beep. If the receiver is taken out of range or there is abnormal external interference or after shutting off the transmitter, the receiver may not be Measure meat temperature set to your specific taste able to receive the transmission from the transmitter.
-
Page 5: Using The Timer
Note: The LO BBQ temperature alarm will not be activated until the 13. Press any button to turn off the alert. actual BBQ temperature goes above the set LO temperature. 14. Take the first piece of steak out of grill. 15. -
Page 6: Helpful Hints
Cautions: reaches 0'00” the timer starts counting up and it will beep for 60 seconds. Press any button to stop the timer. 1. Always wear a heat resistant glove to touch the stainless steel probe sensors or wires during or just after cooking. Do not touch with bare Count up hands. -
Page 7: Limited Two-Year Warranty
LIMITED TWO-YEAR WARRANTY FCC Compliance ThermoPro warrants this product to be free of defects in parts, materials Information to user and workmanship for a period of two years, from date of purchase. Warning: Changes or modifications to this unit not expressly approved by... - Page 8 º º 160 F/71 C º º 165 F/74 C º º 170 F/77 C º º Lamb 145 F/63 C º º Fish 160 F/71 C º º Program 145 F/63 C º º Modèle No.: TP-20 -14- -15-...
-
Page 9: Caractéristiques Du Récepteur
99-heures, 59-minutes 99-heures, 59-minutes, minuterie avec un Introduction compte à rebours et un comptage progressif Félicitations pour votre achat du thermomètre à distance professionnel Plage de température de la sonde : 32˚F à 572˚F (0˚C à 300˚C). pour les aliments, thermomètre avec une fréquence radio programmable Tolérance de température de la lecture interne des aliments : +/-1.8˚F spécialement pour les aliments. - Page 10 Caractéristiques du transmetteur 5.MEAT – En mode thermomètre, appuyez pour sélectionner le type de viande: PROG (programme – Utilisateur Auto-Défini), GBEEF (Viande Compartiment des piles haché), GPOUL (Volaille hachée), BEEF, VEAL, CHCKE (Poulet), PORK, POULT (Volaille), LAMB, FISH & HAM et BBQ. En mode minuterie appuyez pour sélectionner le mode Heure, Minute ou le mode Minute et Second.
- Page 11 Appuyez sur le bouton ºF/ºC/ sur le transmetteur pour activer/ est perdu. En appuyant sur une touche quelconque, le récepteur arrête désactiver le transmetteur; le signal sonore de perte de la liaison. Pour retrouver le signal de transmission, déplacez le récepteur plus proche du transmetteur, le lien doit être redémarré...
- Page 12 rétroéclairage de l'écran LCD sera allumé. Appuyez sur un bouton 6. Appuyez sur le bouton S./S./ /CLEAR pour allumer/éteindre la pour arrêter le bip. fonction d'alarme. 7. Appuyez sur le bouton TASTE pour afficher le réglage de la Mesurer la température de la viande réglée à votre température élevée ou de la basse température.
-
Page 13: Utilisation De La Minuterie
6. Appuyez sur Mode pour sélectionner la sonde 1 du thermomètre. 2. Appuyez sur MEAT pour basculer entre Hour : Minute vers minute : Appuyez sur MEAT puis BEEF sera affiché. second et retourner. ▲ or ▼ 3. Appuyez sur pour ajuster le réglage de la minuterie. -
Page 14: Astuces Utiles
chaque utilisation. 4. Appuyez et maintenez S./S./ /CLEAR pour remettre le réglage à 00:00. 4. Ne pas utiliser le receveur sous la pluie. Il n'est pas résistant à la pluie. 5. Lorsque comptage progressif minuterie atteint 59 minutes et 59 Le transmetteur est résistant à... -
Page 15: Garantie Limitée De Deux Ans
Remarque : Cet équipement a été testé et se trouve dans les limites de instructions sur la manière d'emballer et d'envoyer le colis à ThermoPro. la Classe B des appareils digitaux, en accord avec la partie 15 de la Réglementation FCC. - Page 16 145 F/63 C º º 160 F/71 C º º 165 F/74 C º º 170 F/77 C º º Poisson 145 F/63 C º º Jambon 160 F/71 C º º Programme 145 F/63 C º º Modell-Nr.: TP-20 -30- -31-...
- Page 17 Temperaturtoleranz der internen Lebensmittelmessung: +/-1.0˚C Einfü h rung (+/-1.8˚F). Herzlichen Glückwunsch zum Kauf des professionellen kabellosen Batteriefach - enthält 2 AAA-Batterien. Lebensmittel-Thermometers, einem programmierbaren Funkfrequenz Gürtelclip/Ständer - Gürtelclip ermöglicht es Ihnen, mobil zu sein. Lebensmittel-Thermometer. Sie werden nun in der Lage sein, die Empfangseinheit am Gürtel befestigen.
- Page 18 LCD (Liquid Crystal Display) - zeigt die Temperaturen von Sonde 1 Sekunden''-Modus zu wählen. und Sonde 2. Es schaltet automatisch zwischen den Anzeigen von 6. GESCHMACK - Im Thermometer-Modus drücken, um den Fleis- Sonde 1 und Sonde 2. chgeschmack,RARE, MED RARE, MEDIUM, MEDIUM WELL und Ständer - Ermöglicht Ihnen, den Sender auf einen Tisch zu stellen WELL DONE zu wählen.
- Page 19 Messen Sie Fleischtemperatur im USDA Garheitsgrad- a. Setzen Sie die Edelstahlsonden in die entsprechenden Buchsen des Senders. Temperaturbereich b. Schalten Sie den Sender durch Drücken der Taste ºF/ºC ein. Der 1. Sie können zwei Sonden (Sonde 1 und Sonde 2) zur Messung und Sender wird die aktuellen Temperaturen auf dem LCD-Display Überwachung von Temperaturen von zwei Stück Fleisch oder zwei anzeigen.
- Page 20 Vorgehensweise für den typischen Einsatz auf einem 3. Sobald die Temperatur des Fleisches den voreingestellten Garheitsgrad erreicht, piept der Empfänger und die LCD-Beleuchtung Grill im Freien wird eingeschaltet. Drücken Sie eine beliebige Taste, um den Die folgenden typischen Beispiel werden die Schritte zeigen, damit das Signalton abzustellen.
-
Page 21: Nützliche Hinweise
eingeschaltet. CLEAR Taste, um den Timer fortzusetzen. 7. Wenn der Countdown 00:00 erreicht, ertönt eine Minute lang ein 13. Drücken Sie eine beliebige Taste, um den Alarm auszuschalten. Alarm und die Hintergrundbeleuchtung wird eingeschaltet. 14. Nehmen Sie das erste Steak vom Grill. Hinweis: Wenn der Timer unter 1 Stunde 01:00 zählt, wird das Display 15. - Page 22 weiterhin besteht, ist wahrscheinlich der interne Sondendraht 9. Nicht für die Nutzung durch Personen im Alter von 12 Jahren oder entweder durch Beschädigungen von Feuchtigkeit oder Hitze darunter bestimmt. kurzgeschlossen worden. Reinigung Tauchen Sie die Sonde während der Reinigung nicht in Wasser. Lassen Sie die Sonde oder den Sondendraht nicht in Kontakt mit 1.
- Page 23 º 165 F/74 C º º 170 F/77 C º º Versenden des Produkts an ThermoPro den Kundenservice per Telefon oder E-Mail. Fisch 145 F/63 C º º Diese Garantie gibt Ihnen bestimmte Rechte und eventuell haben Sie zudem andere Rechte, die von Staat zu Staat variieren.
- Page 24 S./S./ /CLEAR LCD (Display a cristalli liquidi) – Consente di visualizzare tutte le icone, la temperatura e il tempo. Modello N.: TP-20 Visualizzazione della temperatura a doppia sonda. Allarme programmabile con temperature predefinite per certi tipi di alimenti. Timer per conteggio alla rovescia e conteggio progressive 99 ore, 59 minuti.
-
Page 25: Display Lcd
Tolleranza di rilevazione della temperatura interna: +/-1.8 F(+/-1.0 C). º º 6. TASTE – In modalità Termometro, premere per selezionare il grado Vano batterie – 2 batterie AAA. di cottura della carne: RARE (Molto al sangue), MED RARE (Al sangue), MEDIUM (Cottura media), MEDIUM WELL (Media-Ben Clip da cintura/Supporto –... - Page 26 LCD (Display a cristalli liquidi) – visualizza la temperatura della seguendo le istruzioni riportate di seguito: sonda 1 e 2. Passerà automaticamente dalla visualizzazione della a. Inserire le sonde in acciaio inossidabile negli spazi corrispondenti del sonda 1 a quella della sonda 2 trasmettitore.
- Page 27 Misurare la temperatura della carne in base ai livelli o diminuirà la temperatura impostata. Premendo MEAT si torna ai valori USDA predefiniti. di cottura stabiliti dall'USDA 3. Una volta che la carne raggiunge il livello prestabilito di cottura, il 1. È possibile utilizzare due sonde (Sonda 1 e Sonda 2) per misurare e ricevitore emette un segnale acustico e la retroilluminazione dello monitorare le temperature di due pezzi di carne o di due sezioni dello schermo LCD si accende.
- Page 28 vengono cucinati due pezzi di bistecca di manzo insieme a una bistecca 16. Premere qualsiasi pulsante per fermare il segnale acustico. di manzo con un livello di cottura media, mentre l'altra con una cottura 17. Spegnare la griglia. Rimuovere i sensori delle sonde da entrambe le media-ben cotta, secondo i livelli preimpostati dall'USDA.
-
Page 29: Suggerimenti Utili
Conteggio alla rovescia dalla carne. Riposizionare la punta della sonda al centro della parte più spessa della carne. Evitare di toccare l'osso o il grasso in eccesso. 1. Premere il pulsante MODE per selezionare la modalità TIMER. Il timer 00:00 con una piccolo icona TIMER verrà visualizzato nella Avvertenze: parte superior del display. -
Page 30: Servizio Clienti
4. Pulire il trasmettitore e il ricevitore con un panno umido. Non GARANZIA LIMITATA DI DUE ANNO immergere in acqua. ThermoPro garantisce che questo prodotto è privo di difetti di componenti, materiali e manodopera per un periodo di due anno, dalla Conformità FCC data di acquisto. - Page 31 º º 160 F/71 C º º 165 F/74 C º º 170 F/77 C º º Pesce 145 F/63 C º º Prosciutto 160 F/71 C º º Programma 145 F/63 C º º Modelo No.: TP-20 -60- -61-...
- Page 32 contador ascendente. Introducción Rango de temperatura of probe: 32 F to 572 F (de 0 C a 300 C). º º º º Felicitaciones por su compra del termómetro remoto profesional para Tolerancia de temperatura de la lectura interna del alimento: +/-1.8 F º...
- Page 33 5. CARNE – En modo termómetro, para seleccionar el tipo de carne pre- Características del emisor sione la tecla: PROG (programa – User Self-Defined), GBEEF(carne Compartimento de la batería de ternera picada), GPOUL (carne de potro picada), BEEF (ternera), CHCKE (Pollo), PORK (Cerdo), POULT (Potro), LAMB (Cordero), FISH (Pescado) HAM(JAMÓN) y BBQ.
-
Page 34: Apagado Automático
Apagado automático fabricación. Normalmente NO necesitan volver a sincronizarse. Sólo conecte las sondas e inserte las pilas, encienda el receptor y el tran- El receptor se apagará automáticamente si no ha recibido la señal de smisor y espere unos segundos. Entonces podrá... - Page 35 ▲ o ▼ Nota: La alarma de temperatura de LO BBQ no se activará hasta que la 2. Presione para subir o bajar la temperatura. Mientras presiona temperatura real de la barbacoa supere la temperatura LO ajustada. ▲ o ▼ la pantalla cambia a PROG (programa). Apretando y sosteniendo el botón subirá...
-
Page 36: Uso Del Temporizador
(al punto), el receptor emitirá un pitido y se encenderá la pantalla ▼ BORRADO. El TIMER (temporizador) se detendrá. Pulse el botón LCD. S./S./ /BORRADO para reactivar el temporizador. 13. Pulse cualquier botón para desactivar la alerta. 7. Cuando el contador llegue a 00:00, sonará una alarma y se 14. - Page 37 contacto. Si el problema persiste, es probable que el cable de la 9. NO recomendado para que sea usado porpersonas de 12 años y sonda interna haya sufrido un cortocircuito y se haya dañado por menores de dicha edad. humedad o calor. Limpieza No sumerja la sonda en agua durante la limpieza.
-
Page 38: Atención Al Cliente
160 F/71 C º º 165 F/74 C º º ThermoPro garantiza que este producto estará libre de defectos en Pollo 165 F/74 C º º piezas, materiales y mano de obra durante un período dos años, a partir de la fecha de compra.
Need help?
Do you have a question about the TP-20 and is the answer not in the manual?
Questions and answers