Nokia E62 User Manual
Hide thumbs
Also See for E62:
- Service manual (238 pages) ,
- User manual (200 pages) ,
- Getting started manual (20 pages)
Table of Contents
Advertisement
Quick Links
Advertisement
Table of Contents

Related Manuals for Nokia E62


Summary of Contents for Nokia E62
- Page 1 Nokia E62 User Guide 9242115 Issue 1...
- Page 2 Copyright © 2006 Nokia. All rights reserved. Reproduction, transfer, distribution or storage of part or all of the contents in this document in any form without the prior written permission of Nokia is prohibited. Nokia, Nokia Connecting People, Xpress-on and Pop-Port are trademarks or registered trademarks of Nokia Corporation. Other product and company names mentioned herein may be trademarks or tradenames of their respective owners.
- Page 3 The availability of particular products may vary by region. Please check with the Nokia dealer nearest to you. EXPORT CONTROLS This device may contain commodities, technology, or software subject to export laws and regulations from the US and other countries. Diversion contrary to law is prohibited.
-
Page 4: Table Of Contents
Forward calls................28 Charge the battery..............12 Call restriction................29 Enter basic settings..............12 Log....................29 CD-ROM..................12 Device security ................29 Nokia support and contact information......12 Contacts................32 Your device..............13 Manage contact groups............32 Keys and parts................13 Manage default information..........33 Keypad lock (Keyguard)............15 Copy contacts between SIM and device memory....33 Common actions in several applications......15... - Page 5 Special messages...............49 Cable connection................72 Infrared..................73 Organizer................51 Internet access points..............73 Calendar..................51 SIM access profile...............74 Notes....................52 Data connections...............75 Calculator..................52 Connection manager..............76 Converter..................53 Modem..................76 Clock....................53 Mobile VPN ..................77 Personalization..............55 Office applications............78 Profiles..................55 File manager................78 Themes..................57 Documents...................78 Sheets....................80 Media applications............59 Presentation................81 Gallery....................59 Adobe Reader................83 RealPlayer ..................60 Screen export................84 Music player.................62...
- Page 6 Data synchronization..............95 Shortcuts................97 General shortcuts...............97 Application-specific shortcuts..........98 Nokia original enhancements.........101 Enhancements................101 Battery information...........102 1500 mAh Li-Polymer battery (BP-5L) information..102 Nokia battery authentication guidelines......102 Care and maintenance..........104 Additional safety information........105 Operating environment............105 Medical devices................105 Vehicles..................106 Potentially explosive environments........106 Emergency calls................106 CERTIFICATION INFORMATION(SAR)........107...
-
Page 7: For Your Safety
For your safety Read these simple guidelines. Not following them may be SWITCH OFF NEAR BLASTING dangerous or illegal. Read the complete user guide for Follow any restrictions. Do not use the device further information. where blasting is in progress. SWITCH ON SAFELY USE SENSIBLY Do not switch the device on when wireless... -
Page 8: About Your Device
Warning: Use only batteries, chargers, and cause interference or danger. enhancements approved by Nokia for use with this particular model. The use of any other types may NETWORK SERVICES invalidate any approval or warranty, and may be dangerous. -
Page 9: Get Started
Get started Model number: Nokia E62-1 Hereinafter referred to as Nokia device. Insert the SIM card and battery 1. Always switch the device off, and disconnect the charger before removing the battery. With the back of the device facing you, press the cover release button (1), and slide the back cover in the direction of the arrows (2). -
Page 10: Insert And Remove A Memory Card
corners of the cover, and slide the cover in the direction of the arrow (2). Insert and remove a memory 4. To insert the battery, align the contacts of the battery card with the corresponding connectors on the battery compartment, insert in the direction of the arrow, and If you have a memory card, follow the instructions to gently click the battery into place. -
Page 11: Switch On Your Device
2. If the device asks for a PIN code (or UPIN code, if you have a USIM card), lock code or security code, enter the code, and select OK. 3. To switch the device off, press the power key. Tip: When you switch the device on, it may recognize the SIM card provider and configure the correct text message, multimedia message, and GPRS settings automatically. -
Page 12: Get Started (Part 2)
98SE, Windows ME, Windows 2000, and Windows XP. the display. If the battery is completely discharged, it You can install Nokia PC Suite from the CD-ROM. Nokia PC may take a few minutes before the charging indicator Suite can be used only with Windows 2000 and Windows is shown. -
Page 13: Your Device
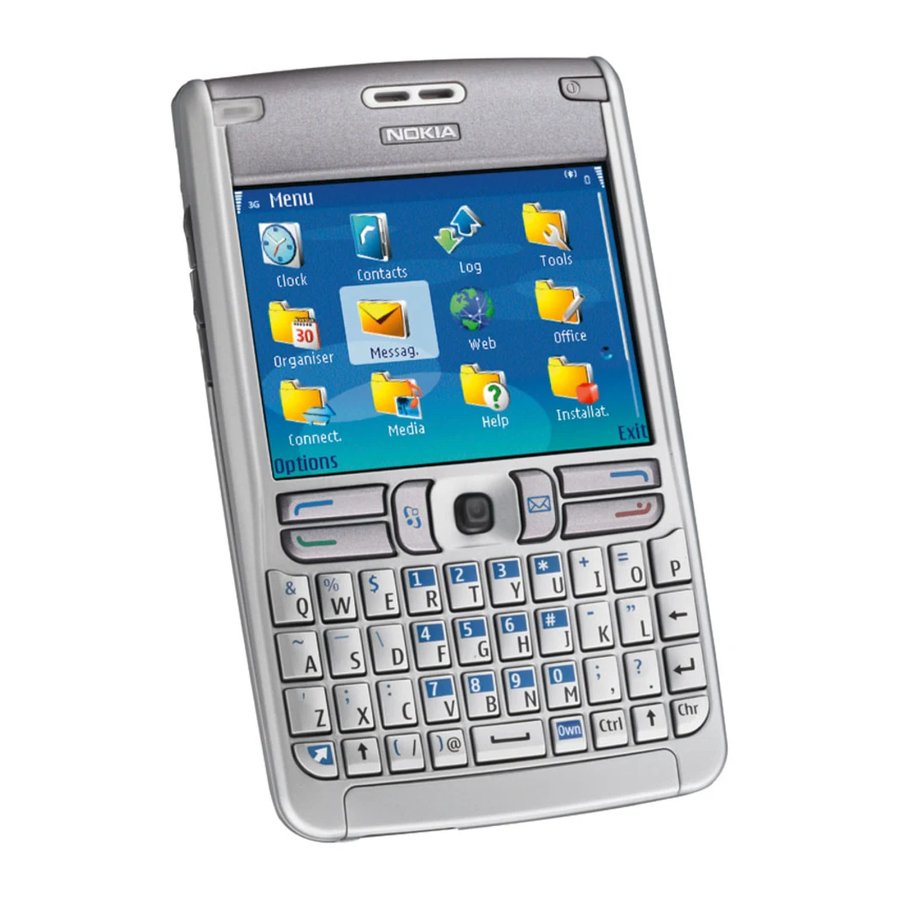
Your device Keys and parts 2 — Display 3 — Joystick 4 — Right selection key Front view 5 — End key 6 — E-mail key 7 — Backspace key 8 — Enter key 9 — Chr key 10 — Shift keys 11 —... - Page 14 Side view Joystick Press the joystick to edit or enter a selection, or to access the most commonly used functions in the different applications. Use the joystick to scroll left, right, up, down, or to move around on the display, for example when browsing.
-
Page 15: Keypad Lock (Keyguard)
Keypad lock (Keyguard) To scroll through a list of different accented characters, press and hold the chr key; then press the key you want as many times as you need to get the accented character When the keypad lock is on, calls may be possible to the you want. -
Page 16: Write Text
To send a file, select Options > Send. You can send a file To open a list of special characters, press the chr key. Use in an e-mail or multimedia message, or by transferring the joystick to scroll through the list and select a the file using infrared or Bluetooth. -
Page 17: Help And Tutorial
Help and tutorial Volume control You can find answers to your questions while using the Warning: Do not hold the device near your ear device even with no user guide present, because your when the loudspeaker is in use, because the volume may device includes both a task-specific help and a tutorial. -
Page 18: Type Label
Headset connector Antennas Your device has two internal antennas. Note: As with any other radio transmitting device, do not touch either of the antennas unnecessarily when the device is switched on. Contact with the antenna affects call quality and may cause the device to operate at a higher power level than otherwise needed. -
Page 19: About The Display
indicators for alarms, and applications you want to access The picture shows the normal use of quickly. the device at the ear for voice calls. To select applications that you want to access in the active standby mode, select Menu Tools Settings >... - Page 20 2 — Right selection text 3 — Left selection text 4 — Message display 5 — Active standby applications 6 — Signal indicator The picture shows elements of the application menu. 1 — Scroll to other pages 2 — Inactive page 3 —...
-
Page 21: Display Indicators
To view the most recently dialed numbers, press the call key. Scroll to a number or name, and press the call key again to call the number. To call your voice mailbox (network service), press and hold 1. To view calendar information, scroll right. To write and send text messages, scroll left. -
Page 22: Memory
A GPRS or EDGE packet data connection is on hold. Your Nokia device only supports the FAT16 file system for memory cards. If you use a memory card from another A data call is active. -
Page 23: Transfer Content Between Devices
5. Select your other device from the list. You are asked device. Using an incompatible memory card may damage to enter a passcode (1 to 16 digits) on your Nokia the memory card as well as the device, and data stored... - Page 24 The passcode is used only once to confirm this connection. device 6. Enter the code on your Nokia device, and select OK. Enter the passcode on your other device, and select If you have previously transferred data to your Nokia device, and your other device supports synchronization, OK.
-
Page 25: Your Device (Part 2)
Your device (part 2) Settings placed beside the application. Scroll to a new location, and select OK. When you switch the device on, it may recognize the SIM To move an application to a different folder, scroll to the card provider and configure the correct text message, application you want to move to another folder, and multimedia message, and GPRS settings automatically. - Page 26 To select different items, such as messages, files, or contacts, scroll to highlight the item you want. Select Options Mark/Unmark Mark to select one item or > > Options Mark/Unmark Mark all to select all items. > > Tip: To select almost all items, first select Options Mark/Unmark Mark...
-
Page 27: Make Calls
Make calls or name, and press the call key to dial the number.See When the device is locked, calls still may be possible to "Log," p. 29. the official emergency number programmed into your device. To adjust the volume of an active call, press the volume keys. -
Page 28: Vanity Dial
Vanity dial To mute a ringing tone instead of answering a call, select Silence. Vanity dialing allows you to substitute letters with To answer a new call during a call when the Call waiting numbers. The letters are used in conjunction with function is activated, press the call key. -
Page 29: Call Restriction
To check the current forwarding status, scroll to the To check the status of voice call restriction, scroll to the forwarding option, and select Options Check status. restriction option, and select Options Check status. > > To stop all voice call restrictions, scroll to a restriction To stop forwarding voice calls, scroll to the forwarding option, and select Options... - Page 30 Avoid using codes that are similar to emergency numbers Autolock period — Set a time-out after which the • to prevent accidental dialing of the emergency number. device is automatically locked and can be used only if the correct lock code is entered. Enter a number for the Codes are shown as asterisks.
- Page 31 restr. password. Enter the current code, then the new Tip: To send text messages to the SIM contacts code twice. The restriction password must be four digits while the fixed dialing service is active, you need long. For details, contact your service provider. to add the text message center number to the fixed dialing list.
-
Page 32: Contacts
Contacts Manage contact groups Select Menu > Contacts. Manage all of your contact information, such as phone numbers and addresses. Add a personal ringing tone, Create a contact group so that you can send text or e-mail voice tag, or a thumbnail image to a contact. Send contact messages to several recipients at the same time. -
Page 33: Manage Default Information
You can send, receive, view, and save contact cards as To copy contacts from a SIM card to device memory, select business cards in vCard or Nokia Compact Business Card Options SIM contacts... - Page 34 To view a received business card, select Open from the displayed notification, or open the message from the inbox folder in Messag.. To save a business card, select Options Save business > card when the incoming message appears on the device. To save a received business card, select Options Save...
-
Page 35: Messages
Messages New message — Create and send a new text, • Select Menu > Messag.. multimedia, or e-mail message. Before sending or receiving messages, you may need to Inbox — View received messages, except e-mails and • do the following: cell broadcast messages. -
Page 36: Messaging Settings
Messaging settings Text messages Select Options > Settings. Your device supports the sending of text messages beyond the character limit for a single message. Longer To define or edit settings for different message types, messages are sent as a series of two or more messages. select Text msg.,... -
Page 37: Multimedia Messages
Text messages on the SIM card Message validity — Select how long the message • center resends your message if the first attempt fails (network service). If the recipient cannot be reached Text messages may be stored on your SIM card. Before you within the validity period, the message is deleted from can view SIM messages, you must copy the messages to the message center. - Page 38 Create and send multimedia Create presentations messages Select New message Multimedia message. > 1. In the field, press the joystick to select recipients The default setting of the multimedia message service is from Contacts, or enter the recipients' mobile phone generally on.
- Page 39 Creating multimedia presentations is not possible if 3. Enter the text of the message, and press the joystick creation mode is Restricted. To change MMS creation to send it. mode, select Messag. Options Settings > > > Multimedia message. View presentations The available options may vary.
-
Page 40: E-Mail Messages
objects or attachments unless you are sure of the Multimedia retrieval — Select Always automatic • trustworthiness of the sender. always receive multimedia messages automatically, Aut. in home network to receive notification of a new To save a media object in its corresponding application, multimedia message that you can retrieve from the scroll to the object, select Options... - Page 41 standards SMTP, IMAP4 (revision 1), and POP3, and with mail messages while the messages are still on different push e-mail solutions. Other e-mail providers the e-mail server. You can then choose which may offer services with different settings or features than messages to download to your device.
- Page 42 mailbox, select Options Settings E-mail To directly and immediately access the default mailbox, > > > display_text mapping for press the e-mail key. 'qtn_mce_settings_mail_rm_in_use', locale='en-US'} To open a new mail to send from the default mailbox, the mailbox. press the e-mail key for two seconds. If you have defined several mailboxes, you must select the To retrieve received e-mail messages to your device and mailbox that you want to use every time you start...
- Page 43 Read and reply to e-mail To view e-mail offline, select your mailbox. When the device asks Connect to mailbox?, select Yes. To view new e-mail messages offline, you need to retrieve Important: E-mail messages may contain viruses them from your remote mailbox. To retrieve e-mail or otherwise be harmful to your device or PC.
- Page 44 To reply to the sender of the e-mail with a text message To view folders in your IMAP4 mailbox, establish a or multimedia message, open the e-mail, and select connection, and select Options E-mail sett. Retrieval > > Options Create message.
- Page 45 E-mail account settings APOP secure login (for POP3 only) — Use with the POP3 • protocol to encrypt the sending of passwords to the remote e-mail server while connecting to the mailbox. Select Menu Messag. > Mailbox. > Settings for sent e-mail The settings available for editing may vary.
-
Page 46: Instant Messaging
US'} — Select whether you want to delete the e-mails IMAP4 folder path (for IMAP4 mailboxes • only from the device or from both the device and the only) — Define the folder path for folders to be server. Select {No display_text mapping for subscribed. - Page 47 Conversations with a single IM user log in to after you register to an IM service. Service providers may differ in their support of features. Conversations view shows a list of the individual If IM is not available from your wireless service provider, conversation participants with whom you have an it may not appear in the menu of your device.
- Page 48 IM groups contact list is not available, wait a few minutes and try to retrieve your contacts list manually. IM groups view shows a list of the IM groups that you Tip: The online status of your IM contacts is have saved or to which you are currently joined.
-
Page 49: Special Messages
Settings — Edit instant messaging application or Sort IM contacts — Select to list your IM contacts • • server settings. alphabetically or by their online status. Availabil. reloading — To update the online status of • The available options may vary. your IM contacts automatically, select Automatic. - Page 50 Ringing tone — To save a ring tone, select Options • > Save. Configuration message — You may receive settings • from your network operator, service provider, or company information management department in a configuration message. To accept the settings, open the message, and select Options Save...
-
Page 51: Organizer
If you select Delete You can synchronize your calendar data with a entry, only the current entry is deleted. compatible computer using Nokia PC Suite. For information on synchronization, see the PC Suite guide. To-do Create calendar entries You can create and maintain a task or list of tasks that must be done by a certain day. -
Page 52: Notes
To restore a task, scroll to it in the todo list, and select To write a new note, select Options note, write > Options Mark as not done. the text and press Done. > Calculator Calendar views To switch between the different calendar views, select Options in any calendar view. -
Page 53: Converter
Converter 1. To set the rate of exchange for the unit of currency, scroll to the Type field, and select Options Currency > rates. Select Menu Organizer > Converter. > 2. A list of currencies opens, and you can see the current The converter has limited accuracy, and rounding errors may occur. - Page 54 To remove an alarm, select Remove alarm. To delete a city, scroll right, scroll to the city, and select Options > Remove. Date and time settings Changing the home city may change the general system To change the date, time, their display formats, and the time of your device.
-
Page 55: Personalization
Personalization Profiles Ringing volume — Select the volume level of the • ringing tone. Message alert tone — Select a tone for received text • messages. Warning: In the offline profile you cannot make or E-mail alert tone — Select a tone for received e-mail •... - Page 56 Voice aid Dialer Recent calls To enter a number, press the selection key when you hear the correct digit. Continue selecting each digit until the entire phone number is displayed on the screen. To view a list of your missed calls, select Missed calls.
-
Page 57: Themes
To view received messages, with the most recent To stop an audio message that is playing, or to stop the message listed first, select {No display_text mapping for recording of an audio message, select Stop. 'qtn_list_inbox', locale='en-US'}Inbox. To send a recorded audio message, select {No display_text To launch the messaging application on your device, mapping for 'qtn_options_send_message', locale='en-... - Page 58 To preview a theme, highlight the theme you want to preview, and select Options > Preview. Select Apply start using the new theme.
-
Page 59: Media Applications
Media applications To download files into the Gallery in one of the main Copyright protections may prevent some images, music folders using the browser, select Graphic downl., Video (including ringing tones), and other content from being downl., Track downl., or Sound downl.. -
Page 60: Realplayer
RealPlayer To open the next or previous image for viewing, scroll right or left in the image viewer. Copyright protections may prevent some images, ringing To enlarge the viewed image on the display, select tones, and other content from being copied, modified, Options Zoom in, or press 5 or 7. - Page 61 problem causes a playback error, RealPlayer attempts Network — Change the access point to connect to the • automatically to reconnect to the Internet access point. Internet and to set the port range used when connecting. To save a media clip, select Options >...
-
Page 62: Music Player
Lowest UDP port — Enter the lowest port number of To select the previous or next track, scroll the joystick up • the server port range. The minimum value is 1024. or down. Highest UDP port — Enter the highest port number of •... -
Page 63: Recorder
You can personalize the sound of your music files with With Recorder, you can record up to 60 seconds of a voice Equalizer. You can use preset frequency settings based on memo, save the voice recording as a sound clip, and play styles of music, like classical or rock. - Page 64 To send a flash file to compatible devices, scroll to it, and press the call key. Copyright protection may prevent the sending of some flash files. To switch between flash files saved on your device memory or memory card, scroll left or right. The available options may vary.
-
Page 65: Services
Services Select Menu Media Services (network service). > > Services is one of the two browsers in your device. With Services, you can browse WAP pages that have been designed specially for mobile devices. For example, operators may have WAP pages for mobile devices. To browse regular Web pages, use the other browser in Menu >... -
Page 66: Web
Browse the Web Select Menu (network service). > is one of the two browsers in your device. With Web, you can browse regular Web sites. These pages use Use the joystick for browsing. The joystick is shown as a the extensible hypertext markup language (XHTML) or pointer on a Web page, and you can scroll the pages up, hypertext markup language (HTML). -
Page 67: Bookmarks
Your device may have some bookmarks loaded for sites them. Downloaded items are handled by the respective not affiliated with Nokia. Nokia does not warrant or applications in your device. endorse these sites. If you choose to access them, you... -
Page 68: News Feeds And Blogs
Web settings end the connection and close the browser, select Options > Exit. Select Menu Options > Settings. > > Clear the cache Define the following settings: Access point — Scroll to the access point to connect to A cache is a memory location that is used to store data •... -
Page 69: Services
Cookies — Select to allow or reject the sending and Check the availability of services, pricing, and fees with • receiving of cookies. Cookies are info the network your network operator or service provider. Service server collects about your visits to various Web pages. providers will also give you instructions on how to use They are necessary if you shop on the Web (for their services. -
Page 70: Connectivity
Connectivity Start using Bluetooth Copyright protections may prevent some images, music (including ringing tones), and other content from being Select Menu Connect. > Bluetooth. > copied, modified, transferred or forwarded. 1. When you activate Bluetooth for the first time, you are Your device offers several options to connect to the asked to give a name to your device. - Page 71 use the SIM card in your device to connect to the Sent folder in Messag. does not store messages sent network. See "SIM access profile," p. 74. using Bluetooth connectivity. If Bluetooth was turned off as a result of entering Bluetooth connectivity indicators Offline profile, you must re-enable Bluetooth manually.
-
Page 72: Cable Connection
Receive data 2. Select the device with which you want to pair, and enter the passcode. The same passcode must be If you want to receive data using Bluetooth, select entered to the other device as well. Bluetooth My phone's visibility Shown to >... -
Page 73: Infrared
USB as a connection type in joystick to turn on infrared on your device. Turn on the Manage connections settings in Nokia PC Suite. infrared on the other device. Insert a memory card to your device, connect the 3. -
Page 74: Sim Access Profile
— Enter your user name if required by • For more information about car kit devices and the service provider. User names are often case- compatibility with your device, see www.nokia.com and sensitive and provided by your service provider. your car kit user guide. Prompt password —... -
Page 75: Data Connections
Manage the SIM access profile When you activate the remote SIM access profile, you can use applications on your device that do not need network 1. Select Menu Connect. Bluetooth to activate > > or SIM services. Bluetooth connectivity in your device. To end the remote SIM access connection from your 2. -
Page 76: Connection Manager
Modem During a voice call, you cannot establish a GPRS connection, and any existing GPRS connection is put on hold unless the network supports dual transfer mode. Select Menu Connect. > Modem. > Together with a compatible computer, you can use your Connection manager device as a modem to connect to the Web. -
Page 77: Mobile Vpn
> VPN. > > > The Nokia mobile virtual private network (VPN) client creates a secure connection to compatible corporate Intranet and services, such as e-mail. Your device connects from a mobile network, through the Internet, to a corporate VPN gateway that acts as a front door to the compatible corporate network. -
Page 78: Office Applications
Office applications Select Menu > Office. To create a new document, select Options file. > Select Blank to create a new document without using a Some office applications are not available in all template or Use template to create a document based on languages. - Page 79 Edit documents Tip: To open a selected chapter in the normal view, scroll to the chapter, and press the joystick. To be able to edit a document, you must activate the edit mode: select the middle view and Options Edit >...
-
Page 80: Sheets
Sheets Find text To find a piece of text from the document, select Select Menu Office > Sheet. > Options > Find, enter the text in the Find: field, and press To open an existing workbook, browse for the folder the joystick. -
Page 81: Presentation
Work with cells To open a chart, open the outline view, select the worksheet and chart, and press the joystick. If charts are not visible, select Options > Expand. To insert cells, select the area where you want to insert new cells and Options Cells... - Page 82 View slide shows Outline view The outline view is used to navigate through long To start a slide show, select Options > Presentation. presentation documents. The view enables fast vertical Select from the following options: scrolling, rearranging of slides, and editing of objects. Manual —...
-
Page 83: Adobe Reader
to move forward and left or up to move backward. Select To change the search option for case and whole words, Options. select Options Search options. > Define the following options: Adobe Reader title, subtitle, text, Insert table, Insert • image —... -
Page 84: Zip Manager
Show screen content • View — View the document in full screen mode. You can also rotate the PDF document by 90 degrees in To show screen content with a data projector, open the either direction. screen export application, and select Options Select •... -
Page 85: Print
Print to the text and choose to include the header on the first page of the document. Footer — The maximum length of the footer is 128 Print a message or file from the device. Preview a print • job, define page layout options, select a printer, or print characters. -
Page 86: Settings
Settings Select Menu Tools > Settings. application in your device. When you change the > language, the device restarts. You can define and modify various settings of your device. Writing language — Select a language from the list. • Modifying these settings affects the operation of your Changing the writing language also affects the device across several applications. -
Page 87: Call Settings
directions. These settings are not available if you select Automatic redial — Select to redial a number if it • Active standby > On. was busy at the first call attempt. Your device makes a maximum of 10 attempts to connect the call. Summary after call —... - Page 88 Packet data — Determine when packet data Some or all access points may be preset for your device • connections are used, and enter the access point if you by your service provider, and you may not be able to use your device as a modem for a computer.
-
Page 89: Date And Time Settings
Configurations connections active at the same time; access points can share a data connection, and data connections remain To view and delete configurations for trusted servers, active (for example, during voice calls). See "Connection select Menu Tools Settings Connection > >... - Page 90 With most enhancements, you can select from the following settings: Default profile — Select the profile that is activated • when you attach an enhancement to your device. Automatic answer — Let the device answer phone • calls automatically when an enhancement is attached. Select to have the device answer an incoming call automatically after 5 seconds.
-
Page 91: Tools
Tools Select Menu > Tools. 1. To make a call using a voice command, press and hold the call key. Tools folder contains applications used to configure your device and to configure other applications. 2. When you hear the tone or see the visual display, clearly speak the name saved on the contact card. -
Page 92: Positioning
Navigator Use voice commands for profiles The device creates a voice tag for each profile. To set on Select Menu Tools > Navigator. > a profile using a voice command, press and hold the call Navigator is a GPS application that enables you to view key, and say the name of the profile. -
Page 93: Application Manager
Certificates have a restricted lifetime. If Nokia Catalogs (network service) is a mobile content shop Expired certificate or Certificate not valid yet is shown available on your device. With Nokia Catalogs you can... - Page 94 The available content depends on your network operator and service provider. Nokia Catalogs uses your network services to access the most updated catalog content. For information on additional items available through Nokia Catalogs, contact your network operator or service provider.
-
Page 95: Device Management
Device management Disable config. — Select to stop receiving • Manage data and software on your device. configuration settings from all servers for which you have a server profile. Remote configuration View log — View the configuration log of the selected •... - Page 96 Create a synchronization profile To create a profile, select Options New sync profile > select from the following options: Sync profile name — Enter a name for the profile. • Applications — Select the applications to synchronize • with the profile. Connection settings —...
-
Page 97: Shortcuts
Shortcuts Here are some of the available keyboard shortcuts in your Ctrl+F Find device. Shortcuts can make the use of the applications Ctrl+I Sort more efficient. Ctrl+M Move There are several different shortcut combinations that you can use: Ctrl+N • Shortcuts with Ctrl+key give you access to the Menu Ctrl+O Open functions. -
Page 98: Application-Specific Shortcuts
Application-specific Ctrl+L Go online, or go offline if a connection shortcuts is active Ctrl+Q Properties Desk application Ctrl+R Reply Ctrl+P Properties Ctrl+T Expand folder contents Ctrl+Own key Configure the Own key Ctrl+U Disconnect Telephone Ctrl+Y Change the connection Ctrl+P View serial number (IMEI) Chr+Messaging Retrieve mail Contacts... - Page 99 Ctrl+I Italics Ctrl+U Move up one level Ctrl+U Underline Sheet Ctrl+B Add to bookmarks Ctrl+H Rename the worksheet Ctrl+E Close the browser Ctrl+M Freeze panes Ctrl+G Back Go to bookmark (in bookmark view) Ctrl+Q View worksheets Ctrl+H Go to home page Ctrl+W Insert a new worksheet Ctrl+I...
- Page 100 Ctrl+T Full screen (with an image open) Voice recorder Ctrl+L Repeat Ctrl+M Mute Ctrl+R Rename Music player Ctrl+B Previous track Ctrl+F Next track Ctrl+I Sort by (the property you have already selected) Ctrl+M Mute RealPlayer Ctrl+B Previous clip (with a video clip open) Ctrl+F Next clip (with a video clip open) Ctrl+M...
-
Page 101: Nokia Original Enhancements
• Wireless boom headset (HS-4W) • Wireless headset (HS-11W) • Wireless clip-on headset (HS-21W) Compatible messaging and data enhancements: • Nokia digital pen II (SU-19W) • Connectivity cable (DKE-2) • Mini SD (3.0V, 64 MB to 2 GB) • Wireless GPS module (LD-1W) Compatible car enhancements: •... -
Page 102: Battery Information
Nokia battery, battery or the connecting object. purchase it from an authorized Nokia dealer, look for the Leaving the battery in hot or cold places, such as in a closed car in summer or winter conditions, will reduce the... - Page 103 The 20-digit original Nokia battery, you should refrain from using it, code reads starting from the and take it to the nearest authorized Nokia service point number at the top row followed or dealer for assistance. Your authorized Nokia service by the bottom row.
-
Page 104: Care And Maintenance
Care and maintenance • Use a soft, clean, dry cloth to clean any lenses, such as Your device is a product of superior design and camera, proximity sensor, and light sensor lenses. craftsmanship and should be treated with care. The suggestions below will help you protect your warranty •... -
Page 105: Additional Safety Information
Additional safety information Operating environment health care facilities may be using equipment that could be sensitive to external RF energy. Remember to follow any special regulations in force in any area and always switch off your device when its use Pacemakers is prohibited or when it may cause interference or danger. -
Page 106: Vehicles
Vehicles Switch off the device at refueling points such as near gas pumps at service stations. Observe restrictions on the use of radio equipment in fuel depots, storage, and RF signals may affect improperly installed or inadequately shielded electronic systems in motor vehicles such as distribution areas;... -
Page 107: Certification Information(Sar)
CERTIFICATION network band. Additional SAR information may be provided under product information at www.nokia.com. INFORMATION(SAR) Your mobile device is also designed to meet the requirements for exposure to radio waves established by... -
Page 108: Index
Index Symbols/Numerics default information 33 groups 32 1-touch dialing 27 cable 72 ringing tones 33 calculator 52 copying text 16 calendar 51 calling 27 access points 73, 87 answering calls 28 calls data forwarding 28 application manager 93 connections 75 restricting 29 applications declining calls 28... - Page 109 file manager 78 multimedia messages flash player 63 creating 38 joystick 13, 86 forwarding calls 28 receiving 39 replying to 39 sending 38 keyboard 13 settings 40 gallery 59 keyguard 15 general packet radio service music player 62 keypad lock 15 GPRS mVPN GPRS 75...
- Page 110 predictive text input 86 display 87 managing messages in the presentations 81 general 86 SIM card 37 printing 85 Internet 73 replying 36 profiles 55 message centers 36 sending 36 multimedia messages 40 writing 36 profiles 55 themes 57 RealPlayer remote configuration 95 to-do list 51 security 30...
Need help?
Do you have a question about the E62 and is the answer not in the manual?
Questions and answers