TCS 3000 Operation Manual
Register
Hide thumbs
Also See for 3000:
- Installation manual (44 pages) ,
- Installation manual (44 pages) ,
- Setup & operation manual (52 pages)
Table of Contents
Advertisement
Quick Links
Advertisement
Table of Contents
Troubleshooting

Related Manuals for TCS 3000


Summary of Contents for TCS 3000
- Page 1 TCS 3000 Catalog Title REGISTER Catalog Subtitle Setup & Operation Manual...
-
Page 2: Table Of Contents
Products Receipt & Inspection Product Test Run Notice Recalibrate Product Introduction Modify Parameters System Specifications Product Name TCS 3000 Start Up Navigation Comp. Table Navigation (Continued) Comp. Table Param. 18 Display Icons Mass Density Select Functions Pump Control Start Delivery... -
Page 3: Receipt & Inspection
Notice Total Control Systems (TCS) shall not be liable for technical or editorial errors in this manual or omissions from this manual. TCS makes no warranties, express or implied, including the implied warranties of merchantability and fitness for a particular purpose with respect to this manual and, in no event, shall TCS be liable for special or consequential damages including, but not limited to, loss of production, loss of profits, etc. -
Page 4: Introduction
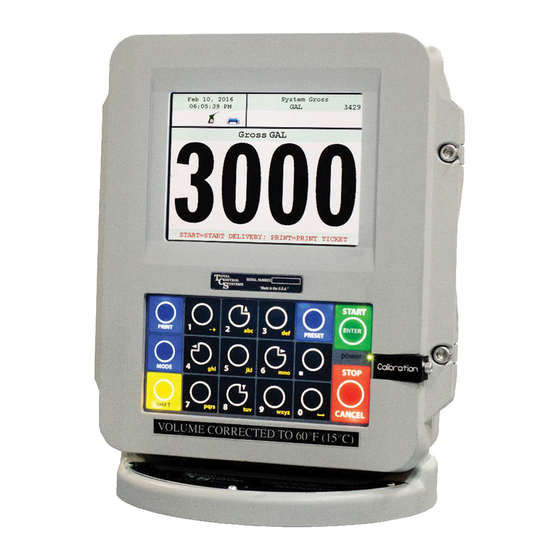
The Open Software Architecture provides the option of a simple “Pump & Print” delivery or a custom measurement solu- tion. The TCS 3000 features a 4.5”x 3.5” full color VGA display screen, multiple delivery screens and a flexible mounting with backlit alpha-numeric keypad for the user interface. Available in flexible mounting configurations of 75 or 90 degree displays for meter mounting, and a remote mounting. -
Page 5: Tcs 3000 Start Up
WARNING– EXPLOSION HAZARD– SUBSTITUTION OF ANY COMPONENT MAY IMPAIR SUITABILITY FOR CLASS 1, DIVISION 2. TCS 3000 Register Start Up: Before placing this register into service you will receive a warning when you turn on the register to calibrate the device before using. It will read as follows:... -
Page 6: Navigation (Continued)
Navigation Keyboard Functions (Continued) Alpha, Numeric, and Symbol Keys Preset Key Print Key Mode Key Shift Key Preset Key Allows you to PRESET the Price and Tax as well as Gallons into the Register. Alpha/Numeric Keys Allow you to enter different prices, products, etc. into the Register. Mode Key MODE allows you to select different screens on the Register. -
Page 7: Select Functions
Start Delivery Begins delivery transaction. Show Last Delivery Shows the last delivery on the TCS 3000 screen. Begin or End Shift Beginning Shift will take a record of Delivery information at the start through the end of the user shift. -
Page 8: Show Last Delivery
Select Function —Show Last SHOW LAST Press START/ENTER to see the last delivery transaction —Begin Shift/End Shift The Shift function records the Time/Date, Meter Identification and the Delivery Data from the beginning of the shift to the end of the shift. NOTE: This function is only accurate as the driver operators that utilize this feature. 1) BEGIN SHIFT Press and hold the SHIFT key, then press the MODE key. -
Page 9: Duplicate Shift Ticket
Select Function SELECT INVENTORY Allows you to use the arrow keys to select the product in order to view the Inventory Details. PRINT INVENTORY REPORT Generates a ticket of the Inventory Report —Duplicate Shift Ticket To print a Duplicate Shift Ticket, navigate down to select the function and press ENTER. —Re-Print Tickets To locate and reprint a past delivery ticket, navigate down to select the function and press ENTER 1) NON PRINTED DELIVERY... -
Page 10: Reports
Model, Meter Version, and the Meter Serial Number. Information must be input within the Weights & Measures menu. 4) VERSION INFO Selecting Version Info allows you to view the Version of Software and Firmware running on the TCS 3000. 5) MEMORY STATUS Selecting Memory Status allows you to view the number and type of tickets printed by the TCS3000. -
Page 11: Display Settings
System Menu TYPE 1 TYPE 2 TYPE 3 TYPE 4 * TYPE 4 Only displays delivered volume. CALIBRATION SCREEN Temperature Calibration screen will show volume/mass and Temperature Flowrate Calibration screen will show volume/mass and Flowrate Empty Calibration screen will show volume/mass and nothing else BRIGHTNESS Brightness allows you to set the brightness of the display screen from 100 to 30 percent (brightest to dimmest) settings. -
Page 12: Enable / Disable Printer
Selecting None will remove the communication for printing PRINTER HOST Printer Host is used when you plan to daisy chain multiple TCS 3000 registers together for a single printer. Host is the primary meter and the Clients are all registers following the Host. - Page 13 System Menu TCS 3000 Menu Example Prints Header 1 Total Control Systems Header 2 TCS 3000 Header 3 Delivery Ticket Header 4 (888) 888-8888 Header 5 Programmable Field Thick Separator ———————————————- Start Time Start Jun 04, 2012 09:42:09 AM End Time...
-
Page 14: Accounting
System Menu Add Ticket Type Create a NEW Customized Ticket, then press ENTER to name it. Copy from an Existing Ticket, then press ENTER to name it. NOTE: Any new ticket name must be 3 or more characters long Remove Ticket Type Select ticket to be removed from the system and press ENTER Header Defaults There are FIVE programmable fields for contact information or messages... -
Page 15: Zero-Flow Timeout
Enter whole numbers in Seconds for the timeout setting and press ENTER. NOTE: Factory setting is 180 seconds, 3 minutes after the last pulse transmission to the TCS 3000 regis- ter. This feature CANNOT be disabled. For desired extended periods, utilizer a large number to have the Timeout ignored. -
Page 16: Pulse Output
Interface is for handheld communication. An interface is required for this setting. Address Device Address will assign the TCS 3000 the unique address within the Daisy Chain communication sequence. Primary Host will always be number one (1) and the Client Address range will be two (2) through eight (8). - Page 17 Select Function L2 Password Level two (2) password protection for System Settings. Procedure to set L2 Password is as follows: Highlight L2 Password and press ENTER. Highlight Set Password and press ENTER. Input alphanumeric password and press ENTER. Confirm password entry by resubmitting password, and press ENTER. NOTE: Alphanumeric password must be at least three (3) characters long.
-
Page 18: W&M Settings
Weights & Measures Weights & Measures Settings NOTE: The Calibration bolt must be removed in order to enter calibration mode. To remove the bolt, unscrew the bolt with a 3mm Hex drive. Place calibration plate and screw in a safe location where it will not be lost. Un- der the calibration plate you will find a screw. -
Page 19: Mass Density
Weights & Measures Mass Density To provide a calculated Mass value, determine the value to input Mass Density and press ENTER. Mass = Density X Volume Unit of Measure Gram/cm3 Gram/Cubic Centimeter Gram/m3 Gram/Cubic Meter Kilogram/m3 Kilogram/Cubic Meter Milligram/m3 Milligram/Cubic Meter Pound/ft3 Pound/Cubic Foot Pound/in3... -
Page 20: Maximum Flow
Pulser Estimate Manual entry of the Meter Pulse Estimate (Meter Factor). Input pulse value and press ENTER. Product Units Select TCS 3000 register units of measure and press ENTER. Volume: Highlight Volume Unit and press ENTER. USA Gallons Liters UK Gallons... -
Page 21: Begin Recalibration
- All parameters for a New Product MUST be entered for the product to be accepted by the TCS 3000. Follow pages 17 through 19, under Modify Parame ters to complete the Add New product setup. Once the new product parameters have been entered, you will be required to calibrate the product. -
Page 22: Remove Product
Weights & Measures E) Remove Product To remove an unwanted product from the TCS 3000, select and press ENTER. To confirm product removal, press MODE. NOTE: You must first End Shift and then Deactivate the product under Product Settings. 2) ACCOUNTING Select Accounting to set the Ticket Number. -
Page 23: Prover Ticket
System and Product Totalizers record the amount of all liquid that has passed through the meter by product. * Please Note * Resetting the Totalizers will reset the TCS 3000 Totalizers to zero. There is no way to recover totalizers once deleted. SYSTEM TOTALIZER System Totalizers record the amount of all liquid that has been measured. -
Page 24: Product Settings
Select Function —Product Settings 1) INVENTORY Inventory monitors how much product is in a tank. ADD INVENTORY Creates an Inventory “Tank” to be monitored. Here you will Name your Inventory “Tank” Enter in the Tank Capacity and Enter the Current Tank Level **Must be outside of a Shift to do this step** ASSIGN INVENTORY Allows you to Pair an Active Product to the Inventory Tank Created to be Monitored. - Page 25 Select Function UNIT PRICE Highlight Unit Price and press ENTER. Input the price value and press ENTER. TAX 1 NAME Highlight Tax 1 Name and press ENTER. Input tax name and press ENTER. TAX 1 TYPE Highlight Tax 1 Type and press ENTER. Use the navigation arrows to select Tax 1 Type and press ENTER.
-
Page 26: Activate Product
(fast) flow valve closure and Solenoid S2 (slow) flow valve and press ENTER. AIR ELIMINATOR HOLD When the TCS 3000 senses air, it will actuate the Solenoid S1 and S2 to shut off and open the Auxiliary Relay for the exhaust port to remove air from the system. Highlight Air Eliminator Hold and press Enter. -
Page 27: Advanced Functions
4 minutes. NOTE: Do not power down or pull USB thumb drive until the TCS3000 tells you to do so. You may remove the USB cable and close the TCS 3000 register once the Update is Complete. FIGURE 1... -
Page 28: Start Up "Must Knows
“Must Know” & How To Installation Procedure—Daisy Chain Daisy Chain: Daisy Chain is used for linking multiple registers together to use one printer or to link multiple registers to the data- base. To Daisy Chain the Registers use a two wire 22 gauge shielded cable. Nominate one Register to be the Host. Once you’ve chosen which Register will be the Host the other Registers will be considered the clients. -
Page 29: Inventory How To
“Must Know” & How To Daisy Chain for the Printer Connect the Printer to the Host Register. To set the Host : Enable the Printer: SYSTEM MENU → SYSTEM SETTINGS → PRINTER SETTINGS → ENABLE/DISABLE PRINTER → ENABLE PRINTER Select the Printer: PRINTER SETTINGS →... -
Page 30: Daisy Chain
“Must Know” & How To Installation Procedure—Daisy Chain Modem Daisy Chain: Daisy Chain is used for linking multiple registers together to use one printer or to link multiple registers to the data- base. To Daisy Chain the Registers use a two wire 22 gauge shielded cable. Nominate one Register to be the Host. Once you’ve chosen which Register will be the Host the other Registers will be considered the clients. -
Page 31: Daisy Chain (Continued)
Selecting the Host Register Select Register as Host: PRINTER SETTINGS → DISABLE/ENABLE HOST → ENABLE Select the Client Range: PRINTER SETTINGS → PRINTER HOST → CLIENTS ADDRESS RANGE → CLIENTS RANGE START ADDRESS [ Enter 2 and Select] → CLIENTS RANGE END ADDRESS [ Enter the number of Registers on the Chain and Select] *Please Note the Host is always # 1. - Page 32 Real Time Inventory How To Manual Inventory How To *Please note, you must End Shift before you may Add or Remove Inventory* Real Time Inventory is for Automatic Tank Levels Only Add Inventory: Add Inventory: While holding Shift select Mode → System Menu → Product Settings →...
-
Page 33: Temperature Probe Calibration
“Must Know” & How To TEMPERATURE PROBE CALIBRATION HOW TO * The following is based on product(s) you have calibrated. You must select the compensation table and the temperature unit for the product when Calibrating your product in order to Calibrate Temperature.* Press Shift and Mode to enter the Select Function Screen. -
Page 34: Trouble Shooting
Trouble Shooting Guidelines: 1) Before attempting to troubleshoot the TCS 3000 system, become familiar with the operation and set-up of the specific installation. 2) Make sure all electrical connections are secure and tight. -
Page 35: Trouble Shooting (Continued)
4. Replace the 7.5A fuse and re-install the wires into the terminal connector. 5. If the 7.5A blows again, then replace the power cable. 6. If the 7.5A fuse blows after replacing the power cable, then replace the TCS 3000 terminal circuit board. -
Page 36: Trouble Shooting (Continued)
Missing pulse 1. Check the pulser output. ure, register counts. 2. Open the TCS 3000 cover by loosening the two bolts that hold the cover is not reading Excessive reversals closed. Using a reliable multimeter, measure the following DC voltages on gallons or terminal block is connected to the circuit board. -
Page 37: Notes
3. If there is NO audible click form the solenoid, check the voltage to Pin + and 0 V of terminal block Solenoid 1. While the TCS 3000 is still in deliv- ery, use a reliable multimeter to measure the following DC voltages on the circuit board. - Page 38 TCS3000 to not function correctly. 2) Products that have been calibrated may appear either as an Active or Inactive Product. The TCS 3000 must have at least 1 Active Product in order to Begin a Shift and Start a Delivery. Products may only be Activated or Deactivated after a Shift has Ended.
-
Page 39: Warranty
TCS has not au- thorized on its behalf any representation or warranties to be made, nor any liability to be assumed except as expressly provided herein;... - Page 40 TCS900040 2515 Charleston Place Fort Wayne, IN 46808 Toll Free: (800) 348-4753 Phone: (260) 484-0382 Fax: (260) 484-9230 Email: sales@tcsmeters.com Website: www.tcsmeters.com...
Need help?
Do you have a question about the 3000 and is the answer not in the manual?
Questions and answers
My meter is pumping slow , GPM is reading about 155 and the master meter on the test stand is reading about little over 400 GPM
The TCS 3000 meter may be pumping slowly with a GPM reading of 155 compared to the master meter reading of over 400 GPM due to a possible issue with the pulser or flow measurement system. The document mentions that if the pulser shaft is not turning with product flow or if the TCS 3000 display does not increment when spinning the pulser shaft manually, there may be a mechanical or pulser failure. Additionally, excessive reversals or missing pulse counts could lead to incorrect flow readings. Checking the pulser output and measuring DC voltages on the terminal block may help diagnose the issue.
This answer is automatically generated