Table of Contents
Advertisement
mammut.com
BARRYVOX
REFERENZHANDBUCH
EXTENDED REFERENCE MANUAL
MANUEL DE RÉFÉRENCE
MANUALE DI REFERENZA
GUÌA DE REFERENCIA
REFERANSEHÅNDBOK
REFERENSHANDBOK
REFERENČNÍ PŘÍRUČKA
RAZŠIRJENA NAVODILA
PRZEWODNIK UŻYTKOWNIKA
СПРАВОЧНОЕ РУКОВОДСТВО
レファレンスハンドブック
DECLARATIONS OF CONFORMITY
S
®
DE
EN
NO
CS
RU
FR
IT
ES
SV
SL
PL
JA
Advertisement
Table of Contents

Related Manuals for Mammut BARRYVOX S


Summary of Contents for Mammut BARRYVOX S
- Page 1 BARRYVOX ® REFERENZHANDBUCH EXTENDED REFERENCE MANUAL MANUEL DE RÉFÉRENCE MANUALE DI REFERENZA GUÌA DE REFERENCIA REFERANSEHÅNDBOK REFERENSHANDBOK REFERENČNÍ PŘÍRUČKA RAZŠIRJENA NAVODILA PRZEWODNIK UŻYTKOWNIKA СПРАВОЧНОЕ РУКОВОДСТВО レファレンスハンドブック DECLARATIONS OF CONFORMITY mammut.com...
- Page 2 North America: Mammut Sports Group Inc. 458 Hurricane Lane Williston, US-VT05495 Phone +1 800 451 5127 info@mammutusa.com Europe: Mammut Sports Group GmbH Mammut Basecamp 1 DE-87787 Wolfertschwenden Phone +49 (0)8334 3620 0 germany@mammut.com Switzerland (Head O ce): Mammut Sports Group AG...
-
Page 3: Table Of Contents
ADDITIONAL INFORMATION ... . .55 COMPANION RESCUE ....60 DECLARATIONS OF CONFORMITY ..67 mammut.com BARRYVOX ®... - Page 4 – and all educators. Barryvox Transceivers – Made in Switzerland ® Our heritage is compelling. Mammut and Barryvox follow the ® Approval / Conformity time-honored tradition of world-class precision products made All information concerning approval and conformity is available in Switzerland.
-
Page 5: Handling The Barryvox
HANDLING THE BARRYVOX ® Interferences Like all transceivers, the Barryvox contains shock sensitive ® ferrite antennas. Therefore, you should handle it with utmost Always avoid having other electronic devices (e.g. mobile care! phones, radios, headlamps, cameras), metal objects (pocket Store the device and the carrying system in a dry spot that is knives, magnetic buttons), or other transceivers close to protected from extreme cold or heat and direct sunshine. -
Page 6: Initial Setup
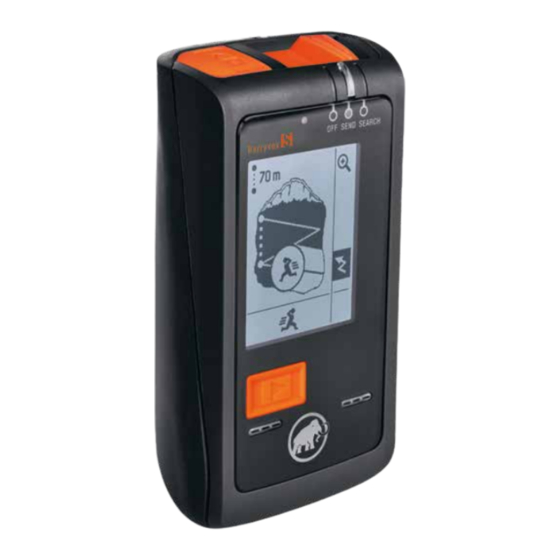
INITIAL SETUP Batteries Only use alkaline (LR03/AAA) or lithium (LR92/AAA) batteries Periodically inspect the battery compartment. Clean or dry it, if of the same type. Always insert 3 new batteries of the same needed, since moisture can cause corrosion. type. In case these batteries need to be removed, the same Avoid touching the contacts with your hands, use a clean cloth. - Page 7 Main Switch OFF / SEND / SEARCH User Interface and Use of Buttons The main switch is located on the top side of the device. In the The Barryvox S uses an easy navigation based on three ® left position OFF, the device is turned o , in the center position buttons: The two scroll-bar buttons located on the side and the SEND the device is in SEND mode and in the right position orange...
-
Page 8: Settings
Language SETTINGS This setting allows you to select the language of your transceiv- er’s user interface. Access to the settings menu is only possible during the initial start-up sequence. For safety reasons, there is no access When turning the device on for the first time and switching to to the settings once the device is in group check, SEND or SEND, the user language must be selected. - Page 9 Owner Beware of the meaning of the following icons: The Barryvox S allows you to enter your name, address, and ® other information, such as your phone number or e-mail ad- Save and exit dress. This information is displayed every time the transceiver Backspace is turned on.
- Page 10 Pro Settings The factory settings of the device are optimally preconfigured to mark deep burials up to distance indication of 6.0 (see for a basic user, directly proceed to chapter “Self- and Battery Test” for further information on basic use. For advanced and chapter “Deep Burial“) professional users, it is advised to adjust these settings to best to unmark a buried subject (see...
- Page 11 Audi o Gu i d an c e Pr o Ch e c k Choose between digital or analog The „Pro Check“ verifi es the trans- tone. The setting is valid for all mit frequency, the pulse duration search phases in standard search as well as the period lengths of the mode.
- Page 12 Aut o- R ever t S EA RC H t o SE N D Gr oup Ch e c k The Auto-Revert SEARCH to SEND function switches the The group check setting allows to defi ne the test distance transceiver from SEARCH mode to SEND mode if there is no during the group check.
- Page 13 Time fo r A uto- R e ve r t t o SEND Vital Data Auto-revert to SEND switches the transceiver from SEARCH Your Barryvox S detects slight motion of the body, such as a ® mode to SEND mode or from Rescue-SEND mode to SEND pumping heart or breathing lungs.
- Page 14 W-Link Regions Europe and neighboring countries (W-Link Region A) [= light grey] US, Canadian, New Zealand and Australian Version (W-Link Region B) [= dark grey] Countries without W-Link [= black] Countries with unknown region allocation [= white] Frequency regulations do not allow that the user modifi es the frequency setting.
- Page 15 Device to Device Update 3. Press the button to start the Thanks to the device-to-device update update procedure. you may share the new functions of In case you do not want to per- your fi rmware with older Barryvox ® form the update, exit the menu devices.
- Page 16 Adjusting the Screen Contrast Reset device to factory settings Adjust the contrast of the screen for The function «Reset device to best visibility in di erent ambient factory settings» allows you to light conditions. restore all default factory settings. In the dark, the Barryvox All modifi...
-
Page 17: Self- And Battery Test
SELF- AND BATTERY TEST Start-Up / Self- and Battery Test While starting, the device conducts a self test. The result of the self-test is shown the first time the device enters a SEND mode. If the battery power falls below 30% (alkaline) or the battery icon is displayed, the batteries must be replaced as soon as possible! BARRYVOX... - Page 18 Battery Test and Battery Level Indicator 100%: The following table gives you average values for the battery Normative requirement (=minimum requirement): levels. The remaining battery level can only be displayed min 200hrs SEND at 10°C followed by 1hr SEARCH at -10°C correctly if batteries are used according to the chapter «Insert / Typical values for the Barryvox S with alkaline batteries:...
- Page 19 Change between Alkaline and Lithium Batteries Be aware of the following important details when answering the questions: As soon as one battery is removed and a reinserted or replaced, the device tries to recognize the battery type (alkaline 3 new or lithium).
-
Page 20: Carrying Positions
CARRYING POSITIONS Adjust the BarryMount to fi t your body. Regardless of the carry- ing position, the display should always face your body! The detection of vital data is only possible if you carry the device in the BarryMount. (Chapter «Triage Criteria and Vital Data»). - Page 21 BarryMount Carrying the Transceiver in a Pocket (Recommended Carrying Position) (without vital data detection) The BarryMount should be put on over your innermost layer of If you carry the Barryvox in a pants pocket, the zipper must clothing prior to beginning the trip (see illustration) and must be ®...
-
Page 22: Cockpit - Overview Of Functions
COCKPIT – OVERVIEW OF FUNCTIONS Turning the Device ON and OFF Settings and Navigation in Lists Exit door: use the «exit door» Settings: scroll down to to leave a menu or function. access the settings menu. List arrow up: Firmware Version (BarryHeart) indicates that a list includes more entries further up. - Page 23 Group Check SEND Remaining battery Participants percentage. The device is currently Leader in SEND mode. Status of the SEND mode: Status information or instructions for the leader. SEND mode is functioning properly. Exit Group check and enter Alert: SEND mode by pressing the the SEND function is key..
-
Page 24: Group Check
GROUP CHECK Single Group Check Participants – > SEND Leader – > Group Check The group leader activates the group check by switching his device from OFF to SEND and presses the button within the first seconds. The test is successful if you can clearly hear beep sounds from each participant‘s transceiver within the range indicated on the Before a party takes o , the transceivers of all party members display. - Page 25 The members of the party must be spread out appropriately to avoid mutual interference. The indicated test distance must not be shortened, or the group check becomes very unreliable. Once all the participant‘s devices are tested, the group check is concluded. The group leader’s transceiver must be switched to the SEND mode.
- Page 26 SEND Confi rmation In case a regular group check is impossible due to limited space, it is possible to perform a basic verifi cation if the trans- ceivers of all participants are turned on. The leader holds his transceiver in group check as close as possible to the transceiver of each participant.
- Page 27 Double Group Check Participants Leader We recommend to perform a double group check once a Subsequently, the party members switch their transceivers to week and in general when a new group gets together. The SEND, and the leader activates the group check or sets the double group check individually tests the SEND and SEARCH transceiver to a low receive volume.
- Page 28 Pro Check Teilnehmer – > SEND Leiter – > Gruppentest The pro check verifies the transmit frequency (Freq: deviation +/- in Hz from 457’000 Hz), the period lengths (Period: duration of the period in milliseconds ms) as well as the pulse duration (Pulse: duration of the signal in milliseconds ms).
-
Page 29: Send
SEND Vital Data and Burial Data The SEND mode is the normal operating mode outdoors or in all other situations in which there is a risk of avalanches. For further information see chapter “Vital Data and Burial Data History”. Each time the SEND mode is activated, this is confirmed by an ascending triple beep SEND Mode, person not moving or in a state of burial. - Page 30 Rescue-Send Mode (Rescue-SEND) The rescue send mode is used by all rescuers who are involved During the 5 sec. count-down, “Rescue-SEND” is now shown in the rescue operation, but do not perform a transceiver at the bottom of the screen. Press the key within this peri- search themselves (shovelers, probe line, surface search, od of time, the activation of the rescue send mode is confirmed...
-
Page 31: Search
SEARCH Elementary understanding of transceiver search Although the avalanche transceiver is easy to use, its e ective use requires proper training. We recommend that you practice The 457kHz transmitter of the transceiver has a kidney shaped transceiver searches regularly. transmit distribution, which is visualized with field lines in the illustration below. - Page 32 Search Phases In an avalanche search, the following phases are distinguished: Signal search Search area to the point where the first clearly audible signal can be detected. Coarse search Search area starting from the reception of the first signal until the immediate vicinity of the buried subject.
- Page 33 SIGNAL SEARCH COARSE SEARCH <10 FINE SEARCH PINPOINTING BARRYVOX EXTENDED REFERENCE GUIDE SEARCH ®...
- Page 34 Signal Search BarryTip: Move swiftly. Emergency plan, search strategies and search strip widths: please see back side of device. Search avalanche surface systemati- cally. During signal search, the rescuer has his visual focus on the surface of the debris in order to look for visual clues on the snow surface.
- Page 35 If your Barryvox detects that the signal search strip width ® needs to be reduced due to interference or due to a device transmitting outside the standard frequency, the reduced search strip width will be indicated. Reduced signal search strip width due to interference.
- Page 36 Regardless of the operating mode, the following search Search strategy if the last seen point is unknown. SEARCH IN DIRECTION OF TH strategies apply: Last seen point unknown, Search strategy if the last seen point is known. one rescuer. LAST SEEN POINT The signal search strip extends downhill from the last seen KNOWN point in the direction of the slide.
- Page 37 Extended Search Strip in Extended Range Mode The search strip width can be extended from 70m to 100m by experienced users. For this, the setting “Pro Search” must be turned “ON” (see chapter “Settings”). For the signal search with extended search strip width, scroll to the magnifying glass by using the lateral keys and press the botton to activate “Extended Range Search Mode”.
- Page 38 Coarse Search BarryTip: Move swiftly, move in the direction of the arrow. Hold the transceiver with the extended arm horizontally in front of you. If the distance increases, then you are moving away from the victim. Continue the search in the opposite direction. D i st a n c e b e l ow 10 BarryTip: Reduce search speed,...
- Page 39 The point where the device indicates the final probing indication Fine Search usually corresponds with the point of lowest distance indica- tion. The greater the remaining distance to the buried subject BarryTip: Follow the arrow! (burial depth), the more repetitions of fine search crosses may Step slowly forward, backwards, be required to reach su cient search-precision.
- Page 40 probe hit within this area, you have missed the buried subject. Pinpointing Repeat probing with a slightly o set probing pattern (chapter «Pinpointing with Transceiver and Probe Pole»). BarryTip: Place a visual indicator at the point where the Barryvox ® Ma r k shows the probing spiral.
- Page 41 Automatic Revert to SEND Multiple Burials For the safety of the rescuers, the device automatically switch- The marking feature allows es into SEND mode after 4 minutes without user interaction continuing the search for further or motion. To modify the automatic revert to SEND time: see buried subjects by marking the chapter «Settings».
- Page 42 Fast overview with multiple burials In Complex Situations Slow Down The Search Using the side buttons, you may allways scroll the list of buried If the signal of the buried subject you are currently searching subjects to quickly gain an overview (see chapter “Mental for temporarily overlaps with another signal, the device tries to Map”).
- Page 43 Search Tones in Fine Search Search for Multiple Buried Subjects Using the Standard Search Mode Within the fine search range, thus in the immediate vicinity of the buried subject (approx. <3m), the Barryvox assists you ® In standard search mode, the transceiver attempts to analyze with an artificial, distance and action related sound while fine all the detectable signals and to determine the number of searching in a cross pattern.
- Page 44 P ro ced u r e f o r M u l t i pl e B uria ls 1. The device favors the closest subject first. Locate the various buried subjects using the transceiver and probe pole. 2. As soon as you mark an individual subject, the transceiver takes you to the next closest, unmarked buried subject.
- Page 45 Anal o g Se a r c h To n e “Sound Check” The analog tone is very useful and important to easily and Interpretation of the Analog Sound: reliably determine the number of buried subjects: Counting the Just as in traditional analog transceivers, the analog tone is number of beep sound sequences gives the number of buried received by only one antenna.
- Page 46 Ment a l M ap of t he B urial Situ at ion Vital Data and Triage The “Sound Check” provides the required information to build If not enough rescuers are available to simultaneously search up the “mental map” of the burial scenario, which is a critical and excavate all buried subjects, buried subjects with increased survival chances, indicated by the - symbol, should be...
- Page 47 Search With Multiple Rescuers When the search is conducted with multiple rescuers searching at the same time, avoid searching for the same buried subject as another rescuer. Use the scrollbar, to choose in the list of buried subjects which buried subject you are searching for. Situation 2: The two rescuers only receive one buried subject.
- Page 48 Limitations N umber of Buri a l s With Pro Search “ON” the calculated number of burials is dis- The larger the number of buried subjects, the more di cult played below the list of buried subjects (to activate Pro Search: and time-consuming the exact analysis of the situation gets, see chapter “Search Setting”).
- Page 49 Analog Tone Criteria to Switch to Alternative Search Mode With the setting “Audio guidance” set to “Analog“, the Barry- If the rescuer detects problems with the digital analysis of a S always provides the analog tone allowing the rescuer to multiple burial situation, he or she can always switch to the ®...
- Page 50 Alternative Search Mode Multiple Buried Subjects in Alternative Search Mode In the alternative search mode, the transceiver shows distance If multiple burials are detected in alternative search mode, an and direction to the subject with the strongest signal and icon symbolizing multiple burials is shown on the display provides an analog tone.
- Page 51 Search Tactics with Multiple, Widely Scattered Burials 1. Mark the location on the avalanche where the «multiple buri- al» icon appeared on the display or where you left the signal search pattern. 2. Search for the first buried subject using the information on the display along with the analog tones.
- Page 52 Search Tactics with Multiple Burials in Close Proximity 5. At each point with a lowest distance reading, you leave the micro search strip pattern to fine search the buried subject The interpretation of the acoustic signals is extremely important through bracketing. At a low point of distance indication on in this situation.
- Page 53 Micro Box The Micro-Box method is used when there is more than one buried subject within fine search range. In these very close proximity cases, the micro search strips (or the 3-circle method) may not provide a su cient resolution to reliably separate and thus detect all of the closely buried subjects.
- Page 54 Further Search Methods Manual Volume Control in Alternative Search Mode There are further methods to search for multiple buried sub- jects in close proximity. The user can manually change the sensitivity by pressing the up key for + and the down key for –. M1 represents the short- The 3-circle method uses concentric, circular search strips with est, M9 the greatest distance to the buried subject.
-
Page 55: Additional Information
457 SEND failure! ADDITIONAL INFORMATION SEND LED doesn’t blink 1. This alert message is usually triggered by external interfer- Problem Solving ence. Make sure that no metal objects or electronic devices are close to the transmitter. Transceiver doesn’t turn on 2. - Page 56 457 SEARCH failure! Use in the Dark 1. Make sure that no metal objects or electronic devices are If you use the transceiver in the dark, the display is automati- close to the transmitter. cally backlit. 2. Turn the transceiver o and turn it back on after it has properly shut down.
- Page 57 Us e i n c o m b i n at i o n wit h t he Ba rr y vox Pe ri od i c c he c k by a Ba rr yvox Se r v i c e C e n te r ®...
- Page 58 Warranty The warranty is voided if the buyer or any non-authorized third There is a 2 year warranty on the Barryvox transceiver (exclu- ® party opens the device. This is also the case for devices that ding the batteries, the carrying system and the leash) from the have been used with spare parts or accessories which are not date of purchase shown on the purchase receipt.
- Page 59 No part may be reproduced or copied without Weight: 210 g (incl. batteries). written permission from the publisher. For further use and publications for educational purposes, please contact Mammut Sports Group AG. All information is provided without liability. Status July 2018. Mammut and Barryvox are registered trademarks of the Mammut ®...
-
Page 60: Companion Rescue
If an Avalanche Occurs quickly and e ciently. Mammut o ers a variety of suitable probe poles and shovels. As a Victim: The use of an airbag system (flotation device) significantly... - Page 61 Emergency Plan Checklist for companion rescue 1. Scene assessment 2. If possible, use the snow sport equipment until you reach fine search. Keep your backpack with gear with you at all times. 3. I am searching with my transceiver: SEARCH Mark I am not searching: Rescue-SEND Pinpointing...
- Page 62 Triage Criteria and Vital Data Tr ia ge With limited resources (few rescuers) it is not possible to locate and dig out all the buried subjects at the same time. The ques- tion arises in which order the buried subjects shall be rescued. Subjects with higher chances of survival should be located and dug out first.
- Page 63 V i t al D a t a D e t e c t i o n rescuer decides in which order he or she will locate and dig them out. Using vital data as a triage criteria shortens the burial The Barryvox S contains highly sensitive sensors (g-sensor) ®...
- Page 64 Buri al an d V i t a l Du r a tio n By pressing any key in the SEND mode, you can see at any time the current burial data of the buried subject. In case of a burial, the transceiver records the burial duration In case the device of the buried subject has been immediately and detects vital data.
- Page 65 No Probe Hit If the buried subject cannot be found by the probe, place the probe approx. 1.5 meter above the point with the lowest distance indication. While digging, enough space is now made available to allow a further fine and pinpoint search within the excavation site.
- Page 66 Excavating the Buried Subject The first rescuer positions him/herself directly at the probe. BarryTip: in hard snow, cut blocks with the shovel. The first two rescuers position themselves in a distance of one In case of multiple burials, switch o the trans- shovel lengths, all other rescuers are two shovel lenghts apart ceiver of the buried subjects as soon as possible.
-
Page 67: Declarations Of Conformity
DECLARATIONS OF CONFORMITY U S A : F C C S t a t e m e n t This equipment has been tested and found to comply with the limits for Class B digital device, pursuant to Part 15 of the FCC Rules. These limits are designed to provide reasonable protection against USA/Canada/New Zealand/Australia harmful interference in a residual installation. - Page 68 ® S is in compliance with Directive 2014/53/EU. The full text of the EU declaration of conformity is available at the following internet address: www.mammut.ch/BarryvoxManual Por la presente, Mammut Sports Group AG declara que el tipo de equipo radioeléctrico Barryvox S es conforme con la Directiva 2014/53/UE.
- Page 69 Celotno besedilo izjave EU o skladnosti je na voljo na naslednjem spletnem naslovu: www.mammut.ch/BarryvoxManual Mammut Sports Group AG týmto vyhlasuje, že rádiové zariadenie typu [označenie typu rádiového zariadenia] je v súlade so smernicou 2014/53/EÚ. Úplné EÚ vyhlásenie o zhode je k dispozícii na tejto internetovej adrese: www.mammut.ch/BarryvoxManual Mammut Sports Group AG vakuuttaa, että...
- Page 70 AVALANCHE SAFETY BEST CHOICE FOR THE WORST CASE mammut.com BarryHeart 3.0 07/2018 BarryHeart 3.0 07/2018...
Need help?
Do you have a question about the BARRYVOX S and is the answer not in the manual?
Questions and answers