Table of Contents
Advertisement
Quick Links
Download this manual
See also:
Diagnostic Manual
REPAIR MANUAL
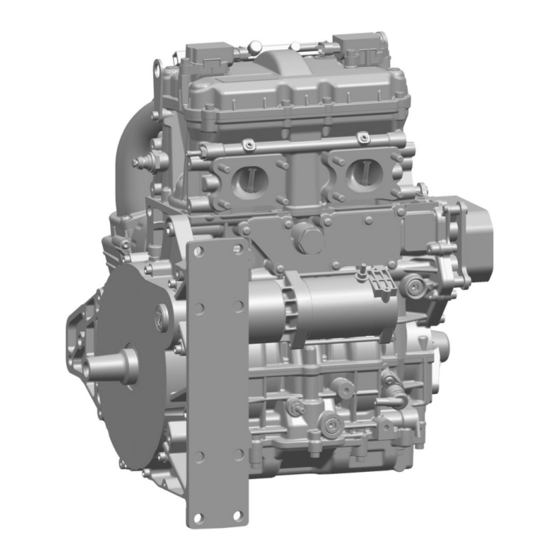
4-Stroke Engine
MPE 850 OFF-ROAD
This repair manual is valid for the following engine models:
– 409135 I2 846 UTV NA-80
– 410750 I2 846 UTV NA-80
TD410023
Rev B
18.04.2017
en_English
Read the introductory chapter before performing the task on the engine.
Pay particular attention to the safety messages.
Advertisement
Table of Contents

Related Manuals for Textron MPE 850 OFF-ROAD


Summary of Contents for Textron MPE 850 OFF-ROAD
- Page 1 REPAIR MANUAL 4-Stroke Engine MPE 850 OFF-ROAD This repair manual is valid for the following engine models: – 409135 I2 846 UTV NA-80 – 410750 I2 846 UTV NA-80 TD410023 Rev B Read the introductory chapter before performing the task on the engine.
- Page 2 TEXTRON MOTORS GmbH strives to make continual improvements as part of the ongoing technical development of its products. All documentation is therefore subject to technical modifications. Reprints and translations, in whole or in part, require written permission from TEXTRON MOTORS GmbH. All rights reserved according to the copyright law.
-
Page 3: Table Of Contents
Installing chain guide ..... 39 TEXTRON MOTORS Special tools ..11 Installing thermostat housing ....39 Workshop equipment and tools . - Page 4 TABLE OF CONTENTS SECTION C – ADDITIONAL WORKING Liquid sealing contour suction pump cover . 86 INSTRUCTIONS Liquid sealing contour thermostat housing. . 87 Liquid sealing contour generator cover ..88 Intake manifold disassembly ....65 Test procedures and adjustments.
-
Page 5: About This Document
The signal word Information indicates specific features and recommendations. CHANGE MANAGEMENT TEXTRON MOTORS GmbH strives to make continual improvements as part of the ongoing technical development of its products. Therefore descriptions in the repair manual can be changed or added. All changes are described in the chapter Overview of revisions. -
Page 6: Safety
This repair manual is solely intended for use in a workshop authorized by TEXTRON OFF ROAD. All tasks on the engine must be performed by appropriately trained personnel. - Page 7 All the components in your engine have been carefully tested and fulfill Spare parts strict quality and safety requirements. ► TEXTRON OFF ROAD offers spare parts to the highest quality. Ensure that equivalent spare parts corresponds with this quality requirements.
- Page 8 SAFETY Operating materials pose a health risk. Fuel, engine oil and coolant handling ► Always read the manufacturer's instructions. ► Always wash your hands immediately after working on or around an engine. Operating materials are hazardous to the environment. ► Never allow operating materials to escape into the groundwater, water courses or sewage system.
-
Page 9: Before You Begin Working
BEFORE YOU BEGIN WORKING BEFORE YOU BEGIN WORKING ENGINE IDENTIFIKATION Each engine will be clearly identified by two numbers. Both numbers are located on a label on the engine. The part number "Part No." is the number of the engine model. The serial number "Serial No."... - Page 10 BEFORE YOU BEGIN WORKING The intake manifold is not shown in the figure. – Oil filter – Coolant circuit to the heat exchanger – Coolant circuit from the heat exchanger – Permanent vent coolant circuit – Exhaust ports / Exhaust side –...
-
Page 11: Workshop Equipment
The tools and supplies described in this chapter you will require when working on the engine. Before you begin working, check that all the tools required for the repair are available. TEXTRON MOTORS SPECIAL TOOLS Visit WWW.TEXTRONOFFROAD.COM for more information. -
Page 12: Workshop Equipment And Tools
BEFORE YOU BEGIN WORKING WORKSHOP EQUIPMENT AND TOOLS In addition to the TEXTRON MOTORS special tools, you will require the following workshop equipment and tools when working on the engine. The figures are examples of suitable workshop equipment and tools. - Page 13 BEFORE YOU BEGIN WORKING Figure Description Figure Description Valve spring Spark plug brush compressor Feeler gauge Stud extractor 8 mm 0,05 – 2 mm Caliper Measuring accuracy Universal pliers 0,05 mm Lockring pliers (bore holes) Angle indicator Clamping pliers Valve stem seal remover Digital-multimeter Piston ring compressor...
-
Page 14: Supplies
BEFORE YOU BEGIN WORKING SUPPLIES The following supplies you will require when working on the engine. Unless otherwise specified, use the products as directed by the manufacturer. Supplies Examples of suitable tools – Liqui Moly brake and parts cleaner AIII Sealing surface cleaner Rust remover –... - Page 15 BEFORE YOU BEGIN WORKING NOTES: TD410023-B RLF...
-
Page 16: Section A - Engine Disassembly
ENGINE DISASSEMBLY SECTION A – ENGINE DISASSEMBLY NOTES: TD410023-B RLF... - Page 17 ENGINE DISASSEMBLY Bearing damage, increased wear and leaks due to installing components swapped over. All components in and on the engine has been run-in together. If the components are installed swapped over, they no longer fit together well. ► Keep your workspace clean and tidy. ►...
-
Page 18: Removing Engine From The Vehicle
ENGINE DISASSEMBLY REMOVING ENGINE FROM THE VEHICLE 1. Remove the engine from the vehicle. (See the vehicle manufacturer‘s documentation.) SECURING THE ENGINE WARNING! Spinal column injury caused by incorrect lifting of heavy loads. Always lift the engine using a workshop crane. NOTICE! Breakage. -
Page 19: Removing Generator Cover
ENGINE DISASSEMBLY REMOVING GENERATOR COVER 5 mm: Remove ten bolts M6 8 mm: Remove three bolts M10 CAUTION! Danger of slipping caused by leaking engine oil. Place a drain tray. The generator cover is sealed with a silicone liquid seal. 3. -
Page 20: Removing Intake Manifold
ENGINE DISASSEMBLY T30: Remove the bolt 3. Remove the starter 5 mm: Remove the bolt 5. Remove the bracket REMOVING INTAKE MANIFOLD 5 mm: Remove four bolts 6 mm: Remove two bolts 3. Remove the intake manifold Observe in section C Additional working instructions the chapters Intake manifold disassembly and Intake manifold reassembly. -
Page 21: Removing Ignition Coils
ENGINE DISASSEMBLY REMOVING IGNITION COILS 5 mm: Remove four bolts 2. Remove two ignition coils REMOVING SPARK PLUGS WARNING! Irritations and eye injuries can be caused by blown out dirt and particles. All persons in the surrounding area must wear protective glasses. -
Page 22: Removing Rocker Arms
ENGINE DISASSEMBLY REMOVING ROCKER ARMS Start with the cylinder where the rocker arms have a certain amount of play. 1. Remove the rocker axle using a universal pliers. 2. Remove the rocker arm 3. Remove two valve adjustment shims using a bar magnet. -
Page 23: Removing Oil Cooler
ENGINE DISASSEMBLY REMOVING OIL COOLER T30: Remove four bolts 2. Remove the oil cooler REMOVING OIL COOLER BRACKET 5 mm: Remove the bolt M6x30 5 mm: Remove 14 bolts M6x20 CAUTION! Danger of slipping caused by leaking coolant. Place a drain tray. 3. -
Page 24: Removing Impeller
ENGINE DISASSEMBLY REMOVING IMPELLER 1. Hold the crankshaft locking tool on rotor in position. 8 mm: Install the bolt and washer. 10 mm: Remove the nut 4. Remove the impeller REMOVING SLIDE RING SEAL 7 mm: Remove the water pump axle REMOVING CRANKSHAFT COVER T30: Remove the bolt 2. -
Page 25: Removing Crankshaft Sensor
ENGINE DISASSEMBLY REMOVING CRANKSHAFT SENSOR 4 mm: Remove the bolt 2. Remove the sensor MOUNT THE ENGINE ACROSS FROM THE DRIVE SIDE 1. Mount the engine across from the drive side on the engine stand. Suitable mounting points M10: – Screw-in depth 30 mm REMOVING GENERATOR AND STUB SHAFT... -
Page 26: Removing Oil Pressure Pump
ENGINE DISASSEMBLY 5 mm: Remove four bolts 6. Remove the stator 7. Remove the distance washer 8. Remove two sleeves REMOVING OIL PRESSURE PUMP 1. Remove the circlip using a lockring pliers. 2. Remove the oil pump cover using a universal pliers. -
Page 27: Mount The Engine On The Drive Side
ENGINE DISASSEMBLY MOUNT THE ENGINE ON THE DRIVE SIDE 1. Mount the engine on the drive side on the engine stand. Suitable mounting points M10: – Screw-in depth 30 mm Support: – Minimum one mounting point M6 REMOVING SUCTION PUMP COVER 1. -
Page 28: Removing Suction Pump Intermediate Gear
ENGINE DISASSEMBLY REMOVING SUCTION PUMP INTERMEDIATE GEAR 8 mm: Remove the plug and seal. 2. Knock out the axle using the intermediate gear axle punch and plastic hammer. 3. Remove the suction pump intermediate gear 4. Turn the engine 180°. REMOVING TIMING CHAIN 27 mm: Remove the chain tensioner 2. -
Page 29: Removing Cylinder Head
ENGINE DISASSEMBLY 4. Turn the engine 180°. 5. Remove the timing chain REMOVING CYLINDER HEAD 1. Check the tie rod thread protrusion according to the specification Tie rod thread protrusion. (See section D Test procedures and adjustments.) Remove all nuts in the sequence as illustrated 14 mm: Remove eight nuts washers. -
Page 30: Removing Crank Drive
ENGINE DISASSEMBLY REMOVING CRANK DRIVE 1. Turn the engine 180°. Remove all bolts in the sequence as illustrated 5 mm: Remove four bolts M6 – 6 mm: Remove five bolts M8 – 4. Remove the oil pressure valve using a bar magnet. - Page 31 ENGINE DISASSEMBLY 9. Remove the balance shaft 10. Remove the crankshaft 11. Remove the oil seal 6 mm: Remove the banjo bolt 13. Remove the oil nozzle 14. Repeat the procedure with the other oil nozzle. 15. Turn the upper case 180°. Use an abrasive fleece and rust remover for cleaning the cylinder liners.
-
Page 32: Removing Thermostat Housing
ENGINE DISASSEMBLY REMOVING THERMOSTAT HOUSING Only remove the thermostat housing if the thermostat housing or the crankcase must be replaced. 5 mm: Remove ten bolts The thermostat housing is sealed with a silicone liquid seal. 2. Remove the thermostat housing Observe in section C Additional working instructions the chapters Thermostat housing disassembly and Thermostat housing... -
Page 33: Replacing Piston Or Con Rod
ENGINE DISASSEMBLY REPLACING PISTON OR CON ROD 1. Remove the circlip using a small screwdriver. 2. Remove the piston pin 3. Replace the piston or con rod Machinings on the con rod are not relevant for the installation position of the con rod. 4. - Page 34 ENGINE DISASSEMBLY Pay particular attention to the steps for the cylinder liners. The areas must be clean and free of grease. 4. Clean the upper case in the area of the cylinder liners thoroughly. 5. Coat the areas of the cylinder liner o-rings below dimension lightly with petroleum jelly.
- Page 35 ENGINE DISASSEMBLY The cylinder head gasket must be replaced after removal. When press-in the cylinder liner, you can use the used cylinder head gasket. 12. Apply the cylinder head gasket. Observe the installation position: – Exhaust side – Centering pins –...
-
Page 36: Section B - Engine Resassembly
ENGINE REASSEMBLY SECTION B – ENGINE RESASSEMBLY NOTES: TD410023-B RLF... - Page 37 ENGINE REASSEMBLY 1. Check if the fitting is installed. 2. Check if the plug is installed. 3. Check if the plug is installed. 4. Check if the plugs installed. 5. Check if the plugs are installed. The plug is not installed in each crankcase. 6.
-
Page 38: Mount The Engine On The Drive Side
ENGINE REASSEMBLY MOUNT THE ENGINE ON THE DRIVE SIDE 1. Mount the engine on the drive side on the engine stand. Suitable mounting points M10: – Screw-in depth 30 mm Support: – Minimum one mounting point M6 REPLACING OIL FILTER 1. -
Page 39: Installing Chain Guide
ENGINE REASSEMBLY INSTALLING CHAIN GUIDE 1. Turn the upper case 180°. 2. Insert the chain guide 5 mm: Install two bolts according to the specification Other bolts M6 Standard. (See section D Tightening torques und assembly instructions.) 4. Turn the upper case 180°. INSTALLING THERMOSTAT HOUSING 1. - Page 40 ENGINE REASSEMBLY 6. When replacing a piston with con rod, check the con rod bearing play according to the specification Con rod bearing play. (See section D Test procedures and adjustments.) 7. Coat four con rod bearing shells lightly with engine oil and insert in the con rods and con rod covers.
- Page 41 ENGINE REASSEMBLY ASSEMBLY INSTRUCTIONS FOR PISTON Position G piston ring gap lower cover ring RING GAPS Arrangement of the piston rings – Upper compression ring – Lower compression ring Three-part oil control ring, consisting of: – Upper cover ring – Sinuous spring –...
- Page 42 ENGINE REASSEMBLY 12. Turn the upper case 180°. 13. Hold the oil nozzle in position. 6 mm: Install the banjo bolt according to the specification Oil nozzle. (See section D Tightening torques und assembly instructions.) 15. Repeat the procedure with the other oil nozzle. 16.
- Page 43 ENGINE REASSEMBLY 21. Observe the markings Both markings ends flush with the crankcase. 22. Turn the crankshaft 180°. 23. Check if the centering pins installed. 24. Apply the silicone liquid seal according to the specification Liquid sealing contour crankcase. (See section D Liquid sealing contours.) 25.
-
Page 44: Installing Cylinder Head
ENGINE REASSEMBLY 27. Assemble the oil pressure valve in the sequence as illustrated 28. Coat the oil pressure valve lightly with engine oil. 29. Insert the oil pressure valve. The crankcase is tightened in two stages. The crankcase will be tightend only after the cylinder head installation. -
Page 45: Installing Timing Chain
ENGINE REASSEMBLY 6. Insert four cross bars . (See the following assembly instruction for cross bars.) 7. Install eight nuts and washers according to the specification Cylinder head nuts. (See section D Tightening torques und assembly instructions.) 8. Check the tie rod thread protrusion according to the specification Tie rod thread protrusion. - Page 46 ENGINE REASSEMBLY 5. Turn the crankshaft on the TDC-adjusting tool in the rotation direction until the marking ends flush with the crankcase joint 6. Turn the engine 180°. 7. Insert the timing chain as illustrated. 8. Insert the chain link to the open ends of the timing chain.
-
Page 47: Installing Suction Pump Intermediate Gear
ENGINE REASSEMBLY 12. Turn the crankshaft on the TDC-adjusting tool several times in the rotation direction until the marking ends flush with the crankcase joint. 13. Check if the camshaft marking ends flush with the cross bar. 7 mm: Remove two bolts 15. -
Page 48: Mount The Engine Across From The Drive Side
ENGINE REASSEMBLY 5 mm: Install seven bolts M6x30 seven bolts M6x20 according to the specification Other bolts M6 Standard. (See section D Tightening torques und assembly instructions.) 5. Turn the engine 180°. MOUNT THE ENGINE ACROSS FROM THE DRIVE SIDE 1. - Page 49 ENGINE REASSEMBLY 4. Slide the guiding sleeve onto crankshaft Use the bolts M10x1x35 that you removed from the rotor. 7 mm: Install two bolts 6. Position the sliding sleeve on the oil seal Use a bolt M10x1x35 that you removed from the rotor.
-
Page 50: Installing Oil Pressure Pump
ENGINE REASSEMBLY 7 mm: Remove two bolts 12. Remove the guiding sleeve 13. Check if the oil seal is tilted. 14. If the oil seal is tilted, it must be replaced. INSTALLING OIL PRESSURE PUMP NOTICE! Engine damage caused by lack of lubrication. -
Page 51: Installing Generator And Stub Shaft
ENGINE REASSEMBLY INSTALLING GENERATOR AND STUB SHAFT 1. Insert two sleeves 2. Insert the distance washer 3. Hold the stator in position. 5 mm: Install four bolts according to the specification Other bolts M6 medium strength thread locker. (See section D Tightening torques und assembly instructions.) 5. -
Page 52: Mount The Engine On The Drive Side
ENGINE REASSEMBLY MOUNT THE ENGINE ON THE DRIVE SIDE 1. Mount the engine on the drive side on the engine stand. Suitable mounting points M10: – Screw-in depth 30 mm Support: – Minimum one mounting point M6 INSTALLING CRANKSHAFT SENSOR 1. -
Page 53: Installing Slide Ring Seal
ENGINE REASSEMBLY 2. Insert the cover T30: Install the bolt according to the specification Other bolts M6 Standard. (See section D Tightening torques und assembly instructions.) INSTALLING SLIDE RING SEAL The crankshaft locking tool is still installed. 1. Replace the water pump axle NOTICE! Leaks caused by damaged sealing surfaces of the water pump axle. - Page 54 ENGINE REASSEMBLY Do not install the guide completely. A gap must remain between the guide and the water pump axle. 7 mm: Install the guide 8. Replace the slide ring seal NOTICE! Leaks can be caused by defective slide ring seal. Do not slide the slide ring seal by hand onto water pump axle.
-
Page 55: Installing Impeller
ENGINE REASSEMBLY NOTICE! Leaks caused by loosened bolt connection If the connection of the water pump axle has loosened during removing the tool, repeat the procedure with a new slide ring seal. 7 mm: Remove the guide INSTALLING IMPELLER The crankshaft locking tool is still installed. 1. -
Page 56: Installing Oil Cooler
ENGINE REASSEMBLY 4. Position the oil cooler bracket to the crankcase. 5 mm: Install the bolt M6x30 and twelve bolts M6x20 according to the specification Other bolts M6 Standard. (See section D Tightening torques und assembly instructions.) INSTALLING OIL COOLER 1. -
Page 57: Installing Rocker Arms
ENGINE REASSEMBLY INSTALLING ROCKER ARMS On this cylinder both cams point downwards. 1. Insert both valve adjustment shims 2. Coat the rocker arm and rocker axle lightly with engine oil. 3. Hold the rocker arm in position. 4. Check if the circlip is installed and insert the rocker axle. -
Page 58: Installing Spark Plugs
ENGINE REASSEMBLY 5. Apply the valve cover 5 mm: Install eight bolts according to the specification Valve cover bolts. (See section D Tightening torques und assembly instructions.) INSTALLING SPARK PLUGS 1. Check two spark plugs according to the specification Spark plug gap. (See section D Test procedures and adjustments.) 16 mm: Install two spark plugs using a... -
Page 59: Installing Intake Manifold
ENGINE REASSEMBLY INSTALLING INTAKE MANIFOLD The o-rings and seals are dependent on the intake socket groove and not interchangeable. Observe the sealing contour when choosing o-rings or seals. – Closed groove: O-ring – Groove with inspection port: Seal 1. Replace the o-rings or seals 2. -
Page 60: Installing Starter
ENGINE REASSEMBLY INSTALLING STARTER 1. Hold the bracket in position. 5 mm: Install the bolt according to the specification Other bolts M6 Standard. (See section D Tightening torques und assembly instructions.) 3. Replace the o-ring and lightly coat with petroleum jelly. 4. -
Page 61: Installing Generator Cover
ENGINE REASSEMBLY INSTALLING GENERATOR COVER 1. Remove all residues of engine oil inside the generator cover 2. Remove the oil seal 3. Replace the oil seal. 4. Press the oil seal into the generator cover until stop. 5. Coat the inside of the oil seal lightly with petroleum jelly. - Page 62 ENGINE REASSEMBLY 8 mm: Install three bolts M10x50 according to the specification Other bolts M10 Standard. (See section D Tightening torques und assembly instructions.) 5 mm: Install ten bolts M6x50 according to the specification Other bolts M6 Standard. (See section D Tightening torques und assembly instructions.) 14 mm: Remove the vent plug If too much oil has been filled, oil may leak at the...
-
Page 63: Securing The Engine
ENGINE REASSEMBLY SECURING THE ENGINE WARNING! Spinal column injury caused by incorrect lifting of heavy loads. Always lift the engine using a workshop crane. NOTICE! Breakage. Lift the engine only using the brackets. Depending on the engine model, use the brackets 1. -
Page 64: Section C - Additional Working Instructions
ADDITIONAL WORKING INSTRUCTIONS SECTION C – ADDITIONAL WORKING INSTRUCTIONS NOTES: TD410023-B RLF... -
Page 65: Intake Manifold Disassembly
ADDITIONAL WORKING INSTRUCTIONS INTAKE MANIFOLD DISASSEMBLY REMOVING THROTTLE BODY 7 mm: Open the screw clamp 2. Remove the throttle body 5 mm: Remove four bolts 4. Remove the rubber mount REMOVING INTAKE MANIFOLD SENSOR T30: Remove the bolt 2. Remove the sensor TD410023-B RLF... -
Page 66: Intake Manifold Reassembly
ADDITIONAL WORKING INSTRUCTIONS INTAKE MANIFOLD REASSEMBLY Only valid for engine model 409135 I2 846 UTV NA-80. 1. Check if the cap is installed. INSTALLING INTAKE MANIFOLD SENSOR 1. Insert the sensor T30: Install the bolt according to the specification Other bolts (self-tapping) 6x20. (See section D Tightening torques und assembly instructions.) INSTALLING THROTTLE BODY... -
Page 67: Valve Cover Disassembly
ADDITIONAL WORKING INSTRUCTIONS 4. Hold the throttle body in position. 5. Close the screw clamp according to the specification Screw clamps. (See section D Tightening torques und assembly instructions.) VALVE COVER DISASSEMBLY REMOVING CAMSHAFT SENSOR 5 mm: Remove the bolt 2. -
Page 68: Suction Pump Cover Disassembly
ADDITIONAL WORKING INSTRUCTIONS SUCTION PUMP COVER DISASSEMBLY REMOVING OIL SUCTION PUMP The oil screen is not installed in each engine. Observe the references in the spare parts catalog. T30: Remove two bolts 2. Remove the oil screen T30: Remove four bolts 4. -
Page 69: Cylinder Head Disassembly
ADDITIONAL WORKING INSTRUCTIONS CYLINDER HEAD DISASSEMBLY REMOVING KNOCK SENSOR Only valid for engine model 409135 I2 846 UTV NA-80. The knock sensor is not installed in each engine. Observe the references in the spare parts catalog. 6 mm: Remove the bolt 2. -
Page 70: Removing Camshaft
ADDITIONAL WORKING INSTRUCTIONS 5 mm: Remove two bolts 9. Remove the bracket REMOVING CAMSHAFT Only remove the camshaft if the camshaft or the cylinder head must be replaced. 5 mm: Remove four bolts 2. Remove two bearing caps using a bearing cap remover 3. -
Page 71: Removing Fuel Rail
ADDITIONAL WORKING INSTRUCTIONS 5. Remove the spring cup , valve spring and spring pad 6. Remove the valve 7. Remove the valve stem seal using the valve stem seal remover. 8. Repeat the procedure with the other valves. REMOVING FUEL RAIL Only remove the fuel rail if the cylinder head, the injectors or the fuel rail must be replaced. -
Page 72: Cylinder Head Reassembly
ADDITIONAL WORKING INSTRUCTIONS 2. Remove the fuel rail Only remove the injectors if the injectors or the fuel rail must be replaced. WARNING! Serious eye injuries caused by a fast hurled bracket. Wear protective glasses. 3. Press the bracket carefully apart. 4. -
Page 73: Installing Valves
ADDITIONAL WORKING INSTRUCTIONS WARNING! Burn injuries caused by ignited fuel. Fuel is highly flammable. Leaks in the fuel system can lead to burns and vapors may ignite and cause an explosion. 5. Coat two o-rings lightly with lubricant for o-ring injectors. 6. -
Page 74: Installing Camshaft
ADDITIONAL WORKING INSTRUCTIONS The valve springs are marked on the side in color. If you replace valve springs, all installed valve springs must have the same color-code. 6. Insert the spring pad , valve spring spring cup 7. Install the valve spring compressor according to the manufacturer's instructions. -
Page 75: Installing Brackets And Oil Pressure Switch
ADDITIONAL WORKING INSTRUCTIONS 5 mm: Install four bolts according to the specification Other bolts M6 Standard. (See section D Tightening torques und assembly instructions.) INSTALLING BRACKETS AND OIL PRESSURE SWITCH 1. Hold the bracket in position. 5 mm: Install the bolt according to the specification Other bolts M6 high strength thread locker. -
Page 76: Installing Knock Sensor
ADDITIONAL WORKING INSTRUCTIONS INSTALLING KNOCK SENSOR Only valid for engine model 409135 I2 846 UTV NA-80. The knock sensor is not installed in each engine. Observe the references in the spare parts catalog. 1. Hold the sensor in position as illustrated. 6 mm: Install the bolt according to the specification Other bolts M8 Standard. -
Page 77: Removing Coolant Sensor
ADDITIONAL WORKING INSTRUCTIONS REMOVING COOLANT SENSOR 19 mm: Remove the sensor THERMOSTAT HOUSING REASSEMBLY INSTALLING COOLANT SENSOR 19 mm: Install the sensor according to the specification Coolant sensor. (See section D Tightening torques und assembly instructions.) INSTALLING THERMOSTAT 1. Coat the contact area of the thermostat lightly with petroleum jelly. - Page 78 ADDITIONAL WORKING INSTRUCTIONS 4. Insert the thermostat Observe the installation position: – Marker on the thermostat 5. Replace the o-ring and lightly coat with petroleum jelly. 6. Insert the fitting T30: Install two bolts according to the specification Other bolts M6 Standard. (See section D Tightening torques und assembly instructions.) TD410023-B RLF...
- Page 79 ADDITIONAL WORKING INSTRUCTIONS NOTES: TD410023-B RLF...
-
Page 80: Section D - Spezifications
SPECIFICATIONS SECTION D – SPEZIFICATIONS NOTES: TD410023-B RLF... -
Page 81: Tightening Torques Und Assembly Instructions
SPECIFICATIONS TIGHTENING TORQUES UND ASSEMBLY INSTRUCTIONS Engine damage caused by improper repairs. All specifications for tightening torques and assembly instructions refer only to parts that are offered in the spare parts catalog. ► Only remove components that are offered separately in the spare parts catalog. - Page 82 SPECIFICATIONS Component Tightening torques Assembly instructions Screw clamps 3 Nm +0,5 Nm [2.2 lbf ft +0.4 lbf ft] 9 mm width Valve cover – Use Anti-Seize assembly paste. 5 mm: – bolts Observe the following sequence during assembly. 8 Nm +2 Nm [5.9 lbf ft +1.5 lbf ft] (Disassembly takes place in reverse order.) Crankcase bolts First stage:...
-
Page 83: Other Bolts
SPECIFICATIONS Component Tightening torques Assembly instructions Cylinder head – Coat the nuts lightly with engine oil. 14 mm: nuts Observe the following sequence during assembly. First stage: (Disassembly takes place in reverse order.) 20 Nm ±3 Nm [14.8 lbf ft ±2.2 lbf ft] Second stage: 40 Nm ±3 Nm [29.5 lbf ft ±2.2 lbf ft] Third stage:... -
Page 84: Screw-In Nipples
SPECIFICATIONS SCREW-IN NIPPLES Screw-in Tightening torques Assembly instructions nipples M8x1 8 Nm +2 Nm [5.9 lbf ft +1.5 lbf ft] – Replace the seal. M18x1.5 suction 25 Nm +3 Nm [18.4 lbf ft +2.2 lbf ft] – When a seal is installed, replace the seal. pump cover –... -
Page 85: Liquid Sealing Contours
SPECIFICATIONS LIQUID SEALING CONTOURS LIQUID SEALING CONTOUR CRANKCASE 1. Clean the sealing surfaces on the lower case and upper case. 2. Apply the silicone liquid seal on the upper case without gaps as illustrated. TD410023-B RLF... -
Page 86: Liquid Sealing Contour Suction Pump Cover
SPECIFICATIONS LIQUID SEALING CONTOUR SUCTION PUMP COVER 1. Clean the sealing surfaces on the crankcase and suction pump cover. 2. Apply the silicone liquid seal into the sealing groove on the suction pump cover including an overhang of 1 mm without gaps. TD410023-B RLF... -
Page 87: Liquid Sealing Contour Thermostat Housing
SPECIFICATIONS LIQUID SEALING CONTOUR THERMOSTAT HOUSING 1. Clean the sealing surfaces on the crankcase and thermostat housing. 2. When the thermostat housing has a sealing groove apply the silicone liquid seal into the sealing groove on the thermostat housing including an overhang of 1 mm without gaps. 3. -
Page 88: Liquid Sealing Contour Generator Cover
SPECIFICATIONS LIQUID SEALING CONTOUR GENERATOR COVER 1. Clean the sealing surfaces on the crankcase and generator cover. 2. Apply the silicone liquid seal into the sealing groove on the generator cover including an overhang of 1 mm without gaps. TD410023-B RLF... -
Page 89: Test Procedures And Adjustments
SPECIFICATIONS TEST PROCEDURES AND ADJUSTMENTS VALVE LASH Check the valve lash with a cold engine. 1. Remove the ignition coils and valve cover. 2. Check the valve lash first on the cylinder where the rocker arms have a certain amount of play. Required valve lash: Intake side 0,1 –... -
Page 90: Con Rod Bearing Play
SPECIFICATIONS CON ROD BEARING PLAY 1. When replacing the crankshaft or con rod, check the con rod bearing play. Required con rod bearing play "A": 0,025 – 0,040 mm 2. If the con rod bearing play is incorrect, repeat the procedure with another con rod bearing shell thickness. -
Page 91: Generator
SPECIFICATIONS 8 mm: Turn the crankshaft on the TDC- adjusting tool in the rotation direction until the marking ends flush with the crankcase joint 5. Check wether the camshaft is at the crossing point. The position of the camshaft is as illustrated The marking ends flush with the cross bar. -
Page 92: Oil Pressure
SPECIFICATIONS OIL PRESSURE 1. Warm up the engine. 7 mm: Remove the wire harness on the oil pressure switch 24 mm: Remove the oil pressure switch. CAUTION! Scalding caused by hot engine oil. Wear protective gloves. 4. Install the adapter M10x1 for oil pressure tester according to the manufacturer's instructions. -
Page 93: Tie Rod Thread Protusion
SPECIFICATIONS TIE ROD THREAD PROTUSION 1. When removing the cylinder head nuts, check the tie rod thread protusion to the cross "A" before romoval and after installation. Permissible tie rod thread protrusion: Maximum 15,4 mm Maximum 16 mm 2. If the maximum permissible thread protrusion is exceeded, replace the tie rod. -
Page 94: Crankshaft Sensing Wheel
SPECIFICATIONS CRANKSHAFT SENSING WHEEL Crankshaft sensing wheel Gap (two missing teeth) 1. Perform a visual inspection on the crankshaft sensing wheel. 2. If mechanical damages are present, replace the crankshaft. ROCKER ARM CAM SPIKE Cam spike at the rocker arm 1. - Page 95 SPECIFICATIONS NOTES: TD410023-B RLF...
- Page 96 The repair manual is valid for both engine Rev B 18.04.2017 – models. – The standard cylinder liner puller was replaced by the TEXTRON MOTORS Rev B 18.04.2017 TEXTRON MOTORS Special tools cylinder liner removal tool. – The oil for generator interior was replaced...
- Page 98 TEXTRON MOTORS GmbH Daimlerstraße 5 88677 Markdorf Germany WWW.TEXTRONMOTORS.COM...
Need help?
Do you have a question about the MPE 850 OFF-ROAD and is the answer not in the manual?
Questions and answers