Table of Contents
Advertisement
SERVICE MANUAL
4-Stroke Engine
MPE 850 MARINE
This service manual is valid for the following engine models:
– 408101 I2 846 MAR TC-100 (TC-80) (TC-120)
– 408014 I2 846 MAR TC-120
– 408090 I2 846 MAR TC-155
– 408246 I2 846 MAR NA-80
TD407477_SHB
Rev F
06.11.2015
en_English
Read this service manual thoroughly before operating the engine for the
first time.
Advertisement
Table of Contents

Related Manuals for Textron MPE 850 MARINE


Summary of Contents for Textron MPE 850 MARINE
- Page 1 SERVICE MANUAL 4-Stroke Engine MPE 850 MARINE This service manual is valid for the following engine models: – 408101 I2 846 MAR TC-100 (TC-80) (TC-120) – 408014 I2 846 MAR TC-120 – 408090 I2 846 MAR TC-155 – 408246 I2 846 MAR NA-80...
- Page 3 Textron Motors GmbH strives to make continual improvements as part of the ongoing technical development of its products. All documentation is therefore subject to technical modifications. Reprints and translations, in whole or in part, require written permission from Textron Motors GmbH.
-
Page 4: Table Of Contents
Table of contents Table of contents 1 About this document 1.1 Meaning of symbols and signal words......... . . 6 2 Safety 2.1 Meaning of safety alert symbol and signal words . - Page 5 8.2.2 Textron Motors diagnostic case ........
-
Page 6: About This Document
1 About this document 1.1 Meaning of symbols and signal words 1 About this document This service manual was designed to help you operating the engine safely and reliably. Observe the following references: – Read this service manual thoroughly before operating the engine for the first time. –... -
Page 7: Safety
2 Safety 2.1 Meaning of safety alert symbol and signal words 2 Safety This engine is state-of-the-art and built according to recognized safety technical and emission regulations. Ignoring the information in this service manual may result in personal injury or property damage. Read and observe the following safety messages carefully before operating the engine for the first time. -
Page 8: Important Safety Messages
All the components in your engine have been carefully tested and fulfill strict quality and safety requirements. ► Textron Motors offers spare parts to the highest quality. Ensure that equivalent spare parts corresponds with this quality requirements. Add-on parts and modifications Engine modifications may pose a safety risk to persons. - Page 9 2 Safety 2.2 Important safety messages Engine fluids pose a health risk. Fuel, engine oil and coolant handling ► Always read the manufacturer's instructions. ► Always wash your hands prior to eating, smoking and using the restroom as well as at the end of the working shift when working with engine fluids.
-
Page 10: Description
The engine models I2 846 MAR has been designed for powering watercrafts. Any other use is not permissible. All specifications in this service manual are only valid for the unmodified engine delivered by Textron Motors. Engine modifications are not permissible and in addition, may void the warranty or violate federal laws. - Page 11 3 Description 3.1 Intended use | 3.2 Identification Engine model I2 846 MAR TC-155 The label with the part number and the serial number is located on the expansion tank The serial number is also engraved on the crankcase The “Emission Control Information” label is located on the expansion tank.
-
Page 12: Fuel
3 Description 3.3 Fuel | 3.4 Engine oil 3.3 Fuel Engine models I2 846 MAR NA-80 TC-80 TC-100 TC-120 TC-155 Fuel Unleaded gasoline Recommended fuel quality 95 ROZ or 85 MOZ 98 ROZ or 88 MOZ USA ʺPremium 91ʺ USA ʺPremium 93ʺ Minimum requirement NOTICE! Low octane fuel can cause loss of power and/or increased fuel consumption. -
Page 13: Coolant
3 Description 3.5 Coolant 3.5 Coolant Engine models I2 846 MAR NA-80 TC-80 TC-100 TC-120 TC-155 Coolant additive Coolant additive based on ethylene glycol, silicate- and nitrite- free, suitable for aluminium engines. Suggested coolant additives NOTICE! Insufficient cooling due to incompatibilities of coolant. Combining different coolant additives may trigger a chemical reaction and they may lose their effectiveness. -
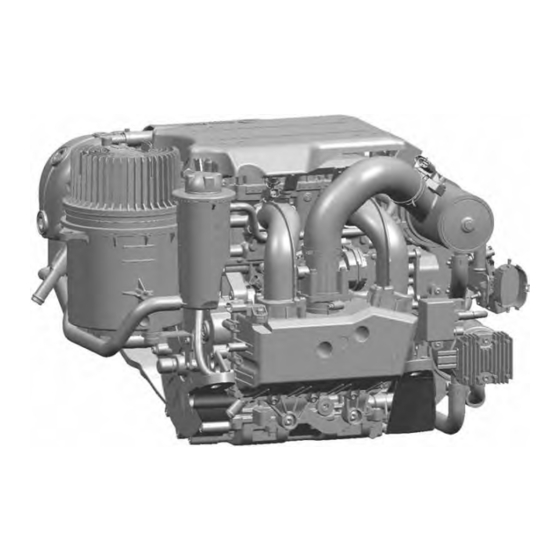
Page 14: Engine Components And Information
3 Description 3.6 Engine components and information 3.6 Engine components and information Inf or ma t ion ! The wire harness is not shown in the figures. Engine models I2 846 MAR TC-80, TC-100 and TC-120 – Oil filter – Drainage for storage –... - Page 15 3 Description 3.6 Engine components and information – 1st cylinder – Sensor camshaft 2nd cylinder – Fuel supply – Engine rotation direction – Stub shaft / Power take off – Engine cover – Oil tank – Coolant expansion tank – Sea water supply –...
- Page 16 3 Description 3.6 Engine components and information Engine model I2 846 MAR TC-155 – Oil filter – Drainage for storage – Waste gate valve – Flame arrester – Connection for sea water cooling circuit flushing device – Heat exchanger – Sacrificial anode –...
- Page 17 3 Description 3.6 Engine components and information – 1st cylinder – Sensor camshaft 2nd cylinder – Fuel supply – Fuse Box – Engine rotation direction – Stub shaft / Power take off – Engine cover – Oil tank – Coolant expansion tank –...
- Page 18 3 Description 3.6 Engine components and information Engine model I2 846 MAR NA-80 – Oil filter – Drainage for storage – Heat exchanger – Connection for sea water cooling circuit flushing device – Sacrificial anode – Exhaust manifold Exhaust side –...
- Page 19 3 Description 3.6 Engine components and information – 1st cylinder – Sensor camshaft 2nd cylinder – Fuel supply – Fuse Box – Engine rotation direction – Stub shaft / Power take off – Engine cover – Oil tank – Coolant expansion tank –...
-
Page 20: Engine Fuses And Relays
3 Description 3.7 Engine fuses and relays 3.7 Engine fuses and relays The engine fuses and relays are located in the fuse box on the engine. (See chapter 3.6 Engine components and information.) ► Remove the cover from the fuse box. Overview configuration fuses and relays Relay “MAIN”, relay main Relay “FUEL”, relay fuel pump... -
Page 21: Protective Functions
If one of the following speed limitations is active there is a malfunction. Speed limitations results in decreased driving performance and can cause unusual vehicle responses. Immediately inspect the cause and repair possible faults by a qualified workshop. All Textron Motors authorized workshops are qualified to repair your engine. 6000 min [rpm]... -
Page 22: Technical Specifications
3 Description 3.9 Technical specifications 3.9 Technical specifications Engine models I2 846 MAR TC-80 TC-100 TC-120 TC-155 Type 4-stroke gasoline engine, parallel twin with balance shaft and single overhead camshaft (SOHC) Displacement 846 cm³ Number of cylinders Bore x stroke 89 x 68 mm [3.5 x 2.7 in] Compression ratio 9 : 1... - Page 23 3 Description 3.9 Technical specifications Engine models I2 846 MAR NA-80 Type 4-stroke gasoline engine, parallel twin with balance shaft and single overhead camshaft (SOHC) Displacement 846 cm³ Number of cylinders Bore x stroke 89 x 68 mm [3.5 x 2.7 in] Compression ratio 11,5 : 1 Engine power ISO 8178...
-
Page 24: Supported Vehicle Equipment
► The required service tasks must be performed in a qualified workshop. All Textron Motors authorized workshops are qualified to service your engine. Observe that only the regular operating hours intervals will be indicated. - Page 25 NOTICE! Engine damage caused by overheating. An empty expansion tank may be an indication of a leaking cooling system. Immediately inspect the cause and repair possible faults by a qualified workshop. All Textron Motors authorized workshops are qualified to repair your engine. ►...
-
Page 26: Operation
4 Operation 4.1 Service intervals 4 Operation Familiarize yourself with the vehicle before operating the engine. Read the vehicle manufacturer‘s documentation. 4.1 Service intervals Regular service is essential to keep your engine in a safe operating condition. Perform all engine and vehicle related service tasks as described in this service manual and the vehicle manufacturer‘s documentation. - Page 27 4.1 Service intervals The following service tasks require special technical knowledge of this engine. These service tasks must be performed in a qualified workshop. All Textron Motors authorized workshops are qualified to service your engine. All activities are described in chapter 8 Service tasks in the workshop.
-
Page 28: Operation During The Break-In Period
4 Operation 4.2 Operation during the break-in period 4.2 Operation during the break-in period The way you operate the engine is a major factor in determining engine performance and useful life. This affects the way you operate in the – first 5 hours of operation. –... -
Page 29: Operating Engine
4 Operation 4.3 Operating engine 4.3 Operating engine 4.3.1 Inspecting the exhaust and fuel system ► Remove the engine cover Exhaust system WARNING! Engine exhaust gases contain carbon monoxide (CO). Inhalation can deprive the body of oxygen and result in organ damage or death by asphyxiation. -
Page 30: Checking Coolant Level
4 Operation 4.3 Operating engine 4.3.2 Checking coolant level Check the coolant level with a cold engine. ► Check the coolant level in the expansion tank The coolant level must be between the MIN-marking and the MAX-marking NOTICE! Overheating damage caused by too low coolant level. -
Page 31: Put The Engine Into Operation
4 Operation 4.3 Operating engine 4.3.3 Put the engine into operation The following procedure is not a complete description of the commissioning, it describes only the engine- specific requirements. Observe strictly the vehicle manufacturer's documentation. NOTICE! Engine damage caused by overheating. If you operate the engine without sea water, the optimal engine cooling is no longer provided. -
Page 32: Checking Oil Level
4 Operation 4.3 Operating engine 4.3.4 Checking oil level Inf or ma t ion ! Your engine features a dry sump lubrication system. Engine oil is pumped from the engine into the oil tank while the engine is operating. When the engine is turned off, some engine oil flows slowly from the oil tank back into the engine. - Page 33 4 Operation 4.3 Operating engine Refilling engine oil NOTICE! Engine damage caused by too much engine oil. Refill engine oil in small quantities with repeatedly checking. The difference between the MIN-marking and the MAX-marking approximately 0,5 liter [0.5 qt (US)] engine oil. ►...
-
Page 34: Take The Engine Out Of Operation
4 Operation 4.3 Operating engine 4.3.5 Take the engine out of operation The following procedure is not a complete description of the decommissioning, it describes only the engine- specific requirements. Observe strictly the vehicle manufacturer's documentation. ► Put the throttle control in neutral position. ►... -
Page 35: Flushing Sea Water Cooling Circuit
Start the engine and run the engine at idle. ► Open the water tap. The sea water cooling circuit will be flushed. Textron Motors recommends to flush the sea water cooling circuit at least for 5 minutes. ► Close the water tap. -
Page 36: Corrosion Protection
4 Operation 4.3 Operating engine 4.3.7 Corrosion protection Inf or ma t ion ! For information about suitable products and their using, please consult your local vehicle dealer. If you operate your vehicle in salt water, regularly use a corrosion protection spray. (See chapter 4.1 Service intervals.) SHB MPE850 Rev F | 408014 | 408090 | 408101 | 408246 |... -
Page 37: Transport And Storage Of The Vehicle
4 Operation 4.3 Operating engine 4.3.8 Transport and storage of the vehicle If you intend to transport or place the vehicle in storage, read the following instructions: ► If you do not intend to operate the engine for 30 days or more, prepare the engine for storage. (See chapter 5.1 Engine storage for more than 30 days.) ►... -
Page 38: Special Scenarios
Preparation for storage requires special technical knowledge of this engine. These tasks must be performed in a qualified workshop. All Textron Motors authorized workshops are qualified to prepare your engine for storage. 5.2 Operating engine without sea water Engine damage caused by overheating. -
Page 39: Measures In Case Of Flooded Engine
5 Special scenarios 5.4 Measures in case of flooded engine 5.4 Measures in case of flooded engine Engine damage due to water in the engine. Water may enter the engine through the exhaust system if your vehicle has been capsized and/or the engine compartment has been flooded. It can still happen even if the engine has been partially flooded. -
Page 40: Malfunctions
6 Malfunctions 6.1 Malfunctions table Follow the remedy guidance or contact a qualified workshop if you cannot correct a malfunction yourself. All Textron Motors authorized workshops are qualified to repair your engine. Observe chapter 3.10.1 Lights in vehicle. Possible cause... - Page 41 Fill up fuel. See the vehicle manufacturer's documentation. The battery is discharged or Contact a qualified workshop. defective. All Textron Motors authorized workshops are qualified to repair your engine. The engine stalls, but can Lack of fuel. Fill up fuel. See the vehicle be started again.
-
Page 42: Checking Engine Fuses
6 Malfunctions 6.2 Checking engine fuses 6.2 Checking engine fuses Risk of fire caused by incorrect or bridged fuse. The fuse protects the cable from cable fire. A higher amperage rating bypasses this protection. ► Never use a higher ampere rating. ►... - Page 43 6 Malfunctions 6.2 Checking engine fuses ► Check the fuse. The wire in the fuse must to be intact. ► If the wire is damaged, replace the fuse. ► Insert the fuse ► Repeat the procedure with other fuses. ► Insert the cover into the fuse box.
-
Page 44: Dealer And Servicing Network
Visit our web site www.textronmotors.com for a list of all authorized Textron Motors workshops. 7.2 Tools and parts Textron Motors offers a selection of accessories to prepare you for the most important situations. Visit your local vehicle dealer or our web site www.textronmotors.com for more information. 7.3 Repairs Repairs require special technical knowledge of this engine. -
Page 45: Service Tasks In The Workshop
► Ensure your workshop is qualified to service your engine. ► All Textron Motors authorized workshops are qualified to service your engine. Service manual Before reading chapter 8 Service tasks in the workshop, you must have read and understood all other information in the service manual. -
Page 46: Tools And Accessories
8 Service tasks in the workshop 8.2 Tools and accessories 8.2 Tools and accessories 8.2.1 Service parts Textron Motors offers a service case that contains the following service parts. Visit your local vehicle dealer or our web site www.textronmotors.com for more information. Figure Description... -
Page 47: Textron Motors Diagnostic Case
8.2.2 Textron Motors diagnostic case Textron Motors offers a diagnostic case that contains the Textron Motors Diagnostic Tool. The Textron Motors Diagnostic Tool is designed for fault diagnostics and service tasks for Textron engines using a Synerject engine management system. -
Page 48: Equipment Workshop
8 Service tasks in the workshop 8.2 Tools and accessories 8.2.3 Equipment workshop In addition to the service case, you will require the following tools and accessories for service tasks. The figures are only examples of suitable tools. Figure Description Figure Description Torque wrench... - Page 49 8 Service tasks in the workshop 8.2 Tools and accessories Figure Description Oil suction pump Drain tray Hose clamp pliers for spring band clamps SHB MPE850 Rev F | 408014 | 408090 | 408101 | 408246 |...
-
Page 50: Supplies
8 Service tasks in the workshop 8.2 Tools and accessories 8.2.4 Supplies You will require the following supplies or equivalents to perform service tasks. Unless otherwise specified, use the products as directed by the manufacturer. Supplies Recommended products Cleansing concentrate for flushing the sea water –... -
Page 51: Changing Engine Oil And Oil Filter
8 Service tasks in the workshop 8.3 Changing engine oil and oil filter 8.3 Changing engine oil and oil filter Inf or ma t ion ! The engine oil will be pumped out in two stages. First as much as possible engine oil will be pumped out from the oil tank. - Page 52 8 Service tasks in the workshop 8.3 Changing engine oil and oil filter Pumping out engine oil ► Insert the suction hose of the oil suction pump through the opening in oil dipstick until the hose reaches the oil tank bottom ►...
- Page 53 8 Service tasks in the workshop 8.3 Changing engine oil and oil filter ► Unscrew the bolts on the oil tank. ► Lift the oil tank from the oil tank bracket NOTICE! Breakage risk due to work on the oil tank. When removing the hose from the oil tank, you need to move the oil tank.
- Page 54 8 Service tasks in the workshop 8.3 Changing engine oil and oil filter ► Open the hose clamps ► Hold the hoses over a drain tray. Extend hoses if necessary. ► Actuate the starter. The engine cranks and the engine oil will be pumped out of the engine.
- Page 55 8 Service tasks in the workshop 8.3 Changing engine oil and oil filter ► Clean the sealing surface with sealing surface cleaner. ► Replace the oil filter ► Coat the oil filter seal lightly with engine oil. ► Replace both o-rings on the banjo bolt ►...
- Page 56 8 Service tasks in the workshop 8.3 Changing engine oil and oil filter ► Insert the cover into the fuse box. ► Lift the oil tank and insert it into the oil tank bracket ► Screw in the bolts at the oil tank. Tightening torque: 8 Nm +2 Nm [5.9 lbf ft +1.5 lbf ft] SHB MPE850 Rev F | 408014 | 408090 | 408101 | 408246 |...
- Page 57 Check the oil level. (See chapter 4.3.4 Checking oil level.) ► Touch up paintwork defects. ► Clear the service counter for service light. (See the Textron Motors Diagnostic Tool manual.) ► Update the engine control unit calibration. (See the Textron Motors Diagnostic Tool manual.) ►...
-
Page 58: Checking Sacrificial Anode
8 Service tasks in the workshop 8.4 Checking sacrificial anode 8.4 Checking sacrificial anode Inf or ma t ion ! The water jacket in the exhaust manifold is protected from corrosion by a passive cathodic protection. ► Unscrew the sacrificial anode ►... -
Page 59: Checking And Adjusting Valve Lash
8 Service tasks in the workshop 8.5 Checking and adjusting valve lash 8.5 Checking and adjusting valve lash 8.5.1 Checking valve lash ► Remove the engine cover Check valve lash with a cold engine. WARNING! Danger of serious cuts from the gear on the camshaft when the engine is started. - Page 60 8 Service tasks in the workshop 8.5 Checking and adjusting valve lash ► Unscrew the bolts ► Remove the valve cover Inf or ma t ion ! The camshaft is turned by turning the crankshaft. Read the vehicle manufacturer‘s documentation for instructions. Always turn the crankshaft in the same direction as the engine rotates. (See chapter 3.6 Engine components and information.) Two rotations of the crankshaft correspond to one rotation of the camshaft.
- Page 61 8 Service tasks in the workshop 8.5 Checking and adjusting valve lash Checking valve lash on the 1st cylinder ► Turn the camshaft until the position of the camshaft is as illustrated. (See the vehicle manufacturer‘s documentation.) The camshaft is marked at the 2nd cylinder end only.
- Page 62 ► Touch up paintwork defects. ► Clear the service counter to reset service light. (See the Textron Motors Diagnostic Tool manual.) ► Update the engine control unit calibration. (See the Textron Motors Diagnostic Tool manual.) ►...
-
Page 63: Adjusting Valve Lash
8 Service tasks in the workshop 8.5 Checking and adjusting valve lash 8.5.2 Adjusting valve lash Inf or ma t ion ! The camshaft is turned by turning the crankshaft. Read the vehicle manufacturer‘s documentation for instructions. Always turn the crankshaft in the same direction as the engine rotates. (See chapter 3.6 Engine components and information.) Two rotations of the crankshaft correspond to one rotation of the camshaft. - Page 64 8 Service tasks in the workshop 8.5 Checking and adjusting valve lash Replacing valve adjustment shim NOTICE! Engine damage from small components in the engine or cylinder head. Operating the engine when there are small components in the crankcase and cylinder head can result in serious damage and cause the crank drive to seize.
- Page 65 8 Service tasks in the workshop 8.5 Checking and adjusting valve lash ► Remove the valve adjustment shim using a bar magnet. ► Measure the valve adjustment shim using a caliper. ► Insert the new valve adjustment shim. ► Hold the rocker arm pusher in position.
-
Page 66: Replacing Spark Plugs And Ignition Coils
8 Service tasks in the workshop 8.6 Replacing spark plugs and ignition coils 8.6 Replacing spark plugs and ignition coils ► Remove the engine cover Remove the spark plugs with a cold engine. ► Disconnect the wire harness connectors from the ignition coils ►... - Page 67 Connect the wire harness connectors to the ignition coils ► Touch up paintwork defects. ► Clear the service counter to reset service light. (See the Textron Motors Diagnostic Tool manual.) ► Update the engine control unit calibration. (See the Textron Motors Diagnostic Tool manual.) ►...
-
Page 68: Checking Spark Plugs
8 Service tasks in the workshop 8.7 Checking spark plugs 8.7 Checking spark plugs ► Remove the engine cover Remove the spark plugs with a cold engine. ► Disconnect the wire harness connectors from the ignition coils ► Unscrew the bolts ►... - Page 69 8 Service tasks in the workshop 8.7 Checking spark plugs ► Unscrew the spark plugs using a spark plug wrench. ► If the electrodes are extremely sooty, clean carefully using a spark plug brush. ► Check the spark plug gap using a feeler gauge.
- Page 70 8 Service tasks in the workshop 8.7 Checking spark plugs ► Insert the ignition coils ► Replace the serrated lock washers Assemble the bolts , washers serrated lock washers as illustrated. Tightening torque: 8 Nm +2 Nm [5.9 lbf ft +1.5 lbf ft] ►...
-
Page 71: Replacing Rubber Mount
8 Service tasks in the workshop 8.8 Replacing rubber mount 8.8 Replacing rubber mount Engine models I2 846 MAR TC-80, TC-100, TC-120 and NA-80 Remove the rubber mount with a cold engine. ► Mark the hose and intercooler ► Open the spring band clamps ►... - Page 72 8 Service tasks in the workshop 8.8 Replacing rubber mount ► Remove the throttle body ► Unscrew the bolts ► Remove the rubber mount ► Replace the rubber mount. ► Hold the rubber mount in position. ► Screw in the bolts. Tightening torque: 8 Nm +2 Nm [5.9 lbf ft +1.5 lbf ft] ►...
- Page 73 Close the spring band clamps ► Touch up paintwork defects. ► Clear the service counter to reset service light. (See the Textron Motors Diagnostic Tool manual.) ► Update the engine control unit calibration. (See the Textron Motors Diagnostic Tool manual.) ►...
- Page 74 8 Service tasks in the workshop 8.8 Replacing rubber mount ► Disconnect the wire harness connector from the throttle body ► Open the hose clamp ► Remove the throttle body ► Unscrew the bolts ► Remove the rubber mount ► Replace the rubber mount.
- Page 75 3 Nm +0,5 Nm [2.2 lbf ft +0.4 lbf ft] ► Touch up paintwork defects. ► Clear the service counter to reset service light. (See the Textron Motors Diagnostic Tool manual.) ► Update the engine control unit calibration. (See the Textron Motors Diagnostic Tool manual.)
-
Page 76: Maintenance Waste Gate Valve
8 Service tasks in the workshop 8.9 Maintenance waste gate valve 8.9 Maintenance waste gate valve – Waste gate valve version 1 – Waste gate valve version 2 SHB MPE850 Rev F | 408014 | 408090 | 408101 | 408246 |... -
Page 77: Maintaining Waste Gate Valve Version 1
8 Service tasks in the workshop 8.9 Maintenance waste gate valve 8.9.1 Maintaining waste gate valve version 1 Engine models I2 846 MAR TC-80, TC-100, TC-120 and TC-155 Maintain the waste gate valve with a cold engine. Observe the indicated directions of rotation One nut has a left-hand thread. - Page 78 ► Touch up paintwork defects. ► Clear the service counter to reset service light. (See the Textron Motors Diagnostic Tool manual.) ► Update the engine control unit calibration. (See the Textron Motors Diagnostic Tool manual.) ►...
-
Page 79: Maintaining Waste Gate Valve Version 2
8 Service tasks in the workshop 8.9 Maintenance waste gate valve 8.9.2 Maintaining waste gate valve version 2 Engine models I2 846 MAR TC-80, TC-100, TC-120 and TC-155 Maintain the waste gate valve with a cold engine. Observe the indicated directions of rotation One nut has a left-hand thread. - Page 80 ► Touch up paintwork defects. ► Clear the service counter to reset service light. (See the Textron Motors Diagnostic Tool manual.) ► Update the engine control unit calibration. (See the Textron Motors Diagnostic Tool manual.) ►...
-
Page 81: Checking Flame Arrester
8 Service tasks in the workshop 8.10 Checking flame arrester 8.10 Checking flame arrester Engine models I2 846 MAR TC-80, TC-100, TC-120 and TC-155 ► Check the flame arrester The fabric must be visible. ► If the fabric is no longer visible, follow instructions in Cleaning flame arrestor section. - Page 82 3 Nm +0,5 Nm [2.2 lbf ft +0.4 lbf ft] ► Touch up paintwork defects. ► Clear the service counter to reset service light. (See the Textron Motors Diagnostic Tool manual.) ► Update the engine control unit calibration. (See the Textron Motors Diagnostic Tool manual.)
- Page 83 8 Service tasks in the workshop 8.10 Checking flame arrester Engine model I2 846 MAR NA-80 ► Unscrew 7 bolts ► Remove the cover ► Check the flame arrester The fabric must be visible. ► When the fabric filter is no longer visible, continue with section Cleaning the flame arrestor.
- Page 84 4,5 Nm +1 Nm [3.3 lbf ft +0.7 lbf ft] ► Touch up paintwork defects. ► Clear the service counter to reset service light. (See the Textron Motors Diagnostic Tool manual.) ► Update the engine control unit calibration. (See the Textron Motors Diagnostic Tool manual.)
-
Page 85: Changing Coolant
8 Service tasks in the workshop 8.11 Changing coolant 8.11 Changing coolant Drain the coolant with a cold engine. ► Unscrew the expansion tank cover Draining coolant ► Place the drain tray under the fitting heat exchanger. ► Open the hose clamp ►... - Page 86 8 Service tasks in the workshop 8.11 Changing coolant Flushing coolant circuit ► Fill the expansion tank with clean fresh water. Water drains off through the heat exchanger. ► Repeat the procedure until only clear water drains off through the heat exchanger. ►...
- Page 87 ► Touch up paintwork defects. ► Clear the service counter to reset service light. (See the Textron Motors Diagnostic Tool manual.) ► Update the engine control unit calibration. (See the Textron Motors Diagnostic Tool manual.)
-
Page 88: Replacing Fuel Filter
8 Service tasks in the workshop 8.12 Replacing fuel filter 8.12 Replacing fuel filter See the vehicle manufacturer‘s documentation. SHB MPE850 Rev F | 408014 | 408090 | 408101 | 408246 |... -
Page 89: Storing Engine And Returning To Operation
8 Service tasks in the workshop 8.13 Storing engine and returning to operation 8.13 Storing engine and returning to operation 8.13.1 Preparing engine for storage ► Change the engine oil and oil filter. (See chapter 8.3 Changing engine oil and oil filter.) ►... - Page 90 8 Service tasks in the workshop 8.13 Storing engine and returning to operation ► Open the hose clamp ► Remove the plug ► Place the hose at the lowest point of the engine compartment. Do not start the engine again. NOTICE! Water inside the engine due to open drainage hose.
-
Page 91: Returning Engine To Operation After Storage
8 Service tasks in the workshop 8.13 Storing engine and returning to operation 8.13.2 Returning engine to operation after storage ► Insert the plug ► Close the hose clamp Tightening torque: 3 Nm +0,5 Nm [2.2 lbf ft +0.4 lbf ft] ►... -
Page 92: Disposal
8 Service tasks in the workshop 8.14 Disposal 8.14 Disposal When disposing of engine fluids, replaced parts or the whole engine, always comply with the relevant applicable national laws and guidelines. SHB MPE850 Rev F | 408014 | 408090 | 408101 | 408246 |... -
Page 93: Confirmation Of Service Tasks
9 Confirmation of service tasks 9 Confirmation of service tasks Have the workshop personnel provide certification confirming that your engine was serviced. You can use the following documents. _________________ _________________ Engine model (6-digit) Date of initial registration _________________ Serial number (10-digit) Work carried out: Work carried out: ... - Page 94 9 Confirmation of service tasks Work carried out: Work carried out: Engine oil and oil filter changed Engine oil and oil filter changed Sacrificial anode checked Sacrificial anode checked Date: Date: Valve lash checked Valve lash checked ...
-
Page 95: Appendix
Appendix Engine manufacturer Appendix Engine manufacturer Engine manufacturer Textron Motors GmbH Kautexstraße 52 53229 Bonn Germany www.textronmotors.com SHB MPE850 Rev F | 408014 | 408090 | 408101 | 408246 |... -
Page 96: Index
Appendix Index Index Manufacturer, engine 95 Break-in period, engine 28 Oil filter, replace 51 Oil level, check 32 Components, engine 14, 16, 18 Oil pressure light 24 Coolant, change 85 Coolant level, check 30 Coolant, specification 13 Part number, engine 10 Corrosion protection, after driving 36 Protection functions, engine 21 Cylinder definition, engine 14, 16, 18...
Need help?
Do you have a question about the MPE 850 MARINE and is the answer not in the manual?
Questions and answers