Table of Contents
Advertisement
A MESSAGE
FROM
FORREST WOOD...
Congratulations! As the
owner of a new Ranger
you have shown that you are a
knowledgeable buyer. Ranger
has earned the reputation of
being the leading manufacturer
of quality fishing boats and
your investment can, with care,
retain its value while giving
excellent service through the
years.
This manual is intended to
help you better understand
your boat and make basic care and maintenance quite simple.
Additionally, it provides information that could be essential to its
safe operation. Please take the time to study this manual along with
your engine operating manual before operating your boat.
Should you have questions, contact your Ranger dealer or contact
us at
Please let me remind you that pleasant boating is safe boating and
the very best safety rules are your COMMON SENSE and
SOUND JUDGEMENT.
Thank you for becoming a part of the "Ranger Family"!
®
boat
Ranger
®
Boats
P.O. Box 179
Flippin, AR 72634
(870) 453-2222
Sincerely,
Forrest L. Wood
Founder
1
Advertisement
Table of Contents

Subscribe to Our Youtube Channel
Related Manuals for Ranger boats 522VX


Summary of Contents for Ranger boats 522VX
- Page 1 A MESSAGE FROM FORREST WOOD… Congratulations! As the owner of a new Ranger ® boat you have shown that you are a knowledgeable buyer. Ranger has earned the reputation of being the leading manufacturer of quality fishing boats and your investment can, with care, retain its value while giving excellent service through the years.
-
Page 2: Getting To Know And Handle Your Ranger Boat
Getting To Know and Handle Your Ranger Boat ® GETTING TO KNOW AND HANDLE YOUR RANGER BOAT… Your Ranger dealer should see that you have selected the proper horsepower engine for the rating range of the boat model you have chosen. - Page 3 Getting To Know and Handle Your Ranger Boat ® While you are easing along within the “No Wake” zone you should trim your engine all the way down to its lowest position (in). Turn the steering right and left to insure that there is no undue slack and inspect the steering system.
- Page 4 Getting To Know and Handle Your Ranger Boat ® setting (see your trim indicator) will be required for different throttle settings. You will soon develop an instinctive feel for these settings. Your ear will become attuned to the sound of the proper engine RPM. Again, over trimming is to be avoided as excessive RPM can cause engine damage and can also cause your prop to “blow out”...
- Page 5 Getting To Know and Handle Your Ranger Boat ® of your outboard engine to drive the boat forward until the bow contacts the roller on the bow stand block.Shut down your outboard and fasten the winch strap hook to the bow eye. Tighten the winch strap and lock winch before pulling the boat from the water.
-
Page 6: Be Responsible For Safer Boating
Be Responsible For Safer Boating BE RESPONSIBLE FOR SAFER BOATING • ALCOHOL and DRUGS - The debilitating effects of alcohol and other d rugs reduces reaction time and detracts from judgment. T h e combined effect of the outdoor environment… sun, heat, wind, rough water, and noise can be more fatiguing than one would imagine and, combined with drugs or alcohol, can be very dangerous. -
Page 7: Carbon Monoxide Warning
Carbon Monoxide Warning CARBON MONOXIDE Carbon monoxide is a deadly gas that is odorless, tasteless and colorless. It is present in the exhaust of internal combustion engines. Inhaling sufficient concentrations of carbon monoxide can be fatal within m i nu t e s. E a rly signs of carbon monoxide poisoning may include headache, nausea, fatigue, drowsiness, confusion and vomiting. -
Page 8: Table Of Contents
TABLE OF CONTENTS Getting to Know and Handle Your Ranger Boat ........2 Be Responsible for Safer Boating ............6 Carbon Monoxide Warning ..............7 Special Information ..................9 Your Ranger Dealer’s Responsibilities..........10 Owner/Operator’s Responsibilities............10 Warning and Cautions................11 Hazard Labeling ................12 & 13 Hull Identification Plate ................14 U.S. -
Page 9: Special Information
Special Information SPECIAL INFORMATION The following special information is intended to alert you to possible dangers and to information important to the safe operation of your boat and other equipment. Observe them carefully. However, simply being aware of the “WARNING”, “CAUTION” AND “NOTICE” notations in this manual will not eliminate the dangers that they signal if you do not implement the info rm a t i o n . -
Page 10: Your Ranger Dealer's Responsibilities
Special Information Prior to delivery, the dealer should make certain that the product and equipment is completely operational;the proper propeller is installed; and that all oil, fuel system and lubrications systems are understood. The dealer should explain the operation of all instrumentation equipment, and the boat electrical and livewell systems. -
Page 11: Warning And Cautions
Special Information Before boating, obtain the weather forecast for your area. Familiarize yourself with the weather bureau warning system signal(s) and waterway traffic sign/marking information. Contact your local U.S. Coast Guard Auxiliary and take advantage of their excellent boating and safety classes and seasonal boat inspections. Operating a boat with an engine of WARNING horsepower in excess of that specified... -
Page 12: Hazard Labeling
Hazard Labeling HAZARD LABELING The hazard warning decals shown on the following pages may be found in various locations on your boat and trailer (photos are not n e c e s s a rily to scale). Some labels are not appropriate for eve ry boat/trailer model so your rig may not have them all. - Page 13 Hazard Labeling WARNING Avoid serious or fatal injury. Do not occupy seat when speed exceeds 5 MPH. Avoid injuries from dislodged seat. Secure unoccupied seat. Designed Application Class B The Springfield Marine Company 1093 Cynthia St. • PO Box 588 • Nixa, MO 65714 WARNING 1.
-
Page 14: Hull Identification Plate
Hull Identification Plate HULL IDENTIFICATION PLATE The hull I.D. Plate is located on the outboard side of the starboard transom, above the water line, and contains the following information: (1) Boat patent information (2) Model Number - This number should be referred to when ordering parts or making other inquiries. -
Page 15: U.s. Coast Guard Capacity Information Plate
U.S. Coast Guard Capacity Information Plate U.S. COAST GUARD CAPACITY INFORMATION PLATE Familiarize yourself with your boat’s maximum capacities. Do not exceed the maximum weight (in pounds) or persons capacity (number) found on the U.S.C.G. capacity information plate attached to your boat. Know the ratings and load your boat accordingly. -
Page 16: Recommended On-Plane Seating Locations
Recommended On-Plane Seating Locations RECOMMENDED ON-PLANE SEATING LOCATIONS A decal similar to the one in Fig.1, below, should be found on your boat in the area of the U.S. Coast Guard Capacity plate. The areas marked by “X’s” are the areas of the boat considered safe and suitable for on-plane seating. -
Page 17: Fuel System
Fuel System FUEL SYSTEM The fuel system consists of a fuel tank equipped with an electric sending unit. The fuel level is displayed on the console mounted gauge when the ignition switch is “on”. On models with two tanks, a console mounted switch marked “fuel”... -
Page 18: Your Livewell Aeration System
Your Livewell Aeration System YOUR LIVEWELL AERATION SYSTEM The livewell aerator system in a Ranger boat is designed to supply the water and oxygen necessary to the survival of your catch. This patented system not only allows fresh water to be pumped in through the aerator supply line(s), but also permits recirculation and aeration at any speed of boat operation. - Page 19 Your Livewell Aeration System LIVEWELL PUMP-OUT Your new Ranger may be equipped with a livewell pump-out system.To use this pump out feature, put the livewell control valve in the recirc position and pull out on the aerator spray head. Turn on the aerator and the water in the well will be emptied.
- Page 20 Your Livewell Aeration System LIVE WELL PLUMBING ASSEMBLY ITEM NUMBER PART NUMBER DESCRIPTION 7100118 Transom Mount Livewell Screen (2pc) 7100112 Grommet 7100118 Transom Mount Livewell Screen (2pc) 7400262 3/4” Blk Spiral Reinf. Water Hose 5903070 Aerator Valve Center Empty 6000057 750 GPH Aerator Pump 7400259 3/4”...
- Page 21 Your Livewell Aeration System SALTWATER RECIRCULATING BAITWELL PLUMBING SYSTEM 2180, 2300 BAY RANGERS AND 223, 191 CAYMANS Operation Instructions: Your Livewell Aeration System 1. Fill Baitwell/Continuous Exchange of Water • Open valve (A) leaving valve (B) closed • Turn pump on •...
- Page 22 Your Livewell Aeration System SALTWATER RECIRCULATING BAITWELL PLUMBING SYSTEM...
- Page 23 Your Livewell Aeration System MAINTENANCE TIPS FOR AERATOR SYSTEM (1) Remove screens only for flushing aerator system. (2) Keep screens in place for cleaning and during operation. Replace damaged or broken screens immediately. (3) Do not exceed the recommended fuse size on the aerator pumps (a larger fuse WILL NOT make a stronger aerator system!).
-
Page 24: Steering At Console
Steering STEERING AT CONSOLE The steering in your boat is one of the WARNING most important items and should be checked by the driver every time the boat is used. You should school yourself and make it a habit to check the steering methodically. Loose or worn steering could lead to an accident causing injury or death. - Page 25 Steering SEA STAR OUTBOARD HYDRAULIC STEERING Remove, clean and grease the support tube annually with quality marine grease. Check the steering fluid level in the helm.It should be maintained at no less than 1/2” and no more then 1/8” below the bottom of the filler cap threads.
- Page 26 Steering For complete installation and troubleshooting info rmation, please refe r to your SeaStar installation instru c t i o n s, Book 1.1 (Pa rt # 296784). SEAL REPLACEMENT KIT (PART # HS5157) FOR: FRONT MOUNT CYLINDER (PART # HC5345) Item Part # Quantity...
- Page 27 Steering STEERING CONNECTIONS AT ENGINE The steering may be connected at the engine by a method similar to the ones shown in Figures 4 & 5 ( page 28). Because Ranger does not supply the “ c a ble to engine” c o n n e c t o r s, except on pre-rigged pack a g e s, we will not make specific installation or torque recommendations.
- Page 28 Steering See engine owner’s manual for proper CAUTION greasing and maintenance of engine link rod and steering kit.
-
Page 29: Your Boat's Finish
Your Boat’s Finish YOUR BOAT’S FINISH… MAINTENANCE AND REPAIR The gel-coat (color) used on your Ranger ® Boat is of the highest quality ava i l a ble today. To keep it looking new and in good condition these tips will prove helpful. A light duty rubbing compound (available at most auto parts stores) is recommended for stains such as mold, water lines on the hull, fine scratches on finish or just to bring back that “look new”... - Page 30 Your Boat’s Finish 4. Using Ranger touch-up gel-coat or putty only, thoroughly mix 1% catalyst (MEKP) with desired amount of gel-coat or putty. Gel-coat will not cure by itself. You must use NOTICE a catalyst. 5. With a putty knife, trowel catalyzed gel-coat in desired area, leaving it slightly higher than the original surface to allow for shrinkage.
- Page 31 Your Boat’s Finish 5. Apply one coat, being sure to cover and fill all sand marks and thin spots. 6. Flush gun and let gel-coat set approximately 10 minutes. 7. Repeat step #4, this time adding wax solution approximately 4 ounces of solution to a quart of gel-coat, then repeat step #5.
-
Page 32: Your Power Pedestals
Your Power Pedestals YOUR POWER PEDESTALS A “ p ower pedestal” is a nitrogen gas filled steel cylinder that is used to raise and lower the fishing seats mounted on the fo r ward and aft casting platfo rm s. This enables you to select the proper seat height fo r c o m fo rt in any fishing situation. - Page 33 Your Power Pedestals If your seat will not raise up to the proper height, adjust the screw approximately 1/4 (one-quarter) turn in a counter-clockwise direction and try the pedestal again. If your seat will not remain in the upright position, move the adjustment screw approximately 1/4 (one-quarter) turn in a clockwise direction.
-
Page 34: Key Locks, Carpet And Upholstery
Key Locks, Carpet and Upholstery KEY LOCKS, CARPET AND UPHOLSTERY Your Ranger ® boat has been equipped with top-quality marine grade key locks to secure your storage areas. Should your boat be subjected to use in or near salt water, care should be taken to flush the locks out thoroughly with fresh water to prevent corrosion. -
Page 35: Cleaning Marine Vinyl
Key Locks, Carpet, and Upholster y CLEANING MARINE VINYL For general purpose cleaning, use V i nyl Finish V i nyl Cleaner, Fantastik, or warm water with a mild dish soap such as Dawn or Ivory. Gently scrub with a small soft bristle brush. For dirt bu i l d - u p, use V i nyl Finish V i nyl Cleaners. - Page 36 Key Locks, Carpet, and Upholstery This chart contains methods for removing common stains and soils: A. Medium-soft brush, warm soapy water. Rinse. Dry. B. Vinyl Finish Cleaner or household cleaner such as Fantastik. C. One tablespoon ammonia, one-fourth cup hydrogen peroxide, three- fourths cup water applied with medium soft brush.
-
Page 37: Adding Accessories To Your Boat
Adding Accessories To Your Boat ADDING ACCESSORIES TO YOUR BOAT… The bow section of the gunwale is properly reinforced for installing such accessories as trolling motors, electric anchors and depth sounders. We recommend thru-bolting all trolling motors, anchor davits and other heavier accessories. - Page 38 Wiring Information HOOK UP OF TROLLING MOTOR LEADS: RED to Battery 1 (+) positive 4 W I R E BLACK to Battery 1 (-) negative 24 VO LT ORANGE to Batter y 2 (+) positive S Y S T E M WHITE to Battery 2 (-) negative...
-
Page 39: Wiring Diagrams
SOME MODELS HAVE ONLY 1 FUEL TANK, IN WHICH CASE THE SENDER WIRE IS PINK AND NO FUEL SWITCH APPEARS ON CONSOLE. -
Page 46: Electrical System
Electrical System ELECTRICAL SYSTEM FUSE PANEL INFORMATION The fuse panel, located for easy access, features plug-in type ATC fuses. The fuses can be easily inspected or replaced. The panel has a capacity of twelve to sixteen individual circuits. The particular accessory(ies) they operate are shown on the decal on the right side of the fuse panel or back side of fuse panel cover. - Page 47 Electrical System FISHERMAN SERIES Navigation and Anchor Lights The switch that is labeled “Lights” on the bow and console keypads controls the operation of these lights. On the first key press the Navigation and Anchor Lights turn on.On the second key press the Navigation Lights turn off and the Anchor Lights remain on.
- Page 48 Electrical System Interior Lights Pressing the switch labeled “Interior Lights” on the console keypad once turns on the interior lights. Pressing the switch again turns the lights off. Once the lights are turned on they will automatically shut off after 5 minutes.
- Page 49 Electrical System COMANCHE SERIES Navigation and Anchor Lights The switch that is labeled “Lights” on the bow and console keypads controls the operation of these lights. On the first key press the Navigation and Anchor Lights will turn on. On the second key press the Navigation Lights turn off and the Anchor Lights remain on.
- Page 50 Electrical System Interior Lights Pressing the switch labeled “Interior Lights” on the console keypad once turns on the interior lights. Pressing the switch again turns the lights off. Once the lights are turned on they will automatically shut off after 5 minutes.
-
Page 51: Keyless Ignition
Electrical System KEYLESS IGNITION 2003 Comanche models may be rigged with keyless ignition. The user code for this system will come from the factory preset to 1-2-3-4. To change from the preset to your personal user code: 1) Enter the 1-2-3-4 code. 2) Press the 1 and 4 keys simultaneously then release 3) The "Stop"... -
Page 52: Saltwater Series
Electrical System SALTWATER SERIES Navigation and Anchor Lights The switch that is labeled "Lights" controls the operation of these lights. On the first key press, the navigation and anchor will both come on. On the second key press, the navigation lights turn off and the anchor lights remain on. -
Page 53: Installation Of Trolling Motor Plug
Electrical System INSTALLATION OF 4 PRONG “TYPE IV”PLUG TO TROLLING MOTOR AND BATTERY CHARGER The Type IV plug is not designed for direct attachment to bare wires. All wires must be terminated with a #10 ring terminal of the appropriate wire gauge size. -
Page 54: Installation Of Battery Charger Plug
Electrical System... - Page 55 Electrical System SAFETY AND MAINTENANCE TIPS When adding accessories, make sure you use the positive and negative terminal from the same battery. Red and Black are battery #1; and Orange and White are battery #2. C h e ck battery connections periodically to make sure they are corrosion free and TIGHT.
-
Page 56: Federal Requirements For Recreational Boats
Federal Requirements for Recreational Boats CLASS A CLASS I EQUIPMENT (Under 16’in Length) (16’ , but under 26’) Whistle or Must have means of making an efficient sound signal. Horn Visual None Required During All recreational boats, when Distress Daytime used on coastal waters, which includes the Great Lakes, the Territorial Seas, and those... - Page 57 Federal Requirements for Recreational Boats Boat operators are required to file a boating accident report with their state boating law enforcement agency when their boat is involved in certain boating accidents as follows: 1) There is loss of life or probable loss of life. 2) Personal injury requiring medical treatment (other than first aid).
-
Page 58: Boat Data (Owner's Information)
BOAT DATA OWNER Address DEALER Address Phone BOAT - MAKE/MODEL Serial No. Key No. ENGINE - MAKE/MODEL Serial No. Drive Unit Serial No. OTHER... -
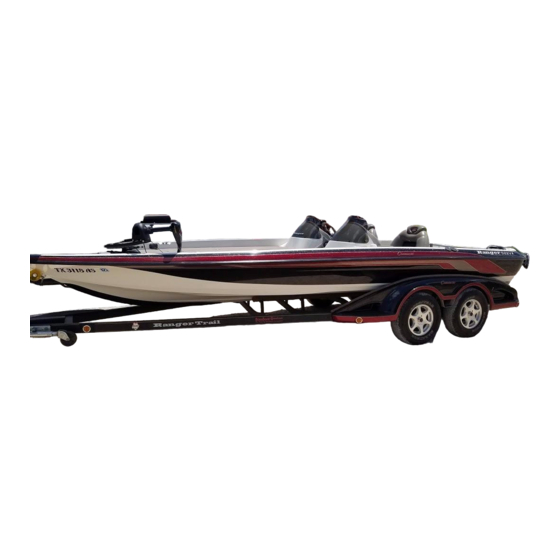
Page 59: Your Ranger Trail ® Trailer
Your RangerTrail Trailer ® GENERAL INFORMATION AND MAINTENANCE Keep the hubs properly lubricated at all times as described in the hub section of this manual. Lubricate jack wheel gears and spline periodically. Check all lights before each use of the trailer. Check the tires for wear, cuts or other damage before each use and replace as needed. -
Page 60: E-Z Lube Hubs And Cool Hubs
Your RangerTrail Trailer ® E-Z LUBE HUBS These hubs have a unique method of lubrication.The grease actually fills from the rear bearing and the back of the hub, forward to the outer bearing.Since the E-Z Lube Hub, properly maintained, lubricates the rear bearing first, all air is forced forward out of the hub, making for a more perfect seal. -
Page 61: Trailer Brakes
Your RangerTrail Trailer ® TRAILER BRAKES If your trailer is equipped with bra ke s, fo l l ow the safety and maintenance tips listed below for best service. Always hook up the brake breakaway cable securely to the tow vehicle (should the trailer come loose, cable will activate the brakes to help slow runaway trailer). - Page 62 Your RangerTrail Trailer ® INSPECTION To assure continued proper operation of our trailer disc brakes, annual inspection is recommended. BRAKE LOCKOUT INSTRUCTIONS Brake lockout is useful in situations where you need to back over soft ground or up a hill while electric solenoid is disconnected. When hitch is fully extended, press down reverse lockout cap and turn clockwise to manually lockout brakes (see Fig.
- Page 63 Your RangerTrail Trailer ®...
-
Page 64: Db 42 Disc Brake Parts List
Your RangerTrail Trailer ® DB 42 DISC BRAKE PARTS LIST Part No. Qty./Axle Description 33640 HUB/ROTOR ASSEMBLY 36020 CALIPER BODY ASSEMBLY 33015 BRAKE PAD SET (Inner shown) 33015 BRAKE PAD SET (Outer shown) AXLE WITH BRAKE FLANGE 36045 MOUNTING BRACKET 32372 GREASE SEAL, #233-168-SP2 32351... - Page 65 Your RangerTrail Trailer ® PADS Pads must be replaced when 1/16 inch (0.060”) of pad friction material is left. If not familiar with disc bra ke pad CAUTION replacement, have work performed by a qualified individual or service shop. ROTORS Rotors should be resurfaced by a qualified brake specialist if extreme galling or wear marks are present.
-
Page 66: Removable Tongue
Your RangerTrail Trailer ® REMOVABLE TONGUE The removable tongue option was made available for those with limited storage space for their boat and trailer. Its design uses 2 hitch pins to secure the coupler slide assembly to the receiver. Do not, under any circumstances, tow your trailer without both pins inserted completely through the slide and receiver. -
Page 67: Swing Hitch
Your RangerTrail Trailer ® SWING HITCH To operate the swing hitch, pull the pin out of the bottom of the T- handle pin, fold up the safety catch on the bottom of the T-handle pin, pull the T-handle pin out of the frame and the hitch can now be swung to the side. - Page 68 Your RangerTrail Trailer ® fully on the tow ball. Be sure that the tongue jack wheel is slightly clear of the ground. Close the ball socket latch by pushing downward into the recess. The release handle should close smoothly if the ball has been seated correctly into the socket.
-
Page 69: Rangertrail Parts List
RANGERTRAIL ® PARTS LIST DESCRIPTION PART # A-60 Inner Member 9603084 Bow Roller Assembly Winch Stand (specify serial number) 1400# Fulton Winch with Strap 9642043 Winch Stand with 4 “U” Bolts (specify serial number) 1200# Fulton Swing Jack 9609152 Ranger Trail ID Plate Carpeted Bunks (specify location and serial number) Front Step Pad (... -
Page 70: Trailer Exploded View
RANGERTRAIL ® PARTS... - Page 72 RANGERTRAIL ® PARTS LIST DESCRIPTION PART # L-Ring Wear Sleeve 9612136 Grease Seal (AD2527E) 9624105 Inner Bearing (L68149) 9624017 Inner Bearing Race (L68110) 9624075 Hub with Races and Studs 9606020 1/8”- 27 Pipe Plug 9606102 Inner Bearing Race (L68110) 9624075 Outer Bearing (L68149) 9624017 Spindle Washer (2”...
-
Page 73: Limited Warranty
WOOD MANUFACTURING COMPANY, INC. LIMITED W ARRANTY RANGER ® BOATS AND RANGERTRAIL ® TRAILERS LIMITED WARRANTY (FIBERGLASS BOATS) "Wood Manufacturing Co., Inc., ("Wood"), warrants to you, the first North American retail purchaser of this 2003 model year boat delivered by a factory authorized dealer, that it will repair or replace defects in materials or workmanship that occur within the applicable warranty periods, subject to the "What This Warranty Does Not Cover"... - Page 74 What This Warranty Does Not Cover: 1. A boat including its components that has been altered or modified so as to adversely affect its operation, performance or durability. 2. Any damage resulting from an impact with another object. 3. Windshield breakage and leakage around windshields, hatches or other designed openings. 4.
- Page 75 MAINTENANCE NOTES...
- Page 76 MAINTENANCE NOTES...
Need help?
Do you have a question about the 522VX and is the answer not in the manual?
Questions and answers
Can’t find where to hook up power to the boat to charge the batteries