Table of Contents
Advertisement
Advertisement
Table of Contents

Related Manuals for KUHN FC243


Summary of Contents for KUHN FC243
- Page 1 OPERATOR'S MANUAL Mower conditioner - English - 02-2006 KN123BGB C...
-
Page 3: Dear Owner
Designated use of the machine The FC243 mower conditioner must only be used for the work for which it has been designed: mowing on the ground of hay fields, grass silage fields and improved pastures for the purpose of harvesting fodder for feeding livestock. -
Page 4: Table Of Contents
Mower conditioner FC243 $CONTENTS Dear Owner........................1 Contents ......................... 2 Identification of the machine ..................4 Rear view ............................4 Model identification plate........................ 5 Optional equipments ........................5 Safety ..........................6 Description of symbols used in this document ................6 Safety instructions........................... - Page 5 Mower conditioner FC243 Instructions for work....................36 Putting the machine into work position ..................36 Adjustments in working position ....................37 Machine use ........................... 46 Optional equipments....................47 Swath shield extensions ....................... 47 Wide spreading system......................... 47 Maintenance and storage ....................48 Frequency chart..........................48 Cleaning the machine........................
-
Page 6: Identification Of The Machine
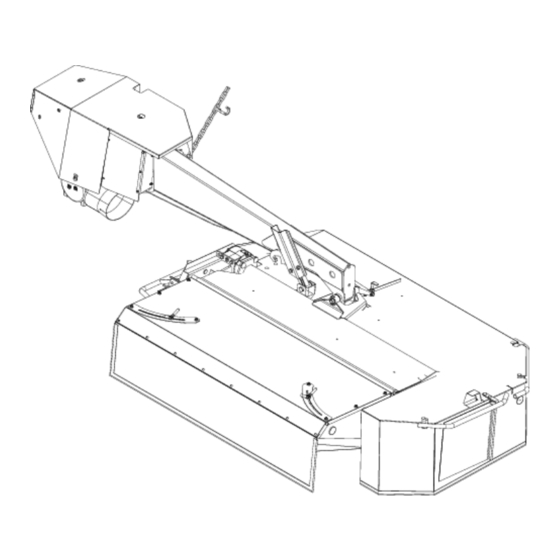
Mower conditioner FC243 $IDENTIFICATION OF THE MACHINE 1. Rear view Identification of the machine... -
Page 7: Model Identification Plate
Mower conditioner FC243 2. Model identification plate Please write below the type and serial number of the machine. This information is to be indicated to the dealer for all spare parts orders. FC243 Type: 3. Optional equipments Tick box corresponding to the equipment fitted on your machine: Kit no. -
Page 8: Safety
Mower conditioner FC243 $SAFETY 1. Description of symbols used in this document This symbol indicates a potentially hazardous situation that if not avoided, could result in serious bodily injury. This symbol is used to identify special instructions or procedures which, if not followed strictly, could result in machinery damage. -
Page 9: Safety Instructions
Never let anyone operate the machine who is not trained to do so. Should you have any difficulties in understanding certain parts in this manual, please contact your KUHN dealer. Precautions to be taken before carrying out any operations on the machine... - Page 10 Mower conditioner FC243 Precautions to take before using the machine Do not wear loose clothing which could become caught up in moving parts. Wear the appropriate protective clothing for the work in hand (gloves, shoes, goggles, helmet, ear-protectors, etc.). Make sure that all operating controls (ropes, cables, rods, etc) are placed so that they cannot be set off accidentally, risking accident or damage.
- Page 11 Mower conditioner FC243 Precautions when driving on public roads Dimensions Depending on the dimensions of the machine, contact the relevant authorities to ensure that it can be legally transported on public roads. If the machine is over the maximum legal size, follow the local regulations for special transports of oversize equipment.
- Page 12 Mower conditioner FC243 Precautions when coupling Before attaching the machine, make sure that it cannot accidentally start moving (chock the wheels) and that the parking stand is in the right position. The machine must only be attached to the hitch points provided for this purpose.
- Page 13 Mower conditioner FC243 PTO shaft Use only PTO shafts supplied with the machine or recommended by the manufacturer. The protective shield of the tractor PTO stub, the PTO shaft guards and the protective covering of the machine input shaft must always be in place and in good condition.
- Page 14 Mower conditioner FC243 Precautions during manoeuvres When moving the machine from the transport position to the working position and vice versa, make sure that nobody is within the machine pivoting area. Remote controlled components Danger of crushing and shearing can exist when components are operated by hydraulic or pneumatic controls.
- Page 15 For your own safety and for correct machine operation, only use original manufacturer parts. It is strongly recommended to have your machine checked by your Kuhn dealer after each season, especially tools and their attaching hardware. Projection of stones and foreign objects For driver safety, always use a tractor equipped with a cab.
- Page 16 Mower conditioner FC243 The protection covers help reducing risks of projections. Therefore, make sure that all mower protection devices are in place and good condition prior to using the machine. Regularly check the condition of the protection covers. Immediatly replace any worn, damaged or missing cover.
-
Page 17: Location And Description Of Safety Decals On The Machine
Mower conditioner FC243 3. Location and description of safety decals on the machine Location of safety decals Safety... - Page 18 Mower conditioner FC243 Description of safety decals Operating instructions (1) The operator's manual contains all the information necessary for using the machine safely. It is imperative to read and comply with all instructions. Working on the machine (2) Before leaving...
- Page 19 Mower conditioner FC243 Manoeuvring area (5) Stay a safe distance from the machine. Crushing hazard. Rotating cutting tools (6) Keep away from the mower knives all the time the engine is running, the PTO drive engaged and the moving parts have not come to a complete stop.
-
Page 20: Road Safety Equipment And Recommendations
Mower conditioner FC243 4. Road safety equipment and recommendations The road safety equipment is mounted in the factory or by your authorized dealer according to current safety regulations. The device is composed of: - A signalling light (1). - A signalling panel (2). -
Page 21: Machine Specifications
Mower conditioner FC243 $MACHINE SPECIFICATIONS 1. Description and glossary Check chain Hydraulic valves Conditioning hood Gauges Connecting frame Hitch pins Cutterbar Central gearbox Right swath shield 10 : Compensation cylinder 11 : Hydro-pneumatic accumulator 12 : Side gearbox 13 :... -
Page 22: Technical Specifications
Mower conditioner FC243 2. Technical specifications Attachment type 3 point, Category 2 Number of discs Working width 2.40 m (7’10’’) Width in working position 4.55 m (14’11’’) Height in working position 1.12 m (3’8’’) Length in working position 1.93 m (6’4’’) Width in transport position 2.17 m (7’1’’) -
Page 23: Putting Into Service
Mower conditioner FC243 $PUTTING INTO SERVICE 1. Description of control elements The machine is fitted with a release cord operated from the tractor cab. The machine is supplied with an 18 mm box wrench (1) to carry out certain adjustment and maintenance tasks. - Page 24 Mower conditioner FC243 Preparing the tractor Check that the tractor's authorized gross weight as well as its lift capacity and maximum weight per axle are not surpassed. The front axle load (1) must never, under any circumstances, be less than 20% of the tractor's unladen weight.
- Page 25 Mower conditioner FC243 Preparing the machine Linkage adjustment - Measure dimension A. If measure A is below 2.10 m (6’11’’): - Place lower links in position (a). - Adjust machine lower hitch pin position: • Unscrew the 8 bolts (3).
- Page 26 Mower conditioner FC243 If measure A is comprised between 2.10 m and 2.30 m (6’11’’ - 7’7’’): - Place lower links in position (b). - Adjust machine lower hitch pin position: • Unscrew the 8 bolts (3). • Centre hitch pin (1) with regards to the mounting plate.
- Page 27 Mower conditioner FC243 If measure A exceeds 2.30 m (7’7’’): - Place lower links in position (c). - Adjust machine lower hitch pin position: • Unscrew the 8 bolts (3). • Position hitch pin (2) at measure A = 10 mm (0.4’’).
- Page 28 Mower conditioner FC243 Coupling the machine Lower the tractor three-point linkage. Adjust levelling rods to position draft arms as close as possible below hitch pins (A = 30-50 mm (1- 2’’) maximum). Lift the tractor lift linkage to connect the draft arms to the hitch pins.
- Page 29 Mower conditioner FC243 HYDRAULIC Connections The machine hydraulic suspension circuit is pressurized at the factory. Connect the 2 hydraulic hoses of the transport/work cylinder to a double acting valve with float position. Electrical CONNECTIONS Connect 7-pin plug to the tractor.
- Page 30 Mower conditioner FC243 Primary PTO shaft Make sure that the PTO shaft is correctly adjusted, to avoid premature wear and tear. The tractor PTO stub must rotate at a speed of 540 min Separate the two half PTO shafts and connect them to the machine's input shaft and to the tractor PTO stub.
- Page 31 Mower conditioner FC243 On machine side, attach guard chain to the headstock hole. Immediately replace any worn or damaged guard. Secondary PTO shaft Before adjusting, maintaining or repairing the machine, turn off ignition key and wait until all moving parts have come to a complete stop.
- Page 32 Mower conditioner FC243 - Tighten nuts to release the friction discs. - Rotate the torque limitor's hub a few turns. - Thread nuts away until they bottom against the threaded studs. The friction slip clutch is ready to function. Putting into service...
- Page 33 Mower conditioner FC243 Adjusting the machine Positioning of lower links - Measure dimension A. - Adjust tractor lower link stabilizers to measure A = 50 mm (2’’). Hitch pin parallelism From the transport position: - Pull on cord to release latch.
- Page 34 Mower conditioner FC243 Frame height and check chains. - Tractor fitted with a hydraulic position control function: • Lower the tractor lift linkage so that hitch pins are at a distance H = 400 mm (1’4’’) from the ground. • Note the corresponding lever position in the tractor cab.
- Page 35 Mower conditioner FC243 Uncoupling the machine For tractors not fitted with a hydraulic position control function, unhook and attach check chain to its support. - Place the machine in transport position. - Lower the tractor three-point linkage to rest the machine on the ground.
-
Page 36: Instructions For Transport
Mower conditioner FC243 $INSTRUCTIONS FOR TRANSPORT Before placing the machine into transport position: - Wait until the rotating parts have come to a complete stop. - Check that nobody is within the machine pivoting area. - If there is someone, make sure the person moves away. -
Page 37: Conformity With The Road Regulations
Mower conditioner FC243 2. Conformity with the road regulations Before driving the machine on public roads, ensure that the machine meets current highway code regulations. Check that the signalling panels are clean and that the lighting equipment functions before going on public roads. -
Page 38: Instructions For Work
Mower conditioner FC243 $INSTRUCTIONS FOR WORK Before placing the machine in working position: - Wait until the rotating parts have come to a complete stop. - Check that nobody is within the machine pivoting area. - If there is someone, make sure the person moves away. -
Page 39: Adjustments In Working Position
Mower conditioner FC243 2. Adjustments in working position Cutting height The desired cutting height is obtained directly by adjusting the top link length. The height can be adjusted between 30 and 80 mm (1.1’’ - 3.1’’) depending on the tractors. - Page 40 Mower conditioner FC243 Ground pressure The ground pressure adjustment determins the safety breakback adjustment: - Example: when the pressure in the gauges increases, mowing unit ground pressure decreases and the breakback force increases. The mowing unit suspension is obtained by a hydro- pneumatic accumulator.
- Page 41 Mower conditioner FC243 Pressure adjustment Increase pressure in the hydro-pneumatic accumulator: - Place the machine in working position. The following adjustments do not cause the machine to move. - Open the hydraulic valve using the 18mm box spanner supplied with the machine. Position (a).
- Page 42 Mower conditioner FC243 Finger conditioning rotor speed Always place the machine in transport position before making rotor speed (rotational frequency) adjustments. The machine is equipped with a finger conditioning rotor. The rotor speed can be set at 888 min or 615 min...
- Page 43 Mower conditioner FC243 Loosen the 2 pulley mounting bolts using box spanner. Loosen belt tensioning bolt using box spanner (1). Remove belt tensioning bolt from its holder. Tip over jockey pulley (2). Remove the 3 V-belts. Remove bolts and washers.
- Page 44 Mower conditioner FC243 Handle pulleys with care. Pulleys must slide on their respective shafts without effort. If this is not the case, clean and coat the mating surfaces with grease before sliding the pulleys on their shafts. - Reinstall bolts and washers without tightening them.
- Page 45 Mower conditioner FC243 Conditioning intensity Before adjusting, maintaining or repairing the machine, turn off ignition key and wait until all moving parts have come to a complete stop. Several factors govern the conditioning intensity adjustment: Conditioning rotor speed See section "Finger conditioning rotor speed".
- Page 46 Mower conditioner FC243 Conditioning comb The angular position of the comb in relation to the conditioning hood also enables altering the conditioning intensity: • Remove the bolt. • Position the comb in one of the 3 positions. • Reinstall the bolt.
- Page 47 Mower conditioner FC243 Fold the front guard cover (1). Remove 2 bolts (1). Pivot and position the conditioning hood opposite the free hole. Reinstall bolts (1). Reassemble the unit. Swathing system The swathing system comprises: - 2 swath shields. Swath width adjustment: - Loosen 2 handles (1): •...
-
Page 48: Machine Use
Mower conditioner FC243 3. Machine use Before mowing and to reduce risks of projections, lower the front guard. Keep all persons and animals away from the machine danger zone. Never lean or step on the protection cover. Before the machine engages the crop:... -
Page 49: Optional Equipments
Mower conditioner FC243 $OPTIONAL EQUIPMENTS 1. Swath shield extensions Kit no. 1076240 The swath shield extensions enable reducing the swath width to approximately 1 m (3’3"). 2. Wide spreading system Kit no. 1076140 The wide spreading kit is used to spread out crop in even layers. -
Page 50: Maintenance And Storage
Mower conditioner FC243 $MAINTENANCE AND STORAGE Before adjusting, maintaining or repairing the machine, turn off ignition key and wait until all moving parts have come to a complete stop. 1. Frequency chart After the Every 200 first 10 Every 30... -
Page 51: Cleaning The Machine
Mower conditioner FC243 2. Cleaning the machine Regularly clean the build up between the conditioning hood and the carrying frame tube: - Remove the split pins on both tube ends. - Remove the rear part of the protection cover. - Clean and reassemble the unit. - Page 52 Mower conditioner FC243 PTO shaft Primary PTO shaft - Every 8 hours: • universal joints (1). • transmission tube (2). • guide rings (3). Secondary PTO shaft Place the machine in working position. Stop the tractor engine and remove ignition key.
- Page 53 Mower conditioner FC243 Cutterbar draining and refilling Before draining oil, operate the machine for a few minutes so that the oil warms up. The cutterbar is lubricated with 1.70 L (0.45 US gal) of SHELL SPIRAX A extreme-pressure gear oil with viscosity grade SAE 80W90 and API grade GL5.
- Page 54 Mower conditioner FC243 Lateral gearbox draining Before draining oil, operate the machine for a few minutes so that the oil warms up. The angle gearbox is lubricated with 0.9 L (0.23 US gal) of SHELL SPIRAX A extreme-pressure oil for mechanical transmissions with viscosity grade SAE 80W90 and API grade GL5.
- Page 55 Mower conditioner FC243 Central gearbox draining Before draining oil, operate the machine for a few minutes so that the oil warms up. The angle gearbox is lubricated with 2.3 L (0.6 US gal) of SHELL SPIRAX A extreme-pressure oil for mechanical transmissions with viscosity grade SAE 80W90 and API grade GL5.
- Page 56 Mower conditioner FC243 Lubricate the following parts Oil: - The moving parts and pivot points. Grease: - The mowing unit compensation cylinder ball joint (1). - the cutterbar connecting frame pivot pin (2). Maintenance and storage...
-
Page 57: Maintenance
Mower conditioner FC243 4. Maintenance Before adjusting, maintaining or repairing the machine, turn off ignition key and wait until all moving parts have come to a complete stop. Hydro-pneumatic accumulators Before any work is carried out on a hydraulic circuit with hydro-pneumatic accumulator, depressurize the circuit. - Page 58 Mower conditioner FC243 The side gearbox drive system Following all service operations on the drive system, check that the distance between the side gearbox drive shaft and the upper side of the cutterbar stiffener equals measure A =577 mm / 1’10’’ +/- 4 mm / 0.16’’.
- Page 59 Mower conditioner FC243 Work/transport cylinder Length in working position: Following all service operations on the transport/work cylinder, proceed to following adjustment: - Cylinder barrel (3) must be contact with frame stop (4). - Adapt cylinder length L to obtain a play J of 2 to 4 mm (0.08’’...
- Page 60 Mower conditioner FC243 Replacing the belts Never replace belts individually. When a belt is damaged, always replace the whole set (Part no. 83101687). With the machine in transport position. Remove self-locking nut of pivoting guardrail using the box spanner supplied with the machine (1).
- Page 61 Mower conditioner FC243 Checking the oil levels Cutterbar Regularly check the cutterbar oil level: • Place the cutterbar in horizontal position (with regards to X and Y axis). • Remove filler plug (1) and (2) as well as their seals.
- Page 62 Mower conditioner FC243 Inspection of knives and securing elements Immediately replace worn or damaged parts with genuine KUHN parts. Knives Inspect systematically all knives before the machine is operated to: • guarantee the cutting quality. • guarantee safety in use.
- Page 63 Mower conditioner FC243 Fixing elements Check the fixing elements: - After hitting an obstacle. - When replacing knives. - At the beginning of each season. The fixing bolts should be changed in the following cases: - When there is visible warping.
- Page 64 Mower conditioner FC243 Knife replacement Replace knife lock-nuts and bolts when they have been removed 5 times. Replace systematically all worn or distorted knives. Never straighten a bent knife. Always replace both knives per disc. Clean the nut case. Place a wooden wedge between two discs to stop them from rotating.
- Page 65 Mower conditioner FC243 Check if there is still a gap of 1 mm (0.04’’) between the disc lower part and the cutterbar wear plates. If this is not the case, fit one (maximum two) spacer(s) between the disc and the mounting hub (Part no.
-
Page 66: Storage
Mower conditioner FC243 5. Storage At the end of each season - Clean the machine thoroughly. - Drain all gearboxes and cutterbar and refill with new oil (see "Lubrication" chapter). - Touch up paint if necessary. - Put the machine under cover in a dry place. -
Page 67: Trouble Shooting Guide
Mower conditioner FC243 $TROUBLE SHOOTING GUIDE Problem Cause Remedy Dull or broken knives. Replace knives. Make sure the arrow on the Knives not installed correctly. knife upper face is pointing in Uneven stubble. the disc's direction of rotation. Too low PTO speed (rotational Increase speed to 540 min frequency). -
Page 68: Limited Warranty
Mower conditioner FC243 $LIMITED WARRANTY Limited warranty... - Page 69 Mower conditioner FC243 Limited warranty...
Need help?
Do you have a question about the FC243 and is the answer not in the manual?
Questions and answers