Table of Contents
Advertisement
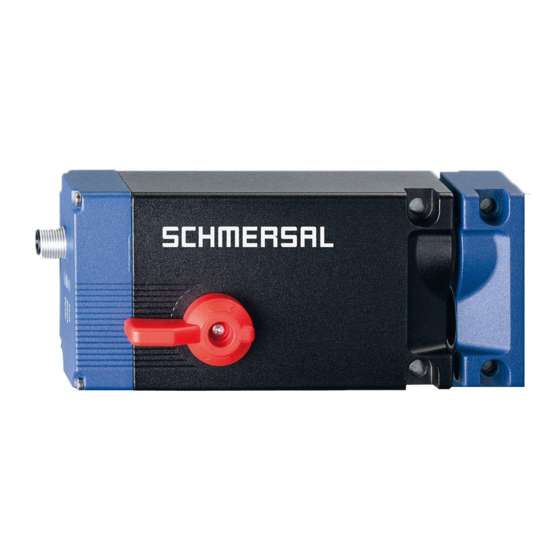
Operating instructions
Solenoid interlock
Operating instructions. . . . . . . . . . . .pages 1 to 12
EN
Original
Content
1
About this document
1.1 Function . . . . . . . . . . . . . . . . . . . . . . . . . . . . . . . . . . . . . . . . . . . . . .1
1.2 Target group: authorised qualified personnel. . . . . . . . . . . . . . . . . .1
1.3 Explanation of the symbols used . . . . . . . . . . . . . . . . . . . . . . . . . . .1
1.4 Appropriate use . . . . . . . . . . . . . . . . . . . . . . . . . . . . . . . . . . . . . . . .1
1.5 General safety instructions . . . . . . . . . . . . . . . . . . . . . . . . . . . . . . .1
1.6 Warning about misuse . . . . . . . . . . . . . . . . . . . . . . . . . . . . . . . . . . .2
1.7 Exclusion of liability . . . . . . . . . . . . . . . . . . . . . . . . . . . . . . . . . . . . .2
2
2.1 Ordering code . . . . . . . . . . . . . . . . . . . . . . . . . . . . . . . . . . . . . . . . .2
2.2 Special versions. . . . . . . . . . . . . . . . . . . . . . . . . . . . . . . . . . . . . . . .2
2.3 Comprehensive quality insurance to 2006/42/EC . . . . . . . . . . . . . .2
2.4 Purpose . . . . . . . . . . . . . . . . . . . . . . . . . . . . . . . . . . . . . . . . . . . . . .2
2.5 Technical data . . . . . . . . . . . . . . . . . . . . . . . . . . . . . . . . . . . . . . . . .3
2.6 Safety classification . . . . . . . . . . . . . . . . . . . . . . . . . . . . . . . . . . . .3
3
3.1 General mounting instructions . . . . . . . . . . . . . . . . . . . . . . . . . . . . .4
3.2 Manual release . . . . . . . . . . . . . . . . . . . . . . . . . . . . . . . . . . . . . . . .5
3.3 Electrical manual release - E (for -ST2). . . . . . . . . . . . . . . . . . . . . .5
3.4 Emergency exit -T . . . . . . . . . . . . . . . . . . . . . . . . . . . . . . . . . . . . . .5
3.5 Assembly with mounting set . . . . . . . . . . . . . . . . . . . . . . . . . . . . . .5
3.6 Dimensions . . . . . . . . . . . . . . . . . . . . . . . . . . . . . . . . . . . . . . . . . . .6
3.7 Actuator and accessories. . . . . . . . . . . . . . . . . . . . . . . . . . . . . . . . .6
4
4.1 General information for electrical connection. . . . . . . . . . . . . . . . . .7
4.2 Control options in the normal operating mode . . . . . . . . . . . . . . . . .7
5
5.1 Mode of operation of the safety outputs. . . . . . . . . . . . . . . . . . . . . .8
5.2 Actuator teaching / actuator detection . . . . . . . . . . . . . . . . . . . . . . .8
6
6.1 Diagnostic-LEDs . . . . . . . . . . . . . . . . . . . . . . . . . . . . . . . . . . . . . . .8
6.2 Diagnostic information . . . . . . . . . . . . . . . . . . . . . . . . . . . . . . . . . . .9
7
7.1 Functional testing. . . . . . . . . . . . . . . . . . . . . . . . . . . . . . . . . . . . . .10
7.2 Maintenance . . . . . . . . . . . . . . . . . . . . . . . . . . . . . . . . . . . . . . . . .10
8
8.1 Disassembly. . . . . . . . . . . . . . . . . . . . . . . . . . . . . . . . . . . . . . . . . .10
8.2 Disposal . . . . . . . . . . . . . . . . . . . . . . . . . . . . . . . . . . . . . . . . . . . . .10
9
9.1 Wiring configuration and accessories . . . . . . . . . . . . . . . . . . . . . . 11
10 EU Declaration of conformity
1. About this document
1.1 Function
This operating instructions manual provides all the information you
need for the mounting, set-up and commissioning to ensure the safe
operation and disassembly of the safety switchgear. The operating
instructions must be available in a legible condition and a complete
version in the vicinity of the device.
1.2 Target group: authorised qualified personnel
All operations described in this operating instructions manual must
be carried out by trained specialist personnel, authorised by the plant
operator only.
Please make sure that you have read and understood these operating
instructions and that you know all applicable legislations regarding
occupational safety and accident prevention prior to installation and
putting the component into operation.
The machine builder must carefully select the harmonised standards
to be complied with as well as other technical specifications for the
selection, mounting and integration of the components.
1.3 Explanation of the symbols used
Information, hint, note:
This symbol is used for identifying useful additional information.
Caution: Failure to comply with this warning notice could
lead to failures or malfunctions.
Warning: Failure to comply with this warning notice could
lead to physical injury and/or damage to the machine.
1.4 Appropriate use
The products described in these operating instructions are developed to
execute safety-related functions as part of an entire plant or machine. It
is the responsibility of the manufacturer of a machine or plant to ensure
the correct functionality of the entire machine or plant.
The safety switchgear must be exclusively used in accordance with
the versions listed below or for the applications authorised by the
manufacturer. Detailed information regarding the range of applications
can be found in the chapter "Product description".
1.5 General safety instructions
The user must observe the safety instructions in this operating
instructions manual, the country specific installation standards as well
as all prevailing safety regulations and accident prevention rules.
EN
AZM400
1
Advertisement
Table of Contents

Related Manuals for schmersal AZM400


Summary of Contents for schmersal AZM400
-
Page 1: Table Of Contents
Operating instructions Solenoid interlock AZM400 Diagnostic functions 6.1 Diagnostic-LEDs ........8 6.2 Diagnostic information . -
Page 2: Warning About Misuse
2.1 Ordering code AZM400 can be driven out. As soon as the locking bolt have reached This operating instructions manual applies to the following types: sufficient depth in the locking hole the guard system is considered to be safely locked. -
Page 3: Technical Data
Operating instructions Solenoid interlock AZM400 2.5 Technical data Electrical data – diagnostic outputs: Standards: IEC 60947-5-1, ISO 14119, - ST1: 1 diagnostic output, OUT ISO 13849-1, IEC 61508 - ST2: 2 diagnostic outputs, OUT1 and OUT2 Material of the enclosure:... -
Page 4: Mounting
Solenoid interlock AZM400 3. Mounting Actuating directions and switch distances The AZM400 can be operated within the following tolerance limits: 3.1 General mounting instructions X – axis: ± 4 mm Y – axis: ± 4 mm Please observe the relevant requirements of the standards Z –... -
Page 5: Manual Release
When using 40 mm aluminium profile, the optimum mounting set MS- 3.3 Electrical manual release - E (for -ST2) AZM400 can be used. This consists of two mounting plates including The electrical manual release can be implemented with an additional four bolt and four nuts. -
Page 6: Dimensions
3.7 Actuator and accessories All measurements in mm. Actuator AZM400-B1 (not included in delivery) AZM400Z-ST AZM400Z-ST2 77. 8 77.8 77.8 Mounting plate, part of the mounting set MS-AZM400 (available as accessory) 23. 8 23. 8 24.3 Device for emergency exit AZM400Z-ST..-T AZM400Z-ST2..-T 6. -
Page 7: Rear Side Electrical Connection
Unlocking after Power On If after switching on, the AZM400 is already in the locked position, the 4.2 Control options in the normal operating mode device must first be unlocked and then locked again. This is to verify... -
Page 8: Operating Principles And Coding
5.1 Mode of operation of the safety outputs 6.1 Diagnostic-LEDs With the solenoid interlock AZM400, the unlock signals immediately The solenoid interlock signals the operating condition, as well as errors switch off the safety outputs. The unlocked guard system can be through 3-colour LEDs. -
Page 9: Diagnostic Information
Invalid input condition of the control inputs and/or of the electronic manual release 7 flash pulses Fault with the actuator detection 0 min. Distance between the AZM400 and the actuator is too large; external magnetic fields prevent detection 8 flash pulses Fault Block drive 0 min. -
Page 10: Set-Up And Maintenance
Operating instructions Solenoid interlock AZM400 7. Set-up and maintenance 8. Disassembly and disposal 7.1 Functional testing 8.1 Disassembly The safety function of the safety components must be tested. The safety switchgear must be disassembled in a de-energised The following conditions must be previously checked and met: condition only. -
Page 11: Appendix
Connector plug M12, 8-pole Function safety switchgear Pin configuration of the Colour code of Possible colour codes for more connector the Schmersal connector to commercially available connectors DIN 47100 based on IEC 60947-5-2: 2007 Control input 1 Safety output 1... - Page 12 Philip Schmersal Managing Director The currently valid declaration of conformity can be downloaded from the internet at www.schmersal.net. K. A. Schmersal GmbH & Co. KG Möddinghofe 30, D - 42279 Wuppertal Postfach 24 02 63, D - 42232 Wuppertal Phone:...
Need help?
Do you have a question about the AZM400 and is the answer not in the manual?
Questions and answers