
Related Manuals for hatch WePlaySmart

Summary of Contents for hatch WePlaySmart
- Page 1 WePlaySmart® Multi-Touch Table Installation Instructions Version 1.0 HatchEarlyLearning.com | 800.624.7968...
-
Page 2: Table Of Contents
WePlaySmart Table Installation Manual Table of Contents Overview ......................3 1.1. Overview of This Manual ......................3 1.1.1. How to Use the Manual ......................3 1.1.2. Special Notices ........................4 1.2. System Overview........................... 5 1.2.1. Included Hardware and Software ..................5 1.3. -
Page 3: Overview
1.1.1. How to Use the Manual Print the WePlaySmart Functional checklist. Follow this manual in sequence. When the installation is complete, complete the checklist. The Functional Checklist will be used after the build is complete, to signify your Hatch system is ready to use! -
Page 4: Special Notices
WePlaySmart Table Installation Manual 1.1.2. Special Notices Pay close attention to these colored box notices. This is a tip. Tip: helpful technique for installation or use Warning: warns of risk of injury to installer or This is a warning. damage to equipment... -
Page 5: System Overview
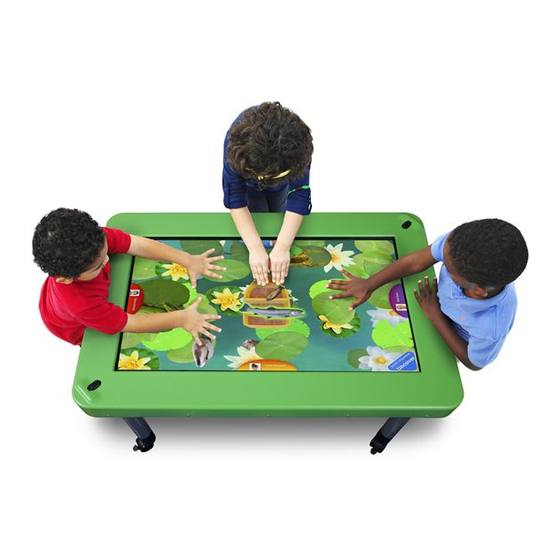
WePlaySmart Table Installation Manual 1.2. System Overview WePlaySmart by Hatch is an interactive computer table with 80 touchpoints, allowing 4 children to play simultaneously. It has an integrated recording and image capture system. WePlaySmart games are visible from all positions around the table. -
Page 6: Overview Of The Assembly
WePlaySmart Table Installation Manual 1.3. Overview of the Assembly The assembly involves unpacking the table and hardware, and then installing the table legs. Connecting the power and a functional check complete the assembly The procedure takes about 1 hour 1.3.1. Room Requirements The table may be placed anywhere you desire, as long as there is a power outlet within 9 feet. -
Page 7: Unpacking
WePlaySmart Table Installation Manual 2. U NPACKING 2.1. Cautions Use caution when cutting packing tape. Be careful not to pierce Cut packing strips with deep enough to slash or cut the equipment. Plastic packing strips flush cut pliers are tough; use a flush cut pliers or robust scissors. To protect hardware, do not walk on or put heavy items on the boxes. -
Page 8: Remove Remaining Packing Materials
WePlaySmart Table Installation Manual 1 Quick Reference Guide 1 10 Ft. power cord 1 Cord Floor Cover 1 Screen Cleaning Kit 1 USB Headphone/Microphone headset Wireless Keyboard (comes pre-installed in dedicated keyboard shelf on bottom of table) ... -
Page 9: Attaching Legs Instructions
WePlaySmart Table Installation Manual 3. A TTACHING NSTRUCTIONS 3.1. Screw Legs onto Table 1. With the table securely propped against a sturdy surface or wall, screw in the power leg into the position nearest the power button. Use care to not cross thread the threaded legs. -
Page 10: Install Mobility Castors (If Purchased - Optional Configuration)
WePlaySmart Table Installation Manual 3.2. Install Mobility Castors (If Purchased - Optional Configuration) 1. With the table still propped on its side, screw the castors into the legs. If you are retrofitting casters, it is best to lay or tilt the table on its side against a wall. -
Page 11: Perform Screen Alignment Check
4.2. Perform Screen Alignment Check The Table with WePlaySmart by Hatch is calibrated before shipment. The unit’s multi-touch interface may require calibration over time. Further functional tests are in the Functional Checklist 2. 1. Turn on the power button. WePlaySmart by Hatch will automatically launch. - Page 12 WePlaySmart Table Installation Manual 4. Select the Windows icon in the lower left of the screen. Enter “calibrate” in the Search box. Select Calibrate the screen for pen or touch input, from the results. 5. Tablet and PC Settings will now open.
-
Page 13: Complete The Checklist
WePlaySmart Table Installation Manual 4.3. Complete the Checklist 1. Perform the Functional Checklist.
Need help?
Do you have a question about the WePlaySmart and is the answer not in the manual?
Questions and answers