
Related Manuals for Toshiba RBM-PMV0363E, RBM-PMV0903E


Summary of Contents for Toshiba RBM-PMV0363E, RBM-PMV0903E
- Page 1 EB99802801-1 Installation Manual PMV Kit Installation Manual RBM-PMV0363E English PMV Kit RBM-PMV0903E...
-
Page 2: Table Of Contents
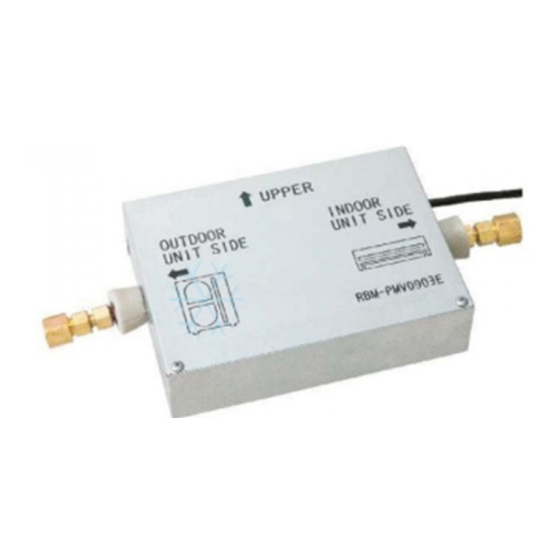
Accessory parts and Parts to be procured locally Thank you very much for purchasing TOSHIBA Air conditioner. Please read this manual carefully before using your PMV Kit. Accessory parts • When installing an indoor or outdoor unit, follow the installation manual supplied with the unit. -
Page 3: Precautions For Safety
INSTALLATION OF NEW REFRIGERANT AIR PRECAUTIONS FOR SAFETY CONDITIONER WARNING This PMV Kit adopts the new HFC refrigerant (R410A) which does not deplete the ozone layer. • Ask an authorized dealer or qualified installation professional to install/maintain the air conditioner. •... -
Page 4: Selection Of Installation Place
• The length of a connection pipe to the indoor unit should be 2 m to 10 m. Installation space Upon customer’s approval, install the air conditioner at a place where satisfies the following RBM-PMV0363E, RBM-PMV0903E conditions. • Place where it can be installed horizontally. -
Page 5: Installation Of Pmv Kit
INSTALLATION OF PMV KIT REFRIGERANT PIPING WARNING WARNING Install the unit securely in the place to sufficiently withstand the weight of the unit. If refrigerant gas has leaked during the installation work, ventilate the room immediately. If the foundation is not sturdy enough, the unit may fall and cause personal injury. If the leaked refrigerant gas comes in contact with fire, noxious gas may be generated. - Page 6 REFRIGERANT PIPING Pipe forming/End positioning Connection of refrigerant pipe Airtight test/Air purge, etc. Connect all the refrigerant pipes with flare Flaring For airtight test, air purge, addition of refrigerant, and gas leak check, follow the Installation Manual connecting work. attached to the outdoor unit. 1.
-
Page 7: Fixation After Connection Pipes
FIXATION AFTER CONNECTION PIPES ELECTRIC WORK 1. After connection to pipes, fix the PMV Kit using the attached binding band so that it is held WARNING closely to the gas pipe. 1. Using the specified wires, ensure to connect the wires, and fix wires securely so that the external strength of the wires do not transmit to the connecting part of the terminals. -
Page 8: Electric Work
ELECTRIC WORK • Work procedure 1 Wire connections (In case of indoor unit which connector conversion cable is not used, but the additional Use the supplied, dedicated wires. clamp filter is used) REQUIREMENT Applicable model: High wall type 4MH (2H) series •... - Page 9 ELECTRIC WORK 4) Open the connector cover of the indoor unit after power-off and then process wiring work. • Work procedure 2 (In case of indoor unit which the connector conversion cable is not used, but the additional clamp filter is used) Applicable model: High Wall type 3H series * For 3H-series models which have [E1] at the end of each model name, the works 1) and 2) are unnecessary.
-
Page 10: Setup Of Outdoor Unit
ELECTRIC WORK SETUP OF OUTDOOR UNIT • Work procedure 3 When using PMV Kit on the MiNi-SMMS system, it is necessary to set up DIP switches on the interface P.C. board of the outdoor unit. (In case of indoor unit which additional clamp filter and the connector conversion cable are If it is not MiNi-SMMS system, setting up of DIP switches is unnecessary. - Page 12 TOSHIBA CARRIER CORPORATION 336, TADEHARA, FUJI-SHI, SHIZUOKA-KEN, 416-8521, JAPAN EB99802801-1...
Need help?
Do you have a question about the RBM-PMV0363E, RBM-PMV0903E and is the answer not in the manual?
Questions and answers