
Subscribe to Our Youtube Channel
Related Manuals for F&U PAC-1030


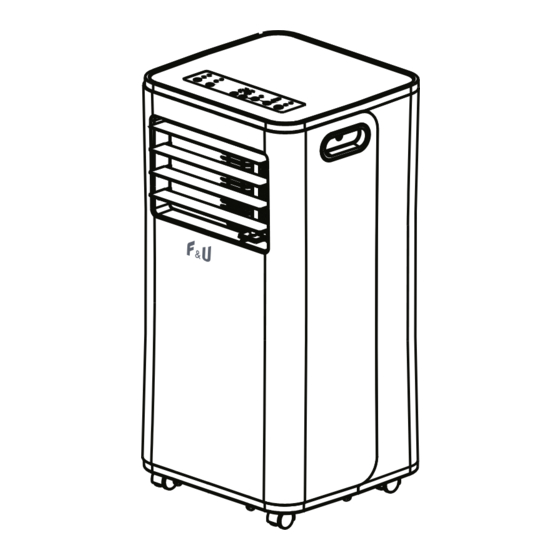
Summary of Contents for F&U PAC-1030
- Page 1 INSTRUCTIONS MANUAL PAC-1030 PORTABLE AIR CONDITIONER Read and save these instructions for future reference...
-
Page 2: Table Of Contents
Content I. Notes II. Features and Components III. Installation and Adjustment IV. Control Setting V. Drainage Instructions VI. Maintenance VII. Troubleshooting VIII. Appendix Thank you for choosing this luxurious and elegant portable air conditioning. Please keep the manual for later review, and read the manual carefully before use. -
Page 3: Notes
Notes Notes: The air conditioning is only suitable for indoor use, and not suitable for other applications. Follow local grid interconnection rules while installing the air conditioning and ensure that it is properly grounded. If you have any question on electrical installation, follow the instructions of the manufacturer, and if necessary, ask a professional electrician to install ... -
Page 4: Features And Components
reduced physical, sensory or mental capabilities if they have been given supervision or instruction concerning use of the appliance in a safe way and understand the hazards involved. Children shall not play with the appliance. Cleaning and maintenance shall not be made by children without supervision. -
Page 5: Installation And Adjustment
Exhaust Pipe Assembly Window Sealing Plate Assembly III. Installation and Adjustment 1. Installation: Warning: before using the mobile air conditioning, keep it upright for at least two hours. The air conditioning can be easily moved in the room. In the moving process, ensure that the air conditioning is in the upright position and placed on a flat surface. - Page 6 Fig.2 Fig.1 Fig.3 1.2 Install the window sealing plate assembly 1) Half open the window, and mount the window sealing plate assembly to the window (as shown in Fig.2 and Fig.3); the assembly can be placed in horizontal and vertical direction. 2) Pull various components of the window sealing plate assembly open, adjust their opening distance to bring both ends of the assembly into contact with the window frame, and fix various components of the assembly.
-
Page 7: Control Setting
Notes: 1. the flat end of the exhaust pipe joints must be snapped into place. 2. The pipe cannot be distorted nor has substantial turning (greater than 45 °). Keep the ventilation of the exhaust pipe unblocked. Fig.5 Fig.6 Important Notice The length of the exhaust hose shall be 280~1,500mm, and this length is based on the specifications of the air conditioning. - Page 8 When the machine is connected to the mains for the first time, a buzzer noise indicates that the machine is at standby status. 1. Power Key: press the key to turn on and off the machine. In the case of power on, press this key to turn off the machine;...
- Page 9 II. Operating Instructions of the Remote Control The remote control Panel is as follows: Instructions for use: 1. Power: Press to turn on or turn off the machine. 2. Timer: press to set the timer. 3. Down: press to reduce the temperature or timer set value. 4.
-
Page 10: Drainage Instructions
When the water level in the water pan exceeds the warning level, the machine will automatically sound an alarm, and the "FULL" indicator light will flash. At this point, you need to move the drainage pipe connecting the machine or the water outlet to sewer or other drainage area to empty the water (details see Drainage Instructions at the end of this chapter). -
Page 11: Maintenance
2. Continuous drainage ( ) (only applicable to cooling & dehumidifying mode), as Optional shown in figure: 1) Unscrew the drainage cover, and unplug the water plug. 2) Set the drainage pipe into the water outlet. 3) Connect the drainage pipe to the bucket. VI. - Page 12 2.1: Clean the upper filter screen frame 1) Clasp the wedging block of the EVA filter screen frame with hands. Force down from the outside to remove the EVA filter screen frame. Unscrew four screws fixing the EVA filter screen and the rear housing to remove the EVA filter screen (as shown in the above figure).
-
Page 13: Troubleshooting
VII. Troubleshooting Do not repair or disassemble the air conditioning by yourself. Unqualified repair will lead to failure of the warranty card, and may cause damage to users or their properties. Problems Reasons Solutions Turn it on after connecting it to a socket with There is no electricity. -
Page 14: Appendix
Displays 'E1'. pipe temperature sensor Check the pipe temperature sensor and related abnormal. circuitry. Displays 'E2' The room temperature sensor is Check the room temperature sensor and abnormal. related circuitry. Note: If problems not listed in the table occur or recommended solutions do not work, please contact the professional service organization. - Page 15 NOTICE ABOUT RECYCLING Your product is designed and manufactured with high quality materials and components which can be recycled and reused. This symbol means that electrical and electronic equipment, at their end-of-life, should be disposed of separately from your household waste. Please dispose of this equipment at your local community waste collection/ recycling centre.
Need help?
Do you have a question about the PAC-1030 and is the answer not in the manual?
Questions and answers