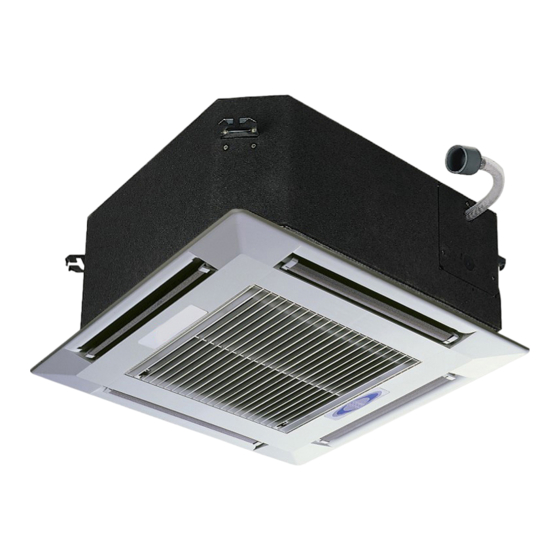
Carrier AirStream 42WKN08-36 Installation, Operation And Maintenance Manual
Hydronic ceiling cassettes
Hide thumbs
Also See for AirStream 42WKN08-36:
Table of Contents
Advertisement
Quick Links
Installation, Operation and Maintenance
TABLE OF CONTENTS
SAFETY CONSIDERATIONS . . . . . . . . . . . . . . . . . . 1
INSPECTION . . . . . . . . . . . . . . . . . . . . . . . . . . . . . . . 2
GENERAL . . . . . . . . . . . . . . . . . . . . . . . . . . . . . . . . . 2
CONTROLS DESCRIPTION . . . . . . . . . . . . . . . . . . . 7
Microprocessor Control Board . . . . . . . . . . . . . . . . 7
Inputs . . . . . . . . . . . . . . . . . . . . . . . . . . . . . . . . . . . . 7
Outputs . . . . . . . . . . . . . . . . . . . . . . . . . . . . . . . . . . . 7
External Connections . . . . . . . . . . . . . . . . . . . . . . . 7
Microprocessor PCB Battery . . . . . . . . . . . . . . . . . 7
Controller . . . . . . . . . . . . . . . . . . . . . . . . . . . . . . . . . 7
Infrared Receiver . . . . . . . . . . . . . . . . . . . . . . . . . . . 7
Self Diagnostics . . . . . . . . . . . . . . . . . . . . . . . . . . . . 7
Receiver Indicators . . . . . . . . . . . . . . . . . . . . . . . . . 7
PRE-INSTALLATION . . . . . . . . . . . . . . . . . . . . . . . 39
Unpack Unit . . . . . . . . . . . . . . . . . . . . . . . . . . . . . . 39
Blank Off Pieces. . . . . . . . . . . . . . . . . . . . . . . . . . . 39
Positioning . . . . . . . . . . . . . . . . . . . . . . . . . . . . . . . 39
Ceiling Opening Sizes . . . . . . . . . . . . . . . . . . . . . . 39
Thermostat . . . . . . . . . . . . . . . . . . . . . . . . . . . . . 39
INSTALLATION. . . . . . . . . . . . . . . . . . . . . . . . . . . . 39
Hanger Bolts. . . . . . . . . . . . . . . . . . . . . . . . . . . . . . 39
Installation Guide . . . . . . . . . . . . . . . . . . . . . . . . . . 39
Condensate Piping. . . . . . . . . . . . . . . . . . . . . . . . . 40
Duct Collars . . . . . . . . . . . . . . . . . . . . . . . . . . . . . . 40
Piping Installation . . . . . . . . . . . . . . . . . . . . . . . . . 40
Piping Insulation . . . . . . . . . . . . . . . . . . . . . . . . . . 41
Wiring . . . . . . . . . . . . . . . . . . . . . . . . . . . . . . . . . . . 41
Terminal Strip Connections . . . . . . . . . . . . . . . . . 42
Fascia Assembly . . . . . . . . . . . . . . . . . . . . . . . . . . 52
PRE-START-UP . . . . . . . . . . . . . . . . . . . . . . . . . . . 52
Pre-Start Checks . . . . . . . . . . . . . . . . . . . . . . . . . . 52
Control Circuit Checks . . . . . . . . . . . . . . . . . . . . . 52
Sequence of Operation . . . . . . . . . . . . . . . . . . . . . 54
OPERATION . . . . . . . . . . . . . . . . . . . . . . . . . . . . . . 54
Manufacturer reserves the right to discontinue, or change at any time, specifications or designs without notice and without incurring obligations.
Catalog No. 04-53420015-01
Instructions
Printed in U.S.A.
Form 42WKN-9SI
Hydronic Ceiling Cassettes
On/Off. . . . . . . . . . . . . . . . . . . . . . . . . . . . . . . . . . . .54
Fan Speeds . . . . . . . . . . . . . . . . . . . . . . . . . . . . . . .54
Modes . . . . . . . . . . . . . . . . . . . . . . . . . . . . . . . . . . .54
Temperature Set Point . . . . . . . . . . . . . . . . . . . . . .54
Clock . . . . . . . . . . . . . . . . . . . . . . . . . . . . . . . . . . . .54
Timer . . . . . . . . . . . . . . . . . . . . . . . . . . . . . . . . . . . .54
Battery Replacement . . . . . . . . . . . . . . . . . . . . . . .54
CONTROLS . . . . . . . . . . . . . . . . . . . . . . . . . . . . . . .55
Setting Jumper Links . . . . . . . . . . . . . . . . . . . . . . .55
Main Control Functions . . . . . . . . . . . . . . . . . . . . .55
Alarms . . . . . . . . . . . . . . . . . . . . . . . . . . . . . . . . . . .55
MAINTENANCE . . . . . . . . . . . . . . . . . . . . . . . . . . . .55
Maintenance Schedule . . . . . . . . . . . . . . . . . . . . . .55
Filter Removal and Cleaning . . . . . . . . . . . . . . . . .55
Recommended Spares . . . . . . . . . . . . . . . . . . . . . .55
DISASSEMBLY PROCEDURE . . . . . . . . . . . . . . . .56
Fan Removal . . . . . . . . . . . . . . . . . . . . . . . . . . . . . .56
Condensate Tray Removal. . . . . . . . . . . . . . . . . . .56
Condensate Pump Removal . . . . . . . . . . . . . . . . .56
TROUBLESHOOTING . . . . . . . . . . . . . . . . . . . . . . .56
REPLACEMENT PARTS . . . . . . . . . . . . . . . . . . . . .59
SAFETY CONSIDERATIONS
Installing and servicing air-conditioning equipment can be
hazardous due to system pressure and electrical components.
Only trained and qualified service personnel should install
and service air-conditioning equipment. See Fig. 1 for Propo-
sition 65 warning label.
Untrained personnel can perform basic maintenance such as
cleaning and replacing filters. All other operations should be
performed by trained service personnel. When working on
air-conditioning equipment, observe safety precautions in lit-
erature and on tags and labels attached to the unit.
1.
The equipment has been designed and manufactured to
meet international safety standards but, like any mechan-
ical/electrical equipment, care must be taken to obtain
the best results.
Pg 1
918
8-18
AirStream™
42WKN08-36
Replaces: 42WKN-8SI
Advertisement
Table of Contents

Related Manuals for Carrier AirStream 42WKN08-36


Summary of Contents for Carrier AirStream 42WKN08-36
-
Page 1: Table Of Contents
AirStream™ 42WKN08-36 Hydronic Ceiling Cassettes Installation, Operation and Maintenance Instructions TABLE OF CONTENTS On/Off........54 Fan Speeds . -
Page 2: Inspection
Service and maintenance of this equipment should only be carried out by skilled personnel. IMPORTANT: Make sure the ceiling grid is supported separately from the appliance. The ceiling must not be When working with any air-conditioning unit, ensure supported by any part of the appliance, fascia or any as- that the electrical disconnect supplying the unit is sociated wiring or pipe work. - Page 3 Table 1 — 42WKN Physical Data 42WKN UNIT SIZE Nominal TONS COOLING CAPACITY (Btuh) 7,800 11,200 18,200 18,600 31,100 34,300 Dimensions/Weights Height – Chassis/Fascia (in.) 11 / 1 11 / 1 13 / 1 13 / 1 (not additive) / 25 / 25 / 37 / 37...
- Page 4 25 3/16 CW Inlet CW Outlet HW Coil Inlet (Optional) HW Coil Outlet (Optional) Branch Duct Opening (x3) Fresh Air Intake (x2) Pump Inspection Port 25 3/16 Condensate Drain Control Panel 10. Mounting Bracket 1 11/16 10 11/16 1 1/8 2 3/4 2 3/4 9 13/16...
- Page 5 CW Coil Inlet CW Coil Outlet HW Coil Inlet (Optional) HW Coil Outlet (Optional) Fresh Air Intake (x3) Branch Duct Opening (x4) Pump Inspection Port Condensate Drain Control Panel 10. Mounting Bracket 11/16 2 5/8 9 1/2 2 3/4 32 3/8 7 13/16 3 1/8 2 3/4...
- Page 6 DX LIQUID LINE 2 DX SUCTION LINE 3 HW INLET (Optional) 4 HW OUTLET (Optional) 5 FRESH AIR INTAKE (x3) 6 BRANCH DUCT OPENING (x4) 7 PUMP INSPECTION PORT 8 CONDENSATE DRAIN 9 CONTROL PANEL 10 MOUNTING BRACKET 11 ELECTRIC HEAT FUSE BOX OR TRANSFORMER NOTE: Dimensions shown in inches.
-
Page 7: Controls Description
into the PCB's battery holder approximately 5 minutes before CONTROLS DESCRIPTION main power is initially applied to the unit. Microprocessor Control Board Controller The PCB (printed circuit board) control board relays control Before using the infrared transmitters, please read this hand- the operation of the indoor-fan motor, outdoor-fan motor, book fully and ensure the batteries (supplied loose) are fitted compressor and electric heater (if fitted), to maintain room... - Page 8 230V LINE WIRING: USE COMPONENT LEADS OR 14 AWG BLACK UNLESS NOTED (OPTIONAL) 24V CONTROL WIRING: USE COMPONENT LEADS OR 18 AWG WHITE STEP UP DISCONNECT 14 AWG BLACK TRANSFORMER SWITCH 14 AWG BLACK FUSE FUSE (100VA) (X1) (H1) 1.25A 2.5A (X3) (H3)
- Page 9 230V LINE WIRING: USE COMPONENT LEADS OR 14 AWG BLACK UNLESS NOTED (OPTIONAL) 24V CONTROL WIRING: USE COMPONENT LEADS OR 18 AWG WHITE DISCONNECT 14 AWG BLACK SWITCH FUSE 1.25A 208-230V / 1PH / 50-60HZ FUSE INCOMING POWER 1.25A AND GROUND BY OTHERS MAIN GROUND...
- Page 10 230V LINE WIRING: USE COMPONENT LEADS OR 14 AWG BLACK UNLESS NOTED (OPTIONAL) 24V CONTROL WIRING: USE COMPONENT LEADS OR 18 AWG WHITE DISCONNECT 14 AWG BLACK SWITCH FUSE 1.25A 208-230V / 1PH / 50-60HZ FUSE INCOMING POWER 1.25A AND GROUND BY OTHERS MAIN GROUND...
- Page 11 230V LINE WIRING: USE COMPONENT LEADS OR 14 AWG BLACK UNLESS NOTED (OPTIONAL) 24V CONTROL WIRING: USE COMPONENT LEADS OR 18 AWG WHITE STEP DOWN DISCONNECT 14 AWG BLACK TRANSFORMER SWITCH 14 AWG BLACK FUSE FUSE (250VA) (X1) (H1) 1.25A 2.5A (X3) (H3)
- Page 12 230V LINE WIRING: USE COMPONENT LEADS OR 14 AWG BLACK UNLESS NOTED (OPTIONAL) 24V CONTROL WIRING: USE COMPONENT LEADS OR 18 AWG WHITE DISCONNECT 14 AWG BLACK SWITCH FUSE 1.25A 208-230V / 1PH / 50-60HZ FUSE INCOMING POWER 1.25A AND GROUND FUSE HTR-2 BY OTHERS...
- Page 13 230V LINE WIRING: USE COMPONENT LEADS OR 14 AWG BLACK UNLESS NOTED (OPTIONAL) 24V CONTROL WIRING: USE COMPONENT LEADS OR 18 AWG WHITE DISCONNECT 14 AWG BLACK SWITCH FUSE 1.25A 208-230V / 1PH / 50-60HZ FUSE INCOMING POWER 1.25A AND GROUND FUSE HTR-2 BY OTHERS...
- Page 14 230V LINE WIRING: USE COMPONENT LEADS OR 14 AWG BLACK UNLESS NOTED (OPTIONAL) 24V CONTROL WIRING: USE COMPONENT LEADS OR 18 AWG WHITE STEP UP DISCONNECT 14 AWG BLACK TRANSFORMER SWITCH 14 AWG BLACK FUSE FUSE (100VA) (X1) (H1) 1.25A 2.5A (X3) (H3)
- Page 15 230V LINE WIRING: USE COMPONENT LEADS OR 14 AWG BLACK UNLESS NOTED (OPTIONAL) 24V CONTROL WIRING: USE COMPONENT LEADS OR 18 AWG WHITE DISCONNECT 14 AWG BLACK SWITCH FUSE 1.25A 208-230V / 1PH / 50-60HZ FUSE INCOMING POWER 1.25A AND GROUND BY OTHERS MAIN GROUND...
- Page 16 230V LINE WIRING: USE COMPONENT LEADS OR 14 AWG BLACK UNLESS NOTED (OPTIONAL) 24V CONTROL WIRING: USE COMPONENT LEADS OR 18 AWG WHITE DISCONNECT 14 AWG BLACK SWITCH FUSE 1.25A 208-230V / 1PH / 50-60HZ FUSE INCOMING POWER 1.25A AND GROUND BY OTHERS MAIN GROUND...
- Page 17 230V LINE WIRING: USE COMPONENT LEADS OR 14 AWG BLACK UNLESS NOTED (OPTIONAL) 24V CONTROL WIRING: USE COMPONENT LEADS OR 18 AWG WHITE STEP DOWN DISCONNECT 14 AWG BLACK TRANSFORMER SWITCH 14 AWG BLACK FUSE FUSE (250VA) (X1) (H1) 1.25A 2.5A (X3) (H3)
- Page 18 230V LINE WIRING: USE COMPONENT LEADS OR 14 AWG BLACK UNLESS NOTED (OPTIONAL) 24V CONTROL WIRING: USE COMPONENT LEADS OR 18 AWG WHITE STEP UP DISCONNECT 14 AWG BLACK TRANSFORMER SWITCH 14 AWG BLACK FUSE FUSE (250VA) (X1) (H1) 2.0A 3.5A (X3) (H3)
- Page 19 230V LINE WIRING: USE COMPONENT LEADS OR 14 AWG BLACK UNLESS NOTED (OPTIONAL) 24V CONTROL WIRING: USE COMPONENT LEADS OR 18 AWG WHITE DISCONNECT 14 AWG BLACK SWITCH FUSE 2.0A 208-230V / 1PH / 50-60HZ FUSE INCOMING POWER 2.0A AND GROUND BY OTHERS MAIN GROUND...
- Page 20 230V LINE WIRING: USE COMPONENT LEADS OR 14 AWG BLACK UNLESS NOTED (OPTIONAL) 24V CONTROL WIRING: USE COMPONENT LEADS OR 18 AWG WHITE DISCONNECT 14 AWG BLACK SWITCH FUSE 2.0A 208-230V / 1PH / 50-60HZ FUSE INCOMING POWER 2.0A AND GROUND BY OTHERS MAIN GROUND...
- Page 21 230V LINE WIRING: USE COMPONENT LEADS OR 14 AWG BLACK UNLESS NOTED (OPTIONAL) 24V CONTROL WIRING: USE COMPONENT LEADS OR 18 AWG WHITE STEP DOWN DISCONNECT 14 AWG BLACK TRANSFORMER SWITCH 14 AWG BLACK FUSE FUSE (250VA) (X1) (H1) 2.0A 2.5A (X3) (H3)
- Page 22 230V LINE WIRING: USE COMPONENT LEADS OR 14 AWG BLACK UNLESS NOTED (OPTIONAL) 24V CONTROL WIRING: USE COMPONENT LEADS OR 18 AWG WHITE DISCONNECT 14 AWG BLACK SWITCH FUSE 2.0A 208-230V / 1PH / 50-60HZ FUSE INCOMING POWER 2.0A AND GROUND FUSE HTR-2 BY OTHERS...
- Page 23 230V LINE WIRING: USE COMPONENT LEADS OR 14 AWG BLACK UNLESS NOTED (OPTIONAL) 24V CONTROL WIRING: USE COMPONENT LEADS OR 18 AWG WHITE DISCONNECT 14 AWG BLACK SWITCH FUSE 2.0A 208-230V / 1PH / 50-60HZ FUSE INCOMING POWER 2.0A AND GROUND FUSE HTR-2 BY OTHERS...
- Page 24 230V LINE WIRING: USE COMPONENT LEADS OR 14 AWG BLACK UNLESS NOTED (OPTIONAL) 24V CONTROL WIRING: USE COMPONENT LEADS OR 18 AWG WHITE STEP UP DISCONNECT 14 AWG BLACK TRANSFORMER SWITCH 14 AWG BLACK FUSE FUSE (250VA) (X1) (H1) 2.0A 3.5A (X3) (H3)
- Page 25 230V LINE WIRING: USE COMPONENT LEADS OR 14 AWG BLACK UNLESS NOTED (OPTIONAL) 24V CONTROL WIRING: USE COMPONENT LEADS OR 18 AWG WHITE DISCONNECT 14 AWG BLACK SWITCH FUSE 2.0A 208-230V / 1PH / 50-60HZ FUSE INCOMING POWER 2.0A AND GROUND BY OTHERS MAIN GROUND...
- Page 26 230V LINE WIRING: USE COMPONENT LEADS OR 14 AWG BLACK UNLESS NOTED (OPTIONAL) 24V CONTROL WIRING: USE COMPONENT LEADS OR 18 AWG WHITE DISCONNECT 14 AWG BLACK SWITCH FUSE 2.0A 208-230V / 1PH / 50-60HZ FUSE INCOMING POWER 2.0A AND GROUND BY OTHERS MAIN GROUND...
- Page 27 230V LINE WIRING: USE COMPONENT LEADS OR 14 AWG BLACK UNLESS NOTED (OPTIONAL) 24V CONTROL WIRING: USE COMPONENT LEADS OR 18 AWG WHITE STEP DOWN DISCONNECT 14 AWG BLACK TRANSFORMER SWITCH 14 AWG BLACK FUSE FUSE (250VA) (X1) (H1) 2.0A 2.5A (X3) (H3)
- Page 28 230V LINE WIRING: USE COMPONENT LEADS OR 14 AWG BLACK UNLESS NOTED (OPTIONAL) 24V CONTROL WIRING: USE COMPONENT LEADS OR 18 AWG WHITE STEP UP DISCONNECT 14 AWG BLACK TRANSFORMER SWITCH 14 AWG BLACK FUSE FUSE (250VA) (X1) (H1) 3.5A 3.5A (X3) (H3)
- Page 29 230V LINE WIRING: USE COMPONENT LEADS OR 14 AWG BLACK UNLESS NOTED (OPTIONAL) 24V CONTROL WIRING: USE COMPONENT LEADS OR 18 AWG WHITE DISCONNECT 14 AWG BLACK SWITCH FUSE 3.5A 208-230V / 1PH / 50-60HZ FUSE INCOMING POWER 3.5A AND GROUND BY OTHERS MAIN GROUND...
- Page 30 230V LINE WIRING: USE COMPONENT LEADS OR 14 AWG BLACK UNLESS NOTED (OPTIONAL) 24V CONTROL WIRING: USE COMPONENT LEADS OR 18 AWG WHITE DISCONNECT 14 AWG BLACK SWITCH FUSE 3.5A 208-230V / 1PH / 50-60HZ FUSE INCOMING POWER 3.5A AND GROUND BY OTHERS MAIN GROUND...
- Page 31 230V LINE WIRING: USE COMPONENT LEADS OR 14 AWG BLACK UNLESS NOTED (OPTIONAL) 24V CONTROL WIRING: USE COMPONENT LEADS OR 18 AWG WHITE STEP DOWN DISCONNECT 14 AWG BLACK TRANSFORMER SWITCH 14 AWG BLACK FUSE FUSE (250VA) (X1) (H1) 3.5A 2.5A (X3) (H3)
- Page 32 230V LINE WIRING: USE COMPONENT LEADS OR 14 AWG BLACK UNLESS NOTED (OPTIONAL) 24V CONTROL WIRING: USE COMPONENT LEADS OR 18 AWG WHITE DISCONNECT 14 AWG BLACK SWITCH FUSE 3.5A 208-230V / 1PH / 50-60HZ FUSE INCOMING POWER 3.5A AND GROUND FUSE HTR-2 BY OTHERS...
- Page 33 230V LINE WIRING: USE COMPONENT LEADS OR 14 AWG BLACK UNLESS NOTED (OPTIONAL) 24V CONTROL WIRING: USE COMPONENT LEADS OR 18 AWG WHITE DISCONNECT 14 AWG BLACK SWITCH FUSE 3.5A 208-230V / 1PH / 50-60HZ FUSE INCOMING POWER 3.5A AND GROUND FUSE HTR-2 BY OTHERS...
- Page 34 230V LINE WIRING: USE COMPONENT LEADS OR 14 AWG BLACK UNLESS NOTED (OPTIONAL) 24V CONTROL WIRING: USE COMPONENT LEADS OR 18 AWG WHITE STEP UP DISCONNECT 14 AWG BLACK TRANSFORMER SWITCH 14 AWG BLACK FUSE FUSE (250VA) (X1) (H1) 3.5A 3.5A (X3) (H3)
- Page 35 230V LINE WIRING: USE COMPONENT LEADS OR 14 AWG BLACK UNLESS NOTED (OPTIONAL) 24V CONTROL WIRING: USE COMPONENT LEADS OR 18 AWG WHITE DISCONNECT 14 AWG BLACK SWITCH FUSE 3.5A 208-230V / 1PH / 50-60HZ FUSE INCOMING POWER 3.5A AND GROUND BY OTHERS MAIN GROUND...
- Page 36 230V LINE WIRING: USE COMPONENT LEADS OR 14 AWG BLACK UNLESS NOTED (OPTIONAL) 24V CONTROL WIRING: USE COMPONENT LEADS OR 18 AWG WHITE DISCONNECT 14 AWG BLACK SWITCH FUSE 3.5A 208-230V / 1PH / 50-60HZ FUSE INCOMING POWER 3.5A AND GROUND BY OTHERS MAIN GROUND...
- Page 37 230V LINE WIRING: USE COMPONENT LEADS OR 14 AWG BLACK UNLESS NOTED (OPTIONAL) 24V CONTROL WIRING: USE COMPONENT LEADS OR 18 AWG WHITE STEP DOWN DISCONNECT 14 AWG BLACK TRANSFORMER SWITCH 14 AWG BLACK FUSE FUSE (250VA) (X1) (H1) 3.5A 2.5A (X3) (H3)
- Page 38 CLOCK TIMER SWING INDICATOR TEMPERATURE Indicates air vane operation (medium and FAN SPEED large cassette untis only) MODE INDICATOR +, — Press to adjust temperature setpoint. Press ON/SEND to send new setting to thermostat. Press to turn unit off. SELECT Press to set clock or timer.
-
Page 39: Pre-Installation
Fig. 38 — Hanger Bolt Mounting Dimensions size shown in Table 2. Installation Guide An installation guide is included in the Carrier Owner Infor- mation packet provided with the unit. Prepare the installation guide by folding the flat metal piece, by hand, along the per- forations as shown in Fig. -
Page 40: Condensate Piping
Secure the unit in position with locknuts and washers on both sides of the unit bracket. Ensure the threaded rod does not protrude more than 2-in. below the mounting bracket as shown in Fig. 41. Fig. 42 — Condensate Piping Duct Collars Up to 2 branch ducts can be attached per unit. -
Page 41: Piping Insulation
Installation of wiring must conform with local building Piping Insulation codes, or in the absence of local codes, with the National Chilled water and condensate pipes should be insulated right up Electric Code ANSI/NFPA (American National Standards In- to the unit chassis to prevent condensation, which can damage stitute/National Fire Protection Association) 70 - Latest Edi- the ceiling and objects located below the piping. -
Page 42: Terminal Strip Connections
Terminal Strip Connections The terminal strip connections are designed to clamp down on the incoming building power and thermostat wiring con- nections. To properly connect the wires to the terminal strip: Push a small flat head screwdriver into the square hole on the terminal. - Page 43 NOTE: Fan is wired to medium speed as a default. To change the default LEGEND fan speed, adjust wiring in the field. Factory-provided electro-mechanical thermostats are for single speed fan operation only. — Alarm Relay Factory-Installed AWG — American Wire Gage Field-Installed —...
- Page 44 NOTE: Fan is wired to medium speed as a default. To change the default LEGEND fan speed, adjust wiring in the field. Factory-provided electro-mechanical — Alarm Relay Factory-Installed thermostats are for single speed fan operation only. AWG — American Wire Gage Field-Installed —...
- Page 45 NOTE: Fan is wired to medium speed as a default. To change the default LEGEND fan speed, adjust wiring in the field. Factory-provided electro-mechanical — Alarm Relay Factory-Installed thermostats are for single speed fan operation only. AWG — American Wire Gage Field-Installed —...
- Page 46 NOTE: Fan is wired to medium speed as a default. To change the default LEGEND fan speed, adjust wiring in the field. Factory-provided electro-mechanical — Alarm Relay Factory-Installed thermostats are for single speed fan operation only. AWG — American Wire Gage Field-Installed —...
- Page 47 NOTE: Fan is wired to medium speed as a default. To change the default LEGEND fan speed, adjust wiring in the field. Factory-provided electro-mechanical — Alarm Relay Factory-Installed thermostats are for single speed fan operation only. AWG — American Wire Gage Field-Installed —...
- Page 48 NOTE: Fan is wired to medium speed as a default. To change the default LEGEND fan speed, adjust wiring in the field. Factory-provided electro-mechanical — Alarm Relay Factory-Installed thermostats are for single speed fan operation only. AWG — American Wire Gage Field-Installed —...
- Page 49 NOTE: Fan is wired to medium speed as a default. To change the default LEGEND fan speed, adjust wiring in the field. Factory-provided electro-mechanical — Alarm Relay Factory-Installed thermostats are for single speed fan operation only. AWG — American Wire Gage Field-Installed —...
- Page 50 NOTE: Fan is wired to medium speed as a default. To change the default LEGEND fan speed, adjust wiring in the field. Factory-provided electro-mechanical thermostats are for single speed fan operation only. — Alarm Relay Factory-Installed AWG — American Wire Gage Field-Installed —...
- Page 51 NOTE: Fan is wired to medium speed as a default. To change the default LEGEND fan speed, adjust wiring in the field. Factory-provided electro-mechanical thermostats are for single speed fan operation only. — Alarm Relay Factory-Installed AWG — American Wire Gage Field-Installed —...
-
Page 52: Fascia Assembly
All condensate drains are installed correctly. Fascia Assembly The power supply is of the correct voltage and frequency. Once the piping and electrical services have been connected, The units are properly grounded in accordance with cur- the 4 fascia mounting bolts can be unscrewed approximately rent electrical codes. - Page 53 CASSETTE START UP SHEET Technician’s Notes Customer Feedback: Please relay any comments about Quality or Service NOTE: Any feedback may be submitted by fax to either the sale engineer or to the local Carrier office. Fig. 55 — Start-Up Sheet Example...
-
Page 54: Sequence Of Operation
Press the ON/SEND button to send information to thermostat. Sequence of Operation ELECTRO-MECHANICAL CONTROLS Temperature Setpoint Adjust the desired temperature using the (+) or (–) buttons. A 24-v signal from the thermostat to terminal G supplies power Press the ON/SEND button to send information to thermostat. to the blower motor(s), condensate pump, and vane motor (if equipped). -
Page 55: Controls
automatically turn on. Alternatively, if the controller was CONTROLS turned off before power fail after power is restored, the con- Setting Jumper Links troller will remain off. Alarms WARNING The controller monitors the following alarm conditions: Disconnect power supply before making wiring connec- •... -
Page 56: Disassembly Procedure
from falling. The fan can now be dropped down from the DISASSEMBLY PROCEDURE unit. WARNING Condensate Tray Removal Disconnect power supply before disassembly to prevent Unclip the grille catches and remove the grille(s) from electrical shock and injury from moving parts. the fascia. - Page 57 Table 5 — Troubleshooting PROBLEM POSSIBLE CAUSE POSSIBLE SOLUTION Two LEDs Flashing Faulty float switch See Condensate High Level section in this table. (Microprocessor Units Only) (Connected to microprocessor termi- nals ‘T4’) Fan thermal trip See Fans Will Not Run section in this table. (Connected to microprocessor termi- nals ‘T4’) Freeze stat alarm...
- Page 58 Table 5 — Troubleshooting (cont) PROBLEM POSSIBLE CAUSE POSSIBLE SOLUTION Coil Freeze Cooling coil freeze protection thermo- Freeze thermostat is normally closed, opens during freeze. stat tripped Where fitted, the thermostat will disable the cooling action (Auto-reset when freeze cleared) (sometimes the entire system) during coil freeze conditions.
-
Page 59: Replacement Parts
This information can be found on the serial plate attached to the unit. See Fig. 56. CEILING CASSETTE UNIT When a component part fails, contact your local Carrier rep- MADE IN U.S.A. Unit Type: resentative to order a replacement part. See Fig. 57 and 58 for HOT WATER COIL: the 42WKN unit exploded views and parts lists. - Page 60 Grille Label Fig. 57 — 42WKN08, 12 Unit Exploded View and Parts List © Carrier Corporation 2018 Manufacturer reserves the right to discontinue, or change at any time, specifications or designs without notice and without incurring obligations. Catalog No. 04-53420015-01 Printed in U.S.A.
Need help?
Do you have a question about the AirStream 42WKN08-36 and is the answer not in the manual?
Questions and answers