Table of Contents

Subscribe to Our Youtube Channel
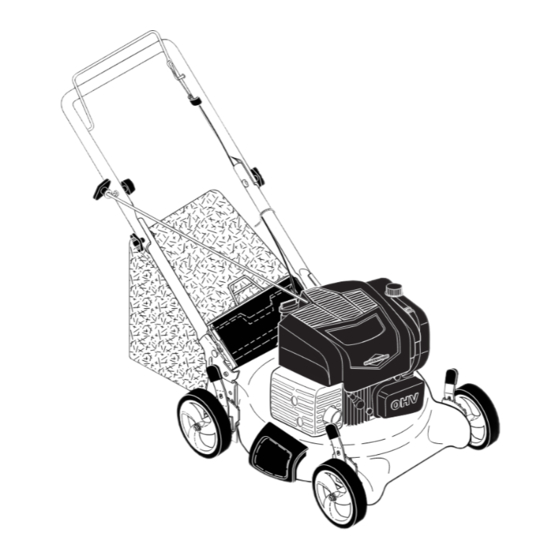
Related Manuals for Craftsman 944.100530


Summary of Contents for Craftsman 944.100530
- Page 1 Owner’s Manual ROTARY LAWN MOWER 725 Series Briggs & Stratton Engine 21" Multi-Cut Model No. 944.100530 CAUTION: Read and follow all Safety Rules and In struc tions before operating this equipment Sears Canada, Inc., Toronto, Ontario M5B 2B8...
-
Page 2: Table Of Contents
TABLE OF CONTENTS Safety Rules .......... 2-3 Maintenance ........12-15 Warranty - Lawn Mower ......4-5 Service and Adjustments ....... 15 Product Spec i fi ca tions ......5 Storage ..........16-17 Assembly/Pre-Operation ....... 6-7 Troubleshooting ........ 18-19 Operation ..........8-11 Repair Parts ........ - Page 3 • Mow only in daylight or good artificial light. • Never refuel the machine indoors. • Do not operate the machine while under • Never store the machine or fuel contain- the influence of alcohol or drugs. er where there is an open flame, spark •...
-
Page 4: Warranty - Lawn Mower
WARRANTY GENERAL: Craftsman products are warranted to be free from defects in materials or workmanship for a specific time period as set-out below (the “Warranty Period”). Warranties extend to the original purchaser of a Craftsman product only. Purchases made through an online auction or through any website other than www.sears.ca are excluded. -
Page 5: Product Specifications
LIST OF APPLICABLE WARRANTY PERIODS: The following list contains the applicable Warranty Period for your Craftsman product and is based on a combination of the type of product or component and the intended and actual use of the product or component:... -
Page 6: Assembly/Pre-Operation
ASSEMBLY / PRE-OPERATION Read these instructions and this manual HOW TO SET UP YOUR LAWN in its entirety before you attempt to as- MOW ER semble or operate your new lawn mower. TO UNFOLD HANDLE IMPORTANT: This lawn mower is shipped WITHOUT OIL OR GASOLINE in IMPORTANT: Unfold handle carefully so as not to pinch or damage con trol cables. - Page 7 TO ASSEMBLE GRASS CATCH ER INSTALL STARTER ROPE 1. Put grass catcher frame into grass bag 1. Loosen T-knob. with rigid part of bag on the bottom. 2. Hold control bar against upper handle. Make sure the frame handle is outside 3.
-
Page 8: Operation
OPERATION KNOW YOUR LAWN MOWER READ THIS OWNER'S MANUAL AND ALL SAFETY RULES BEFORE OPERATING YOUR LAWN MOWER. Compare the illustrations with your lawn mower to familiarize yourself with the location of various controls and adjustments. Save this manual for future reference. These symbols may appear on your lawn mower or in literature supplied with the product. - Page 9 The operation of any lawn mower can result in foreign objects Use ear thrown into the eyes, which can result in severe eye damage. protec- Always wear safety glasses or eye shields while operating your tors to lawn mower or performing any adjustments or repairs. We recom- a v o i d mend standard safety glasses or a wide vision safety mask over spectacles.
- Page 10 SIMPLE STEPS TO REMEMBER WHEN 4. Insert and tighten dipstick. IMPORTANT: CONVERTING YOUR LAWN MOWER • Check oil level before each use. Add FOR MULCHING - oil if needed. Fill to full line on dipstick. 1. Rear door closed. 2. Mulcher door closed. ADD GASOLINE FOR REAR BAGGING - •...
- Page 11 TO START ENGINE • Keep top of engine around starter clear and clean of grass clippings and chaff. NOTE: Due to protective coatings on the This will help engine air flow and extend engine, a small amount of smoke may be engine life.
-
Page 12: Maintenance Schedule
MAINTENANCE BEFORE AFTER EVERY EVERY EVERY BEFORE EACH EACH 25 HOURS STORAGE HOURS OR SEASON HOURS Check for Loose Fasteners Clean / Inspect Grass Catcher * Check Tires Check Drive Wheels *** Clean Lawn Mower **** Clean under Drive Cover *** Check Drive Belt / Pulleys *** Check / Sharpen / Replace Blade Lubrication... - Page 13 LAWN MOWER Blade adapter Crankshaft keyway Always observe safety rules when per- form ing any main te nance. Lockwasher TIRES Blade • Keep tires free of gasoline, oil, or insect control chemi cals which can harm rubber. • Avoid stumps, stones, deep ruts, sharp objects and other hazards that may cause tire damage.
- Page 14 Check the crankcase oil level before TO CLEAN AIR FILTER starting the engine and after each five (5) 1. Remove cover. hours of continuous use. Tighten oil plug 2. Carefully remove cartridge. securely each time you check the oil level. 3.
-
Page 15: Service And Adjustments
• Keep finished surfaces and wheels free of your lawn mower unless the elec tri cal of all gasoline, oil, etc. system, muffler, air filter and carburetor • With the exception of the water washout are covered to keep water out. Water in port (if equipped), we do not recommend engine can result in shortened engine life. -
Page 16: Storage
STORAGE Immediately prepare your lawn mower for Operator MOWING presence POSITION storage at the end of the season or if the control bar unit will not be used for 30 days or more. LAWN MOWER When lawn mower is to be stored for a FOLD period of time, clean it thor oughly, remove FORWARD... - Page 17 OTHER CYLINDER 1. Remove spark plug. • Do not store gasoline from one season 2. Pour 1 ounce/29 ml of oil through to another. spark plug hole into cylinder. • Replace your gasoline can if your can 3. Pull starter handle slowly a few times starts to rust.
-
Page 18: Troubleshooting
TROUBLESHOOTING - See appropriate section in manual unless directed to a Sears Parts & Repair Centre. PROBLEM CAUSE CORRECTION Does not start 1. Dirty air filter. 1. Clean/replace air filter. 2. Out of fuel. 2. Fill fuel tank. 3. Stale fuel. 3. - Page 19 TROUBLESHOOTING - See appropriate section in manual unless directed to a Sears Parts & Repair Centre. PROBLEM CAUSE CORRECTION Loss of power 1. Rear of mower housing or 1. Raise cutting height. blade dragging in grass. 2. Cutting too much grass. 2.
-
Page 20: Repair Parts
REPAIR PARTS... - Page 22 BRIGGS & STRATTON 4-CYCLE ENGINE MODEL NUMBER 104M02-0012-F1 1036 1329 1330 1264 1263...
- Page 23 BRIGGS & STRATTON 4-CYCLE ENGINE MODEL NUMBER 104M02-0012-F1 745A 1005...
- Page 24 BRIGGS & STRATTON 4-CYCLE ENGINE MODEL NUMBER 104M02-0012-F1 1238 1127...
- Page 25 BRIGGS & STRATTON 4-CYCLE ENGINE MODEL NUMBER 104M02-0012-F1 1029 1022 1029A 1023 1022 1026 1022 Engine Power Rating Information The gross power rating for individual gas engine models is labeled in accordance with SAE (Society of Automotive Engineers) code J1940 (Small Engine Power & Torque Rating Procedure), and rating performance has been obtained and corrected in accordance with SAE J1995 (Revision 2002-05).
- Page 26 BRIGGS & STRATTON 4-CYCLE ENGINE MODEL NUMBER 104M02-0012-F1 PART PART DESCRIPTION DESCRIPTION 596216 Cylinder Assembly 590558 Pin-Float Hinge 299819s Seal-Oil (Magneto Side) 594581 Valve-Float Needle 594101 Sump-Engine 594558 Jet-Main (Standard) 594091 Head-Cylinder 594559 Jet-Main (High Altitude) 592358 Gasket-Cylinder Head (5000 > 9000 Feet) 590522 Tube-Breather 590589...
- Page 27 BRIGGS & STRATTON 4-CYCLE ENGINE MODEL NUMBER 104M02-0012-F1 PART PART DESCRIPTION DESCRIPTION 593330 Bracket-Mounting (Carburetor) 594061 Cap-Fuel Tank 793515 Nut (Governor Control Lever) 594106 Cover-Air Cleaner 796503 Dipstick 590552 Screw (Air Cleaner Base to 691876 Seal-Dipstick Tube Carburetor) (M4.2 x 14mm) 793514 Screw 594112...
- Page 28 02489 590196501 Rev. 1 01.20.17 BY Printed in U.S.A.
Need help?
Do you have a question about the 944.100530 and is the answer not in the manual?
Questions and answers