
Related Manuals for Digi-Sense 20250-02


Summary of Contents for Digi-Sense 20250-02
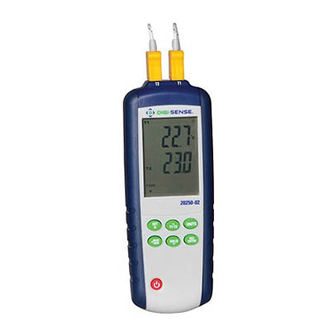
- Page 1 User Manual Thermocouple Thermometer with Dual Type K/J Inputs and Data Logging with NIST-Traceable Calibration Model 20250-02 THE STANDARD IN PRECISION MEASUREMENT...
- Page 2 Introduction The Digi-Sense Thermocouple Thermometer with Dual Inputs and Data Logging (Model 20250-02) offers fast response and high accuracy. This thermometer accepts two thermocouple sensors (type K or J). Advanced features include data logging, USB interface, relative time clock, offset compensation, temperature differential, data Hold, Max/Min/Avg readings, and auto power-off.
-
Page 3: Key Features
Key Features • Large backlit display shows any combination of T1, T2, T1–T2; plus Max, Min, and Avg readings • Relative time clock on Max/Min/Avg provides a time reference for major events • Electronic Offset function allows compensation of thermocouple errors to maximize overall accuracy •... -
Page 4: Meter Description
Meter Description 1. Temperature sensor inputs (2) 2. LCD 3. SET / backlight button 4. (Up)/T1–T2 button 5. Units (°C/°F/K) button 6. (Return)/Max/Min button 7. Hold/(Down) button 8. Rec/Enter button 9. Power on/off button... -
Page 5: Display Layout
Display Layout 1. T1, T2, T1–T2 icons 8. Tertiary display (elapsed time) 2. HOLD icon 9. Time icon (hour:min or 3. Auto power-off icon min:sec) 4. Primary temperature 10. SETUP mode icon display 11. Low-battery indicator 5. User-selectable temper- ature units (°C/°F/K) 12. -
Page 6: Setup And Operation
Setup and Operation 1. Press Power on/off button to turn the unit on. The value immediately shown is the number of data logging sample points remaining (from 18,000 to 0). After one second, the display will then switch to the temperature measurement reading mode. -
Page 7: Setup Mode
Setup Mode Use the Setup mode to change offset, sample rate, time, clear data logging memory, and sleep mode settings. The thermometer stores the settings in its memory. Option Menu item Settings Offset T1, T2 T1 , T2 offset Sample rate Sampling of recording Time setting Show the time or set the time... - Page 8 Setup Mode (continued) Offset Function The primary display shows the temperature plus the offset and the secondary display shows the offset. You can store individual offsets for T1 and T2. 1. When the meter is in Setup mode, the display shows the SETUP icon. Press /T1–T2 button or Hold/...
- Page 9 Sample Rate of Data Recording 1. Press and hold SET button for three seconds to enter the Setup mode. While in Setup mode, the display shows the SETUP icon. 2. Use the /T1–T2 and Hold/ buttons to scroll to the rate set- ting option screen (see Fig.
- Page 10 Setup Mode (continued) Time Setting Function 1. Press and hold SET button for three seconds to enter the Setup mode. While in Setup mode, the display shows the SETUP icon. 2. Use the /T1–T2 and Hold/ buttons to scroll to the time setting option screen (Fig.
- Page 11 7. Press /Max/Min button again until the hour value is flashing. Use the /T1–T2 and Hold/ buttons to set the desired value. 8. Press /Max/Min button again until the minute value is flashing. Use the /T1–T2 and Hold/ buttons to set the desired value.
- Page 12 Setup Mode (continued) 4. Press /T1–T2 button or Hold/ button until the display shows “YES”, indicating the memory will be cleared. 5. Press Rec/Enter button to select the “YES” setting and clear the memory. Data logging capacity now returns to 18,000 sample points. Auto Power-Off (APO)/Sleep Mode The meter’s default mode is to auto- matically shut off after 15 minutes...
- Page 13 Measuring Temperatures 1. Plug the thermocouple(s) into the T1 or T2 input connector(s). Make sure that the polarity is correct. 2. Press Power on/off button to turn the unit on. The value immediately shown is the number of data log- ging sample points remaining (from 18,000 to 0).
- Page 14 Hold Function 1. Press Hold/ button to freeze the readings on the display. The display shows the HOLD icon. 2. Use the /T1–T2 button to toggle between showing the T1, T2, and T1–T2 readings in the primary or secondary display. 3.
- Page 15 Recording/Data Logging Operation (Meter) 1. Press Power on/off button to turn the unit on. The first value imme- diately shown is the number of data logging sample points remaining. (Fig. 7) 2. Press and hold Rec/Enter button for three seconds until the REC icon appears.
- Page 16 Recording/Data Logging Operation (Software) 1. First install software on PC following the setup wizard (see “Software Installation” on next page). Once software is successfully installed, the “MultiDL” software icon shortcut will be automatically placed on your PC desktop. 2. Connect the meter to your PC via the supplied USB cable. 3.
-
Page 17: Software Installation
10. To download the data to the PC, select the downward- facing arrow in menu bar in the software window. The software screen will display the data being downloaded from the meter. Upon completion of downloading the data to the PC, the data results will be displayed graphically. -
Page 18: Specifications
Specifications Range Type K thermocouple(s) –328 to 2501°F (–200 to 1372°C) Type J thermocouple(s) –346 to 2012°F (–210 to 1100°C) Resolution Temperature display 0.1 below 1000 or 1 above 1000 Accuracy T1, T2 temperatures above ±[0.5% rdg + 1.8°F (1°C)] –148°F (–100°C) T1, T2 temperatures below ±[0.5% rdg + 3.6°F (2°C)]... - Page 19 Note: If you do not intend to use the meter for a long time, remove the batteries. It is recommended that Digi-Sense products are calibrated annually to ensure proper function and accurate measurements; however, your quality system or regulatory body may require more frequent calibra- tions.
- Page 20 For Product and Ordering Information, Contact: Toll-Free: 1-800-358-5525 Phone: 1-847-327-2000 Fax: 1-847-327-2700 Davis.com/Digi-Sense Manual Part No. 00100-34 1065DGMAN_20250-02 Rev.1...
Need help?
Do you have a question about the 20250-02 and is the answer not in the manual?
Questions and answers