Table of Contents
Advertisement
www.maping.com
1.
DESCRIPTION................................................ 1-2
2.
SAFETY INSTRUCTIONS.................................. 1-3
3.
MAIN PARTS AND CONTROLS........................... 1-4
4.
PREPARATIONS ................................................ 1-5
5.
BINDING A SOFTCOVER BOOK ......................... 1-6
6.
BINDING A HARDCOVER BOOK .......................... 1-9
7.
BINDING WITH STRIP ........................................... 1-13
8.
BINDING A SCRATCH PAD ................................ 1-16
Manual Rev. d5 090804 --- multilang
E L I T E
E L I T E
9.
CARE AND MAINTENANCE ................................ 1-18
10. TECHNICAL SPECIFICATIONS ............................ 1-19
11. WARRANTY TERMS .............................................. 1-19
12. NIPPING TOOL ADJUSTMENT ................................. 1-19
APPENDIX A : Hardcover Toolset Installation ...................... 1-26
APPENDIX B : Fastbind Trimmer Installation ...................... 1-27
Advertisement
Table of Contents

Related Manuals for Fastbind Elite


Summary of Contents for Fastbind Elite
-
Page 1: Table Of Contents
BINDING A SOFTCOVER BOOK ..………………. 1-6 BINDING A HARDCOVER BOOK ……....…. 1-9 APPENDIX A : Hardcover Toolset Installation ....…..1-26 BINDING WITH STRIP ......…………….. 1-13 APPENDIX B : Fastbind Trimmer Installation ....…….. 1-27 BINDING A SCRATCH PAD ..….….….…………… 1-16 Manual Rev. d5 090804 --- multilang... - Page 2 1 - 2 REV. d5 Elite Multilang © 2004 Maping Co www.maping.com...
-
Page 3: Description
We believe that Elite brings tabletop document binding onto a completely new level and wish you productive moments with it! Elite can be used to bind various paper and cardboard products. All four binding Binding Possibilitiess types can be done with two simple tool sets and with the same machine settings. - Page 4 SAFETY Section 2 SAFETY Before installing and operating Fastbind Elite, the safety instructions and Operate Safely recommendations in this User’s Manual must be studied carefully. In this way one can ensure to get the most out of the new binding machine and operate it safely.
- Page 5 ‘overcooking’, which blocks the applicator. External timer available as an external accesory. • Use only original Fastbind accessories and spare parts approved by the manufacturer to ensure that the unit can be operated safely. For service and maintenance, contact Fastbind authorized service outlet.
-
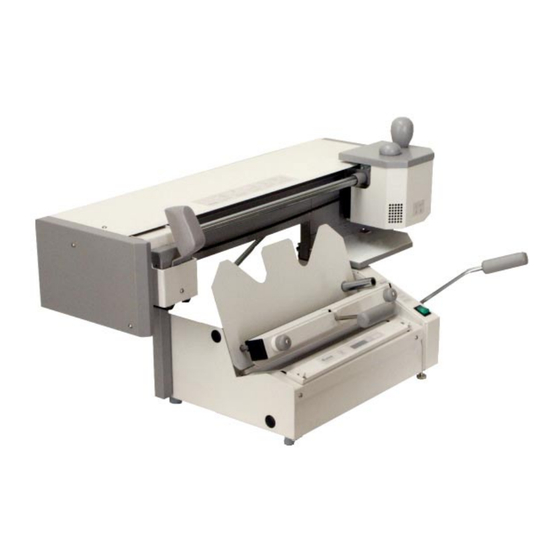
Page 6: Main Parts And Controls
Connect to grounded power outlet only! power outlet only! www.maping.com www.maping.com ELITE Serial no xx-xx Serial no xx-xx 220 V, 50-60Hz 220 V, 50-60Hz Made in Finland Made in Finland 1 - 6 REV. d5 Elite Multilang © 2004 Maping Co www.maping.com... -
Page 7: Preparations
Note that the applicator can be moved only when the machine has warmed up. At the room temperature hot melt in the reservoir is still solid and thus blocks the roller rotation. 1 - 7 rev. d5 Elite Multilang © 2003 Maping Co www.maping.com... - Page 8 Alternatively one can use external timer to switch off the electricity after pre- set time limit. Timer is available as an optional accessory. 1 - 8 REV. d5 Elite Multilang © 2004 Maping Co www.maping.com...
-
Page 9: Binding A Softcover Book
BINDING A SOFTCOVER BOOK Before you begin, ensure that Check List • Τhere is glue in the applicator reservoir (Fastbind Hot-Melt) • Machine has warmed up at least 20 min • Soft cover nipping plate is attached (marked with “S”) •... - Page 10 For bindings with easy material, simply apply glue once or twice along the whole spine length. For thicker books or books with coated paper, apply glue 2-3 times. 1 - 10 REV. d5 Elite Multilang © 2004 Maping Co www.maping.com...
- Page 11 1. FRONT PANEL DETACHMENT Loosen Clamping Front panel Remove Unscrew 2. TRIMMER INSTALLATION Insert Tighten Fasten rev. d5 Elite Multilang © 2003 Maping Co www.maping.com...
-
Page 12: Binding A Hardcover Book
BINDING A HARDCOVER BOOK Before you begin, ensure that Check List & Preparations • Τhere is glue in the applicator reservoir (Fastbind Hot-Melt) • Machine has warmed up at least 20 min • Ηard cover nipping plate is attached (marked with “H”) •... - Page 13 Turn the table over (UP) by pushing the operating handle up. 6.1.5 a,b) Fold the cover back and the block is ready for adhesive application. 1 - 13 rev. d5 Elite Multilang © 2003 Maping Co www.maping.com...
- Page 14 Caution: Do not slam the table against the table limit stops as this can damage the machine a) Open the clamp. b) Pull from hardcover tool’s outer collar to release the book. Move the book to left. 1 - 14 REV. d5 Elite Multilang © 2004 Maping Co www.maping.com...
- Page 15 Turn the book over. Repeat steps a) and b) for the other cover. To nish the spine, press your ngers together and follow the folding line all the way down. 1 - 15 rev. d5 Elite Multilang © 2003 Maping Co www.maping.com...
-
Page 16: Binding With Strip
Section 7 BINDING WITH STRIP Before you begin, ensure that Check List & Preparations • Τhere is glue in the applicator reservoir (Fastbind Hot-Melt) • Machine has warmed up at least 20 min • Τhat softcover nipping plate is attached (marked with “S”) •... - Page 17 Roughening opens the paper grain on book spine and improves binding result with difcult materials. Note that roughening several times increases spine width. Too heavy roughening results unsquare book spine. 1 - 17 rev. d5 Elite Multilang © 2003 Maping Co www.maping.com...
- Page 18 Release the clamp by lowering the handle and pull it up. Remove the book by lifting the turntable slightly with the 7.3.3 clamp handle. 1 - 18 REV. d5 Elite Multilang © 2004 Maping Co www.maping.com...
- Page 19 Attaching the strip edges to binding 7.4.1 a, b) Remove the silicon release paper. Press to attach the strip to cover. Turn binding around and repeat steps b) to c). 1 - 19 rev. d5 Elite Multilang © 2003 Maping Co www.maping.com...
-
Page 20: Binding A Scratch Pad
Section 8 BINDING A SCRATCH PAD (BOOK WITHOUT COVER) Before you begin, ensure that Check List & Preparations • Τhere is glue in the applicator reservoir (Fastbind Hot-Melt ) • Machine has warmed up at least 20 min. • Softcover nipping plate is attached (marked with “S”) •... - Page 21 Release the clamp by lowering the handle and pull it up. Remove the binding by lifting the turntable slightly with the 8.3.3 clamp handle. 1 - 21 rev. d5 Elite Multilang © 2003 Maping Co www.maping.com...
-
Page 22: Care And Maintenance
Cleaning maintenance work. Elite is easy to take care of and serves you well if cleaned periodically. Use a damp soft cloth with alcohol based solvent or mild detergent solution for this purpose. Do not use solution containing ammonia or abrasive. Let glue drops cool down before removal. -
Page 23: Technical Specifications
BINDING POSSIBILITIES Applications Softcover bindings Cardboard covers Transparent covers Hardcover bindings Hardcover (supply) Personalized hardcovers (made with Fastbind H530) Scratch pad (pad without covers) Duo Strip binding Lay at -binding BINDING SPECIFICATIONS Binding material Normal uncoated paper Coated and colorcopy paper --- with roughener... -
Page 24: Nipping Tool Adjustment
The sooner the better. Proper compressing time is between short 5 – 7 seconds. Poor adhesive quality Use Fastbind hot melt type 1adhesive. Normal operating or low temperature temperature for the adhesive applicator is 170 - 180 °C. Book bound against... - Page 25 Maping Co warrants this product against defects in material or workmanship as Declaration of Conformity Model number: follows: Type: Hot melt book binding machine Machine name: Fastbind ELITE is in conformity with essential requirements of the following standard: 98/37/EEC (MC). Model number: 12 Type: Hot-melt book binding machine...
-
Page 26: Appendix A : Hardcover Toolset Installation
Locking screw To adjust nipping bar, remove locking screw from the side play was detected. Rotate adjustment screw clockwise and repeat nipping test until play is eliminated. 1 - 26 REV. d5 Elite Multilang S02-05 © 2004 Maping Co www.maping.com www.maping.com... - Page 27 APPENDIX B APPENDIX B TRIMMER INSTALLATION Instructions 1. FRONT PANEL DETACHMENT Loosen Clamping Front panel Remove Unscrew 2. TRIMMER INSTALLATION Insert Tighten Fasten 1 - 27 rev. d5 Elite Multilang © 2003 Maping Co S02-04 www.maping.com www.maping.com TRIMMER INSTALLATION...
Need help?
Do you have a question about the Elite and is the answer not in the manual?
Questions and answers