Miele FNS 37492 iE Operating And Installation Instructions
Hide thumbs
Also See for FNS 37492 iE:
- Operating and installation instructions (92 pages) ,
- Operating and installation instructions (92 pages) ,
- Operating and installation instructions (100 pages)

Related Manuals for Miele FNS 37492 iE


Summary of Contents for Miele FNS 37492 iE
- Page 1 Operating and Installation Instructions Freezer To prevent accidents and machine damage, read these instructions be- fore installation or use. en-US M.-Nr. 10 117 220...
-
Page 2: Table Of Contents
Contents IMPORTANT SAFETY INSTRUCTIONS .............. 5 Caring for the environment ................ 13 How to save energy..................... 14 Guide to the appliance .................. 16 Control panel ......................16 Explanation of symbols ..................17 Switching on and off ................... 19 Before first use ...................... 19 Cleaning the refrigerator................... - Page 3 Contents Making ice cubes .................... 37 Ice cube maker with integrated ice cube tray ............37 Turning the ice cube maker on/off................. 38 Making a large quantity of ice cubes ..............38 Changing the size of the ice cubes ............... 39 Turning the ice cube maker on/off with the on/off button ........
- Page 4 Contents Installation dimensions .................. 71 Limiting the opening angle of the appliance door.......... 72 Changing the door hinges .................. 73 Building in the appliance .................. 77 Installing the cabinet door..................85...
-
Page 5: Important Safety Instructions
The appliance is not suitable for use in areas where there is a risk of explosion. Miele cannot be held liable for damage resulting from improper or in- correct use of the appliance. - Page 6 In the event of any damage: – avoid open flames and anything that creates a spark, – disconnect the appliance from the electrical power supply, – ventilate the room where the appliance is located for several min- utes, and – contact Miele Technical Service.
- Page 7 Reliable and safe operation of this appliance can only be assured if it has been connected to the electricity supply. If the power cord is damaged, it must be replaced by a Miele au- thorized technician in order to protect the user from harm. ...
- Page 8 Any manufacturer's warranty will be void if the appliance is not re- paired by a Miele approved service technician. Defective components should only be replaced by Miele original parts. Only with these parts can the manufacturer guarantee the safety of the appliance.
- Page 9 IMPORTANT SAFETY INSTRUCTIONS Correct use The appliance is designed for use within a certain climate range (ambient temperatures), and should not be used outside this range. The climate range for your appliance is stated on the data plate in- side the appliance.
- Page 10 Observe the manufacturer's “use-by” dates and storage in- structions. Use only genuine original Miele parts. If parts or accessories from other manufacturers are used, the warranty may become invalid. Cleaning and maintenance ...
- Page 11 IMPORTANT SAFETY INSTRUCTIONS California Proposition 65 – This product contains chemicals known to the state of California to cause cancer or reproductive harm. – This product can expose you to chemicals including Diisononyl Phthalate (DINP) which is known to the State of California to cause cancer.
- Page 12 IMPORTANT SAFETY INSTRUCTIONS Make sure that the coolant pipework is not damaged during dis- posal to avoid uncontrolled leakage of oil and coolant (see data plate for coolant type). Splashes of coolant can cause damage to the eyes. Be careful not to damage any part of the pipework while awaiting disposal, e.g.
-
Page 13: Caring For The Environment
Consult with local authorities, dealers or Miele in order to dispose of and recycle electrical and electronic appliances. Miele assumes no responsibility for deleting any personal data left on the appliance being disposed. -
Page 14: How To Save Energy
How to save energy Normal Increased energy consumption energy consumption Installation / In a well-ventilated room. In an enclosed, poorly venti- Maintenance lated room. Protected from direct sun- In direct sunlight. light. Away from heat sources (ra- Near a heat source (radiator, diator, range/oven). - Page 15 How to save energy Normal Increased energy consumption energy consumption Drawers and shelves ar- ranged as they were when the appliance was delivered. Only open the door when Frequent opening of the necessary and for as short a door for long periods will time as possible.
-
Page 16: Guide To The Appliance
( for colder); selection button in settings mode b Optical interface e For confirming your selection (OK (for Miele Technical Service only) button) c For turning the SuperFrost function f For setting the temperature on and off (... -
Page 17: Explanation Of Symbols
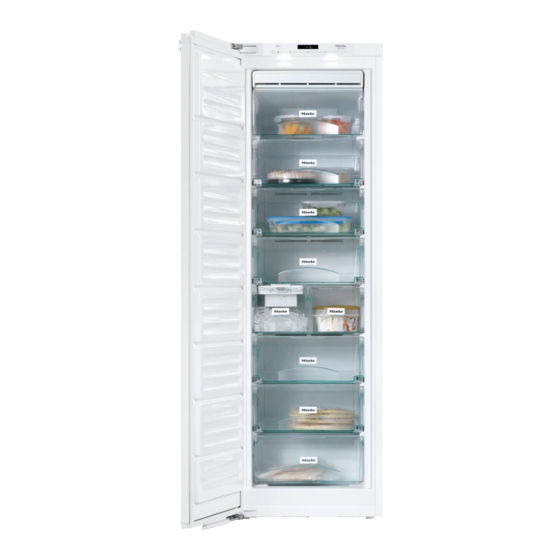
Audible signals Selection options for the button tone and the door and temperature alarm tone Miele@home (if avail- Only visible when the Miele@home commu- able) nication module or communication stick is used (see “Miele@home”) Display Brightness For adjusting the brightness of the display Settings ... - Page 18 Guide to the appliance This drawing is for illustration purposes only. a Control panel b Interior lighting c NoFrost unit d Top freezer drawer, can also be used as a freezing tray e Freezer drawers (number depends on model) f Ice cube drawer with automatic ice maker...
-
Page 19: Switching On And Off
Switching on and off Before first use Operating the appliance A light touch of the finger on the sen- Packaging material sors is all that is required to operate this Remove all packaging material from appliance. the inside of the appliance. A tone will sound each time a sensor is Removing the protective film touched. -
Page 20: Turning Off For Longer Periods Of Time
Switching on and off Switching off the appliance Turning off for longer periods of time If you go away for a prolonged period, there is a danger of mould building up inside the appliance if Touch the On/Off button. you leave it switched off with the If this does not work, the safety lock door shut without cleaning it first. -
Page 21: The Correct Temperature
The correct temperature It is very important to set the correct Temperature display temperature for storing food in the ap- In normal operation, the temperature pliance. Bacteria will cause food which display shows the average, current is not stored at the correct temperature temperature in the freezer zone. -
Page 22: Setting The Temperature
The correct temperature If you have adjusted the temperature, Setting the temperature wait for approximately 6 hours if the Use the two sensors below the dis- appliance is not very full and for ap- play to set the temperature. proximately 24 hours if the appliance is full before checking the temperature When you touch the sensor display. -
Page 23: Using Superfrost
Using SuperFrost Turning off SuperFrost SuperFrost function The SuperFrost function turns off auto- For best results, turn on the SuperFrost matically after approx. 65 hours. The function before putting fresh food into exact amount of time will vary accord- the freezer. ing to how much fresh food is placed in Fresh food will be frozen quickly, so that the freezer. -
Page 24: Temperature And Door Alarm
Temperature and door alarm The appliance has been fitted with a The acoustic and visual signals are trig- warning system which ensures that the gered, for example: temperature in the freezer cannot rise – when the appliance is switched on unnoticed and to avoid energy being and the temperature in the appliance wasted if the door is left open. -
Page 25: Door Alarm
Temperature and door alarm Cancelling the door alarm Door alarm If the alarm is disturbing you, it can be An alarm will sound if the door is left switched off. open for too long. The alarm symbol will light up. The amount of time until the door alarm is triggered depends on the setting se- lected and can be either 2 minutes (fac-... -
Page 26: Selecting Additional Settings
Selecting additional settings Certain settings for the appliance can Safety lock only be selected in settings mode. The safety lock can be activated to pre- vent: While you are in settings mode, the door alarm and any other fault mes- –... -
Page 27: Acoustic Signals
Selecting additional settings Acoustic signals The appliance has acoustic signals such as the button tone and the door and temperature alarms. By touching the or sensor, you can now select whether the safety You can turn the button tone and the lock is activated or deactivated: door alarm on and off, but you cannot 0: the safety lock is deactivated... -
Page 28: Display Brightness
Selecting additional settings Display brightness You can adjust the brightness of the display to suit the ambient light condi- tions in the room. By touching the or sensors you can now select the following: The display brightness can be adjusted 0 : Sensor tone off;... -
Page 29: Sabbath Mode
Selecting additional settings Sabbath mode The appliance offers a Sabbath mode for the purposes of religious obser- vance. By touching the or sensor, you can now alter the brightness of the The following are switched off: display: – the interior lighting when the appli- 1 : Dimmest setting ance door is opened, 2 : Medium setting... - Page 30 Selecting additional settings As soon as the symbol goes out in Turning on Sabbath mode the display after 3 seconds, Sabbath mode is switched on. Turn off Sabbath mode after the Sab- bath has passed. Touch the Settings sensor. Turning off Sabbath mode All symbols available for selection will appear in the display and the ...
-
Page 31: Freezing And Storing Food
Freezing and storing food If food is frozen quickly, the cells have Always observe USDA food safety less time to lose moisture, so they guidelines. shrink less. As there is not so much moisture loss, it is easier for the food to ... -
Page 32: Home Freezing
Freezing and storing food – Placing hot food or drink in the Home freezing freezer causes food that is already Only freeze food that is fresh and in frozen to partially thaw and increases good condition. energy consumption. Allow hot food and drink to cool down before plac- Tips for home freezing ing it in the freezer. - Page 33 Freezing and storing food Before placing food in the freezer When placing food on the glass shelf make sure that you do not block the When freezing more than 4.4 lb (2 kg) ventilation slits in the back wall of the of fresh food, switch on the Super- appliance.
-
Page 34: Defrosting
Freezing and storing food Storage time for frozen food Defrosting The storage life of food is very variable, Frozen food can be thawed in various even at a constant temperature of 0°F ways: (-18°C). Decomposition processes also – in the microwave, take place in frozen food, albeit at a very reduced speed. -
Page 35: Using Accessories
Freezing and storing food Cooling drinks quickly Using accessories Risk of injury from broken glass! WARNING! DANGER of injury Bottles and cans of drinks, particu- and damage! larly carbonated drinks, can burst Do not use any mechanical or other when frozen. -
Page 36: Adjusting The Interior Fittings
Adjusting the interior fittings Removing freezer drawers on Removing the shelves telescopic runners The shelves can be removed. Some of the freezer drawers are on tele- Lift the shelf slightly at the front and scopic runners and can be removed for then pull it forward and out. -
Page 37: Making Ice Cubes
Making ice cubes For the automatic ice maker to oper- ate, it must be connected to a water supply (see “Water supply”). Danger to health! Rinse out the ice maker and water supply line: – before using for the first time, – if the ice maker has not been used for a long time, – regularly when in continuous use... -
Page 38: Turning The Ice Cube Maker On/Off
Making ice cubes close the appliance door. The ice cube maker can be turned off independently of the freezer if you do The electronics will otherwise switch to not want to make any ice cubes. normal operation after approx. one minute. -
Page 39: Changing The Size Of The Ice Cubes
Making ice cubes By touching the or button, you Changing the size of the ice can now set the water volume you re- cubes quire (E1 to E8): The size of the ice cubes depends on E1: low the quantity of water being taken in. -
Page 40: Turning The Ice Cube Maker On/Off With The On/Off Button
Making ice cubes Turning the ice cube maker on/ Turning the ice maker off for a off with the on/off button long time. Open the ice cube drawer slightly. Risk of damage! If the water supply is cut off while the ice maker is still in use, the water in- take pipe can freeze up. -
Page 41: Automatic Defrosting
Automatic defrosting The appliance is equipped with a “NoFrost” system. The freezer defrosts automatically. The moisture generated in the appli- ance collects on the condenser and is automatically defrosted and evaporates periodically. This automatic defrosting system en- ables the Freezer Zone to remain per- manently ice-free. -
Page 42: Cleaning And Care
Cleaning and care Cleaning agents WARNING! DANGER of electric shock! Cleaning and conditioning agents Unplug the appliance or trip the cir- used inside the appliance must be cuit breaker. food safe. To avoid damaging the surfaces of your WARNING! Fire hazard! appliance, do not use Do not damage the coolant... -
Page 43: Rinsing The Ice Cube Maker
Cleaning and care Rinsing the ice cube maker “Rinse the ice cube maker” can only be selected when the ice cube maker Rinse out the ice cube maker and is on. water supply line: – before using for the first time, –... -
Page 44: Cleaning The Ice Cube Tray
Cleaning and care Carefully remove the ice cube drawer, Cleaning the ice cube tray which is now full of water, and empty Clean the ice cube tray and clean it. – before switching off the ice cube The ice cube tray is not detachable maker for a long time. - Page 45 Cleaning and care Remove the ice cube drawer. Setting the cleaning position This setting can only be selected if the The ice cube tray is not detachable ice cube maker is on. and can only be cleaned when in place.
-
Page 46: Before Cleaning
Cleaning and care Removing the telescopic runners Before cleaning Turn the appliance off. The display goes out and the cooling function is turned off. If this does not work, the safety lock is activated (see “Selecting additional set- tings – Activating and deactivating the safety lock”). -
Page 47: Cleaning The Interior And Accessories
The following parts cannot be cleaned The air vents should be cleaned on a in a dishwasher: regular basis with a brush or vacuum cleaner (you could use a Miele vac- – the freezer drawers uum cleaner dusting brush, for exam- – the trims ple). -
Page 48: Frequently Asked Questions
Check whether the fuse has tripped. There could be a fault with the appliance, the household electrical wiring or another electrical appliance. Contact a qualified electrician or Miele Technical Service for assistance. The compressor runs Not a fault. To save energy, the compressor runs at a continuously. - Page 49 Frequently Asked Questions Problem Possible cause and solution The compressor is turn- The ventilation gaps in the cabinetry have been cov- ing on more frequently ered or become too dusty. and for longer periods Do not block the ventilation gaps. of time;...
- Page 50 Frequently Asked Questions Problem Possible cause and solution The compressor is turn- The temperature setting is too low. ing on more frequently Correct the temperature setting. and for longer periods A large amount of food was put in for freezing at of time;...
- Page 51 “Activating and de- ance off. activating the safety lock”). “F0 to F9” appears in There is a fault. the display. Contact Miele Technical Service. There is a fault. “FE*” appears on the Contact Miele Service. display. The alarm symbol ...
- Page 52 Possible cause and solution The ice cube maker There is a fault with the ice cube maker. and alarm symbols Contact Miele Service. are flashing on the dis- play. The indicator light on the ice cube maker is also flashing.
- Page 53 Frequently Asked Questions Problems with the ice cube maker Problem Possible cause and solution You cannot turn the ice The appliance is not connected to the power supply cube maker on. or is not switched on. Reconnect to the power supply and switch the ap- pliance back on.
- Page 54 Frequently Asked Questions Problem Possible cause and solution The ice cubes have an The ice cube maker is in constant use and needs to unpleasant odor or fla- be cleaned regularly. vor. Rinse the ice cube maker and water supply line regularly (see “Cleaning and care - Rinsing the ice cube maker”).
- Page 55 There are live electrical components under the lighting cover. The LED lighting may only be repaired or replaced by a Miele authorized service technician. Danger of injury from LED lighting. Light inten- sity corresponds to laser beam class 1/1M.
- Page 56 Frequently Asked Questions Other problems Problem Possible cause and solution The door to the freezer This is not a fault. The suction caused by opening section will not open and closing the door is preventing the door from because it has been opening.
-
Page 57: Causes Of Noises
Causes of noises Normal Cause noises Brrrrr... A humming noise is made by the motor (compressor). This noise can get louder for brief periods when the motor switches on. Blub, blub... A gurgling noise can be heard when the coolant circulates through the pipes. -
Page 58: Technical Service
In the event of a fault which you cannot For more information about warranty remedy yourself, please contact your conditions, please contact Miele Tech- Miele dealer or Miele Technical Service. nical Service. Contact information for Miele Techni- cal Service can be found at the end of this document. -
Page 59: Information For Dealers
Information for dealers Demo mode The appliance can be demonstrated in the showroom or at exhibitions in “Demo mode”. In this mode, the control Touch and hold the button. panel and interior lighting are active but the compressor remains off. Turning on demo mode ... - Page 60 Information for dealers Turning off Demo mode The symbol is illuminated in the dis- play. Touch the or sensor so that the symbol 0 appears in the display (meaning: Demo mode is inactive). Touch the settings sensor. All symbols available for selection will appear in the display and the symbol flashes.
-
Page 61: Water Connection
Water connection The appliance is only suitable for Information on the fresh water connection to a cold water supply, connection which The machine may only be connected – is directly connected to the water to the fresh water supply by qualified supply in order to ensure a circulation technicians. -
Page 62: Connecting The Water Supply Line
Water connection Connecting the water supply line Before establishing the fresh water connection, ensure that the machine is disconnected from the power sup- ply. Before the cold water line is used for the first time, it must be vented by a suitably qualified plumber. - Page 63 Water connection Insert the water filter with the de- pression facing downward toward the adapter . Risk of damage! Do not overtighten the union nut, as this can cause damage. Connect the union nut to the sole- noid valve , and tighten it. ...
-
Page 64: Electrical Connection
Electrical connection Wait for 1 hour after installation before Danger of electric shock! plugging the appliance into the power The appliance must only be switched supply. This allows coolant and refriger- on when it has been installed in ac- ator oil to settle in accordance with reg- cordance with the installation in- ulations. - Page 65 Electrical connection The outlet must be easily accessible in Do not connect the appliance to an in- an emergency so that the appliance can verter such as those used with an au- be quickly disconnected from the elec- tonomous energy source e.g. solar trical supply in case of an emergency.
-
Page 66: Installation
Installation – The plug and power cord must not Side-by-side touch the back of the appliance as The appliance has two side-wall heaters they could be damaged by vibrations encased in foam and can be installed from the appliance. side-by-side with other appliances. –... -
Page 67: Ventilation
Installation Climate class Ventilation The appliance is designed for use within WARNING! Fire hazard! specific ambient temperatures (climate Operation of the appliance is limited. range). Do not use in ambient tempera- Keep the ventilation slits free from tures for which it is not designed. obstruction. - Page 68 Installation The air at the back wall of the appliance If you wish to fit a grille in the ventila- warms up. Therefore the cabinet must tion openings, the ventilation open- be constructed in such a way that en- ings must be larger than 31 square sures unhindered ventilation (see “Built- inches.
-
Page 69: Door Panel
– the bags located in the metal grille lbs (kg) (heat exchanger, depending on FNS 37492 iE 57 (26) model). These are required for the functioning of the appliance. Their contents are not toxic or hazardous. -
Page 70: Wall Spacer At The Back
Installation Wall spacer at the back At a furniture depth of less than 21 3/4'' (553 mm), you can remove the wall spacer from the back of the appli- ance so that you can push the appli- ance right into the niche. Removing the wall spacer can in- crease energy consumption as there is then a smaller ventilation area. -
Page 71: Installation Dimensions
Installation dimensions * The declared energy consumption was achieved with a niche depth of 22 1/16“ (560 mm). The appliance is fully capable of functioning at a niche depth of 21 5/8” (550 mm), but will consume slightly more energy. If the appliance is suitable for installation in a niche, ensure before installation that it has precisely the correct dimensions. -
Page 72: Limiting The Opening Angle Of The Appliance Door
Limiting the opening angle of the appliance door The door hinges are set to enable the appliance door to be opened wide. However, if the opening angle of the door needs to be limited for any reason, the hinge can be adjusted to accommo- date this. -
Page 73: Changing The Door Hinges
Changing the door hinges Always change the door hinging with the assistance of another person. The appliance is supplied with right- hand hinging. If left-hand hinging is re- quired, the hinges must be changed: To change the door hinging, you will need the following tools: ... - Page 74 Changing the door hinges Removing the soft-close mechanism Warning! The soft-close mecha- nism folds in when dismantled! Danger of injury! Place the door on a stable surface with the front facing down. Undo the screws completely. Install the bracket on the opposite side and attach the screws ...
- Page 75 Changing the door hinges Fastening the soft-close mech- anism Now turn over the appliance door so that the outer side faces downward. Using a screwdriver, remove the ball joint and screw it into the adjacent hole. Now turn over the appliance door so that the front is facing up (hinges re- main open).
- Page 76 Changing the door hinges Hang the appliance door onto the pre-fitted screws and , and se- curely tighten the screws and . Replace the covers: , , and . Refit the locking pins into the top of the hinges to prevent the door from opening too far.
-
Page 77: Building In The Appliance
Building in the appliance To install the appliance, you will need Two people are required to install the the following tools: appliance. Install the appliance in a stable, solid housing unit, positioned on an even and level floor. Secure the cabinetry against tipping. ... - Page 78 Building in the appliance Parts required for installation: – For installing the cabinet door: All installation parts are number-coded. This coding is also used in the installa- tion instructions. – For building the appliance into the niche: ** Number depends on niche height. Also contains additional installation parts for fitting large or divided cabinet doors.
- Page 79 Building in the appliance Preparing the appliance Position the appliance directly in front of the cabinet niche. Use the Allen key to screw the fix- ing brackets into the pre-drilled holes in the appliance door. Screw a second pair of fixing brack- ets ...
- Page 80 Building in the appliance With 5/8" (16 mm) thick unit walls only: Clip the spacers and onto the right of the hinges. Remove the cover . Open the appliance door. Screw the fixing plate loosely into the top left of the appliance using the screws .
- Page 81 Building in the appliance Building in the appliance If the appliance is pushed too far into the niche, the appliance door may not close properly once the cabinet door has been fitted. This can cause ice to build up and condensate to accumulate, and cause the appliance to malfunction.
- Page 82 Building in the appliance Important for cabinetry with door fittings (e.g., knobs, raised seals, etc.): The dimensions of these must be taken into account to ensure there is a gap of 1 5/8" (42 mm) all the way round. Pull the appliance forward by the ap- propriate dimension.
- Page 83 Building in the appliance Securing the appliance in the niche Push the loose securing bracket against the cabinet wall. Push the appliance onto the cabinet Fix the securing bracket to the wall on the hinge side. cabinet wall with the screw .
- Page 84 Building in the appliance Only for an appliance with a niche height greater than 55" (140 cm) To give the appliance additional security in the niche, push the batons supplied between the appliance and the cabinet base: Snap off any protruding ends from the securing bracket.
-
Page 85: Installing The Cabinet Door
Building in the appliance Installing the cabinet door If installed in a run of units, make sure that the top edge of the cabinet door is at the same height as neighboring unit doors. The cabinet door must be installed level, and not under tension. - Page 86 Building in the appliance Place the cabinet door on a stable surface with the outer side facing downward. Attach the side cover to the mounting frame on the side opposite the hinge. Turn the cabinet door over and attach the handle (if required).
- Page 87 Building in the appliance Open the appliance door. Adjusting the position of the door Hang the cabinet door on the adjust- ing bolts . - Adjusting the sides (X) Screw the nuts loosely onto the Move the cabinet door. adjusting bolts.
- Page 88 Building in the appliance While counterholding the adjusting Pre-drill fixing holes in the cabinet bolts with a screwdriver, tighten door and fasten the screws . Make the nuts on the appliance door sure both metal edges are flush with a box wrench . (// symbol).
- Page 89 Building in the appliance Tighten all the screws again. The appliance is properly installed in the niche if: – the door closes properly – the door does not touch the housing unit – the seal on the top corner of the han- dle side is firmly seated ...
- Page 91 Technical Service. U.S.A. Canada Miele, Inc. Importer Miele Limited National Headquarters 9 Independence Way Headquarters and Miele Centre Princeton, NJ 08540 161 Four Valley Drive Phone: 800-843-7231 Vaughan, ON L4K 4V8 609-419-4298 Fax: www.miele.ca www.mieleusa.com...
- Page 92 FNS 37492 iE en-US M.-Nr. 10 117 220 / 03...
Need help?
Do you have a question about the FNS 37492 iE and is the answer not in the manual?
Questions and answers