Table of Contents
Advertisement
Quick Links
INSTRUCTION MANUAL
PD1900
Touch Screen Paging Microphone
Thank you
for choosing another quality product from Amperes Electronics.
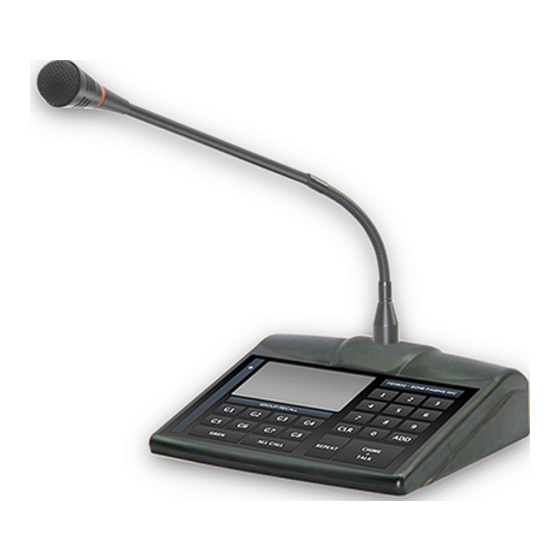
Introducing a new tool in a new age of paging, ie PD1900 touch screen paging microphone. Is features a 7" capacitive type touch
screen panel with 800x480 pixel resolution, providing contemporary outlook with ease of operation.
It is compatible with all zone decoders, IP paging clients and MxP2288 matrix controllers, with built in chime, volume controls and
other hosts of features that would be made available from time to time. Integrate it to your PA system, and definitely it would bring
up a class above from the rest.
Advertisement
Table of Contents

Subscribe to Our Youtube Channel
Related Manuals for Amperes PD1900


Summary of Contents for Amperes PD1900
- Page 1 Amperes Electronics. Introducing a new tool in a new age of paging, ie PD1900 touch screen paging microphone. Is features a 7" capacitive type touch screen panel with 800x480 pixel resolution, providing contemporary outlook with ease of operation.
-
Page 2: Part Identification
Pin 2 - Data B Pin 6 - Audio -ve output Pin 3 - Relay Trigger Signal Pin 7 - Ground Pin 4 - NC Pin 8 - Audio +ve output PAGE 2 PAGE 2 PD1900 | TOUCH SCREEN PAGING MICROPHONE... -
Page 3: Parts Identification
Use a DC24V power adaptor supplied for powering the unit. 8. PAGING MIC CONNECTION (EX2800) Connect to the paging mic via this RJ45 connector. For pin configuration, refer to the diagram. PD1900 | TOUCH SCREEN PAGING MICROPHONE PAGE 3... -
Page 4: Application Schematic
The one with higher priority shall override the unit with lower priority even though the latter is in paging mode. If lower priority unit would have busy LED blinking when the higher priority is active. Priority 1 ( highest ) ..Priority 9 ( lowest ) PAGE 2 PAGE 4 PD1900 | TOUCH SCREEN PAGING MICROPHONE... -
Page 5: Connecting The Unit
Use this switch to select the audio output level ; mic or line level when connecting to pre-amplifier mixer Set unit address ; each address represents one unit of decoder of 24 zones. example : 10000 0000 - Zone 1 to 24 01000 0000 - Zone 25 to 48 PD1900 | TOUCH SCREEN PAGING MICROPHONE PAGE 5... - Page 6 P IN 5-Z5 P IN 5-Z11 P IN 6-Z6 P IN 6-Z12 P IN 7-AC P IN 7-AC P IN 8-PR P IN 8-GND 100V Speakers in Various Zones Power Amplifier PAGE 2 PAGE 6 PD1900 | TOUCH SCREEN PAGING MICROPHONE...
- Page 7 The Diagram shows the connectivity using Fiber Optic for long distance mic connectivity with IP setup. Multipoint paging setup is possible and the paging mic shall operate in similar manner as of using conventional system. PD1900 | TOUCH SCREEN PAGING MICROPHONE PAGE 7...
- Page 8 3. Audio +ve TD6240 2 pair screen cable 4. Audio -ve 5. Screen - Ground Cable Size shall be according to the distance from the paging mic and the equipment rack. PAGE 2 PAGE 8 PD1900 | TOUCH SCREEN PAGING MICROPHONE...
- Page 9 PORT CASCADE OUT Cat5e Cat5e To Next PD1900 Unit 2 Power for PD1900 is drawn directly from MxP2288 via Cat5e cable. Note : Cat5e Length shall not exceed 30 m, to avoid voltage drop as Max Distance: 30 m well as noise to audio line.
-
Page 10: Unit Startup
Unit Startup Upon powering the LCD display shall show ‘ Amperes Logo’. Setup Menu I AM PD1900 PGMI PD1900 - ZONE PAGING MIC ENTER ZONE NUMBER Touch on ‘Setting Icon’ to enter Setup mode. GROUP RECALL CHIME REPEAT TALK SIREN ALL CALL Enter the password to enter setup mode. -
Page 11: Unit Setup
3. ADDRESS / BRIGHTNESS SETTING ADDRESS / BRIGHTNESS SETTING - This setting is to set the Address & Address ID. ADDRESS: - To adjust brightness of screen. ADDRESS ID: I AM PD1900 PGMI BRIGHTNESS: 100% BACK PD1900 | TOUCH SCREEN PAGING MICROPHONE PAGE 11... - Page 12 - Group zone enable easy access to a group of zones for paging. GROUP ID GROUP NO: Follow the simple step below to setup grouping: i) Select Group number. SAVE BACK ii) Select number of Zone. iii) Press the Save button. PAGE 2 PAGE 12 PD1900 | TOUCH SCREEN PAGING MICROPHONE...
-
Page 13: Operating The Unit
A complete installation shall consist of the Mic, Zone Selector and Mixer / Amplifier. Initial setup such as priority level should be set. ( if more than one PD1900 is installed ) PD1900 can be linked to TD6240 for zone decoding, or used in MatriMix MxP2288 for matrix installations. Follow the simple steps below to begin paging. -
Page 14: Group Paging
To end paging, simply press the “CHIME + TALK” button again. Press “ CHIME + TALK ” Talk when the LED ring at the mic is lit and to end, press “CHIME + TALK” PAGE 2 PAGE 14 PD1900 | TOUCH SCREEN PAGING MICROPHONE... -
Page 15: Technical Specification
S / N ratio >65 dB @ 1 KHz Gooseneck mic length 370 mm Dimension (W x H x D) 230 x 192 x 65 mm ( Excluding Mic) Weight 1.2 kg PD1900 | TOUCH SCREEN PAGING MICROPHONE PAGE 15... -
Page 16: Warranty Conditions
Only Amperes Electronics Service Centres are allowed to make warranty repairs : a list of Amperes Electronics Service Centres may be asked for by the purchaser or send directly to Amperes Electronics Sdn Bhd at 70 Jalan Industri PBP 3, Tmn Perindustrian Pusat Bandar Puchong, 47100, Puchong, Selangor, Malaysia or its authorized dealers.
Need help?
Do you have a question about the PD1900 and is the answer not in the manual?
Questions and answers