Table of Contents
Advertisement
Quick Links
Advertisement
Table of Contents

Subscribe to Our Youtube Channel
Related Manuals for Acnodes RM 6193


Summary of Contents for Acnodes RM 6193
- Page 1 RM 6193 8U 19” Rack Mount High brightness LCD Monitor User’s Manual Rev 1.0...
-
Page 2: Packing List
The complete RM 6193 package consist of: Rack mount 19” TFT LCD display x 1 6' VGA cable (male to male) x 1 Auto switch power adapter x 1 User manual x 1 AC Power cord x 1 Check to make sure that the unit was not damaged in shipping. If you encounter a problem, contact your dealer. -
Page 3: Safety Instructions
The equipment has not worked well or you can not get it work according to User’s Manual. The equipment has dropped and damaged. If the equipment has obvious signs or breakage. Acnodes Corporation, www.acnodes.com, info@acnodes.com RM 6193 User manual afety Instructions... -
Page 4: Table Of Contents
4. Connecttion Diagram ...11 4.1 Video Connection Diagram ...11 4.2 Touch Screen Connection Diagram...12 5. Touch Screen Specification ...13 6. DC Input power Supply (option)...14 7. Trouble shooting ...15 Acnodes Corporation, www.acnodes.com, info@acnodes.com RM 6193 User manual Index of Contents... -
Page 5: General Information
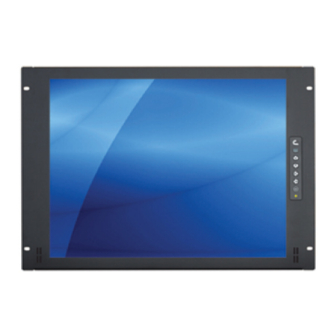
RM 6193 User manual 1. General Information 1.1 Overview The RM6193 is a 8U rack mount LCD monitor with 19” 800-nit 1280 x 1024 TFT LCD monitor and rugged metal black color front bezel. This monitor comes with a standard 15-pin VGA video input and front access OSD membrane switch. -
Page 6: Product Specification
Storage -20 ~ 60°C / -4 ~ 140°F Humidity 10% ~ 90% RH Shock 10G acceleration (11ms duration) Vibration 5~500Hz 1G RMS random vibration Chassis Heavy duty steel materials Construction Certification CE / FCC, ROHs Compliance Acnodes Corporation, www.acnodes.com, info@acnodes.com RM 6193 User manual... -
Page 7: Rack Mount Installation
RM 6193 User manual 2. Rack mount Installation 1. Find the property position and size to screw rack mount front bezel onto the server rack mount first. 2. Lift & push the rack mount monitor into the rack cabinet, and screw between bracket and rack mount monitor with screws. -
Page 8: Osd Menu
RM 6193 User manual 3. OSD Menu 3.1 OSD Menu Membrane Switch Acnodes Corporation, www.acnodes.com, info@acnodes.com... -
Page 9: On Screen Display Menu
RM 6193 User manual On screen Display menu BRIGHTNESS / CONTRAST Brightness: Adjust background black level of the screen image. Contrast: Adjust the difference between the image background (black level) and the foreground (white level). AUTO ADJUST Auto Adjust: Fine tunes the video signal to eliminate waviness and distortion. A "Adjusting"... - Page 10 RM 6193 User manual Color Select the screen color - 5500K, 6500K & 9500K. The factory default is 9500K. Language Select the language in which the OSD menu is displayed - English, Chinese (中文), Japanese (日本語), German, French, Spanish, Italian RESET Restore the settings to factory defaults.
-
Page 11: Connecttion Diagram
RM 6193 User manual 4. Connecton Diagram The RM6193 comes with a standard 15-pin VGA video input and external 110/220VAC power adapter. Optional Video-input for S-video / BNC / RCA connector and USB or PS/2 type resistive-type touch. 4.1 Video-input Connection Diagram... -
Page 12: Touch Screen Connection Diagram
RM 6193 User manual 4.2 Touch Screen Connection Diagram 15-pin D-sub VGA and USB-type touch screen 15-pin D-sub VGA and Serial-type touch screen Acnodes Corporation, www.acnodes.com, info@acnodes.com... -
Page 13: Touch Screen Specification
■ Serial touch screen package includes an extra 6ft serial cable, quick reference guideline and CD disc ■ For detailed information, please refer to the attached CD disc ■ As the touch screen unit is not made of toughened glass, please handle it carefully. Acnodes Corporation, www.acnodes.com, info@acnodes.com RM 6193 User manual... -
Page 14: Dc Input Power Supply (Option)
RM 6193 User manual 6. DC Input Power Supply (Option) Acnodes Corporation, www.acnodes.com, info@acnodes.com... -
Page 15: Trouble Shooting
RM 6193 User manual 7. Trouble shooting 1. How do I adjust the resolution? To change monitor resolution, click Start -> Control Panel -> Display. Select Setting tab to adjust the monitor resolution in Desktop Area. The available resolutions, "640 x 480", "800 x 600", "1024 x 768", "1152 x 864", "1280 x 1024", are deter- mined by...
Need help?
Do you have a question about the RM 6193 and is the answer not in the manual?
Questions and answers