Advertisement
Quick Links
Overview
2
Vision
version 8.2 is a sophisticated, fully-integrated video capture,
management, and broadcast system for organizations and homeowners wanting
a comprehensive, yet simple-to-use, IP video delivery solution. Vision
live, scheduled, or on-demand video, all managed from a convenient web
interface. Through the web interface, you can perform the following:
•
Capture and encode content
•
Upload, archive, manage, and publish content
•
Schedule programming with a dynamic online program guide
•
Broadcast at selectable bitrate to any platform
•
Provide live TV and video on-demand over Intranet to any desktop/display
or select mobile devices
2
V2-MASTER-0300 FG3106-03, V2-MASTER-1200
The Vision
FG3106-12, V2-MASTER-2400 FG3106-24, and V2-MASTER-3600
FG3106-36
have large capacity hard drives and are used to host Vision
Archive Services containing videos. This server is typically used as the Vision
Master Server but you can add it as a Slave Server to an existing Vision
system if you already have a Master Server.
2
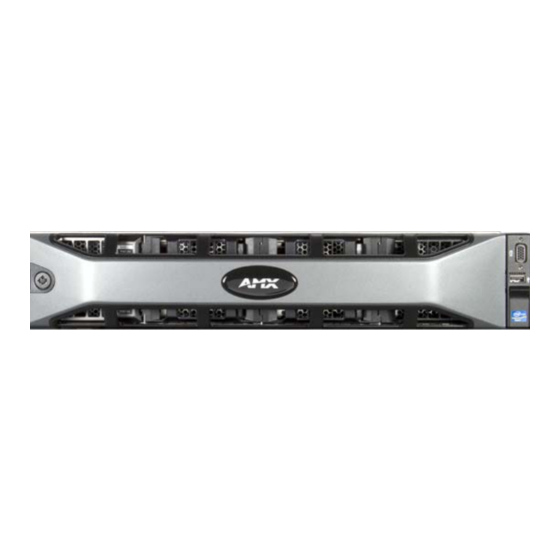
FIG. 1
Vision
V2-MASTER-xxxx (front view)
The following table lists the specifications for the Master Server:
2
Vision
Master Server Specifications
Processor:
2 x Intel® E5500 Xeon® E5-2620 2.00 GHz processors
Memory:
16GB RAM
Storage:
• 1.8 TB (7.2K RPM) (V2-MASTER-0300, FG3106-03)
• 9.1 TB (7.2K RPM) (V2-MASTER-1200, FG3106-12)
• 18.2 TB (7.2K RPM) (V2-MASTER-2400, FG3106-24)
• 27.3 TB (7.2K RPM) (V2-MASTER-3600, FG3106-36)
Power:
1100W (100-240 VAC), 50/60 Hz
Front Panel Components:
USB ports
2 USB 2.0 ports for mouse, keyboard, or external peripheral
devices
Video
1 15-pin (female) video connector for connecting a video output
connector
device such as a PC monitor
LCD panel
Displays system ID, status info, and error messages
Power button
Press to power on server
Rear Panel Components:
Video
2 15-pin (female) video connector for connecting a video output
connector
device such as a PC monitor
Serial
1 9-pin (male) serial connector
connector
USB port
3 USB 2.0 ports for mouse, keyboard, or external peripheral
devices
LAN
4 RJ-45 LAN ports for connecting to a network router (10/100/
connectors
1000 Ethernet)
Rack Mount
Sliding Ready™ rails with Cable Management arm
Operating
Operating Temperature: 10º C to 35º C (50º F to 95º F)
Environment:
Storage Temperature: -40º C to 65º C (-40º F to 149º F)
Operating Relative Humidity (non-condensing twmax=29º C):
20% to 80% non-condensing
Maximum Humidity Gradient: 10% per hour, operational and
non-operational conditions
Storage Relative Humidity: 5% to 95% non-condensing
(twmax=38º C)
For full warranty information, refer to the AMX Instruction Manual(s) associated with your Product(s).
©2011 AMX. All rights reserved. AMX and the AMX logo are registered trademarks of AMX.
3000 RESEARCH DRIVE, RICHARDSON, TX 75082 • 800.222.0193 • fax 469.624.7153 • technical support 800.932.6993 • www.amx.com
2
Vision
2
offers
2
2
11/11
AMX reserves the right to alter specifications without notice at any time.
V2-MASTER-0300,-1200,-2400,-3600
Dimensions
3 7/16" (873cm) H x 19" (48.24cm) W x 29 3/4" (75.5cm) D
(HWD):
Weight:
Rack Weight 17.76 lbs (8.058 kg)
FIG. 2 displays the rear panel of the Vision
Monitor port
2
FIG. 2
Vision
V2-MASTER-xxxx (rear-view)
Configure Network Settings for your Vision2 Server
Configure network settings for your server as follows:
2
1.
Connect a monitor, mouse, and keyboard to your Vision
v8.2
the machine
2.
Connect a network cable to the first LAN port next to the USB ports.
3.
Login as administrator with password Vision2.
4.
Make a note of the server name, this should begin V2-AMX-xxxxxxxx as
you will need this later.
5.
Configure a static IP address for the first network interface card on your
machine, this will be the network card that users connect on to access the
2
Vision
user interface and to view Video on Demand and Live Channels.
Make a note of this IP address for future reference.
6.
Select the "v2Server Configurator Run Once" shortcut on the desktop
7.
Select the network card whose IP address you configured in step 1 (nor-
mally 0) and press return
8.
Press any key to close the Window
Set the V2 Service application to run automatically as follows:
1.
Click Start
2.
Click in the Start Search box, type services.msc and press ENTER.
3.
In the details pane, right-click AMX Vision2 and click Properties
4.
On the General tab, in Startup type, click Automatic
5.
Click Apply and then reboot the server
If this is the only server in your Vision
as a master server see Option A below. If you already have a master server in
your system go to Option B.
Option A - Configure this Server as a Master Server
Perform these steps to start and access Vision
1.
Power on the Vision
2.
Test that you can access the server via the LAN. You can run this test by
accessing a Command Prompt using the Ping command. For example:
3.
ping v2AMX-xxxxxxxx where
you found when configuring the server network settings (see above). If the
server responds, continue to step 3.
4.
Using Internet Explorer 9 32bit on a PC with network access to this server,
navigate to http://
v2AMX-xxxxxxxx
appears. Alternatively you can click the v2 Manager UI shortcut on the
server desktop. Note when you first run IE on the server, select Use Rec-
ommended settings and allow VLC add-on
5.
Once you login, enter your username and password. The Vision
has one administrator account. The default username and password are:
•
Username - administrator
•
Password - Vision2
6.
The first time you login to a machine, the Vision
to make this the master server. Note that you can only have one master
server in your system. Click OK to convert this server to a master server
7.
Reboot the server
Installation Guide
2
Master server.
LAN ports
2
system, you need to configure this server
2
:
2
server. It may take a few minutes to boot.
v2AMX-xxxxxxxx
is the server name that
/v2.aspx. The Vision
2
interface will prompt you
Power
2
server and start
2
login page
2
system
93-3106-02
REV: A
Advertisement

Related Manuals for AMX V2-MASTER-0300


Summary of Contents for AMX V2-MASTER-0300
-
Page 1: Installation Guide
©2011 AMX. All rights reserved. AMX and the AMX logo are registered trademarks of AMX. AMX reserves the right to alter specifications without notice at any time. 3000 RESEARCH DRIVE, RICHARDSON, TX 75082 • 800.222.0193 • fax 469.624.7153 • technical support 800.932.6993 • www.amx.com... - Page 2 Next to proceed to the Select License Server dialog where you can either System as a Slave server: specify an AMX license server on your network if you have one already or use the local license server Power on the server, it may take a few minutes to boot.