Advertisement
Advertisement
Table of Contents

Subscribe to Our Youtube Channel
Related Manuals for InFocus LiteShow 4 DB+


Summary of Contents for InFocus LiteShow 4 DB+
- Page 1 Wireless Presentation Adapter Model Name: LITESHOW4DB+ Quick Installation Guide Date: October, 2017...
- Page 2 快速安裝手冊...
-
Page 3: Package Contents
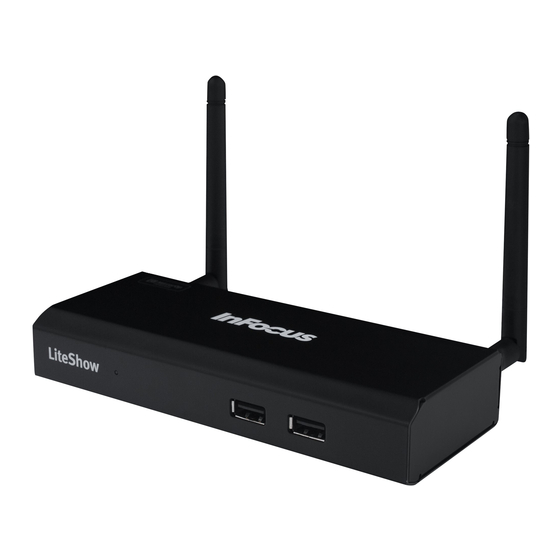
Quick Installation Guide 1. Package Contents • LiteShow 4 module • LiteShow USB token • Power Adapter (DC +5V, 2.5A) • Antenna (2) • Mounting hardware • Quick Installation guide with warranty card • Quick Installation guide for mobile applications 2. - Page 4 3. Installation for Windows and Mac 1) Attach the antennas to LiteShow, connect a VGA or HDMI cable between the LiteShow and your display, and turn on the display. 2) Plug in LiteShow. The LiteShow instructions below will display on the display when LiteShow is ready for use.
- Page 5 Quick Installation Guide 3) Download the Utility from the LiteShow USB token, or download from the web following these instructions: a) Verify that your computer’s wireless connection is enabled and connect to the LiteShow wireless network. Windows 7/8 Mac OSX b) Open your browser.
- Page 6 c) Login as “None” (no password is required). Click Download for the appropriate utility (Mac or Windows), and follow the Installation Wizard instructions. 4) Once the installation is complete, a LiteShow shortcut will be available on your desktop.
- Page 7 Quick Installation Guide 5) Click the LiteShow shortcut and enter the Login Code visible on the display. Windows 7/8 Mac OSX 6) Click the button to start projection. Note: To enable QuadView projection, click the desired Quadrant button (1-4).
-
Page 8: Warranty Policy
Warranty Services If any fault has developed during the warranty period, after confirmation by InFocus, we will (1) Repair the product directly or (2) Replace the product with a new or remanufactured product, at InFocus' discretion. - Page 9 • We will not be responsible for costs due to damage other than repairs to InFocus products. Any damage or malfunction caused to other machines linked to InFocus products is not covered by this warranty.
Need help?
Do you have a question about the LiteShow 4 DB+ and is the answer not in the manual?
Questions and answers