Table of Contents
Advertisement
Advertisement
Table of Contents

Subscribe to Our Youtube Channel
Related Manuals for Snorkel S1930


Summary of Contents for Snorkel S1930
- Page 1 Operator’s Manual P/N 0361266 March, 2001...
- Page 2 Battery posts, terminals and related accessories contain lead and lead components, chemicals known to the State of California to cause cancer and birth defects or other reproductive harm. Wash hands after handling. S1930 – 0361266...
-
Page 3: Table Of Contents
Placards and Decals......8-9 Prestart Inspection Check List ....8-11 S1930 – 0361266... - Page 4 Electrical Power Outlet ..... . 9-4 Chapter 12. Troubleshooting Troubleshooting Chart ..... 12-1 Appendix A. Glossary S1930 – 0361266...
-
Page 5: Chapter 1. Introduction
Level sensor with drive/lift interlock Additional copies of this manual may be ordered from Snorkel. Supply the model and manual part number Hour meter from the front cover to assure that the correct manual Manual lowering valve will be supplied. -
Page 6: Operation
The aerial platform has built-in safety features and has Every person who maintains, inspects, tests, or repairs been factory tested for compliance with Snorkel specifi- the aerial platform must be qualified to do so. Following cations and industry standards. However, any person- the daily prestart inspection in this Operator’s Manual... -
Page 7: Chapter 2. Specifications
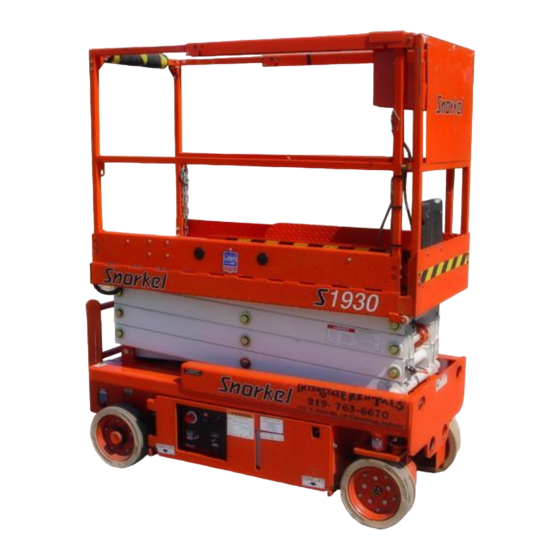
Platform Extension Upper Guardrails Controls Toeboards Platform Operator’s Scissors Manual Holder Structure Entry Step Chassis Ground Strap Front Rear Lower Pothole Controls Protector Skid Hydraulic Tray on Right Side Battery Tray on Left Side S1930 – 0361266 2 - 1... -
Page 8: General Specifications
250 lb (113 kg) Below 10°F (-13°C) Mobil DTE-11M (ISO VG15) Maximum number of occupants 2 people AC outlet 120 V, 17.4 amp Ambient Air Temperature Operating Range Fahrenheit 0°F to 110°F Celsius -18°C to 43°C 2 - 2 S1930 – 0361266... -
Page 9: Chapter 3. Safety
Minimum Safe Approach Distance Table 1—Minimum Safe Approach Distance Minimum safe approach distances to energized power lines and their associated parts must be observed while operating the aerial platform. Figure 3—Minimum Safe Approach Distance S1930 – 0361266 3 - 1... -
Page 10: Prestart Inspection
General Specifications chart for the maximum wheel load, maximum floor pressure, and drive/lift level sensor interlock information. Raise the platform only when the aerial platform is on level ground. 3 - 2 S1930 – 0361266... -
Page 11: Electrical System
In case of injury by escap- prior written consent from Snorkel. ing hydraulic fluid, seek medical attention at once. Do not operate the aerial platform from trucks, trailers,... -
Page 13: Chapter 4. Safety Devices
This greatly reduces the likelihood of the aerial platform tipping over. The pothole protection system is for added protection and does not justify operating near drop-offs or holes. S1930 – 0361266 4 - 1... -
Page 14: Drive/Lift Pothole Protector Interlock
Stand clear while raising and lowering the platform. Be careful when lowering the platform. Keep hands and fingers away from the scissors structures components. Figure 4.5—Safety Prop 4 - 2 S1930 – 0361266... -
Page 15: Guardrails
Flashing Light Figure 4.7—Electrical Power Outlet Figure 4.9—Flashing Light The light flashes at about one flash per second when the machine is set up for operation from the upper con- trols. S1930 – 0361266 4 - 3... -
Page 17: Chapter 5. Gauges
Chapter 5. Gauges The aerial platform is equipped with several gauges to monitor the condition of the machine before and during operation. Ammeter Hour Meter The hour meter is located on the lower control panel (re- fer to Figure 5.1). It measures the accumulated aerial platform operating time. -
Page 19: Chapter 6. Batteries
Replace the or flame. battery caps. ACAUTION The batteries can be overcharged and/or damaged if the charger fails to shut off automatically. Do not leave the battery charger on for more than two days. S1930 – 0361266 6 - 1... -
Page 21: Chapter 7. Controls
Component damage can re- sult if the cause of the malfunction is not corrected. Do not operate the aerial platform if the circuit breaker trips repeatedly. Push the button to reset the circuit breaker. S1930 – 0361266 7 - 1... -
Page 22: Upper Controls
Press the button to sound the horn. Battery Condition Indicator The optional battery condition indicator gauge is on the top of the upper control box. It indicates the level of available battery power to operate the aerial platform. 7 - 2 S1930 – 0361266... -
Page 23: Chapter 8. Prestart Inspection
2. Plug the charger into a source of power. combine explosively. Death or serious injury can re- sult from a chemical explosion. Do not smoke or permit open flames or sparks when checking the batteries. S1930 – 0361266 8 - 1... -
Page 24: Safety Prop
In case of injury by escap- ing hydraulic fluid, seek medical attention at once. 8 - 2 S1930 – 0361266... -
Page 25: Fluid Level
Inspect the tubes for dents or other damage that may restrict fluid flow. Make sure all hoses and tubes are held firmly in their support brackets. S1930 – 0361266 8 - 3... -
Page 26: Tires And Wheels
Raise the platform and then lower it to ensure that the each control from the lower control station (refer to Fig- alarm sounds to warn personnel in the area that the ure 8.11). platform is lowering. 8 - 4 S1930 – 0361266... -
Page 27: Pothole Protector Interlock
4. Pull the level sensor to the side as far as possible while raising the platform. The platform should stop raising and the alarm should sound at less than 7′ (2 m) of platform elevation. S1930 – 0361266 8 - 5... -
Page 28: Emergency Lowering
Raise the platform from the lower controls to visually in- spect the slide blocks underneath the front of the plat- form (refer to Figure 8.18). Slide Block Flashing Light Figure 8.16—Flashing Light Figure 8.18—Platform Slide Blocks 8 - 6 S1930 – 0361266... -
Page 29: Fasteners
From the upper controls, test the interlock by moving the joystick without engaging the interlock switch. If move- ment occurs the interlock is not functioning properly. Do not operate the machine until the problem is corrected. S1930 – 0361266 8 - 7... -
Page 30: Emergency Stop
2. Plug an electrical tool into the outlet and verify the power is off. If the power was off, push the reset button to restore power. If the power was on, repair or replace the receptacle. 8 - 8 S1930 – 0361266... -
Page 31: Placards And Decals
Replace any missing or illegible placards or decals be- fore operating the aerial platform. Placard and decal kits are available from Snorkel dealers. The safety related placards and decals are illustrated on the following pages. - Page 32 Death or serious injury might result from having body parts sheared or crushed as the platform Front descends. Keep away from closing scissor arms and keep out from under the platform as the platform comes down. 300700 300700 8 - 10 S1930 – 0361266...
-
Page 33: Prestart Inspection Check List
Sounds when platform lowers Lowering alarm Drive motion alarm Sounds when aerial platform moves Proper operation Electrical power outlet Proper operation Battery condition indicator Horn Sounds when activated Placards and decals In place and readable S1930 – 0361266 8 - 11... -
Page 35: Chapter 9. Operation
1. Perform a prestart inspection as described in Chapter 8. 2. Close and latch the battery and hydraulic compo- nent trays. Emergency Stop Button 3. Place the battery disconnect switch in the on posi- tion. Figure 9.2—Upper Controls S1930 – 0361266 9 - 1... -
Page 36: Driving
Drive speed ranges are interlocked through a limit switch that senses scissors arm position. When the plat- form is elevated below approximately seven feet, the ae- rial platform may be driven within the full range of drive 9 - 2 S1930 – 0361266... -
Page 37: Raising And Lowering
The tray on the right side of the chassis contains the lower controls, the hydraulic directional control valve, the pump, free-wheeling valve, and the hydraulic fluid filter. The tray on the left side contains the four batteries and the battery charger. S1930 – 0361266 9 - 3... -
Page 38: Electrical Power Outlet
(refer to Figure 9.7). Power-Input Connector Figure 9.7—Power-Input Connector To use the outlet, plug a source of power into the power-input connector. Unplug the source of power be- fore moving the aerial platform. 9 - 4 S1930 – 0361266... -
Page 39: Chapter 10. Stowing And Transporting
3. Insert the forklift forks into the pockets (refer to Figure pins from the wheel lugs releasing the brakes. Re- 10.1) or at the designated points under the pothole move the wrench. protector skids to lift the machine. S1930 – 0361266 10 - 1... -
Page 40: Driving
8. Use the winch to position the aerial platform on the transport vehicle. 9. Close the free-wheeling valve. 10. Use a wrench to manually reset the parking brakes. 10 - 2 S1930 – 0361266... -
Page 41: Securing For Transport
There is no effective way of putting a corner protec- platform to the transport vehicle using the front and tor in the hole of the lug. rear tie-down lugs as attachment points. Proper tie-down and hauling is the responsibility of the car- rier. S1930 – 0361266 10 - 3... -
Page 43: Chapter 11. Emergency Operation
Restrain the aerial platform 8. Verify that the drive system and brakes operate before disengaging the brakes and opening the properly. free-wheeling valve. S1930 – 0361266 11 - 1... -
Page 45: Chapter 12. Troubleshooting
Stow the machine and do not operate until repairs are made. Platform will not lower. Safety prop in place. Stow the safety prop. Platform will not extend. Latch pin still in place. Remove latch pin before extending the platform. S1930 – 0361266 12 - 1... - Page 46 Hydraulic system component failure. Stow the machine and do not operate until repairs are made. Severe hydraulic leak. Failure of hose, tube, fitting, seal, etc. Stow the machine and do not operate until repairs are made. 12 - 2 S1930 – 0361266...
-
Page 47: Appendix A. Glossary
Although federal regulations, OSHA, ANSI, and Snorkel do not require the use of fall protection beyond the platform personal fall arrest system—a fall protection system that is... - Page 49 8-3 hydraulic pump, 8-2 electrical hazard see inside front cover interlock, 8-7, 9-2 electrical power outlet, 4-3, 8-8, 9-4 accidental conductor grounding, 4-3 ground fault circuit interrupter, 4-3 electrical system, 2-2, 3-3, 8-1 battery terminals, 8-1 S1930 – 0361266...
- Page 50 8-4 tilt alarm, 4-3 personal fall arrest, 3-3 tip-over and falling hazards, 3-2 placards and decals, 3-3, 8-9 cleaning, 8-9 tires, 8-4 safety related, 8-9 towing, 11-1 platform, 2-2, 3-2, 3-3, 8-7, 9-2, 10-1, 11-1 transporting, 10-1 S1930 – 0361266...
- Page 51 10-1 securing, 10-3 user responsibility, 10-1 warranty winching, 10-1 see inside back cover turntable rotation, 2-2 wheel lug nuts, 8-4 wheelbase, 2-2 windy or gusty conditions, 3-3 work place inspection and practices, 3-2 S1930 – 0361266...
- Page 53 Dealer rental fleet, whichever comes first. Any part or parts which, upon examination by the Snorkel Service Department, are found to be defective, will be replaced or repaired, at the sole discretion of Snorkel, through its local Authorized Dealer at no charge.
Need help?
Do you have a question about the S1930 and is the answer not in the manual?
Questions and answers