
Related Manuals for Graco UNO2DUO


Summary of Contents for Graco UNO2DUO
- Page 1 UNO2DUO™ • featuring • presentando • Owner’s Manual • Manual del propietario www.gracobaby.ca ©2018 Graco NWL0000742780B 3/18...
-
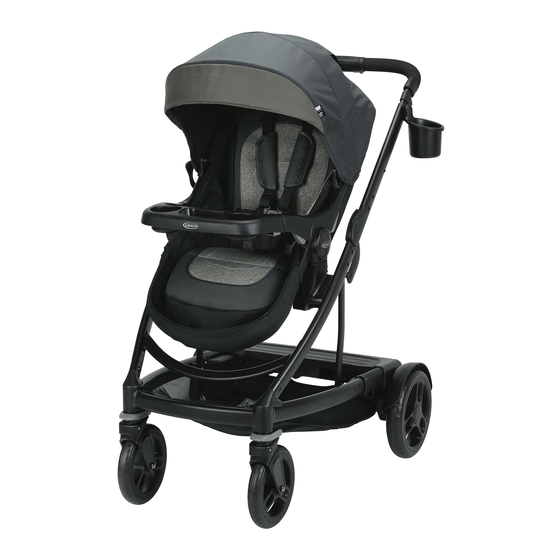
Page 2: Features • Características
Brakes • Los frenos 4-G Swivel Wheels • Las ruedas giratorias 4-H To Attach Graco® Infant Car Seat to Stroller Frame in Front Position • Para sujetar el asiento de automóvil para bebé Graco® al armazón del cochecito en la posición delantera To Attach Graco®... - Page 3 5 Care • Cuidado 61-64 Pages • Páginas Care & Maintenance • Cuidado y mantenimiento Replacement Parts • Warranty Information Piezas de repuesto • Información sobre la garantía Product Registration • Registro del producto...
- Page 4 Failure to follow these warnings and the assembly instructions could result in serious injury or death. Only use product as instructed. PLEASE SAVE OWNER’S USE OF THE FRONT SEAT, REAR MANUAL FOR FUTURE USE. SEAT, OR STANDING PLATFORM with a child weighing more than ADULT ASSEMBLY REQUIRED.
- Page 5 • READ THE MANUAL provided with your Graco car seat before using it with your stroller. • ALWAYS SECURE your child with the car seat harness when using the car seat in the stroller.
- Page 6 ADVERTENCIA No observar estas advertencias y las instrucciones de ensamblaje podría resultar en lesiones serias o la muerte. Use solamente el producto según las instrucciones. POR FAVOR, GUARDE EL NUNCA USE EL COCHECITO EN MANUAL DEL PROPIETARIO ESCALERAS o escaleras PARA USO FUTURO.
- Page 7 • LEA EL MANUAL incluido con su asiento de automóvil Graco antes de usarlo con su cochecito. • SUJETE SIEMPRE a su niño con el arnés del asiento de automóvil cuando usa el asiento...
- Page 8 ADVERTENCIA • NUNCA SUJETE el asiento de • PELIGRO DE TUMBO: Si el niño automóvil para bebé en el se agarra de la manija cuando asiento para niño pequeño sin sube o baja de la plataforma la bandeja y sin los trasera para viajar parado, apoyabrazos laterales del niño podría causar que el cochecito...
- Page 9 UNO2DUO™ Use Positions • Posiciones del uso del UNO2DUO™ WARNING ADVERTENCIA DO NOT allow child to stand on NO deje que el niño se pare en la platform facing backwards. To avoid plataforma mirando hacia atrás. falling, child must hold onto frame.
- Page 10 Two Children • Dos niños Second Seat (on certain models or sold separately) • Segundo asiento (en ciertos modelos o se vende por separado)
- Page 11 2-B Parts List • Lista de piezas This model may not include some Este modelo podría no incluir features shown below. Check that algunas de las características que you have all the parts for this model se indican a continuación. Verifique BEFORE assembling your product.
- Page 12 To Open Stroller • Abrir el cochecito WARNING • Remove and IMMEDIATELY discard the zip ties. ADVERTENCIA • Quite y deseche INMEDIATAMENTE los cordones. Zip ties Cordones Be sure to place stroller on top of a piece of cardboard or some other protective cover to prevent any damage to floor.
- Page 13 2. Lift handle of stroller up. 2. Levante la manija del cochecito hacia arriba. 3. CHECK that the stroller is completely latched open every SNAP! time you open the stroller and ¡CRAC! before continuing with the rest of the assembly steps. 3.
- Page 14 Rear Wheels • Las ruedas traseras Fenders • Guardabarros Extension Extensión 1. Attach fender with extension facing the rear of stroller. Insert tabs into stroller frame and slide to secure. 1. Sujete el guardabarros con la extensión orientada hacia la parte trasera del cochecito.
- Page 15 Rear Axle • Eje trasero 1. Remove protective end cap from each axle end. 1. Quite la tapa protectora del extremo en cada eje. 2. Insert axle through axle opening. 2. Inserte el eje por la abertura del eje.
- Page 16 Rear Wheels • Las ruedas traseras 3. Place wheel on axle. 3. Ponga la rueda en el eje. 4. Place washer on axle. 4. Ponga la arandela en el eje.
- Page 17 5. Push straight side of pin through axle hole. Pin will separate around the axle. Curved end of pin MUST face up as shown. Repeat steps 3-5 on other side. 5. Empuje el lado recto de la clavija por el agujero del eje. La clavija se separará...
- Page 18 Front Wheels • Las ruedas delanteras 1. Attach front wheels to front leg tubes as shown. SNAP! ¡CRAC! 1. Sujete las ruedas delanteras a los tubos de las patas delanteras como se indica. 2. CHECK that wheels are securely attached by pulling on wheel assembly.
- Page 19 Cup holder and Phone holder • Apoyavasos y soporte del teléfono 1. Line up opening in cup holder or phone holder with mount on stroller and press onto stroller tube. 1. Alinee la abertura en el apoyavasos y soporte del teléfono con el montante en el cochecito y presiónelo al tubo del cochecito.
- Page 20 Assemble Seat(s) • Ensamblaje de los asientos 1. Seat wire should be inserted as shown. DO NOT insert with wire facing head end of seat. 1. El alambre del asiento debe insertarse como se indica. NO lo inserte con el alambre orientado hacia el extremo de la cabeza del asiento.
- Page 21 3. Secure flap around wire with 3 snaps. Repeat on other toddler seat (on certain models). 3. Sujete la solapas alrededor del alambre con los 3 broches. Repita en el otro asiento para niño pequeño (en ciertos modelos). Canopy • Capota Toddler Seat - 3 panels with visor Asiento par niños pequeño - 3 paneles con visera Second Seat (on certain models) - 2 panels with visor...
- Page 22 2. Fasten hook and loop tape on the rear of canopy as shown. MAKE SURE canopy is always fastened with the hook and loop tape when toddler seat is in use. 2. Sujete la cinta de gancho y bucle en la parte trasera de la capota como se indica.
- Page 23 Child’s Tray • Bandeja para el niño WARNING Always secure your child with the seat belt. The tray is not a restraint device. DO NOT lift the stroller by the child’s tray. Use care when snapping the tray on the stroller with a child in the stroller. ADVERTENCIA Asegure siempre a su niño con el cinturón de seguridad.
- Page 24 2. Attach child’s tray to side armrests. 2. Sujete la bandeja para niños a los apoyabrazos laterales. 3. To open, press button on bottom and rotate child’s tray up. 3. Para abrirla, oprima el botón de abajo y gire la bandeja para niños hacia arriba.
- Page 25 4. To remove child’s tray, (a) press buttons on bottom on both ends and (b) lift off. 4. Para sacar la bandeja para niños, (a) oprima los botones de abajo en ambos extremos y (b) levántela. 5. (a) Press release buttons on underside of side armrests and (b) pull away from stroller.
- Page 26 To Use Toddler Seat • Para usar el asiento para niños pequeños WARNING • ONLY USE toddler seat on the stroller and do not remove, reverse, or carry the toddler seat while child is in it. See warnings for additional information. ADVERTENCIA •...
- Page 27 2. To attach seat, place seat on mounts as shown until they lock into place on both sides of the stroller. 2. Para sujetar el asiento, ponga el asiento en los montantes como se indica hasta que se traben en su lugar en ambos costados del cochecito.
- Page 28 To Remove Toddler Seat • Sacar el asiento para niño pequeño 1. Squeeze buttons on both sides of the seat and pull up as shown. 1. Oprima los botones de ambos costados del asiento y tire hacia arriba como se indica.
- Page 29 Canopy • Capota 1. Pull forward to open canopy. 1. Tire hacia adelante para abrir la capota. 2. Push backwards to close canopy. 2. Empuje hacia atrás para cerrar la capota. 3. Pull flap forward to open and backwards to close canopy window.
- Page 30 To Use Toddler Seat in Bassinet Position • Para usar el asiento para niño pequeño en la posición de moisés WARNING • Child may slip into leg openings and strangle. • NEVER use in full recline position unless footrest is in the bassinet position.
- Page 31 ADVERTENCIA • El niño podría caerse por las aberturas de las piernas y estrangularse. • NUNCA lo use en la posición totalmente reclinada a menos que el apoyapiés esté en la posición de moisés. • Nunca use un soporte para la cabeza en la posición reclinada del moisés.
- Page 32 2. Remove front toddler seat if it is attached. Squeeze buttons on both sides of the seat and pull up as shown. 2. Saque el asiento para niño pequeño delantero si está sujetado. Oprima los botones de ambos costados del asiento y tire hacia arriba como se indica.
- Page 33 4. To attach seat, place seat on mounts as shown until they lock into place on both sides of the stroller. Bassinet can only be used in front seat position. Bassinet can be attached forward or rear facing. MAKE SURE buckles do not interfere with seat and mounts.
- Page 34 6. To recline seat back, push button down and pull seat towards the rear. 6. Para reclinar el asiento hacia atrás, oprima el botón hacia abajo y tire el asiento hacia atrás. 7. To put in bassinet position, pull handle on top of seat and rotate seat flat.
- Page 35 To Extend Platform for Child Use, Extra storage or Rear Seat Attachment • Para extender la plataforma para usarla con un niño, almacenamiento adicional o accesorio de conexión del asiento trasero WARNING • DO NOT adjust mounts with child on the platform or allow child to play with mounts.
- Page 36 Rear Position Mounts • Montantes en la posición trasera 1. To extend frame and to access rear toddler seat mounts: a. pull extension handle under rear of platform, b. pull platform rearward. 1. Para extender el armazón y acceder los montantes del asiento para niño pequeño trasero: a.
- Page 37 3. To attach toddler seat in rear position, place attachment mounts in upright position by: a. rotating up, b. snapping into place. 3. Para sujetar el asiento para niño pequeño, ponga los montantes de sujeción en la posición vertical al: SNAP! a.
- Page 38 To Attach Second Seat • Para sujetar el segundo asiento For models that do not come with a second seat one may be purchased separately. Para los modelos que no vienen con un segundo asiento, se puede comprar uno por separado. 1.
- Page 39 2. MAKE SURE seat mounts are securely attached to the stroller on both sides as shown. 2. ASEGÚRESE de que los montantes del asiento estén apretadamente sujetados al cochecito en ambos lados como se indica. SNAP! ¡CRAC! 3. CHECK that toddler seat is securely attached to the stroller by pulling up on toddler seat.
- Page 40 To Remove Second Seat • Para sacar el segundo asiento 1. Squeeze buttons on both sides of the seat and pull up as shown. 1. Oprima los botones de ambos costados del asiento y tire hacia arriba como se indica.
- Page 41 Canopy • Capota 1. Pull forward to open canopy. 1. Tire hacia adelante para abrir la capota. 2. Push backwards to close canopy. 2. Empuje hacia atrás para cerrar la capota. 3. Pull flap forward to open and backwards to close canopy window.
- Page 42 To Secure Child • Sujetar al niño WARNING Falling Hazard: Always use the seat belt. ADVERTENCIA Peligro de caídas: Use siempre el cinturón de seguridad. 5 Point Harness • Arnés de 5 puntos 1. To open, press button on buckle to release the waist straps.
- Page 43 3. Use slide adjuster at shoulder and waist for tighter adjustment. To Use slide adjuster change shoulder harness slots, waist for further a see page 46. Repeat on other s 3. Use el ajustador deslizable en el Utilisez le régulate hombro y la cintura para hacer à...
- Page 44 3. Remove shoulder straps from stroller. 3. Saque las correas para los hombros del cochecito. 4. Attach waist straps to harness buckle as shown. 4. Sujete las correas para la cintura a la hebilla del arnés como se indica. 5. Use slide adjuster at waist for tighter adjustment.
- Page 45 Adjusting Shoulder Harness position • Ajustar la posición del arnés para los hombros Shoulder harness anchor—larger child Anclaje del arnés del hombro - niño grande Shoulder harness anchor—smaller child Anclaje del arnés del hombro - niño pequeño Slide adjuster Ajustador deslizable...
- Page 46 1. Push harness anchor through the front of the seat then re-insert through desired slots at the same height level. Use either shoulder harness anchor in the slots that are closest to child’s shoulder height. Use slide adjuster for further adjustment. 1.
- Page 47 To Recline • Reclinar WARNING When making adjustments to the stroller seat, make sure child’s head, arms, and legs are clear of moving seat parts and stroller frame. ADVERTENCIA Cuando realiza ajustes al asiento del cochecito, asegúrese que la cabeza, brazos y piernas del niño estén lejos de las piezas del asiento que se mueven y del armazón del cochecito.
- Page 48 Brakes • Los frenos WARNING CHECK that brakes are on by trying to push stroller. ALWAYS LOCK BRAKES before folding. ADVERTENCIA VERIFIQUE que los frenos estén activados tratando de empujar el cochecito. SIEMPRE TRABE LOS FRENOS antes de plegarlo. 1. Push down on either brake to lock brakes.
- Page 49 Swivel Wheels • Las ruedas giratorias Front swivel wheels lock for use on uneven surfaces such as grass, stones or gravel. Las ruedas giratorias delanteras se traban para el uso en superficies desparejas tales como césped, piedras o grava. 1. To lock, press up. SNAP! 1.
- Page 50 Click Connect™ logo. Improper use of this product with a car seat may result in serious injury or death. Read the manual provided with your Graco car seat before using it with your product. • Always secure your child with infant car seat harness when using the car seat in the product.
- Page 51 Graco® SnugRide® con Click Connect™. Úselo solamente con los asientos de automóvil para bebé de Graco® que tienen el logotipo Click Connect™. El uso inadecuado de este producto con un asiento de automóvil podría resultar en lesiones serias o la muerte. Lea el manual incluido con su asiento de automóvil Graco antes de usarlo con su producto.
- Page 52 1. Infant car seat can be attached to stroller frame rear and forward facing. DO NOT use car seat in rear seat position. 1. El asiento de automóvil para bebé se puede sujetar al armazón del cochecito orientado hacia atrás y hacia adelante.
- Page 53 2. Insert car seat into stroller and push down on car seat until the latches snap into the seat attachment mounts. 2. Inserte el asiento de automóvil en el cochecito y empuje hacia abajo hacia el asiento de automóvil hasta que se trabe en los montantes de sujeción del asiento.
- Page 54 To Attach Graco Infant Car Seat to Toddler ® Seat in Front Position • Para sujetar el asiento de automóvil para bebé Graco® al asiento para niño pequeño en la posición delantera WARNING • NEVER ATTACH infant car seat in the toddler seat without the child’s tray and side armrests attached.
- Page 55 2. Recline seat back to full recline position. (See section 4-E, p. 47). 2. Recline el asiento en la posición totalmente reclinada. (Consulte la sección 4-E, página 47). 3. Find mounts in toddler seat. 3. Busque los montantes en el asiento para niño pequeño.
- Page 56 5. Check that infant car seat is securely attached by pulling up on it. 5. Verifique que el asiento de automóvil para bebé esté apretadamente sujetado tratando de tirarlo hacia arriba. 6. To remove infant car seat: (a) squeeze release handle at back of infant car seat, and (b) lift infant car seat out of the stroller.
- Page 57 To Fold Stroller Frame • Para plegar el armazón del cochecito NOTE: Stroller can be folded with front toddler seat installed forward-facing or with no seats attached. DO NOT fold stroller with: • a toddler seat rear-facing, • a toddler seat in the rear position, •...
- Page 58 1. Before folding stroller: a. remove infant car seat and rear toddler seat. b. lock brakes. 1. Antes de plegar el cochecito: a. Saque el asiento de automóvil para bebé y asiento para niño pequeño trasero. b. Trabe los frenos. SNAP! ¡CRAC! 2.
- Page 59 3. Rotate handle down. 3. Gire la manija hacia abajo. 4. CHECK that the storage latch is secured. 4. VERIFIQUE que la traba de almacenamiento esté segura. Harness Covers • Fundas del arnés 1. To attach harness covers, slide onto shoulder harness straps. 1.
- Page 60 Cover Crotch Strap • Funda de la correa de la entrepierna 1. To attach crotch strap cover, slide onto crotch strap. 1. Para sujetar la funda de la correa de la entrepierna, deslícela sobre la correa de la entrepierna. 4-M To Adjust Handle • Para ajustar la manija To adjust handle, (a) lift up on handle release and (b) slide handle into desired position.
-
Page 61: Care And Maintenance
• FROM TIME TO TIME, CHECK YOUR STROLLER for loose screws, worn parts, torn material or stitching. Replace or repair the parts as need- ed. Use only Graco replacement parts. • EXCESSIVE EXPOSURE TO SUN OR HEAT could cause fading or warping of parts. - Page 62 Cambie o repare las piezas según sea necesario. Use solamente piezas de repuesto de marca Graco. • LA EXPOSICIÓN EXCESIVA CON EL SOL O EL CALOR podría causar que se destiña o se tuerzan algunas piezas.
- Page 63 Notes • Notas...
- Page 64 We currently do not accept product registrations from those living outside the United States of America. Para registrar su producto Graco dentro de los EE.UU., visítenos en línea en www.gracobaby.com/productregistration o envíe la tarjeta de registro provista con su producto.
Need help?
Do you have a question about the UNO2DUO and is the answer not in the manual?
Questions and answers