Table of Contents
Advertisement
Advertisement
Table of Contents

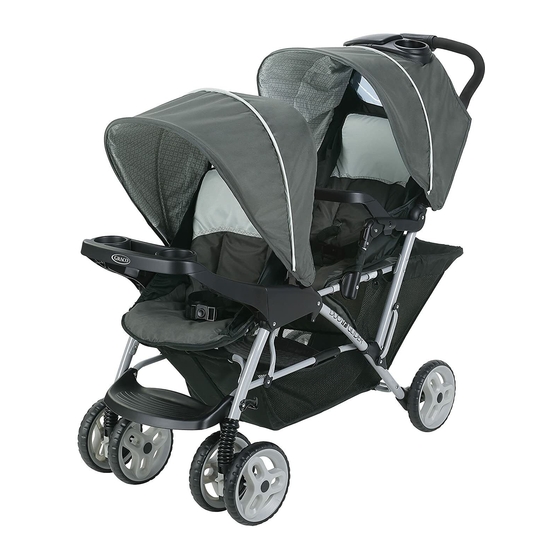
Summary of Contents for Graco DUOGLIDER
- Page 1 DUOGLIDER featuring Owner’s Manual Graco PD349315A 4/16...
- Page 2 3-G Child’s Tray 3-H Front Canopy 4 Use To Secure Child Swivel Wheels Brakes 4-D To Recline Seats To Fold Stroller Rear Seat Reclined Carriage Position 4-G To Attach Graco® Infant Car Seat to Rear Position 5 Cleaning Care & Maintenance...
- Page 3 Failure to follow these warnings and the assembly instructions could result in serious injury or death. Only use product as instructed. CHILD MAY SLIP INTO LEG PLEASE SAVE OWNER’S OPENINGS AND STRANGLE. MANUAL FOR FUTURE USE. Never use rear seat in a reclined ADULT ASSEMBLY REQUIRED.
- Page 4 INFANT CAR ® car seat may result in serious SEATS(S) WITH STROLLER: injury or death. TO AVOID See Graco infant car seat owners INJURY TO manual for maximum size of child. YOUR CHILD: TO PUT CHILDREN IN THE THIS STROLLER:...
- Page 5 2-A Parts List This model may not include some features shown below. Check that you have all the parts for this model BEFORE assembling your product. If any parts are missing, call Customer Service. All models...
- Page 6 To Open Stroller Be sure to place stroller on top of a piece of cardboard or some other protective cover to prevent any damage to floor. 1. Release storage latch. 2. CHECK that stroller is completely open (by trying to fold it) before continuing.
- Page 7 Basket SNAP! 2. Snap straps on both sides of basket. SNAP! 3. Secure 2 snaps around tube on base of basket. SNAP!
- Page 8 Front Wheels 1. CHECK that wheels are securely attached by pulling on wheel SNAP! assemblies.
- Page 9 Rear Axle 1. Recline front seat before turning stroller over. 2. Brake levers point toward rear of stroller. CHECK that rear axle is securely attached by pulling on brake assembly. SNAP!
- Page 10 Child’s Tray or Arm Bar WARNING Always secure your child with the seat belt. The arm bar or tray is not a restraint device. Do not lift the stroller by the child’s tray or arm bar. Use care when snapping the arm bar or tray on the stroller with a child in the stroller.
- Page 11 Rear Arm Bar (on certain models) SNAP! Child’s Tray SNAP!
- Page 12 Front Canopy SNAP!
- Page 13 To Secure Child Your stroller will have one of the following seat belts:...
-
Page 14: Point Harness
3 Point Harness Use slide adjuster at waist for tighter adjustment. - Page 15 Swivel Wheels Front swivel wheels lock for use on uneven surfaces such as grass, stones or gravel. Brakes WARNING Always apply both brakes. CHECK that brakes are on by trying to push stroller.
- Page 16 To Recline Seats WARNING Fabric caught in the latches may prevent them from locking. When returning seat to upright position, do not allow fabric to be pinched in the latch. CAUTION When making adjustments to the stroller seat, make sure child’s head, arms, and legs are clear of moving seat parts and stroller frame.
- Page 17 To Fold Stroller Before folding stroller: (1) remove infant carrier(s) if in use; (2) adjust seat backs to recline position; (3) lock brakes; (4) fold canopies and LOWER FRONT CANOPY as shown.
- Page 18 Rear Seat Reclined Carriage Position When rear seat is fully reclined (on certain models): • Remove head support (on certain models). Never use any head support in the full recline position. • Top 2 hook/loop tabs must be threaded through two plastic slots and tightly fastened.
- Page 19 Use only a Graco® SnugRide® Click Connect™ car seat with this stroller. This stroller is only compatible with Graco® SnugRide® infant car seats with Click Connect™. Only use with Graco® infant car seats that have the Click Connect™ logo. Improper use of this product with a car seat may result in serious injury or death.
- Page 20 Remove child’s tray and front canopy before installing car seat. • Recline seats(s) to lowest position. SNAP! SNAP!
- Page 21 • TO REMOVE CAR SEAT: squeeze release handle at back of car seat, and lift car seat out of the stroller.
- Page 22 • FROM TIME TO TIME, CHECK YOUR STROLLER for loose screws, worn parts, torn material or stitching. Replace or repair the parts as need- ed. Use only Graco replacement parts. • EXCESSIVE EXPOSURE TO SUN OR HEAT could cause fading or warping of parts.


Need help?
Do you have a question about the DUOGLIDER and is the answer not in the manual?
Questions and answers