Table of Contents
Advertisement
Quick Links
Advertisement
Table of Contents

Related Manuals for Allen-Bradley SLC 500 DeviceNet


Summary of Contents for Allen-Bradley SLC 500 DeviceNet
- Page 1 SLC 500 DeviceNet Scanner Module 1747-SDN User Manual...
- Page 2 Important User Information Because of the variety of uses for the products described in this publication, those responsible for the application and use of this control equipment must satisfy themselves that all necessary steps have been taken to assure that each application and use meets all performance and safety requirements, including any applicable laws, regulations, codes and standards.
- Page 3 European Communities (EC) If this product has the CE mark it is approved for installation within the European Union and EEA regions. It has been designed and tested Directive Compliance to meet the following directives. EMC Directive This product is tested to meet the Council Directive 89/336/EC Electromagnetic Compatibility (EMC) by applying the following standards, in whole or in part, documented in a technical construction file:...
-
Page 5: Publication 1747-6.5.5 - August
Preface About This User Manual Introduction This user manual is designed to provide you enough information to get a small example application up and running. Use this manual if ™ ™ you are knowledgeable about DeviceNet and SLC 500 products, but may not have used the products in conjunction. -
Page 6: Before You Begin
About This User Manual Contents This user manual contains the following chapters: Before You Begin Configuring the go to Chapter DeviceNet Network go to Chapter Planning Your Configuration Configuring go to Chapter DeviceNet From Another Network Setting Up the Creating and Running Hardware the Application go to Chapter... - Page 7 About This User Manual The Example Application This manual describes how to set up an example application. The manual provides examples of each step of the setup, with references to other manuals for more details. System Components We used the following devices and software for the example application.
- Page 8 About This User Manual Common Techniques The following conventions are used throughout this manual: Used in This Manual • Bulleted lists provide information, not procedural steps. • Numbered lists provide sequential steps. • Information in bold contained within text identifies menu windows, or screen options, screen names and areas of the screen, such as dialog boxes, status bars, radio buttons and parameters.
- Page 9 About This User Manual Where to Find Refer to the following sources of information as needed for additional More help when setting up and using your DeviceNet network: More Information For information about See this Item Number the 1747-SDN DeviceNet Scanner module DeviceNet Scanner Module Installation Instructions 1747-5.8 SLC 500 Processors...
- Page 10 About This User Manual Terminology This term Means Bridge The scanner module’s support of explicit message transfer. Change of State A type of I/O data communication. The scanner module can send and receive data with slave devices that have the change of state feature. Data is sent whenever a data change occurs.
- Page 11 About This User Manual Strobed A type of I/O data communication. A strobed message solicits a response from each strobed device (a multicast transfer). It is a 64-bit message that contains one bit for each device on the network. An abbreviation for “transmit”. Rockwell Automation Rockwell Automation offers support services worldwide, with over 75 sales/support offices, 512 authorized distributors, and 260 authorized...
- Page 12 About This User Manual If you have any suggestions about how we can make this manual more useful to you, please contact us at the following address: Rockwell Automation, Allen-Bradley Company, Inc. Control and Information Group Technical Communication 1 Allen-Bradley Drive Mayfield Heights, OH 44124-6118 Publication 1747-6.5.5 - August 2000...
-
Page 13: Table Of Contents
Table of Contents Chapter 1 Before You Begin What This Chapter Contains ......1-1 What You Need to Know ......1-1 What Your 1747-SDN Module Does . - Page 14 Table of Contents Chapter 3 (continued) Installing the 1747-SDN Scanner Module ....3-9 Identifying Module Features ..... . . 3-9 Installing the 1747-SDN Module In the Chassis .
- Page 15 Table of Contents Chapter 6 (continued) Downloading and Running the Program via a DH+ Network......6-8 What’s Next? .
-
Page 16: Configuring The 1784-Ktcx15 Communications Driver
Table of Contents Appendix H Installing and Configuring the Installing the 1784-KTCX15 Communication Interface Card . . H-1 Configuring the 1784-KTCX15 Communications Driver . . . H-2 ControlNet Communications Driver Index Publication 1747-6.5.5 - August 2000... -
Page 17: What This Chapter Contains
Chapter Before You Begin What This Chapter Contains This chapter provides an overview of communication between the SLC 500 processor and DeviceNet devices via the 1747-SDN module. The configuration data tables and the RSNetWorx for DeviceNet screens and windows used to configure the data tables are also described. -
Page 18: What Your 1747-Sdn Module Does
Before You Begin What Your 1747-SDN In a typical configuration, the 1747-SDN module acts as an interface between DeviceNet devices and the SLC 500 processor. Module Does Typical DeviceNet Network PC with RSNetWorx SLC 500 Modular Chassis for DeviceNet software 1770-KFD PC Communication Module... - Page 19 Before You Begin A processor to I/O DeviceNet configuration is shown in the following figure. See the referenced chapters for more information. Processor to I/O Input Read by Processor (Chapter 2) PC running RSNetWorx Configure SDN module (Chapter 4) for DeviceNet Mapping Table (Chapters 2 and 4) Output Write by Output Data to Devices...
- Page 20 Before You Begin The 1747-SDN interface module can also be used to bridge a DeviceNet network with another network. Configuring Devices and Data Collection on Higher-Level Networks Via SLC 500/SDN Industrial Laptop PC workstation running running RSView RSNetWorx DH+ or Ethernet network (Chapter 5) Configuration of device Collection of status using RSNetWorx...
-
Page 21: Communicating With Your Devices
Before You Begin Communicating with The 1747-SDN module communicates with a device via strobe, poll, change of state, and/or cyclic messages. It uses these messages to Your Devices solicit data from or deliver data to each device. Data received from the devices, or input data, is organized by the 1747-SDN module and A strobe message is a made available to the processor. - Page 22 Before You Begin DeviceNet Devices 1747-SDN Scanner Module Input Data From Input Data Storage DeviceNet Devices Byte Different portions of data from a single device can be mapped to separate 1747-SDN memory input from the locations. For example, devices to the SLC “On/Off”...
-
Page 23: Communicating With Your Slc 500 Processor
Before You Begin Communicating with Your Your processor communicates with the 1747-SDN interface module via M1 file transfer reads, M0 file transfer writes, and DIO transfers. SLC 500 Processor Input data, gathered from the network’s devices, is organized within the 1747-SDN and made available for the processor to “read” from the An M1 file transfer is the transfer of M1 file. -
Page 24: What 1747-Sdn Module Data Tables Are And What They Do
Before You Begin What 1747-SDN Module To manage the flow of data between your SLC 500 processor and the network devices, the 1747-SDN module uses the following data tables: Data Tables Are and What They Do • Scanner Configuration Table (SCT) •... -
Page 25: The Scanlist Table (Slt)
Before You Begin The Scanlist Table (SLT) The SLT supports I/O updating for each of your devices on the network. It also makes it possible for your 1747-SDN module to make device data available to your SLC processor. The SLT tells your 1747-SDN module: •... - Page 26 1-10 Before You Begin The configuration screen map below shows the RSNetWorx for DeviceNet screens used to configure the 1747-SDN module and the navigation paths between them. The use of these screens is described in Chapter 4. Publication 1747-6.5.5 - August 2000...
-
Page 27: Rsnetworx For Devicenet Configuration Screen Map
Before You Begin 1-11 RSNetWorx for DeviceNet Configuration Screen Map The main RSNetWorx for DeviceNet screen. To browse the network, click on the Online button and select the driver. To access the 1747-SDN Interface Module, double-click on the 1747-SDN icon. To access the scanlist, click on the Scanlist tab. - Page 28 1-12 Before You Begin • Chapter 2 covers the configuration process planning stage through a data mapping example. • Chapter 3 describes the hardware setup for the example application. • Chapter 4 covers configuration of the DeviceNet network using RSNetWorx for DeviceNet software. •...
-
Page 29: Planning Your Configuration And Data Mapping Your Devices
Chapter Planning Your Configuration and Data Mapping Your Devices What This Chapter Contains This chapter introduces questions you should ask before configuring your 1747-SDN communication module. In addition, it presents an example DeviceNet network and I/O data mapping scheme for a photoeye and a RediSTATION operator interface module. -
Page 30: The Example Network
Planning Your Configuration and Data Mapping Your Devices A very important question to answer is “what is on your network?” You should be familiar with each device’s: • communication requirements • I/O importance and size • frequency of message delivery You should also ask “how might this network appear in the future?”... - Page 31 Planning Your Configuration and Data Mapping Your Devices The system you will set up is shown below: PC running Windows NT or Windows 95/98, containing RSNetWorx for DeviceNet software Series 9000 Photoelectric Sensor 1770-KFD Node 62 Communication Node 9 Module ∗...
-
Page 32: Redistation Input And Output Data Mapping
Planning Your Configuration and Data Mapping Your Devices RediSTATION Input and Output Data Mapping The RediSTATION has both inputs and outputs that must be mapped. The input byte is mapped to the 1747-SDN module’s M1 file and then to the SLC 500 processor’s input data file. The output byte is mapped to the 1747-SDN module’s M0 file and then to the SLC 500 processor’s output data file. -
Page 33: Mapping Redistation Input Data For An M1 File Data Table Read
Planning Your Configuration and Data Mapping Your Devices Mapping RediSTATION Input Data for an M1 File Data Table Read The following is an example of input data mapping for the RediSTATION. RediSTATION Input Byte What’s Happening? R = bit for red button (STOP) The bits for the RediSTATION 1 byte G = bit for green button (START) -
Page 34: Mapping Redistation Output Data For An M0 File Data Table Write
Planning Your Configuration and Data Mapping Your Devices Mapping RediSTATION Output Data for an M0 File Data Table Write The RediSTATION’s output is mapped to the 1747-SDN module’s M0 file. Within the output byte is a bit for the indicator light. The output data file is then transferred from the SLC 500 processor application to turn the light on or off. -
Page 35: Photoeye Input Data Mapping
Planning Your Configuration and Data Mapping Your Devices Photoeye Input Data Mapping The photoelectric sensor (photoeye) inputs are mapped to the 1747-SDN module’s M1 file and then to the SLC 500 processor’s input data file. The procedure for doing this using RSNetWorx for DeviceNet software is described on pages 4-12 to 4-15. -
Page 36: Mapping Photoeye Input Data For An M1 File Data Table Read
Planning Your Configuration and Data Mapping Your Devices Mapping Photoeye Input Data for an M1 File Data Table Read Photoeye Input Byte What’s Happening? The status and data bits from 1 byte the photoeye are mapped into the 1747-SDN Scanner’s M1 file data table. -
Page 37: Hardware Setup
Chapter Hardware Setup What This Chapter Contains This chapter describes how to set up the hardware for the example application. The following table describes what this chapter contains and where to find specific information. For information about See page Installing the 1770-KFD Module Installing the SLC 500 Processor Installing the ControlNet RS-232 Interface Module Installing the 1747-SDN Scanner Module... -
Page 38: Installing The Slc 500 Processor
Hardware Setup Installing the Identifying Processor Features SLC 500 Processor Refer to the following figures to identify the features of your SLC 5/04 or SLC 5/05 processor. SLC 5/04 Processor SLC 5/05 Processor Make sure system power is off; then insert the processor into slot 0 of the 1746 I/O chassis. -
Page 39: Establishing Data Highway Plus Communications
Hardware Setup Establishing Data Highway Plus Communications For the examples using Data Highway Plus (DH+) in chapters 5 and 6 of this manual we installed a 1784-KTX communications card in the host platform (see Appendix G) and a SLC 5/04 processor with the default Channel 1 DH+ configurations listed below: •... -
Page 40: Configuring The Rs-232 Port For The Controlnet Interface
Hardware Setup Connect channel 1 of the Ethernet SLC 5/05 processor to an Ethernet hub using 10 Base-T cable as shown below. RJ45 connectors on both Ethernet ends of cable (10Base-T) to SLC 5/05 to Host Platform Channel 1 Ethernet card See Chapter 5 and Appendix E for information on configuring the SLC More 5/05 processor’s Ethernet communications. -
Page 41: Configuring The 1747-Kfc15 Module's Rs-232 Port
Hardware Setup To communicate with the SLC 500 processor via a ControlNet network Installing the ControlNet you must install a 1747-KFC15 ControlNet RS-232 Interface module in RS-232 Interface Module the 1746 I/O chassis close to the processor. Configuring the 1747-KFC15 Module’s RS-232 Port The communication parameters of 1747-KFC15 IMPORTANT module must match those of the SLC 500 processor. - Page 42 Hardware Setup For this configuration, set the switches as shown in the tables below. Bank S1 DIP Switches Upper digit of SW 1 SW 2 SW 3 Digit Switches 1-3 DF1 station address Lower digit of SW 4 SW 5 SW 6 Digit Switches 4-6...
-
Page 43: Configuring The 1747-Kfc15 Module's Controlnet Node Address
Hardware Setup Configuring the 1747-KFC15 Module’s ControlNet Node Address The 1747-KFC15’s ControlNet node address is set by rotary switches S4 and S5 on the top of the module. Switch S5 sets the upper digit of the address and S4 the lower. These switches can be turned by hand while holding the module in the orientation illustrated below. -
Page 44: Connecting The 1747-Kfc15 Module To The Controlnet Network
Hardware Setup 3. Connect the 1747-KFC15 module to your SLC 500 processor with the RS-232 cable. Connecting the 1747-KFC15 Module to the ControlNet Network Connect the 1747-KFC15 to the ControlNet cable system using an approved ControlNet tap. Refer to the ControlNet Cable System Planning and Installation Manual (pub. -
Page 45: Installing The 1747-Sdn Scanner Module
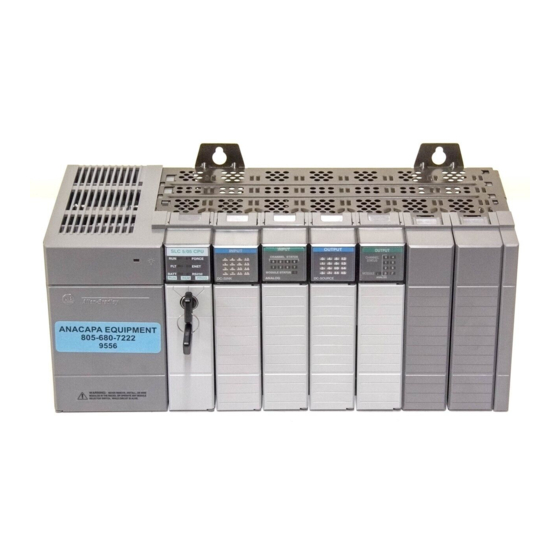
Hardware Setup Installing the 1747-SDN Identifying Module Features Scanner Module Use the following figure to identify the features of the 1747-SDN/B scanner module. Publication 1747-6.5.5 - August 2000... -
Page 46: Installing The 1747-Sdn Module In The Chassis
3-10 Hardware Setup Installing the 1747-SDN Module In the Chassis Do not install the 1747-SDN Scanner Module with ATTENTION the chassis power supply on. Installing the module with the chassis power supply on may damage the module. To install your module into the chassis: 1. -
Page 47: Connecting The 1747-Sdn Module To The Devicenet Network
Hardware Setup 3-11 Connecting the 1747-SDN Module to the DeviceNet Network To connect your module to the DeviceNet network: 1. Turn off the network power supply. Do not wire the 1747-SDN Scanner Module with the ATTENTION network power supply on. Wiring the module with the network power supply on may short your network or disrupt communication. - Page 48 3-12 Hardware Setup 10-pin Linear Plug DeviceNet Port Connector DeviceNet Drop Line You use RSNetWorx for DeviceNet software to configure the scanner module’s DeviceNet address and baud rate, if needed. This is done when configuring the DeviceNet network (see pages 4-6 to 4-8).
-
Page 49: Installing The Redistation Operator Interface
Hardware Setup 3-13 Installing the RediSTATION Begin installing the RediSTATION by removing the six screws fastening the cover and setting the DIP switches inside as follows: Operator Interface Set this position To this value: (node address (data rate The DeviceNet address is 000111 (node 7). The data rate is 10 (500 kb). -
Page 50: Installing The Series 9000 Photoeye
3-14 Hardware Setup Installing the Series Connect the photoeye to the network and configure the photoeye as follows: 9000 Photoeye • Node Address: 9 • Operating Mode: Light Operate (default) • Baud Rate: 500 kb Top View of Series 9000 Photoeye Programming Pushbutton Sensitivity... -
Page 51: How Your Network Will Look
Hardware Setup 3-15 How Your Network When you have finished installing all the devices, the network should look similar to this: Will Look PC running Windows NT Series 9000 or Windows 95/98, Photoelectric containing RSNetWorx for Sensor DeviceNet software Node 9 1770-KFD Communication Module... - Page 52 3-16 Hardware Setup Publication 1747-6.5.5 - August 2000...
-
Page 53: What This Chapter Contains
Chapter Configuring the DeviceNet Network What This Chapter Contains This chapter describes how to configure the DeviceNet network using RSLinx and RSNetWorx for DeviceNet software. The following table describes what this chapter contains and where to find specific information. For information about See page Installing the Software Using RSLinx to Configure the DeviceNet Driver... -
Page 54: Using Rslinx To Configure The Devicenet Driver
Configuring the DeviceNet Network Using RSLinx to Configure 1. Start RSLinx. The RSLinx main window will open. the DeviceNet Driver 2. From the Communications menu, select Configure Drivers as shown above. The following window will appear. 3. Select DeviceNet Drivers from the above pull-down list and click on Add/New. - Page 55 Configuring the DeviceNet Network The Driver Configuration window will appear. Your driver setup will depend on your particular system setup (COM port, baud rate, node address). Choose the appropriate settings for your system. We used the settings shown at right. 5.
-
Page 56: Using Rsnetworx To Configure The 1747-Sdn Module Scanlist
Configuring the DeviceNet Network Using RSNetWorx to Setting Up an Online Connection Configure the 1747-SDN Follow the procedure below to set up an online connection to the Module Scanlist DeviceNet network using the 1770-KFD driver. 1. Start RSNetWorx for DeviceNet. The following screen will open. 2. - Page 57 Configuring the DeviceNet Network A list of the available drivers in RSLinx will appear. (Your list may appear different from that shown below, depending upon the drivers you have configured on your system.) 5. Select the 1770-KFD-1, DeviceNet driver and click on OK. You will be prompted to upload or download devices before going online.
-
Page 58: Setting The 1747-Sdn Node Address
Configuring the DeviceNet Network RSNetWorx for DeviceNet performs a one-shot browse when you go online or choose the browse feature. The software will poll for devices one time and display the results. If a node which was online later goes offline, there will be no “live” indication in RSNetWorx. - Page 59 Configuring the DeviceNet Network Perform the following steps: 1. From the Tools menu select Node Commissioning. You will see the Node Commissioning window. 2. Click on the Browse button. You will see the Device Selection window. 3. Select the 1770-KFD driver. Publication 1747-6.5.5 - August 2000...
- Page 60 Configuring the DeviceNet Network The devices on the network will appear in the right panel of the window. 4. Select the device you are commissioning in the right panel and click on OK. You will see the Node Commissioning window with the current settings for your 1747-SDN module.
-
Page 61: Configuring The I/O Devices
Configuring the DeviceNet Network Configuring the I/O Devices 1. Double-click on the 1747-SDN module icon. The following window will appear: 2. Select the Module tab. You will receive the following prompt. 3. Click on Upload. Publication 1747-6.5.5 - August 2000... - Page 62 4-10 Configuring the DeviceNet Network After uploading the following window will appear: 4. Make sure the 1747-SDN: Slot number is correct for your system. We used slot 2. We used the Module Defaults for the other settings. For an explanation of these settings click on the Help button.
-
Page 63: Verifying The Photoeye Configuration
Configuring the DeviceNet Network 4-11 7. Click on the double arrow button to add the photoeye and RediSTATION to the Scanlist. Verifying the Photoeye Configuration 1. Double-click on the photoeye in the Scanlist. The Edit I/O Parameters window will appear for the photoeye. The I/O parameters define the configuration for the device in terms of how much and what data the device will exchange with the 1747-SDN module. -
Page 64: Automapping The Devices Into The Scanlist
4-12 Configuring the DeviceNet Network 2. Make sure that the Polled box is checked and that the Rx Size and Tx Size are each 1 byte. 3. Click on OK to close the Edit I/O Parameters window for the RediSTATION. 4. - Page 65 Configuring the DeviceNet Network 4-13 2. In the Memory field, select M File. 3. Highlight the RediSTATION and the photoeye and click on the AutoMap button. The resulting device mapping will appear in the lower panel: Photoeye RediSTATION inputs inputs In this example, the inputs from the RediSTATION will appear in the M1 file for the device in slot 2 as word 0, bits 0 to 7.
- Page 66 4-14 Configuring the DeviceNet Network 5. Select the Output tab. After mapping the RediSTATION output address will appear here. 6. In the Memory field, select M File. 7. Highlight the RediSTATION and click on the AutoMap button. In this example, the output to the RediSTATION appears in the M0 file for the device in slot 2 as word 0, bits 0 to 7.
-
Page 67: Download And Save Your Configuration
Configuring the DeviceNet Network 4-15 Download and Save Your Configuration 1. Click on the Scanlist tab and then on the Download to Scanner button. You will see this window: 2. Select All Records. 3. Click on the Download button to download the configuration to the 1747-SDN scanner module. - Page 68 4-16 Configuring the DeviceNet Network Publication 1747-6.5.5 - August 2000...
-
Page 69: What This Chapter Contains
Chapter Communicating with DeviceNet from Another Network What This Chapter Contains This chapter describes how to communicate with the DeviceNet network from another network, using the SLC 500 “pass-through” feature. This feature can be used to adjust and fine tune the nodes on your network. -
Page 70: Where To Find More Information
Communicating with DeviceNet from Another Network Where to Find Refer to the following publications for information on configuring More other networks: More Information For information about: See this publication: Publication number: the Data Highway Plus network SLC Modular Style Hardware Installation and Operation Manual 1747-6.2 the Ethernet interface Ethernet SLC 500 Processors Quick Start for Experienced Users... -
Page 71: Communicating With Devicenet Via An Ethernet Network
Communicating with DeviceNet from Another Network The SLC 500 chassis used for these examples was set up with the following hardware mapping. The SLC 5/04 processor was used for the DH+ example. The SLC 5/05 processor was used for the Ethernet example. -
Page 72: Configuring The Ethernet To Slc-5 Communications Driver
Communicating with DeviceNet from Another Network Configuring the Ethernet to SLC-5 Communications Driver To communicate with your SLC 500 processor over Ethernet you must configure the Ethernet to SLC 500 driver. Perform the following steps to configure the driver using RSLinx software. 1. - Page 73 Communicating with DeviceNet from Another Network You will be prompted to choose a name for the new driver. 4. Enter an appropriate driver name (e.g., AB_ETH-1) and click on the OK button. The Configure driver for Ethernet to PLC-5/SLC-5/5820-EI window will open. 5.
-
Page 74: Configuring The Devicenet Pass-Through Driver
Communicating with DeviceNet from Another Network The new driver will be added to the list of Configured Drivers in RSLinx. (Your list will contain the drivers you have configured.) Configuring the DeviceNet Pass-Through Driver Before you can communicate with the 1747-SDN module via the Ethernet network, you must configure the DeviceNet pass-through driver (1747-SDNPT) using RSLinx, version 2.10 or higher. - Page 75 Communicating with DeviceNet from Another Network The Configure Drivers window will appear. 3. From the list of Available Driver Types select DeviceNet Drivers and click on Add/New. You will see the following list of drivers. 4. Select the Allen-Bradley 1747-SDNPT driver. The Allen-Bradley 1747-SDNPT Driver Configuration window will open.
- Page 76 Communicating with DeviceNet from Another Network 5. Select a pass-through port to be configured from the pull-down list, e.g., Port 2. 6. Expand your Ethernet driver (AB_ETH-1) and highlight the SLC 5/05 processor. 7. Verify that the 1747-SDN Slot is correct. 8.
-
Page 77: Communicating With The Devicenet Network
Communicating with DeviceNet from Another Network Communicating with the DeviceNet Network Once you have the Ethernet pass-through driver configured, you can use RSNetWorx for DeviceNet to communicate with the DeviceNet network via the Ethernet network. Perform the following steps: 1. Start RSNetWorx for DeviceNet. 2. - Page 78 5-10 Communicating with DeviceNet from Another Network The Browse for network window will appear. You will see the drivers you have configured on your system. 5. Highlight the 1747-SDNPT-2, DeviceNet driver and click on OK. You will receive the following prompt: 6.
- Page 79 Communicating with DeviceNet from Another Network 5-11 When RSNetWorx for DeviceNet is finished browsing, the network displayed on your screen should look similar to the one shown below. If RSNetWorx fails to find a device, check the physical connection to that device.
-
Page 80: Communicating With Devicenet Via A Dh+ Network
5-12 Communicating with DeviceNet from Another Network Communicating with Before performing this example the DH+ network must be configured and running. This example uses a SLC 5/04 processor. The SLC 5/04 DeviceNet via a DH+ processor lets you operate DH+ communication protocol by means of Network DH+ communication channel 1. - Page 81 Communicating with DeviceNet from Another Network 5-13 You will see the following list of drivers. 4. Select the Allen-Bradley 1747-SDNPT driver. The Driver Configuration window will appear. 5. Select a pass-through port to be configured from the pull-down list, e.g., Port 3. 6.
- Page 82 5-14 Communicating with DeviceNet from Another Network You will be prompted to enter a name for the driver. 9. Enter an appropriate driver name (e.g., 1747-SDNPT-3) and click on the OK button. The new driver will be added to the Configured Drivers in RSLinx.
-
Page 83: Communicating With The Devicenet Network
Communicating with DeviceNet from Another Network 5-15 Communicating with the DeviceNet Network Once you have the DH+ pass-through driver configured, you can use RSNetWorx for DeviceNet to communicate with the DeviceNet network via the DH+ network. Perform the following steps: 1. - Page 84 5-16 Communicating with DeviceNet from Another Network The Browse for network window will appear. You will see the drivers you have configured on your system. 5. Highlight the 1747-SDNPT-3 driver and click on OK. You will receive the following prompt: 6.
-
Page 85: What's Next
Communicating with DeviceNet from Another Network 5-17 When the software is finished browsing, the network should look similar to the one shown below. If RSNetWorx fails to find a device, check the physical connection to that device. You are now online to the DeviceNet network via the Data Highway Plus network. - Page 86 5-18 Communicating with DeviceNet from Another Network Publication 1747-6.5.5 - August 2000...
-
Page 87: What This Chapter Contains
Chapter Creating and Running the Example Application Program What This Chapter Contains This chapter describes the procedure to create, download, and run an example ladder logic program to test the DeviceNet network. When the processor is put into Run mode, pressing the START button on the network’s RediSTATION will cause the red indicator light to come on and stay on until the STOP button is pressed. -
Page 88: Installing The Software
Creating and Running the Example Application Program Installing the Software Perform the following steps to install the software. 1. Insert the software CD-ROM installation disk in the drive. The CD-ROM supports Windows Autorun. If you have Autorun configured, the installation will automatically start when you insert the CD-ROM in your drive. - Page 89 Creating and Running the Example Application Program The Select Processor Type window will open. 3. Select your Processor Type from the list (e.g., 1747-L542A) and click on OK. 4. Enter the following ladder program. Note that the program uses the addresses mapped to the devices by RSNetWorx for DeviceNet in chapter 4.
-
Page 90: Downloading And Running The Program
Creating and Running the Example Application Program Downloading and Running You cannot go online to the processor directly over the DeviceNet network. The following sections provide examples of downloading the Program and running the program using the following networks: • ControlNet (page 6-4) •... - Page 91 Creating and Running the Example Application Program You must also place the 1747-SDN scanner in run IMPORTANT mode by setting the Run Bit (bit 0) in the scanner’s command register. The command register is located at word 0 in the Output image table. 6.
-
Page 92: Downloading And Running The Program Via An Ethernet Network
Creating and Running the Example Application Program Downloading and Running the Program via an Ethernet Network To communicate with your SLC 5/05 processor over IMPORTANT an Ethernet network you must first configure the processor’s Ethernet communications channel and assign it a unique IP address. See Appendix B for information on configuring the Ethernet communications channel. - Page 93 Creating and Running the Example Application Program You must also place the 1747-SDN scanner in run IMPORTANT mode by setting the Run Bit (bit 0) in the scanner’s command register. The command register is located at word 0 in the Output image table. 6.
-
Page 94: Downloading And Running The Program Via A Dh+ Network
Creating and Running the Example Application Program Downloading and Running the Program via a DH+ Network Follow the procedure below to download and run the example program via a DH+ network. 1. Click on the Comms menu in RSLogix 500 and select System Communications. -
Page 95: What's Next
Creating and Running the Example Application Program 6. Double-click on the O0 - OUTPUT file under the Data Files folder. You will see the 1747-SDN module’s command register (file O:2.0 below). 7. Set bit 0 in the command register to "1", as shown above. 8. - Page 96 6-10 Creating and Running the Example Application Program Publication 1747-6.5.5 - August 2000...
-
Page 97: Troubleshooting
Chapter Troubleshooting The 1747-SDN interface module is provided with LED diagnostic indicators on its front panel. The diagnostics provided by these indicators are described in this chapter. For information about See page Module Status Indicator Network Status Indicator Numeric Display Code Summary Module Status Indicator The bicolor (green/red) Module Status indicator (MODULE) indicates whether the 1747-SDN module has power and is functioning properly. -
Page 98: Network Status Indicator
Troubleshooting Network Status Indicator The bicolor (green/red) network status indicator (NET) provides troubleshooting information about the DeviceNet channel communication link. Table 7.B - Network Status Indicator If the NET Then Which indicates Take this action indicator is: The device has no power or the The channel is disabled for Power-up the module, provide network power channel is disabled for communication... -
Page 99: Numeric Display Code Summary
Troubleshooting Numeric Display The 1747-SDN module uses numeric codes to display diagnostic information about its status. The display flashes at one second Code Summary intervals. The following table summarizes the meanings of the numeric codes. Table 7.C - Numeric Display Code Summary Numeric Description Take this action... - Page 100 Troubleshooting Table 7.C - Numeric Display Code Summary Numeric Description Take this action Code Run time data size returned from slave Check slave device installation and device is not the size expected. configuration. Device is producing idle state data Check device configuration/slave node while the scanner is in Run Mode.
-
Page 101: Data Map Example
Appendix Data Map Example What This Appendix This appendix illustrates a basic mapping example that connects a DeviceNet network to 62 simple sensor-type devices. Each device Contains sends one data byte that contains one data bit and one status bit. These are given in response to a strobe message. -
Page 102: Example Framework
Data Map Example Example Framework This example adheres to the following structure: • there cannot be any 1771-SDN scanners or other 1747-SDNs on that network • DeviceNet devices may reside only at nodes 1-62 • address 0 must be used for the scanner •... - Page 103 Data Map Example The status and data bits for each scanned device are mapped to the scanner’s DeviceNet Message discrete input data table. Data bits are mapped in the first four words while from Node #11 status bits are mapped in the next four words of the table. The bit numbering for device data bits begins with 0.
-
Page 104: Example Output Mapping Scheme
Data Map Example Example Output Mapping This example’s output mapping scheme is a simplified and fixed map of the discrete outputs and data from the device output data table to Scheme DeviceNet devices. Devices present in the default database are strobed only; therefore, the output data-map bits are mapped into each network’s strobe message. - Page 105 Data Map Example The processor writes output data for each scanned device in the scanner’s discrete output data table. The scanner then maps each bit into a strobe 1747-SDN Output Strobe Message message that is sent to all scanned devices. The bit number, where a particular The strobe message contains one bit for device’s data is mapped, directly corresponds to that device’s MAC ID.
- Page 106 Data Map Example Publication 1747-6.5.5 - August 2000...
-
Page 107: Configuring The M0/M1 Files Using
Appendix Configuring the M0/M1 Files Using RSLogix 500 RSLogix 500 To enable pass-through access using a SLC 500 processor, you must configure the M0 and M1 files associated with the 1747-SDN module I/O Configuration at a minimum length of 361 words. Use the following procedure to configure the 1747-SDN’s M0 and M1 files using RSLogix 500 software. - Page 108 Configuring the M0/M1 Files Using RSLogix 500 4. Double-click on the 1747-SDN module. The Advanced I/O Configuration window will open. 5. Set the MO Length and the M1 Length to 361 (or greater) as shown above. 6. Click on the OK button. 7.
-
Page 109: Configuring The Rs-232 Port Using Rslogix 500
Appendix Configuring the Processor’s RS-232 Port for the ControlNet Interface Before you can communicate with your SLC 500 processor over a ControlNet network, you must configure channel 0 (the RS-232 serial port) of the processor to match the serial port settings of the 1747-KFC15 ControlNet Interface Module. - Page 110 Configuring the Processor’s RS-232 Port for the ControlNet Interface The Channel Configuration window will open. 3. Make sure the Channel 0 Mode: is “System.” 4. Select the Chan. 0 - System tab. The Channel 0 -System configuration page will open. 5.
- Page 111 Configuring the Processor’s RS-232 Port for the ControlNet Interface For the example application we used the following settings: Driver DF1 Full-Duplex Error Detection Baud 19200 Embedded Responses Enabled Parity NONE Duplicate Packet Detect Enabled (checked) Source ID ACK Timeout (x20 ms) Control Line No Handshaking NAK Retries ENQ Retries...
- Page 112 Configuring the Processor’s RS-232 Port for the ControlNet Interface Publication 1747-6.5.5 - August 2000...
-
Page 113: Configuring The Processor's
Appendix Configuring DH+ Communications Configuring the DH+ Before you can communicate with the SLC 5/04 processor over a DH+ network, the processor’s DH+ communications channel (Channel 1) Communications Channel must be compatible with your network. The SLC 5/04 processor’s default Channel 1 settings are: Driver Baud Rate 56.7K... - Page 114 Configuring DH+ Communications The Channel Configuration window will open. 3. Select the Chan 1 - System tab. 4. Set the DH+ parameters to match your network. We used the settings shown above (the default settings). 5. Click on Apply, then click on OK. The new Channel Configuration will be applied to the processor.
-
Page 115: Configuring Slc 5/05 Ethernet Communications
Appendix Configuring SLC 5/05 Ethernet Communications Configuring the Ethernet Before you can communicate with the SLC 5/05 processor over an Ethernet network, you must configure the processor’s Ethernet Communications Channel communications channel (Channel 1). • If you are also interfacing your processor to a ControlNet network via a 1747-KFC15 module, you can configure the communications via the ControlNet network. - Page 116 Configuring SLC 5/05 Ethernet Communications The Channel Configuration window will open. 3. Select the Chan 1 - System tab. 4. Make sure the BOOTP Enable box is not checked (i.e., disable BootP). 5. Enter your processor’s unique IP address in the space provided. We used 130.130.130.2 for the example application.
- Page 117 Configuring SLC 5/05 Ethernet Communications 6. Leave the Subnet Mask at the default value. The Hardware Address is filled in by the software. 7. Click on the Apply button and then on OK. The new Channel Configuration will be applied to the processor. You can also download the channel configuration to your processor along with the example application program in chapter 6.
- Page 118 Configuring SLC 5/05 Ethernet Communications Publication 1747-6.5.5 - August 2000...
-
Page 119: Configuring The Df1 Driver Using Rslinx
Appendix Configuring the SLC 500 Processor’s Communication Channels Using a DF1 Driver The SLC 500 processors used for the examples in this manual are provided with an RS-232 serial port (Channel 0) and either a Data Highway Plus port (SLC 5/04) or an Ethernet port (SLC 5/05) as channel 1. - Page 120 Configuring the SLC 500 Processor’s Communication Channels Using a DF1 Driver The following window will appear. 3. Select RS232 DF1 Devices from the pull-down list as shown above and click on Add/New. You will be prompted to select a name for the new driver. 4.
- Page 121 Configuring the SLC 500 Processor’s Communication Channels Using a DF1 Driver The Configure Allen-Bradley DF1 Communications Device window will open. 5. Select the serial communications port on your computer that you wish to use (e.g., COM2). 6. Under the Device type, select SLC-CH0/Micro/PanelView. If you connect an RS-232 cable between the selected COM port on your PC and Channel 0 (the RS-232 port) on your SLC 5/04, you can click on...
-
Page 122: Configuring The Slc
Configuring the SLC 500 Processor’s Communication Channels Using a DF1 Driver The new driver will be added to the list of configured drivers. (Your list will contain the drivers you have configured on your system.) 9. Close RSLinx. You can now use the DF1 driver to configure the SLC 500’s communications channels using RSLogix 500 software. - Page 123 Configuring the SLC 500 Processor’s Communication Channels Using a DF1 Driver 4. Click on OK. On the left side of the RSLogix 500 screen you will see the Project window. 5. Double-click on Channel Configuration under the Controller folder. The Channel Configuration window will open. 6.
- Page 124 Configuring the SLC 500 Processor’s Communication Channels Using a DF1 Driver Publication 1747-6.5.5 - August 2000...
-
Page 125: Installing And Configuring The Dh+ Communications Driver
Appendix Installing and Configuring the DH+ Communications Driver The examples in this manual using Data Highway Plus (DH+) were performed with a 1784-KTX communication interface card installed in the personal computer that was used as the programming terminal. This appendix describes how to install and configure the 1784-KTX card. -
Page 126: Configuring The 1784-Ktx Communications Driver
Installing and Configuring the DH+ Communications Driver Configuring the 1784-KTX After installing the card in the computer, you must run RSLinx to configure the communications driver. Communications Driver 1. Start RSLinx. 2. From the Communications menu select Configure Drivers. The Configure Drivers window will appear: 3. - Page 127 Installing and Configuring the DH+ Communications Driver 5. Enter the following configuration: Device Type KTX(D) Network Station Name RSLinx Station Number Board Address D700 None Interrupt DH+ Speed 57.6K Must match switch settings on car 6. Click on OK to save your settings. 7.
- Page 128 Installing and Configuring the DH+ Communications Driver Publication 1747-6.5.5 - August 2000...
-
Page 129: Installing The 1784-Ktcx15 Communication Interface Card
Appendix Installing and Configuring the ControlNet Communications Driver The examples using ControlNet in this manual were performed with a 1784-KTCX15 communication interface card installed in the personal computer that was used as a programming terminal. This appendix describes how to install and configure the 1784-KTCX15 card. Installing the 1784-KTCX15 Perform the following steps to install the 1784-KTCX15 card in your personal computer. - Page 130 Installing and Configuring the ControlNet Communications Driver Front of Switches Front View Side View up (1) 240h shown down (0) (adjust for your system) up (1) down (0) These settings depend on the devices installed on your computer. We used the following addresses: Base I/O Space Address Base Memory Address D000:000...
- Page 131 Installing and Configuring the ControlNet Communications Driver The following window will appear: 3. Select the Allen-Bradley 1784-KT/KTC(X) device from the pull-down list and click on Add/New. 4. When prompted for a name for the new driver, select the default name assigned by the system, i.e., AB_KTC-1. The Configure Device window will appear: 5.
- Page 132 Installing and Configuring the ControlNet Communications Driver This is an unscheduled device. For maximum efficiency, set its address higher than the highest scheduled address on your network. Modify as necessary for your system. 6. Click on OK to save your settings. 7.
- Page 133 Index A-4 to A-5 example output mapping example example characteristics P-1 to P-8 about this user manual A-4 to A-5 example framework audience 2-4 to 2-7 data mapping 4-12 to 4-15 automapping 2-5, 2-7 input data example output data example 1-8 to 1-9 data tables background poll ratio...
- Page 134 Index 3-2 to 3-4 SLC 500 processor configuring the RS-232 port questions or comments about manual establishing DH+ communications identifying processor features 3-3 to 3-4 installing an Ethernet processor RediSTATION help 2-4 to 2-5 data mapping local product support 2-5, 2-7 input data Rockwell Automation support output data...
- Page 135 Allen-Bradley Publication Problem Report If you find a problem with our documentation, please complete and return this form. Pub. Name SLC 500 DeviceNet Scanner Module User Manual Cat. No. 1747-SDN Pub. No. 1747-6.5.5 Pub. Date August 2000 Part No. 955134-56...
- Page 136 Other Comments PLEASE FOLD HERE NO POSTAGE NECESSARY IF MAILED IN THE UNITED STATES BUSINESS REPLY MAIL FIRST-CLASS MAIL PERMIT NO. 18235 CLEVELAND OH POSTAGE WILL BE PAID BY THE ADDRESSEE 1 ALLEN BRADLEY DR MAYFIELD HEIGHTS OH 44124-9705...
- Page 138 Back Cover Publication 1747-6.5.5 - August 2000 PN 955134-56 Supersedes Publication 1747-6.5.2- - May 1997 © 2000 Rockwell International Corporation. Printed in the U.S.A.
Need help?
Do you have a question about the SLC 500 DeviceNet and is the answer not in the manual?
Questions and answers