Table of Contents
Advertisement
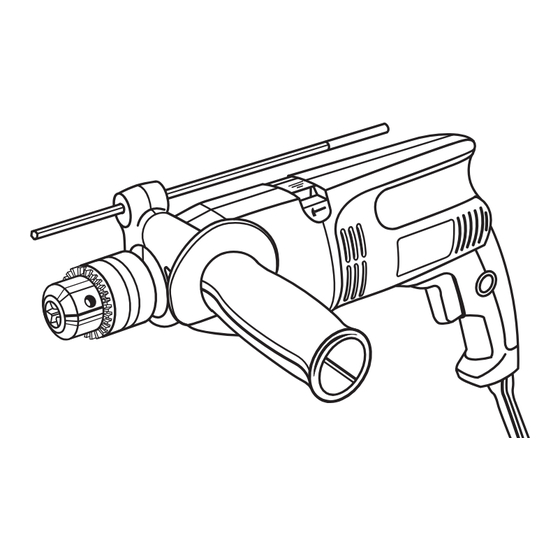
Your new hammer drill has been engineered and manufactured to Ryobi's high standard for dependability, ease of
operation, and operator safety. Properly cared for, it will give you years of rugged, trouble-free performance.
WARNING: To reduce the risk of injury, the user must read and understand the operator's manual.
Thank you again for buying a Ryobi hammer drill.
SAVE THIS MANUAL FOR FUTURE REFERENCE
OPERATOR'S MANUAL
HAMMER DRILL - 1/2 in. (13 mm)
D550H
VARIABLE SPEED – DOUBLE INSULATED
Advertisement
Table of Contents

Summary of Contents for Ryobi D550H
- Page 1 Your new hammer drill has been engineered and manufactured to Ryobi's high standard for dependability, ease of operation, and operator safety. Properly cared for, it will give you years of rugged, trouble-free performance. WARNING: To reduce the risk of injury, the user must read and understand the operator’s manual.
-
Page 2: Table Of Contents
Safety, performance, and dependability have been given top priority in the design of this hammer drill making it easy to maintain and operate. The operation of any power tool can result in foreign objects being thrown into your eyes, WEAR YOUR which can result in severe eye damage. -
Page 3: Electrical Safety
GENERAL SAFETY RULES WARNING: Read and understand all instructions. Failure to fol- low all instructions listed below, may result in electric shock, fire and/or serious personal injury. SAVE THESE INSTRUCTIONS WORK AREA ■ Keep your work area clean and well lit. Cluttered benches and dark areas invite accidents. -
Page 4: Specific Safety Rules
GENERAL SAFETY RULES SERVICE ■ Tool service must be performed only by quali- fied repair personnel. Service or maintenance per- formed by unqualified personnel could result in a risk of injury. SPECIFIC SAFETY RULES Hold tool by insulated gripping surfaces when performing an operation where the cutting tool may contact hidden wiring or its cord. -
Page 5: Symbol Meaning
Important: Some of the following symbols may be used on your tool. Please study them and learn their meaning. Proper interpretation of these symbols will allow you to operate the tool better and safer. SYMBOL NAME Volts Amperes Hertz Watt Minutes Alternating Current No Load Speed... -
Page 6: Specifications
■ If any parts are damaged or missing, please call 1-800-525-2579 for assistance. You may use your hammer drill for the purposes listed below: ■ Hammer drilling in concrete, brick, or other masonry. ■ Drilling in wood. ■ Drilling in ceramics, plastics, fiberglass, and laminates. -
Page 7: Features
Your hammer drill has a conveniently located trigger switch. LOCK-ON The hammer drill contains a lock-on feature that allows you to lock the drill on when you operate it continuously for extended periods of time. FEATURES VARIABLE SPEED This tool has a variable speed switch that delivers higher speed with increased trigger pressure. - Page 8 FEATURES MODE DEPTH SELECTOR GAUGE ROD LOCK-ON BUTTON SWITCH HANDLE TRIGGER ASSEMBLY CHUCK Fig. 1 WARNING: Do not attempt to modify this tool or create accessories not recommended for use with this tool. Any such alteration or modification is misuse and could result in a hazardous condition leading to possible serious personal injury.
-
Page 9: Removing Bits
NOTE: To open the chuck jaws, turn the chuck collar counterclockwise. To close the chuck jaws, turn the chuck collar clockwise. ■ Raise the front of the drill to keep the drill bit from falling out of the chuck jaws. WARNING: Do not insert a drill bit into the chuck jaws and tighten as shown in Figure 3. - Page 10 ■ Loosen the handle assembly by turning the handle counterclockwise. ■ Adjust the depth gauge rod so that the drill bit ex- tends beyond the end of the rod to the required drilling depth. ■ Tighten the handle assembly by turning the handle clockwise.
-
Page 11: Adjusting The Speed
ADJUSTING THE SPEED See Figure 7. The hammer drill has a two-speed knob that provides a high speed of approximately 3,000 RPM and a low speed of approximately 1,000 RPM (stated speeds are with the trigger switch in the “Full-on” position). - Page 12 ■ Plug the hammer drill into a power supply. ■ Hold the drill firmly and place the bit at the point to be drilled. ■ Depress the switch trigger to start the drill.
-
Page 13: Operation
The oil will prolong the life of the bit and increase the drilling action. WARNING: When servicing use only identical Ryobi replacement parts. Use of any other parts may create a hazard or cause product damage. GENERAL Avoid using solvents when cleaning plastic parts. -
Page 14: Maintenance
TIGHTENING THE CHUCK See Figures 12 and 13. The chuck may become loose on the spindle and begin to shake when using the drill. Also, the chuck screw may become loose causing the chuck jaws to bind and prevent them from closing. - Page 15 NOTES...
-
Page 16: Parts, Ordering, And Service
Ryobi Authorized Service Center. Tool service must be performed only by qualified repair personnel. Be sure to provide all pertinent facts when you call or visit. Please call 1-800-525-2579 for your nearest Ryobi Authorized Service Center. You can also check our Web site at www.ryobitools.com for a complete list of Authorized Service Centers.


Need help?
Do you have a question about the D550H and is the answer not in the manual?
Questions and answers