Table of Contents
Advertisement
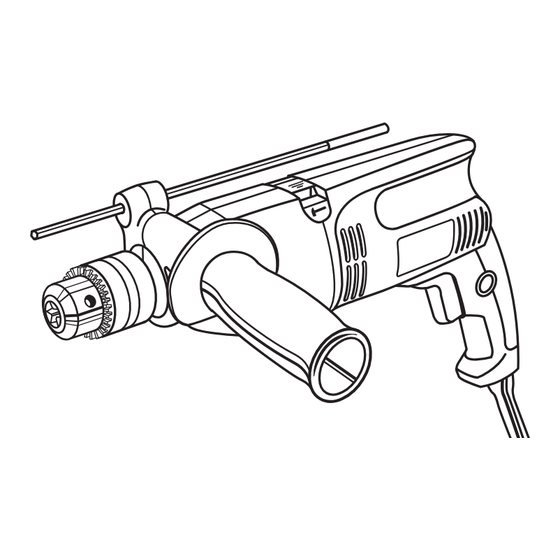
Your hammer drill has been engineered and manufactured to Ryobi's high standard for dependability, ease of operation,
and operator safety. When properly cared for, it will give you years of rugged, trouble-free performance.
WARNING:
To reduce the risk of injury, the user must read and understand the operator's manual before using
this product.
Thank you for buying a Ryobi product.
SAVE THIS MANUAL FOR FUTURE REFERENCE
OPERATOR'S MANUAL
1/2 in. HAMMER DRILL
VARIABLE SPEED
DOUBLE INSULATED
D551H
Advertisement
Table of Contents

Summary of Contents for Ryobi D551H
- Page 1 Your hammer drill has been engineered and manufactured to Ryobi’s high standard for dependability, ease of operation, and operator safety. When properly cared for, it will give you years of rugged, trouble-free performance. WARNING: To reduce the risk of injury, the user must read and understand the operator’s manual before using this product.
-
Page 2: Table Of Contents
n Introduction ... 2 n General Safety Rules ... 3-4 n Specific Safety Rules... 4 n Symbols... 5-6 n Electrical ... 7 n Features... 8-9 n Assembly ... 10 n Operation... 10-14 n Maintenance ... 14-15 n Parts Ordering / Service ... 16 This tool has many features for making its use more pleasant and enjoyable. -
Page 3: Electrical Safety
WARNING: Read and understand all instructions. Failure to follow all instructions listed below, may result in electric shock, fire and/or serious personal injury. SAVE THESE INSTRUCTIONS WORK AREA n Keep your work area clean and well lit. Cluttered benches and dark areas invite accidents. n Do not operate power tools in explosive atmospheres, such as in the presence of flammable liquids, gases, or dust. -
Page 4: Specific Safety Rules
SERVICE n Tool service must be performed only by qualified repair personnel. Service or maintenance performed by unqualified personnel may result in a risk of injury. n Hold tool by insulated gripping surfaces when performing an operation where the cutting tool may contact hidden wiring or its own cord. -
Page 5: Symbols
Some of the following symbols may be used on this tool. Please study them and learn their meaning. Proper interpreta- tion of these symbols will allow you to operate the tool better and safer. SYMBOL NAME Volts Amperes Hertz Watt Minutes Alternating Current Direct Current... - Page 6 The following signal words and meanings are intended to explain the levels of risk associated with this product. SYMBOL SIGNAL DANGER: WARNING: CAUTION: CAUTION: SERVICE Servicing requires extreme care and knowledge and should be performed only by a qualified service technician. For service we suggest you return the product to your nearest AUTHORIZED SERVICE CENTER for repair.
-
Page 7: Extension Cords
DOUBLE INSULATION Double insulation is a concept in safety in electric power tools, which eliminates the need for the usual three- wire grounded power cord. All exposed metal parts are isolated from the internal metal motor components with protecting insulation. Double insulated tools do not need to be grounded. -
Page 8: Product Specifications
PRODUCT SPECIFICATIONS Chuck Capacity...5/64 in. - 1/2 in. Hammer Speed ... Low (0 - 16,000 BPM*) No Load Speed ... Low (0 - 1,000/min.) Input ...120 V, 60 Hz, AC only, 5.5 Amps Net Weight... 5.75 lbs. *Blows Per Minute DEPTH GAUGE ROD CHUCK... -
Page 9: Know Your Hammer Drill
A chuck key is provided for use when installing or removing bits. It is also used when removing the chuck. DEPTH GAUGE ROD A depth gauge rod is installed on the hammer drill to assist you in controlling the depth of drilled holes. ERGONOMIC DESIGN... -
Page 10: Packing List
Do not discard the packing material until you have care- fully inspected and satisfactorily operated the tool. n If any parts are damaged or missing, please call 1-800-525-2579 for assistance. PACKING LIST Hammer Drill Carrying Case Operator’s Manual Warranty Registration Card WARNING: Do not allow familiarity with tools to make you care- less. -
Page 11: Removing Bits
NOTE: To open the chuck jaws, turn the chuck collar counterclockwise. To close the chuck jaws, turn the chuck collar clockwise. n Raise the front of the drill to keep the drill bit from falling out of the chuck jaws. WARNING: Do not insert a drill bit into the chuck jaws and tighten as shown in Figure 3. -
Page 12: Adjusting The Speed
Loosen the handle assembly by turning the handle coun- terclockwise. n Adjust the depth gauge rod so that the drill bit extends beyond the end of the rod to the required drilling depth. n Tighten handle assembly by turning handle clockwise. - Page 13 NOTE: The design of the switch will not permit changing the direction of rotation while the drill is running. Release the switch trigger and allow the drill to stop before chang- ing its direction. n For forward rotation: Move the lever to the left.
-
Page 14: General Maintenance
Plug the hammer drill into a power supply. n Hold the drill firmly and place the bit at the point to be drilled. n Depress the switch trigger to start the drill. -
Page 15: Removing The Chuck
See Figures 12 - 13. The chuck may become loose on the spindle and begin to shake when using the drill. Also, the chuck screw may become loose, causing the chuck jaws to bind and prevent them from closing. To tighten the chuck: n Unplug the hammer drill. -
Page 16: Parts Ordering / Service
Ryobi Authorized Service Center. Be sure to provide all pertinent facts when you call or visit. Please call 1-800-525-2579 for your nearest Ryobi Authorized Service Center. You can also check our web site at www.ryobitools.com for a complete list of Authorized Service Centers.


Need help?
Do you have a question about the D551H and is the answer not in the manual?
Questions and answers