Table of Contents
Advertisement
This new drill has been engineered and manufactured to Ryobi's high standard for dependability, ease of operation,
and operator safety. When properly cared for, the drill will give you years of rugged, trouble-free performance.
WARNING
: To reduce the risk of injury, the user must read and understand the operator's manual before
using this product.
Thank you for buying a Ryobi product.
SAVE THIS MANUAL FOR FUTURE REFERENCE
OPERATOR'S MANUAL
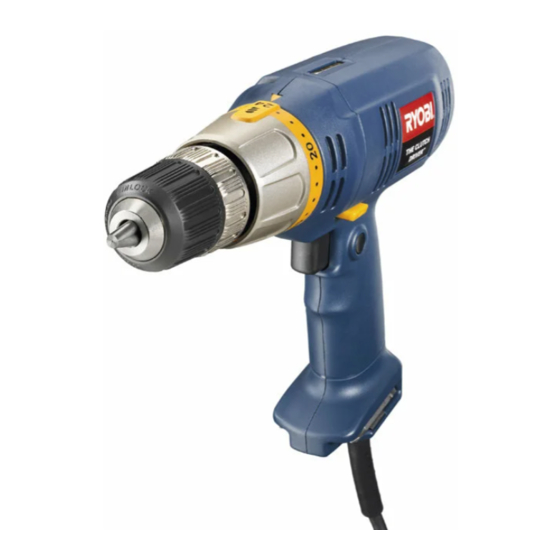
3/8 in. Drill-Driver
D45CK
DOUBLE INSULATED
Advertisement
Table of Contents

Summary of Contents for Ryobi D45CK
- Page 1 This new drill has been engineered and manufactured to Ryobi’s high standard for dependability, ease of operation, and operator safety. When properly cared for, the drill will give you years of rugged, trouble-free performance. WARNING : To reduce the risk of injury, the user must read and understand the operator's manual before using this product.
-
Page 2: Table Of Contents
n Introduction ... 2 n General Safety Rules...3-4 n Specific Safety Rules ... 4 n Symbols ...5-6 n Electrical... 7 n Features...8-9 n Operation...9-13 n Maintenance... 14 n Exploded View and Repair Parts List ... 15 n Parts Ordering / Service ... 16 This tool has many features for making its use more pleasant and enjoyable. -
Page 3: General Safety Rules
WARNING Read and understand all instructions. Failure to follow all instructions listed below, may result in electric shock, fire and/or serious personal injury. SAVE THESE INSTRUCTIONS WORK AREA n Keep your work area clean and well lit. Cluttered benches and dark areas invite accidents. n Do not operate power tools in explosive atmospheres, such as in the presence of flammable liquids, gases, or dust. -
Page 4: Additional Safety Rules
SERVICE n Tool service must be performed only by qualified re- pair personnel. Service or maintenance performed by unqualified personnel may result in a risk of injury. n Hold tool by insulated gripping surfaces when per- forming an operation where the cutting tool may contact hidden wiring or its own cord. -
Page 5: Symbols
Some of the following symbols may be used on this tool. Please study them and learn their meaning. Proper interpreta- tion of these symbols will allow you to operate the tool better and safer. SYMBOL NAME Volts Amperes Hertz Watt Minutes Alternating Current Direct Current... - Page 6 The following signal words and meanings are intended to explain the levels of risk associated with this product. SYMBOL SIGNAL DANGER: WARNING: CAUTION: CAUTION: SERVICE Servicing requires extreme care and knowledge and should be performed only by a qualified service technician. For service we suggest you return the product to your nearest AUTHORIZED SERVICE CENTER for repair.
-
Page 7: Extension Cords
DOUBLE INSULATION Double insulation is a concept in safety in electric power tools, which eliminates the need for the usual three-wire grounded power cord. All exposed metal parts are isolated from the internal metal motor components with protecting insulation. Double insulated tools do not need to be grounded. WARNING: The double insulated system is intended to protect the user from shock resulting from a break in the tool's in-... -
Page 8: Specifications
CHUCK SCREWDRIVER BITS BIT STORAGE AREA FEATURES KEYLESS CHUCK Your drill-driver has a keyless chuck that allows you to 1/16 in. to 3/8 in. hand tighten or release drill bit in the chuck jaws. SWITCH Variable Speed To turn your drill-driver ON, depress the switch trigger. -
Page 9: Lock-On Button
Drilling in ceramics, plastics, fiberglass, and lami- nates. WARNING: If any parts are missing, do not operate your drill-driver until the missing parts are replaced. Failure to do so could result in possible serious personal injury. LOCK-ON BUTTON See Figure 2. -
Page 10: Installing Bits
4. n Tighten the chuck jaws on drill bit. n To tighten the chuck jaws on drill bit; grasp and hold the collar of the chuck with one hand, while rotating the chuck body with your other hand. -
Page 11: Removing Bits
WARNING: Make sure to insert drill bit straight into chuck jaws. Do not insert drill bit into chuck jaws at an angle and then tighten, as shown in Figure 5. This could cause drill bit to be thrown from drill, resulting in possible serious personal injury or damage to the chuck. - Page 12 If not prepared, this loss of control can result in possible serious injury. When drilling metals, use a light oil on the drill bit to keep it from overheating. The oil will prolong the life of the bit and increase the drilling action.
-
Page 14: Maintenance
WARNING: When servicing use only identical Ryobi replacement parts. Use of any other parts may create a hazard or cause product damage. WARNING: The tool should never be connected to a power supply when you are assembling parts, making adjustments, cleaning, performing maintenance, or when the tool is not in use. -
Page 15: Exploded View And Repair Parts List
RYOBI 3/8 in. (10 mm) DRILL-DRIVER – MODEL NO. D45CK The model number will be found on a plate attached to the motor housing. Always mention the model number in all correspondence regarding your DRILL-DRIVER or when ordering parts. SEE BACK PAGE FOR PARTS ORDERING INSTRUCTIONS Key No. -
Page 16: Parts Ordering / Service
Ryobi Authorized Service Center. Be sure to provide all pertinent facts when you call or visit. Please call 1-800-525-2579 for your nearest Ryobi Authorized Service Center. You can also check our website at www.ryobitools.com for a complete list of Authorized Service Centers.


Need help?
Do you have a question about the D45CK and is the answer not in the manual?
Questions and answers