mectron Piezosurgery Use And Maintenance Manual
Hide thumbs
Also See for Piezosurgery:
- Cleaning and sterilization manual (134 pages) ,
- Cleaning manual (204 pages)

Related Manuals for mectron Piezosurgery


Summary of Contents for mectron Piezosurgery
- Page 1 Manuale d’uso e manutenzione Manual of use and maintenance Gebrauchs- und Wartungshandbuch Notice d’utilisation et d’entretien Manual de uso y mantenimiento...
-
Page 2: Table Of Contents
ASSEMBLY, CONFIGURATION AND USE 5.1 Safety measures to take before using 5.2 Assembly and switching on the system 5.2.1 Additional earth connection 5.2.2 Power supply cable connection 5.2.3 Footswitch - stirrup opening 5.2.4 Connecting the footswitch connector to the body of the device 5.2.5 Insertion of the poles for supporting the physiological solution 5.2.6 Switching on the device 5.2.7 Choice of language 5.2.8 Setting up the irrigation circuit 5.2.9 Piezosurgery Medical Handpiece connection 5.2.10 Operating instructions 5.3 Configuration of the system 5.3.1 Controls 5.3.2 Settings 5.3.3 Safety measures when using 5.4 Switching off the device - “SHUTDOWN” PERIODIC MAINTENANCE 6.1 Idle device 6.2... -
Page 3: Introduction
The purpose of this manual is to inform the operator of the safety measures, the installation procedures, the operating instructions and instructions for a correct maintenance of the device. ! DANGER This manual must be used in association with the “Instructions for Cleaning and Sterilizing” manual provided with the Piezosurgery Medical device. If any anomaly is detected, please contact Mectron Assistance Centre. Any attempt to tamper with or modify the device by the operator or non authorized personnel will invalidate the guarantee and relieve the Manufacturer of any responsibility in case of injury to people or damage to property. All the information and illustrations have been updated to the date of issue referred to on the last page. MECTRON has undertaken to continuously upgrade its products with possible modifications and accessories. In the case of discrepancies between the descriptions contained in this manual and the components of the device, contact your Retailer or MECTRON’s Post-sale Service. Type testing All devices produced by Mectron S.p.A. are rigorously checked and type tested in every component. During this type testing the components undergo a series of work cycles. This procedure guarantees the product’s reliability in all its components. Description of the device The Piezosurgery Medical device is a piezoelectric ultrasound device for bone cutting: the device uses piezoelectric ultrasound technology to generate mechanical micro vibrations which cut through mineralized structures without damaging the soft tissues. -
Page 4: Intended Use
Furthermore it is possible to execute osteotomy and osteoplastic techniques and drill holes in neurosurgery and surgery of the spinal column. The device can also be used with the aid of visual endoscopic techniques to carry out the above listed procedures. Do not use the Piezosurgery Medical device for any other purposes other than those above mentioned. On the contrary, injury to the patients and/or the users or to the device itself may be caused. Safety measures... - Page 5 Failure to comply with this prescription may cause serious injury to the patient, the operator and damage/faults to the device. ! DANGER: The removable panel placed on the back of the device is accessible only to Mectron specialized personnel. Users must not attempt to remove it or tamper with it as this would invalidate the guarantee and could damage the device. ! DANGER: Contraindications.
-
Page 6: Symbols Used
! DANGER: Injury to people. Make sure the cables do not hinder the free passage of people. ! DANGER: Injury to people. When the peristaltic pump flap is open (Pic.12 - Ref.C) do not activate the Piezosurgery Medical footswitch. The moving parts could injure the operator. ! WARNING: Do not use pointed or sharp objects on the lcd screen. This could damage the Touch Screen or the screen itself. A light pressure of the finger, even in a latex glove, allows the operator to choose the desired settings. ! WARNING: Contraindication. Do not use to treat metal or ceramic prostheses. The ultrasound vibrations could cause the de- cementation of the prostheses. - Page 7 The device and its accessories must not be disposed of or treated as solid urban waste Footswitch connector May be sterilized at a maximum temperature of 135° C Alternate Current Do not touch the moving parts with your fingers Quantity of product in the packing QTY. Non sterile Expiry date Production date Sterilized with ethylene oxide Disposable Do not use if the confection is damaged The product is made with components that do not contain latex Manual of use and maintenance...
-
Page 8: Identification Data
IDENTIFICATION DATA A precise description of the model and indication of the serial number of the device will enable prompt and effective answers from our Post-Sales Service. Always refer to this data when contacting Mectron’s Technical Assistance Service. Piezosurgery Medical device identification Each device is provided with an ID tag (Pic.1) which gives the technical characteristics and the serial number. This ID tag is placed on the back of the device. Further information is contained in paragraph 12.1 “Technical data”. Manufacturer Mectron S.p.A. Via Loreto 15/a 16042 Carasco -GE- Italy PIEZOSURGERY Medical 100-240 V 200 VA - 50/60 Hz. Intermittent operation UL 60601-1 CSA C22.2 No. 601-1 - E113015 ����... -
Page 9: Delivery
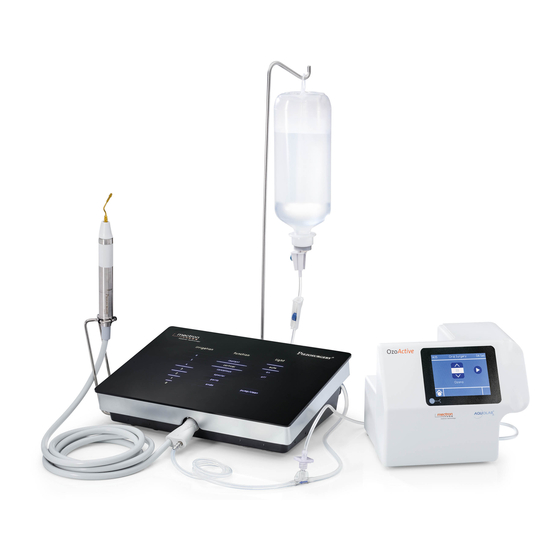
DELIVERY Delivery of the device The device contains electronic components which could be damaged if knocked about, even when properly packed. Therefore transport and stocking must be handled with particular care. Do not put one carton on top of another to avoid crushing the ones underneath. All goods forwarded by MECTRON have been carefully checked before sending. The device is delivered opportunely protected and packed. On receipt of the device, check for any eventual damage occurred during transport and if so, issue a complaint to the hauling firm. Standard list of materials supplied The Piezosurgery Medical device comes with a series of accessories: 1 x Device unit (Pic.3 - Ref.A). 1 x Footswitch with cable and pin jack (Pic.3 - Ref.G). 2 x Peristaltic pump (Pic.3 - Ref.D) 1 x Electric supply cable (Pic.3 - Ref.H). 2 x Bag support pole (Pic.3 - Ref.F). 1 x Operating instructions manual. 1 x Cleaning and Sterilizing instructions manual This list may vary during promotional campaigns. Accessories The following accessories are sold separately from the Piezosurgery Medical device. Sterile accessories (disposable): Inserts (Pic.3 - Ref.B) Piezosurgery Medical Irrigation Kit (Pic.3 - Ref.I). Non sterile accessories (multipurpose): Piezosurgery Medical handpieces complete with cord (Pic.3 - Ref.E) and connector protective cap. Piezosurgery Medical dynamometric keys (for fixing the inserts to the handpiece) (Pic.3 - Ref.C). Manual of use and maintenance... - Page 10 Pic.3 Manual of use and maintenance...
-
Page 11: Installation
Safety measures to apply in the installation phase ! DANGER: Interference with other devices. Il Piezosurgery Medical could emit frequencies which interfere with other devices in the vicinity. Install the Piezosurgery Medical device at an appropriate distance from the life support devices. -
Page 12: First Installation
First installation ! WARNING: Remove all the accessories before extracting the device body. NOTE: After unpacking the Piezosurgery Medical device, keep the cartons and packing material. If the device needs to be sent from one place o another the packing material purposely designed for this device will provide suitable protection. In order to guarantee a perfect performance of the device, this must be installed by a Mectron authorized technician. The device must be installed in a suitable and spacious place. The technician must carry out the following 5 points: 1. Unpack the device as shown in the following picture (Pic.4). Pic.4 Manual of use and maintenance... - Page 13 - Slightly push the peristaltic pump’s head towards the corresponding base (placed on the device) (Pic.5). Pic.5 - Gently rotate the pump’s head backwards and forwards to match the two parts. - Rotate clockwise until the pump’s head blocks with a “CLICK” and settles in a vertical position (Pic.6). CLICK! Pic.6 - Gently pull the pump’s head to make sure the pump is positioned correctly. 3. Explain to the user the safety measures to be considered for the installation to be executed correctly. 4. Fill in the installation form (including the purchaser’s data). 5. Send the compiled installation module to Mectron S.p.A. in order to guarantee the traceability of the device and the activation of the guarantee. Manual of use and maintenance...
-
Page 14: Assembly, Configuration And Use
! DANGER: Interference with other devices. The electrosurgical lancet may interfere with the correct functioning of the device. ! DANGER: Interference with other devices. Il Piezosurgery Medical could emit frequencies which interfere with other devices in the vicinity. Install the Piezosurgery Medical device at an appropriate distance from life support devices. Before operating always check the correct functioning of all devices. ! DANGER: Check the state of the device before using for treatment. - Page 15 ! DANGER: Inserts with water irrigation. Check the irrigation release before and during use. Make sure the liquid comes out of the insert’s point. Do not use the device if the physiological solution is not released or the pump is faulty. ! DANGER: Injury to people. Make sure the cables do not hinder the free passage of people. ! DANGER: Injury to people. When the peristaltic pump flap is open (Pic.12 - Ref.C) do not activate the Piezosurgery Medical footswitch. The moving parts could injure the operator. ! WARNING: Do not use pointed or sharp objects on the lcd screen. This could damage the touch screen or the screen itself. A light pressure of the finger, even in a latex glove, allows the operator to choose the desired settings. ! WARNING: Contraindication.
-
Page 16: Assembly And Switching On The System
Assembly and switching on the system Before operating it is necessary to assemble the system as described in the following steps: 5.2.1 Additional earth connection If required, insert additional earthing to the corresponding connector (Pic.7 - Ref.A). 5.2.2 Power supply cable connection Insert the power supply connector in the connector placed on the back of the device (Pic.7 - Ref.B) and then to the wall socket. Pic.7 Pic.8 Manual of use and maintenance... -
Page 17: Footswitch - Stirrup Opening
5.2.3 Footswitch - stirrup opening ! WARNING: The footswitch is specifically designed to be used only with the Piezosurgery Medical device. Only use original Piezosurgery Medical footswitch as otherwise damage or malfunction may occur. Rotate the metal stirrup until it is fixed in vertical position (Pic.8 - Ref.A). Rotate and manually fasten the lateral clamps to secure the stirrup in the correct position (Pic.8 - Ref.B). 5.2.4 Connecting the footswitch connector to the body of the device. Insert the connector of the footswitch cable into the corresponding connector placed on the back of the device and marked with the special symbol as indicated in Pic.9. To disconnect the footswitch from the device body, hold the connector, press the release tab and pull back. ! WARNING: Do not attempt to twist or rotate the connector of the footswitch cable while inserting or removing. -
Page 18: Insertion Of The Poles For Supporting The Physiological Solution
5.2.5 Insertion of the poles for supporting the physiological solution Insert the poles for supporting the physiological solution in the appropriate holes in the device (Pic.10). Pic.10 5.2.6 Switching on the device Switch on the device with the main switch placed on the back of the device (Pic.7 - Ref.C) making sure the footswitch is not pressed during this procedure. The device thus switches on. Manual of use and maintenance... -
Page 19: Choice Of Language
NOTE: The language may be modified only when the there is no handpiece inserted in the device. Pic.11 5.2.8 Setting up the irrigation circuit A. OPERATIONS TO CARRY OUT IN STERILE CONDITIONS: ! DANGER: The Piezosurgery Medical Irrigation Kit is guaranteed for a single use. Segregate and dispose of the kit according to the laws in force regulating hospital waste. ! DANGER: Before using the Piezosurgery Medical Irrigation Kit, check the integrity of the sterile packing and carefully inspect the product to exclude any eventual damage or faults. Do not use the irrigation kit if the packing has been tampered with or damaged. The irrigation kit loses its sterile condition if the packing is broken or damaged. If the packing is damaged, dispose of the kit. Do not attempt to sterilize or reuse the kit. - Page 20 ! DANGER: Contraindications. Check that the Piezosurgery Medical handpiece has been cleaned and sterilized before using. If it isn’t, do not use. ! DANGER: The Piezosurgery Medical handpiece (new or serviced) is not sterile when it is supplied and must therefore be carefully cleaned and sterilized (with the autoclave) before using. ! DANGER: After sterilizing the Piezosurgery Medical handpiece in the autoclave, wait until it has cooled down before using. ! WARNING: When the sterilization cycle is complete and before connecting the handpiece to the device body, make sure the electrical contacts of the handpiece-cord connector are perfectly dry. If necessary, dry the contacts by blowing compressed air for medical use. ! DANGER: After using, each handpiece-cord must be thoroughly cleaned and sterilized before using again, following the instructions contained in the “Cleaning and Sterilizing Instructions” manual supplied with the Piezosurgery Medical device.
-
Page 21: Piezosurgery Medical Handpiece Connection
7 Remove the protective cap from the perforator. Insert the perforator in the irrigation bag (Pic.12 - Ref.D). 8 Open the air inlet on the tube before operating. 9 Release the irrigation tube clamp, if this is closed. NOTE: Use the “PUMP” key on the lcd display console to fill the irrigation tube (see paragraph 5.3.2 - Phase 4). ! DANGER: Personal injuries. When the peristaltic pump flap is open (Pic.4 - Ref.C) never activate the Piezosurgery Medical footswitch. The moving parts may cause injury to the operator. ! DANGER: Only use original Mectron accessories and spares. Do not use silicone sterile tubes with characteristics different to those supplied by the manufacturer. (Silicone sterile tube for the peristaltic pump - Wall thickness: 1.6 mm - Internal diameter: 2.4 mm). ! DANGER: Before using the device, check that the irrigation tube clamp is released. After surgery, close the clamp before disconnecting the irrigation kit from the physiological bag. - Page 22 Do not force the insertion of the handpiece-cord connector into the connector of the device body as this can damage the connector of the handpiece-cord and/or that of the device. If the two connectors do not connect easily, they probably do not fit. Make sure the connector of the handpiece-cord matches that on the device and that it is correctly positioned as indicated by the dots (Pic.13) ! WARNING: Do not attempt to twist or rotate the handpiece-cord connector while inserting or removing the same. Twisting could cause damage to the connector. ! WARNING: To avoid damaging the Piezosurgery Medical Handpiece, connect and/or disconnect always holding only the connector. Never pull the cord. ! WARNING: Check that the Piezosurgery Medical Handpiece is properly connected before using the system. ! DANGER: Inserts with flow of liquids. In order to ensure the cooling of the handpiece, always activate with the irrigation circuit correctly installed and filled. To fill the irrigation circuit always use the PUMP key. Manual of use and maintenance...
-
Page 23: Operating Instructions
5.2.10 Operating instructions Screw on the insert. Choose the insert and manually screw onto the Piezosurgery Medical Handpiece (Pic.14). Pic.14 Fasten the insert. Use the Piezosurgery Medical dynamometric key to fasten the insert to the handpiece. For a correct use of the dynamometric key proceed as follows: - Position the insert in the Piezosurgery Medical dynamometric key as shown in Pic.15 - Hold the handpiece body firmly. - Hold the insert, firmly rotating the key clockwise until it clicks (the external part of the key rotates with respect to the handpiece with a mechanical “click”) (Pic.16). The insert is now fastened correctly. - Page 24 Screw - Clockwise Unscrew - Counterclockwise Pic.16 ! DANGER: Make sure that the insert is correctly fastened to the handpiece. This occurs when the Piezosurgery Medical dynamometric key used for fastening “clicks”. ! WARNING: While fastening the insert, never hold the terminal part of the handpiece or the cord, but only the plastic part of the handpiece itself (Pic.16). To fasten the insert correctly, hold the handpiece firmly and only rotate the dynamometric key. To remove the insert. Position the insert in the Piezosurgery Medical dynamometric key and rotate the key in anti- clockwise direction (Pic.16). Unscrew the insert. ! DANGER: Particular care is required in handling the sharp blades of the cutting inserts. The blades could cause injuries while fastening or removing these inserts. Manual of use and maintenance...
-
Page 25: Configuration Of The System
Configuration of the system 5.3.1 Controls ! WARNING: Do not use pointed or sharp objects on the lcd screen. This could damage the touch screen or the screen itself. A light pressure of the finger, even in a latex glove, allows the operator to choose the desired settings. The Piezosurgery Medical display has an integrated touch screen. The controls can be selected by a simple pressure of the finger on the screen in correspondence of the chosen key. The Piezosurgery Medical screen can be graphically divided into 3 sections: - The upper section, which shows the inserts with their picture, name and pertaining family (Pic.17 - Ref.A). - The central section, divided into 2 areas - left (Pic.17 - Ref.B) and right (Pic.17 - Ref.C) - which show the inserts selected and the settings for the 2 operating channels. - The lower section, which shows the control keys (LANGUAGE, PUMP and SHUTDOWN) and the indication of the preset language. Pic.17 Manual of use and maintenance... - Page 26 The functions which the user can select from the screen are the following: Pic.17 - Ref.D INFO button - Graphic display, upper section. Function Enables the operator to view the technical description of the corresponding insert. Pic.17 - Ref.E Page buttons - Graphic display, upper section. Function Enables the operator to change the view inserts page. Pic.17 - Ref.B Handpiece n° 1 work station - Graphic display central left section. Functions - Selection of power in relation to the bone to treat: CORTICAL: highly mineralized, dense bone. CANCELLOUS MEDIUM: average mineralization cancellous bone. CANCELLOUS LOW: low mineralization cancellous bone. DELICATE ANATOMY: bone with a maximum thickness of 1 mm or in proximity of neurological soft tissues. - Choice of quantity of liquid to deliver using the +/- keys in the IRRIGATION field.
-
Page 27: Settings
Phase 1: Choice of work channel. When no handpiece-cord is connected to the device, the two work stations display the wording: “CONNECT HANDPIECE” (Pic.18a - Ref.1). Connect the Piezosurgery Medical Handpiece in the desired work station (1 or 2), following the instructions contained in paragraph 5.2.9. When the handpiece-cord is inserted, “SELECT HANDPIECE” will appear in the central section (Pic.18b - Ref.2). After connecting the handpiece to the device body, the PUMP button will appear in the lower corner of the display (Pic.18b - Rif 3). - Page 28 Phase 2: Select insert. Selection of the insert is obtained in the upper section of the screen (Pic.17 - Ref.A) which shows the pictures of the insert to use. To do so it is possible to scroll the list of inserts using the “Page” buttons (Pic.17 - Ref.E), until the required insert is identified. If further information on the insert is required use the “INFO” button placed next to the insert itself. Press the picture of the required insert: the insert is shown in the central section of the chosen work station (Pic.20 - Ref.6) and the “CONFIRM” (Pic.20 - Ref.7) “CANCEL” (Pic.20 - Ref.8) buttons will appear. To change the insert selected, press the picture of a new insert from the list in the upper section of the screen (Pic.17 - Ref.A) Press the “CONFIRM” button to confirm the selection and proceed to the next step (Pic.21a) or press the “CANCEL” button to return to “Phase 1: Select work channel” (Pic.21b). ! WARNING: Check that the insert on the handpiece matches that selected and shown on the display. Pic.20 Pic.21a Pic.21b Manual of use and maintenance...
- Page 29 Phase 3: Channel use settings. By selecting the “CONFIRM” button, the readings predefined by the manufacturer relative to the selected handpiece will appear. The manufacturer also establishes the minimum and maximum readings within which operating settings of every specific insert may vary. In this phase the operator can set, within the established interval, the readings needed for the surgical operation to be executed.
- Page 30 NOTA Inserts with flow of liquid: If the operator tries to activate the channel without previously enabling the PUMP function, the device will display a warning message and will not be activated. Phase 5: Activating the work channel. ! WARNING: Before proceeding, check that the parameters set are the required ones. Press the “START” button (Pic.22 - Ref.13) to activate the channel and use the Piezosurgery Medical. A fixed yellow dot appears in place of the “START” button (Pic.24a - Ref.14) which indicates that the channel is ready to operate. Press the footswitch to activate the handpiece relative to the activated channel. The insert starts to vibrate according to the settings selected and the yellow dot start to flash, indicating a correct function of the device. Phase 6: Changing the settings.
-
Page 31: Safety Measures When Using
To ensure the cooling of the handpiece always activate it with the irrigation circuit correctly installed and filled. To fill the irrigation circuit, always use the PUMP key. ! WARNING: Intermittent function. A prolonged use may cause the handpiece to overheat. Please refer to paragraph 12.1 “Technical Data” for the average times of use (intermittent use). SAFETY IF THE INSERTS ! DANGER: Sterilization. The Piezosurgery Medical inserts are supplied sterilized. Sterilization is obtained by means of ethylene oxide (ETO). ! DANGER: Disposable. The Piezosurgery Medical inserts are disposable: these must be used only in a single operation on a single patient and then disposed of. The inserts must not be sterilized or reused. Segregate and dispose of according to the laws in force regulating hospital waste. ! DANGER: Prior to surgery. - Page 32 ! WARNING: Only use the Piezosurgery Medical dynamometric key to fasten and remove the insert from the handpiece. Do not use other instruments such as pliers, pincers, etc. ! WARNING: While fastening the insert, never hold the terminal part of the handpiece or the cord, but only the plastic part of the handpiece itself (Pic.16). To fasten the insert correctly, hold the handpiece firmly and only rotate the dynamometric key. ! DANGER: Do not change the insert while handpiece is functioning as this could cause possible injuries ! DANGER: I fan insert were to break while being used, it is necessary to take great care in recovering and removing all the fragments of the insert from the operating site. Remaining fragments may cause...
-
Page 33: Switching Off The Device - "Shutdown
Switching off the device - “SHUTDOWN” To switch off the device it is necessary to proceed as follows: Press the “SHUTDOWN” button (Pic.25 - Ref.A). A window appears at the center of the screen which asks the operator to confirm the choice of shutting down the work session (Pic.25). Press the “OK” button to switch off the device. The device will start the system shutdown process. To return to the previous step, press “NO”. The device will return to the previous shutdown request. When the writing “The device can now be turned off with the switch at the back. It is necessary to wait 4 seconds before switching the device on again”, appears, turn the power off by means of the main switch on the back of the device body (Pic.7 - Ref.C). The device will switch off. -
Page 34: Periodic Maintenance
PERIODIC MAINTENANCE Idle device If the device is not used for a few days follow the following recommendations: Disconnect the device from the power supply. Carry out the cleaning and sterilizing operations (see the “Cleaning and Sterilizing Instructions” manual supplied with the device). Power supply cable ! DANGER: Periodically check the integrity of the power supply cable. If any damage is detected replace with an original Piezosurgery Medical cable. Using other power supply cables may have a negative effect on the EMC electromagnetic compatibility results. Manual of use and maintenance... -
Page 35: Replacing The Fuses
REPLACING THE FUSES ! DANGER: Switch off the device. Before replacing the fuses, always switch off the device from the main switch (Pic.7 - Ref.C) and disconnect from the power supply. 1. Gently lever with a screwdriver placing the point on the seat of the fuse box under the power supply socket (Pic.26 - Ref.A). 2. Extract the fuse box (Pic.26 - Ref.B). 3. Replace the fuses, respecting the characteristics indicated on the ID tag placed on the back of the device. 4. Reinsert the fuse box in its lodging. ! DANGER: Take special care in respecting the technical characteristics of the fuses. The fuses must be of the 5x20mm T 2AL, 250V kind. Pic.26 Manual of use and maintenance... -
Page 36: Disposal Procedures And Precautions
DISPOSAL PROCEDURES AND PRECAUTIONS The device must be treated and disposed of as waste subject to separate collection. The purchaser has the faculty to return the used device to the retailer who will provide a new device. Contact Mectron S.p.A. for instructions for disposal. The non observance of the above points may entail sanctions in virtue of EC directive 2002/96/ ! DANGER: Hospital waste. The following objects should be treated as hospital waste: Inserts, at the end of each operation; Tube, at the end of each operation; Insert dynamometric key, when worn or broken. Handpiece-cord, when worn or broken. Manual of use and maintenance... -
Page 37: Inserts
INSERTS Inserts of various forms and sizes designed to meet the surgeons’ needs to execute different surgical procedures. Inserts are sold separately as accessories of the Piezosurgery Medical device. Inserts are disposable and are provided sterilized. Inserts for the Piezosurgery Medical device are divided into four categories: Inserts for Osteotomy Inserts with a sharp blade for effectively cutting through bone tissue. Inserts for Osteoplasty Inserts for remodeling and recovering bone fragments. Inserts for Drilling Inserts for drilling holes in mineralized structures. Inserts for Finishing Inserts with a diamond surface for a gentle action on the bone tissues. These inserts are used to finish the osteotomy in proximity of delicate anatomy such as nerves, vessels, membranes or muscles. -
Page 38: Description Of Shields, Alarms And Solutions
10 DESCRIPTION OF SHIELDS, ALARMS AND SOLUTIONS The device is provided with a diagnostics circuit which shows the activation of the shields and alarms on the display. In some cases it is necessary to contact technical assistance, making reference to error code “MED - XXX” displayed. Three types of error can be identified: 1. Blocking: Alarms which for safety reasons interrupt all the device’s operations inhibiting the use of the single channel or the entire device preventing any harm to the patient. 2. Non-blocking: Alarms which, for safety reasons, interrupt all the device’s operations, momentarily inhibiting the use of the single channel or the entire device. Confirmation of acknowledgment of the alarm is needed in order to continue. 3. Information messages: Alarms which indicate the presence of an anomaly, but do not block the device that continues to function either in normal conditions or in reduced function mode. NOTE: In case a non blocking error occurs on the channel in use, after confirming the alarm reading it is necessary to press the “START” button again to continue. - Page 39 Message Description Action needed MED - 022 Checksum error signal, firmware - The device is functioning Internal problem: please contact module alteration. properly: assistance contact as soon as possible - The device is not functioning properly: contact technical assistance immediately MED - 028 Anomaly in external power supply. Check that the settings are correct External power supply problem. and continue operating. Check the settings MED - 029 Module interface program Contact technical assistance Channel out of use execution error signal.
- Page 40 Action needed MED - 047 / MED - 048 Internal problem. “SHUTDOWN” the device then start it again. Internal problem. “SHUTDOWN” If the problem persists, contact the device then start it again MECTRON assistance. MED - 049 Data synchronization needed. “SHUTDOWN” the device then The data need to be start it again. synchronised. “SHUTDOWN” If the problem persists, contact the device then start it again...
-
Page 41: Problem-Solving
The power supply cable is faulty. Check that the power supply socket is working. Replace the power supply cable. The fuses are out of order. Replace the fuses (see chapter 7 “Replacing the fuses”). The device is switched on but The footswitch jack is not correctly Insert the footswitch jack correctly doesn’t work. The display does not inserted in the socket. in its socket. show any messages. The footswitch doesn’t work. Contact Mectron authorized technical assistance. When working a hiss is heard The insert is not correctly locked Unscrew the insert and screw back coming from the Piezosurgery on the handpiece. on correctly. Medical handpiece. The device works correctly but the Incorrect positioning of the tube in Check that the tube is inserted pump isn’t running properly. the peristaltic pump. correctly in the peristaltic pump (see paragraph 5.2.8). The pump is running correctly but The peristaltic pump flap is not Check that the peristaltic pump when it stops liquid seeps out of properly shut. flap is perfectly shut (see the handpiece. paragraph 5.2.8). When working no liquid comes out... - Page 42 Problem Possible cause Solution Insufficient power The insert is not correctly inserted Unscrew the insert and screw back on the handpiece (an error on correctly. message appears on the display). The insert is worn, broken or Replace the insert. deformed (an error message appears on the display). The rear green led light of the Switch off the device (see device is switched off paragraph 5.4). (Pic.7 - Ref.E). Wait at least 4 seconds before switching on the device. If the problem persists, contact Mectron authorized technical assistance Manual of use and maintenance...
-
Page 43: Technical Data And Electromagnetic Compatibility
30” ON 120” OFF without irrigation Power supply tension: 100-240 Vac 50/60 Hz. Max. power absorbed: 200 VA Fuses: Type: 5 X 20 mm T 2AL, 250V Work frequency: Automatic scanning from 24 KHz to 36 KHz Average power levels applied to the handpiece: 4 power variations are possible: CORTICAL CANCELLOUS MEDIUM CANCELLOUS LOW DELICATE ANATOMY Not all power variations can be used for every insert: the variations which cannot be selected are not viewed. Every power variation has 7 levels. The choice of level is allowed within the preset interval established by Mectron, in relation to the insert and power variation selected. Range of the peristaltic pump: There is a scale of 5 range levels, from 7 to 65 ml/min approximately. The choice of level is allowed within the preset interval established by Mectron, in relation to the insert and the type of cut selected. APC circuit protections: - No handpiece - Cord wire disconnected - Insert not locked properly or broken - Grounding protection activated Malfunction detection system: The display on the front indicates an anomaly detected and the corrective action to take (see ch.10 “Description of shields, alarms and solutions”) Operating conditions: From +10°C to +40°C. Relative humidity from 30% to 75%. -
Page 44: Electromagnetic Compatibility En 60601-1-2
12.2 Electromagnetic compatibility EN 60601-1-2 ! DANGER: Contraindications. Interference from other devices. An electrosurgical knife or other electrosurgical devices placed in the vicinity of the Piezosurgery Medical device may interfere with the correct functioning of the same device. ! DANGER: Contraindications. Interference with other devices. Even if conforming to EC standard 60601-1-2, the Piezosurgery Medical device may interfere with other devices. The Piezosurgery Medical device must not be used in proximity of, or piled with, other devices. However, if this were necessary, check and monitor the correct functioning of the device in that configuration. - Page 45 Guidance and manufacturer’s declaration - Electromagnetic immunity The Piezosurgery Medical device is designed to work in the electromagnetic environment specified below. The client or user of the Piezosurgery Medical device should always make sure that it is used only in such environment. Immunity test IEC 60601 Compliance level Electromagnetic Test level environment - Guidance Electrostatic ±6 kV contact The device continues Floors must be wood, discharge (ESD) ±8 kV air to work regularly and in concrete or ceramic. If the IEC 61000-4-2 safety. floor is lined with synthetic materials, the relative humidity should be at least 30 % Electrical fast ±2 kV for power supply The device continues The quality of the power transient/burst lines to work regularly and in supply should be that of IEC 61000-4-4 safety.
- Page 46 Guidance and manufacturer’s declaration - Electromagnetic immunity The Piezosurgery Medical device is designed to work in the electromagnetic environment specified below. The client or user of the Piezosurgery Medical should always make sure that it is used only in such environment. IEC 60601 Compliance Immunity test Electromagnetic environment - Guidance Test level level Portable or mobile RF communication device must not be used in close proximity of the product, including its cables, except when these respect the distances of separation recommended and calculated from the equation applicable to the frequency of the transmitter. Recommended distances of separation Conducted RF 3 Veff 3 Veff d = 1,2 √P IEC 61000-4-6 from150 kHz to 80 MHz Radiated RF 3 V/m 3 V/m d = 1,2 √P from 80 MHz to 800 MHz...
- Page 47 Recommended separation distances between portable and mobile RF communications equipment and the Piezosurgery Medical Device The Piezosurgery Medical device is designed to work in an electromagnetic environment in which RF radiated disturbances are kept under control. The purchaser or user of the Piezosurgery Medical device can contribute to prevent electromagnetic interference by ensuring a minimum distance between the RF mobile and cordless communication device (transmitters) and the Piezosurgery Medical device, as recommended below, in relation to the maximum output power of the radio-communication devices. Separation distance according to frequency of transmitter “m” Rated maximum output 150 kHz to 80 MHz 80 MHz to 800 MHz 800 MHz to 2,5 GHz power of transmitter “W” d = 1,2 √P d = 1,2 √P d = 2,3 √P 0,01 0,12...
-
Page 48: Guarantee
Mectron S.p.A. guarantees its products, if purchased new from a MECTRON retailer or importer, against material and manufacturing flaws for: 2 YEARS (TWO) from the date of installation and type testing with regard to the device; 1 YEAR (ONE) from the date of purchase with regard to the Piezosurgery Medical handpiece. During the period of validity of the guarantee, Mectron undertakes to repair (or, to its discretion, replace), free of charge, the parts which it acknowledges as being faulty. Mectron S.p.A. declines any responsibility for direct or in direct injury to people and damage to property in the following cases: The device is not used for the purpose for which it was designed. -
Page 49: Packing
14 PACKING To pack the device follow the steps indicated in Pic.27, after having removed the peristaltic pumps. The steps are also illustrated on the cardboard lid of the packing. ! WARNING: When packing, place particular attention on parts C and D since these are similar but differ in size and position in the packing. 9 cm 7 cm Pic.27 Manual of use and maintenance... - Page 50 ! WARNING: Remove the peristaltic pumps before packing the device. Press the tab of the peristaltic pump’s head (Pic.28) and rotate the head of the pump anticlockwise until it separates from the base. Pic.28 The indications contained herein are not binding and may be changed without prior notice. The Italian version of this manual is to be considered the original version which was subsequently translated in different languages. In the case of any discrepancy, the Italian version will prevail. Manual of use and maintenance...
- Page 51 Manual of use and maintenance...
- Page 52 Manufacturer Distributore Mectron S.p.a. Piezosurgery S.r.L. Via Loreto 15/A Via Portobello, 12 16042 Carasco (GE) Italy 16039 Sestri Levante -GE- Italy Tel. +39 0185 450863 Fax. +39 0185 42799 www.piezosurgery.com piezosurgery@piezosurgery.com Rivenditore - Reseller - Wiederverkäufer - Revendeur - Revendedor...
Need help?
Do you have a question about the Piezosurgery and is the answer not in the manual?
Questions and answers