Table of Contents
Advertisement
Quick Links
We thank you for choosing an Australian made
shed. For further assistance please visit our detailed
instructional video library at
Http://www.abscosheds.com.au/watch-videos
At ABSCO Industries we are always looking to be
number ONE, so please let us know what you think
of our instructions. Feedback makes us better.
feedback@absco.com.au
ABSCO INDUSTRIES
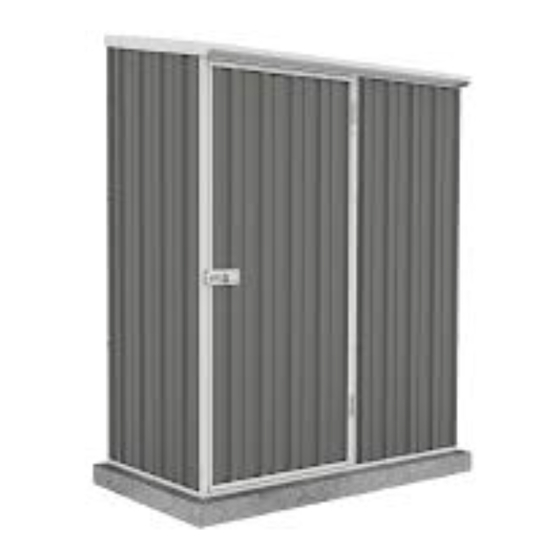
Absco Space Saver Shed
Assembly Instructions
Model: 15081SK
WHEN LAYING YOUR CONCRETE
SLAB, ENSURE THERE IS A
REBATED EDGE 25mm DEEP
AROUND THE PERIMETER
THIS WILL HELP WATER EGRESS
FROM THE BASE OF THE SHED
ASSEMBLY INSTRUCTION - MODEL: 15081SK 23/10/17
FRONT BASE
LENGTH: 1.52m
SIDE BASE
LENGTH: 0.78m
FRONT WALL
HEIGHT: 1.8m
REAR WALL
HEIGHT: 1.95m
BOTTOM CHANNEL
REBATED EDGE
75mm WIDE REBATE
CONCRETE SLAB
PAGE 1
Advertisement
Table of Contents

Related Manuals for Absco 15081SK


Summary of Contents for Absco 15081SK
- Page 1 For further assistance please visit our detailed instructional video library at Http://www.abscosheds.com.au/watch-videos At ABSCO Industries we are always looking to be number ONE, so please let us know what you think of our instructions. Feedback makes us better. feedback@absco.com.au...
-
Page 2: General Instructions
Do not erect your shed in windy conditions, ensure that the shed is securely anchored to a solid foundation immediately after construction is completed. · It is highly recommended to erect the shed with two or more people. ABSCO INDUSTRIES ASSEMBLY INSTRUCTION - MODEL: 15081SK 23/10/17 PAGE 2... -
Page 3: Component Description
L = 1513mm CHANNEL CHANNEL L = 1513mm L = 783mm ALL SHEETS HAVE PART NO.S LOCATED ON Part No. Here LOWER RIGHT OR UPPER LEFT CORNER OF COLORED SIDE AS SHOWN ABSCO INDUSTRIES ASSEMBLY INSTRUCTION - MODEL: 15081SK 23/10/17 PAGE 3... - Page 4 DRILL FAST038 SELF TAPPING SCREWS PACK 6P PACKET CONTAINING 220 SCREW PACK 6 PACK 6P - SCREW PACK 6 3/16 COUNTERSUNK 3.2 x 8mm SCREWS & NUTS BLIND POP RIVETS ABSCO INDUSTRIES ASSEMBLY INSTRUCTION - MODEL: 15081SK 23/10/17 PAGE 4...
- Page 7 Do not join components together at this location yet, as the screw may obstruct further assembly of other components ABSCO INDUSTRIES ASSEMBLY INSTRUCTION - MODEL: 15081SK 23/10/17 PAGE 7...
-
Page 8: Rear Panel Assembly
Absco Space Saver Shed INSTRUCTIONS Model: 15081SK AND VIDEOS 1. REAR PANEL ASSEMBLY ABSCO INDUSTRIES ASSEMBLY INSTRUCTION - MODEL: 15081SK 23/10/17 PAGE 8... -
Page 9: Side Panel Assembly
Absco Space Saver Shed INSTRUCTIONS Model: 15081SK AND VIDEOS 2. SIDE PANEL ASSEMBLY (TWO REQUIRED) Reverse side of Door Mullion ABSCO INDUSTRIES ASSEMBLY INSTRUCTION - MODEL: 15081SK 23/10/17 PAGE 9... -
Page 10: Roof Assembly
Absco Space Saver Shed INSTRUCTIONS Model: 15081SK AND VIDEOS 3. ROOF ASSEMBLY ABSCO INDUSTRIES ASSEMBLY INSTRUCTION - MODEL: 15081SK 23/10/17 PAGE 10... - Page 11 Model: 15081SK AND VIDEOS DOOR PANEL ASSEMBLY 4. DOOR PANEL ASSEMBLY ALL VERTICAL DOOR CHANNELS ARE INSTALLED IN THE REVERSE DIRECTION IN COMPARISON TO HORIZONTAL DOOR CHANNELS 20mm FLANGE 15mm FLANGE ABSCO INDUSTRIES ASSEMBLY INSTRUCTION - MODEL: 15081SK 23/10/17 PAGE 11...
-
Page 12: Front Panel Assembly
Absco Space Saver Shed INSTRUCTIONS Model: 15081SK AND VIDEOS 5. FRONT PANEL ASSEMBLY ABSCO INDUSTRIES ASSEMBLY INSTRUCTION - MODEL: 15081SK 23/10/17 PAGE 12... -
Page 13: Door Panel Assembly
NOTE: The two holes required to connect the padbolt hasp for each door have not been pre-punched, to allow for proper alignment. position each hasp centrally over the padbolt shaft, and drill 3mm holes and secure with screws ABSCO INDUSTRIES ASSEMBLY INSTRUCTION - MODEL: 15081SK 23/10/17 PAGE 13... - Page 14 SIDE WALL PANEL CHANNELS FIT INTO THE NOTCHED FRONT AND REAR WALL PANEL CHANNELS REPLACE PADBOLT HASP 10mm SCREWS WITH 20MM SCREWS CONNECT DOOR MULLION SECTIONS WITH SIX 20mm SCREWS ABSCO INDUSTRIES ASSEMBLY INSTRUCTION - MODEL: 15081SK 23/10/17 PAGE 14...
- Page 15 - EACH ANCHOR CONSISTS OF ONE NUT, BOLT, DYNABOLT AND STEEL ANGLE SLAB - DRILL A 10mm HOLE INTO THE WALL SHEET - DRILL A 10mm HOLE INTO THE CONCRETE DYNABOLT ABSCO INDUSTRIES ASSEMBLY INSTRUCTION - MODEL: 15081SK 23/10/17 PAGE 15...
- Page 16 This warranty covers any Absco product used for normal domestic use and installed in accordance with the installation instructions. The warranty does NOT cover Damage caused by storms, wind, rain snow or poor foundations.
- Page 17 ABSCO SHEDS include garden sheds, garden beds, storage units, aviaries, garages, awnings and carports. ABSCO SHEDS are designed to be weatherproof for normal weather conditions. In the event of extreme weather conditions such as heavy rain, combined with high wind gusts, the ridge capping, sheeting joins, screw fixings etc., may exhibit minor deformations which may allow some water entry.
Need help?
Do you have a question about the 15081SK and is the answer not in the manual?
Questions and answers