Table of Contents
Advertisement
Advertisement
Table of Contents

Related Manuals for Bissell CLEANVIE PROHEAT 46L5-F


Summary of Contents for Bissell CLEANVIE PROHEAT 46L5-F
- Page 1 MODEL 46L5-F...
-
Page 2: Safety Instructions
WARNING SHOCK – USE INDOORS ONLY. DO NOT IMMERSE. USE ONLY ON SURFACES MOISTENED BY THE CLEANING PROCESS. USE ONLY BISSELL TO REDUCE THE RISK OF ELECTRIC SHOCK, CLEANING PRODUCTS INTENDED FOR USE WITH ALWAYS INSTALL FLOAT BEFORE ANY WET THIS MACHINE. -
Page 3: Table Of Contents
Thanks for buying a BISSELL deep cleaner Safety Instructions... 2 We’re glad you purchased a BISSELL deep cleaner. Everything we know Product View....4... -
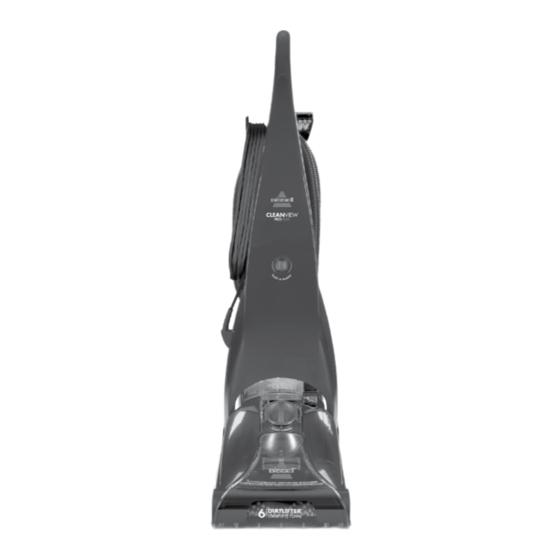
Page 4: Product View
19 Handle Release 4 Lower Body Assembly 13 Tough Stain Tool 20 Power Switch 5 Integrated Carry Handle 14 Hose Secure Latch 21 Large, Easy-To-Maneuver 6 ReadyTools™ Dial 15 Quick Release™ Cord Wrap Wheels 7 Belt Access Door 16 Power Cord www.BISSELL.com... -
Page 5: Assembly
Hose Secure Latch Cleaning fluid WARNING Keep plenty of genuine BISSELL 2X formula on hand so you can clean and protect whenever it To reduce the risk of fire and electric shock due to internal fits your schedule. Always use genuine BISSELL component damage, use only BISSELL cleaning fluids deep cleaning formulas. -
Page 6: Operations
The BISSELL range of deep carpet cleaners and deep To learn more about managing asthma and carpet cleaning formulas has been approved by the allergies, visit the Sensitive Choice website at: National Asthma Council Australia’s Sensitive Choice... - Page 7 BISSELL Stain PreTreat, generously spray evenly over soiled area, do not overwet. b. Wait 3-5 minutes before deep cleaning. c. Clean as normal using your BISSELL deep cleaner. ATTENTION Some Berber carpets have a tendency to fuzz with wear. Repeated strokes in the same area with an ordinary vacuum or deep cleaner may aggravate this condition.
- Page 8 Remove lid, turn over and locate built in measuring cup. 3. Fill with BISSELL 2X formula to the indicated fill line on the built in measuring cup and pour into mouth of the bladder.
- Page 9 Use a vacuum with a brush attach- ment and a crevice tool to clean in fabric folds and tufts. 6. To begin cleaning with attachments, follow the instructions on page 8 for filling the 2-in-1 Manufacturer’s tag water tank. www.BISSELL.com...
- Page 10 10 more times counter clockwise. This should free up any debris. 17. Wipe diverter assembly with a soft cloth and replace back on machine. Replace nozzle. 18. Return ReadyTools dial to FLOOR CLEANING setting. Screw Run water through here www.BISSELL.com...
- Page 11 NOTE: Prior to filling with formula and water be sure all carpet cleaning formula is thoroughly rinsed from the 2-in-1 water tank. 2. Pour BISSELL Hard Floor Solutions to the indicated fill line in the built in measuring cup and pour into mouth of bladder.
-
Page 12: Maintenance & Care
Rinse the filter under cold water. NOTE: Be careful not to drop the filter into the sink or disposal. b . Replace the white filter back into the filter area. NOTE: Make sure the white filter is seated properly before replacing the red solution filter cap. c . Replace the red solution filter cap and turn clockwise to tighten. www.BISSELL.com... - Page 13 Put the unit away in a closet or basement for the next use. Store cleaner in a protected, dry area. Since this product uses water, it must not be stored where there is a danger of freezing. Freezing will damage internal components and void the warranty. www.BISSELL.com...
- Page 14 10. Reattach pivot arm, white pivot arm connector and screw. 11. Reattach red belt cover and screw. NOTE: Do not over tighten screws. 12. Reattach belt access door. If you have any questions or are having trouble removing, replacing or reinstalling your brush belt or brush, please call BISSELL Consumer Care.
- Page 15 10. Reattach pivot arm, white pivot arm connector and screw. 11. Reattach red belt cover and screw. NOTE: Do not over tighten screws. 12. Reattach belt access door. If you have any questions or are having trouble removing, replacing or reinstalling your pump belt, please call BISSELL Consumer Care.
-
Page 16: Troubleshooting
Clean out lint screen. Refer to page 9. Please do Other maintenance or service not included in the manual should not return be performed by an authorized service representative. this product Thank you for selecting a BISSELL product. to the store. www.BISSELL.com... -
Page 17: Replacement Parts
Replacement Parts These items are available for your BISSELL deep cleaner. Visit www.BISSELL.com PART # PART NAME PART # PART NAME 203-0104 Tank Assembly Complete 203-0102 Tank Base 203-0124 Removable Nozzle 215-0628 Replacement Pump Belt (with instructions) 015-0621 Replacement Brush Belt... -
Page 18: Notes
Notes... - Page 19 Notes...
-
Page 20: Guarantee
Consumer Guarantee BISSELL DOES NOT EXCLUDE OR LIMIT IN ANY WAY ITS LIABILITY FOR (A) DEATH OR PERSONAL INJURY CAUSED BY OUR NEGLIGENCE OR THE NEGLIGENCE OF This Guarantee only applies outside of the USA and Canada. It is provided OUR EMPLOYEES, AGENTS OR SUBCONTRACTORS;...
Need help?
Do you have a question about the CLEANVIE PROHEAT 46L5-F and is the answer not in the manual?
Questions and answers