Advertisement
Table of Contents
- 1 Attach Boom Tube Tray to the Carrier Base
- 2 Insert the Skewer into the Fork Base
- 3 Attach Sidewinder to the Crossbars
- 4 Get Ready to Load the Tandem Bicycle
- 5 Load the Tandem Bicycle
- 6 Lift the Bike Onto the Carrier
- 7 Before Driving Away
- 8 Test Bike Stability and before Driving Away
- Download this manual
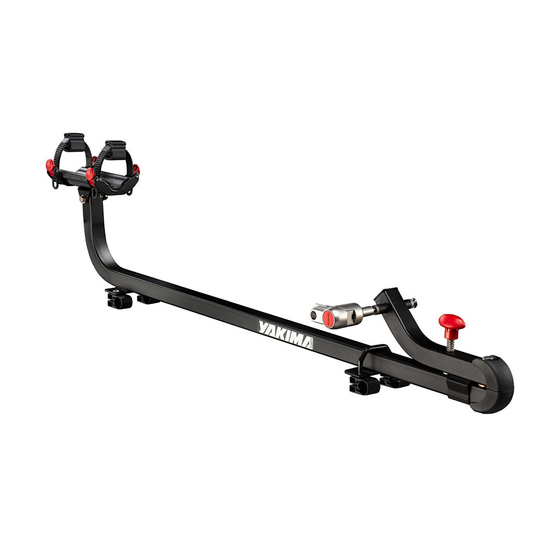
SideWinder
IMPORTANT WARNING!
IT IS CRITICAL THAT ALL
YAKIMA RACKS AND
ACCESSORIES BE PROPERLY
AND SECURELY ATTACHED
TO YOUR VEHICLE. IMPROPER
ATTACHMENT COULD RESULT
IN AN AUTOMOBILE ACCIDENT,
MINIMUM CROSSBAR
AND COULD CAUSE SERIOUS
SPREAD: 24"/61cm
BODILY INJURY OR DEATH TO
YOU OR TO OTHERS. YOU ARE
RESPONSIBLE FOR SECURING
THE RACKS AND ACCESSORIES
TO YOUR CAR, CHECKING
THE ATTACHMENTS PRIOR
TO USE, AND PERIODICALLY
INSPECTING THE PRODUCTS
FOR ADJUSTMENT, WEAR, AND
DAMAGE. THEREFORE, YOU
MUST READ AND UNDERSTAND
ALL OF THE INSTRUCTIONS AND
CAUTIONS SUPPLIED WITH YOUR
YAKIMA PRODUCT PRIOR TO
INSTALLATION OR USE. IF YOU DO
NOT UNDERSTAND ALL OF THE
INSTRUCTIONS AND CAUTIONS,
OR IF YOU HAVE NO MECHANICAL
EXPERIENCE AND ARE NOT
THOROUGHLY FAMILIAR WITH
THE INSTALLATION PROCEDURES,
YOU SHOULD HAVE THE PRODUCT
INSTALLED BY A PROFESSIONAL
INSTALLER SUCH AS A QUALIFIED
NOT COMPATIBLE
GARAGE OR AUTO BODY SHOP.
WITH MIGHTY
MOUNTS.
Advertisement
Table of Contents

Related Manuals for Yakima SideWinder


Summary of Contents for Yakima SideWinder
- Page 1 DAMAGE. THEREFORE, YOU MUST READ AND UNDERSTAND ALL OF THE INSTRUCTIONS AND CAUTIONS SUPPLIED WITH YOUR YAKIMA PRODUCT PRIOR TO INSTALLATION OR USE. IF YOU DO NOT UNDERSTAND ALL OF THE INSTRUCTIONS AND CAUTIONS, OR IF YOU HAVE NO MECHANICAL...
- Page 2 9/16" THE SIDEWINDER IS ASSEMBLED FOR PASSENGER SIDE INSTALLATION. You can change the loading side or continue to step 3. TO CHANGE TO DRIVER'S SIDE LOADING: • Reassemble the pivot • Release the • loosen the knob until ends and tighten.
- Page 3 Separate the skewer from the quick release lever. liFT covER. loosen red knob until skewer slips out. If you changed the stopper for driver’s side loading, remember to reverse the skewer’s direction in step 4. INSERT THE SKEWER INTO THE FORK BASE. Attach the quick-release lever to the skewer.
- Page 4 Attach SideWinder to the crossbars. if you have square bars, loosen the Do you have square or tabs in the brackets round crossbars? by bending them Remove the tabs with repeatedly. scissors or pliers. IF BARS ARE ROUND, CONTINUE BELOW.
- Page 5 Get ready to load the tandem bicycle. Loosen knob to free the Swing the fork base away from the car. fork base until it pops up. I N S T A L L T H E S T A B I L I Z I N G S T R A P. HANDLEBARS: SEAT POST: PULL TO TIGHTEN.
- Page 6 LoAd the tAndem bicycLe. Remove the front wheel Load the forks straight onto the skewer. from your tandem. PREVENT DAMAGE TO YOUR FORKS! On some tall vehicles, the chain ring Set your wheel in a may make contact while loading. safe location! CHECK TO MAKE SURE CLOSE COVER...
- Page 7 LIFT THE BIKE ONTO THE CARRIER. • Raise up the bike. • Pivot the bike and the fork base. • Set the boom tube into the tray. • TIGHTEN THE KNOB! (pivot) boom tube (raise) (tighten) Slide the spacer pads REVERSE THE onto the tray straps. PROCESS TO Decide which pad direction works UNLOAD THE BIKE. best for good strap and tube contact. IF NECESSARY: The tray can be adjusted by loosening the two nuts...
- Page 8 Test bike stability: To release the straps Push the red buttons. • CHECK THE fORKS. if forks move out of the • Check the tray skewer, open the lever straps. and tighten the nut again. your bike’s forks are secure onLy after the lever closes with firm resistance.
Need help?
Do you have a question about the SideWinder and is the answer not in the manual?
Questions and answers