Vega VEGAPULS WL 61 Quick Setup Manual
Radar sensor for continuous level measurement of water and wastewater
Hide thumbs
Also See for VEGAPULS WL 61:
- Operating instructions manual (64 pages) ,
- Installation & maintenance instructions manual (60 pages) ,
- Quick setup manual (20 pages)

Subscribe to Our Youtube Channel
Related Manuals for Vega VEGAPULS WL 61


Summary of Contents for Vega VEGAPULS WL 61
-
Page 1: Quick Setup Guide
Quick setup guide Radar sensor for continuous level measurement of water and wastewater VEGAPULS WL 61 4 … 20 mA/HART - two-wire Document ID: 47095... -
Page 2: Table Of Contents
Operating Instructions Manual as well as the Safety Manual that comes with instruments with SIL qualification. These manuals are available in the download area of "www.vega.com". Operating instructions VEGAPULS WL 61 - 4 … 20 mA/HART - two-wire: Document-ID 38061 Editing status of the quick setup guide: 2018-06-29... -
Page 3: For Your Safety
During work on and with the device the required personal protective equipment must always be worn. Appropriate use VEGAPULS WL 61 is a sensor for continuous level measurement. You can find detailed information about the area of application in chapter "Product description". Operational reliability is ensured only if the instrument is properly used according to the specifications in the operating instructions manual as well as possible supplementary instructions. -
Page 4: Eu Conformity
The instrument must be stationary mounted and the antenna directed vertically downward • The mounting location must be at least 4 km away from radio astronomy stations, unless special permission was granted by the responsible national approval authority VEGAPULS WL 61 • 4 … 20 mA/HART - two-wire... -
Page 5: Radio Approval For Usa
Operation is subject to the following conditions: • This device may not cause interference, and • This device must accept any interference, including interference that may cause undesired operation of the device VEGAPULS WL 61 • 4 … 20 mA/HART - two-wire... - Page 6 • D'autre part, les capteurs de niveau qui perturbent une exploita- tion autorisée par licence de fonctionnement principal doivent être enlevés aux frais de leur utilisateur. VEGAPULS WL 61 • 4 … 20 mA/HART - two-wire...
-
Page 7: 1.10 Environmental Instructions
That is why we have introduced an environment management system with the goal of continuously improving company environmental pro- tection. The environment management system is certified according to DIN EN ISO 14001. Please help us fulfil this obligation by observing the environmental instructions in this manual: • Chapter "Packaging, transport and storage" • Chapter "Disposal" VEGAPULS WL 61 • 4 … 20 mA/HART - two-wire... -
Page 8: Product Description
The 4-digit PIN is necessary for the Bluetooth connection to the sen- sor. The PIN is unique and is only valid of this sensor. You can find the PIN as a label on a supplementary sheet in the sen- sor packaging and next to the type label. Fig. 2: Bluetooth PIN VEGAPULS WL 61 • 4 … 20 mA/HART - two-wire... -
Page 9: Adjustment
Test certificate (PDF) - optional Go to "www.vega.com", "Instrument search (serial number)". Enter the serial number. Alternatively, you can access the data via your smartphone: • Download the VEGA Tools app from the "Apple App Store" or the "Google Play Store" • Scan the Data Matrix code on the type label of the instrument or •... - Page 10 Smartphone/tablet (iOS or Android operating system) • PC/notebook with Bluetooth USB adapter (Windows operating system) Fig. 4: Wireless connection to standard operating devices Display and adjustment module Sensor Smartphone/Tablet Bluetooth USB adapter PC/Notebook VEGAPULS WL 61 • 4 … 20 mA/HART - two-wire...
-
Page 11: Mounting
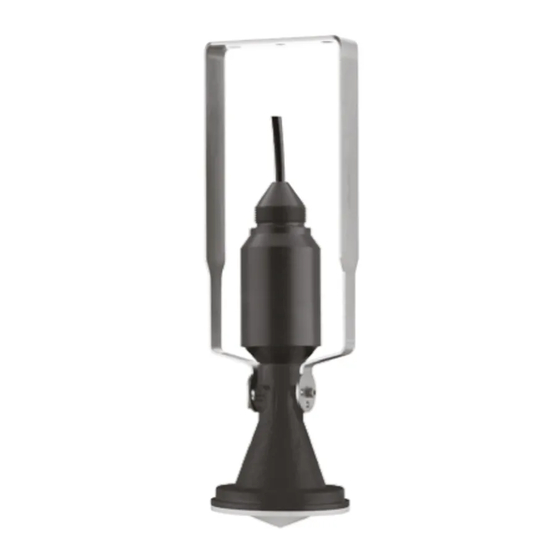
G1½, e.g. from the VEGA product range, is recommended. The mounting of the sensor in the bracket is carried out via a G1½ counter nut of plastic. Take note of chapter "Mounting instructions" for the distance to the wall. VEGAPULS WL 61 • 4 … 20 mA/HART - two-wire... - Page 12 The instrument is normally mounted vertically with a bracket on the mounting ceiling. This ensures swivelling of the sensor up to 180° for optimum orienta- tion. Fig. 7: Ceiling mounting via the mounting strap with length 300 mm VEGAPULS WL 61 • 4 … 20 mA/HART - two-wire...
- Page 13 Fig. 10: Wall mounting with inclined wall via the mounting strap with length 300 mm Flange mounting For mounting the instrument on a socket or a manhole cover, an unassembled combi collar flange for DN 80 (ASME 3" or JIS 80) is optionally available also as retrofitting part. VEGAPULS WL 61 • 4 … 20 mA/HART - two-wire...
-
Page 14: Mounting Preparations, Mounting Strap
The optional mounting strap is supplied unassembled. It must be screwed to the sensor before setup with the attached screws. Max. torque, see chapter "Technical data". Required tools: Allen wrench size 4. There are two different variants of screwing the strap to the sensor. Depending on the selected variant, the sensor can be rotated in the strap infinitely variable through 180° or in three steps 0°, 90° and 180°. VEGAPULS WL 61 • 4 … 20 mA/HART - two-wire... -
Page 15: Connecting To Power Supply
Wiring plan Wire assignment, con- nection cable Fig. 12: Wire assignment in permanently connected connection cable Brown (+) and blue (-) to power supply or to the processing system Shielding VEGAPULS WL 61 • 4 … 20 mA/HART - two-wire... -
Page 16: Setup With Smartphone/Tablet (Bluetooth)
5 Setup with smartphone/tablet (Bluetooth) Setup with smartphone/tablet (Bluetooth) Connecting Connecting … Start the "VEGA Tools" app and select the function "Setup". The smartphone/tablet searches automatically for Bluetooth-capable instruments in the area. The message "Searching …" is displayed. The found instruments will be listed on the left side of the adjustment window. -
Page 17: Sensor Parameter Adjustment
For indication of the real level, an allocation of the measured distance to the percent- age height must be carried out. To perform the adjustment, enter the distance with full and empty vessel, see the following example: VEGAPULS WL 61 • 4 … 20 mA/HART - two-wire... - Page 18 The actual product level during this adjustment is not important, because the min./max. adjustment is always carried out without changing the product level. These settings can be made ahead of time without the instrument having to be installed. VEGAPULS WL 61 • 4 … 20 mA/HART - two-wire...
-
Page 19: Setup With Vegadis 82
4 … 20 mA/HART signal cable Sensor Adjustment volume Main menu: Setup, Diagnosis, Additional adjustments, Info Setup: Settings, for example, for medium, application, vessel form, adjustment, signal output Diagnosis: Information, for example on the instrument status, peak value, measurement reliability, echo curve memory as well as simula- tion VEGAPULS WL 61 • 4 … 20 mA/HART - two-wire... -
Page 20: Setup Steps
6 Setup with VEGADIS 82 Additional adjustment: False signal suppression, linearization, reset Info: Instrument type and serial number Setup steps You can find a detailed description of the setup steps for VEGAPULS WL 61 in the operating instructions manual "VEGADIS 82 - 4 … 20 mA/HART". VEGAPULS WL 61 • 4 … 20 mA/HART - two-wire... -
Page 21: Setup With Pactware
This applies, e.g. to the VEGA instruments VEGATRENN 149A, VEGAMET 381, VEGAMET 391. Common Ex separators are also usually equipped with a sufficient current limiting resistance. In such cases, the interface converter can be connected parallel to the 4 … 20 mA cable (dashed line in the previous illustration). VEGAPULS WL 61 • 4 … 20 mA/HART - two-wire... -
Page 22: Parameter Adjustment With Pactware
"DTM Collection/PACTware" attached to each DTM Collection and which can also be downloaded from the Internet. Detailed descrip- tions are available in the online help of PACTware and the DTMs. VEGAPULS WL 61 • 4 … 20 mA/HART - two-wire... - Page 23 The standard version is available as a download under www.vega.com/downloads and "Software". The full version is avail- able on CD from the agency serving you. VEGAPULS WL 61 • 4 … 20 mA/HART - two-wire...
-
Page 24: Supplement
Ʋ for 9.6 V< U < 14 V ≤ 0.7 V (16 … 400 Hz) Ʋ for 18 V< U < 36 V ≤ 1.0 V (16 … 400 Hz) Load resistor Ʋ Calculation )/0.022 A Ʋ Example - Non-Ex instrument with (24 V - 9.6 V)/0.022 A = 655 Ω = 24 V DC VEGAPULS WL 61 • 4 … 20 mA/HART - two-wire... - Page 25 Notes VEGAPULS WL 61 • 4 … 20 mA/HART - two-wire...
- Page 26 Notes VEGAPULS WL 61 • 4 … 20 mA/HART - two-wire...
- Page 27 Notes VEGAPULS WL 61 • 4 … 20 mA/HART - two-wire...
-
Page 28: Information
Subject to change without prior notice © VEGA Grieshaber KG, Schiltach/Germany 2018 VEGA Grieshaber KG Phone +49 7836 50-0 Am Hohenstein 113...
Need help?
Do you have a question about the VEGAPULS WL 61 and is the answer not in the manual?
Questions and answers