
Related Manuals for AlpicAir AWI-25HPDC1C


Summary of Contents for AlpicAir AWI-25HPDC1C
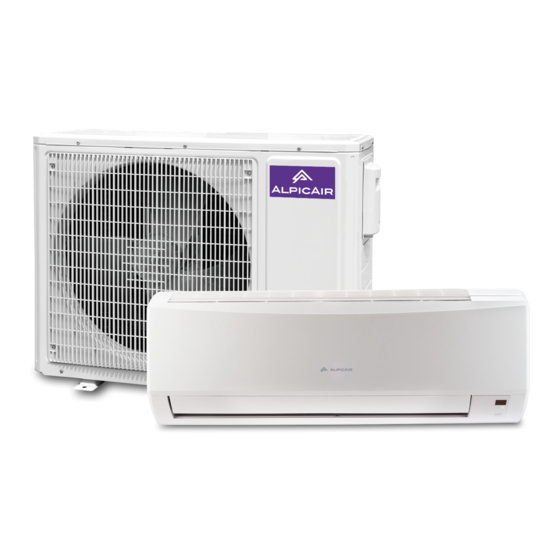
- Page 1 Installation Manual Models: AWI/AWO-25HPDC1C AWI/AWO-35HPDC1C (Refrigerant R410A)
-
Page 2: Installation Dimension Diagram
1 Installation Dimension Diagram Space to the wall At least 15cm At least 15cm Space to the wall Drainage pipe... -
Page 3: Installation Procedures
Installation procedures Start installation Preparation before installation Read the requirements select installation Prepare tools for electric connection location Select indoor unit Select outdoor unit installation location installation location Install the support of outdoor unit Install wall-mounting frame, drill wall holes (select it according to the actual situation) Connect pipes of indoor Fix outdoor unit... -
Page 4: Installation Parts-Checking
2 Installation Parts-checking 4 Electric Connection Requirement Name Name 1. Safety Precaution Indoor unit Sealing gum (1) Must follow the electric safety regulations when installing Outdoor unit Wrapping tape the unit. Support of outdoor (2) According to the local safety regulations, use qualified Connection pipe unit power supply circuit and air switch. - Page 5 in the holes. 5. Connect the Pipe of Indoor Unit (3) Fix the wall-mounting frame on the wall with tapping screws (1) Aim the pipe joint at the corresponding bellmouth.(As show (ST4.2X25TA) and then check if the frame is firmly installed by in Fig.5) pulling the frame.
- Page 6 7. Connect Wire of Indoor Unit 8. Bind up Pipe (1) Open the panel, remove the screw on the wiring cover and (1) Bind up the connection pipe, power cord and drain hose then take down the cover.(As show in Fig.11) with the band.(As show in Fig.14) Panel (2) Reserve a certain length of drain hose and power cord...
-
Page 7: Installation Of Outdoor Unit
6 Installation of Outdoor Unit Refer to the following table for wrench moment of force: Tightening torque(N . m) 1. Fix the Support of Outdoor Unit(Select it according to Hex nut diameter(mm) the actual installation situation) Φ6 15~20 Φ9.52 30~40 (1) Select installation location according to the house structure. -
Page 8: Vacuum Pumping And Leak Detection
8 Check after Installation and Test Operation The drain hose can't be fluctuant 1. Check after Installation Check according to the following requirement after finishing The water outlet installation. can't be placed in water The drain hose Items to be checked Possible malfunction can't be fluctuant The water... - Page 9 Model: AWI-25HPDC1C Wiring Diagram 2017-04-25...
- Page 10 Model: AWO-25HPDC1C Wiring Diagram 2017-04-25...
- Page 11 Model: AWI-25HPDC1C Outline Dimensions Drawing 2017-05-29...
- Page 12 Model: AWO-25HPDC1C Outline Dimensions Drawing 2017-05-29...
- Page 13 Model: AWI-35HPDC1C Wiring Diagram 2017-04-25...
- Page 14 Model: AWO-35HPDC1C Wiring Diagram 2017-04-25...
- Page 15 Model: AWI-35HPDC1C Outline Dimensions Drawing 2017-05-29...
- Page 16 Model: AWO-35HPDC1C Outline Dimensions Drawing 2017-05-29...
- Page 17 Model: AWI/AWO-25HPDC1C AWI/AWO-35HPDC1C AWI/AWO-53HPDC1C AWI/AWO-70HPDC1C Installation & Service Space Drawing 2017-03-24...
- Page 18 Installation Manual Models: AWI/AWO-53HPDC1C AWI/AWO-70HPDC1C (Refrigerant R410A)
- Page 19 1 Installation Dimension Diagram Space to the wall Space to the wall At least 15cm At least 15cm Drainage pipe...
- Page 20 Installation procedures Start installation Preparation before installation Read the requirements select installation Prepare tools for electric connection location Select indoor unit Select outdoor unit installation location installation location Install the support of outdoor unit Install wall-mounting (select it according to the actual situation) frame, drill wall holes Connect pipes of indoor Fix outdoor unit...
- Page 21 4 Electric Connection Requirement 2 Installation Parts-checking 1. Safety Precaution Name Name (1) Must follow the electric safety regulations when installing Indoor unit Sealing gum the unit. Outdoor unit Wrapping tape (2) According to the local safety regulations, use qualified Support of outdoor power supply circuit and air switch.
- Page 22 in the holes. Left Right (3) Fix the wall-mounting frame on the wall with tapping screws (ST4.2X25TA) and then check if the frame is firmly installed by pulling the frame. If the plastic expansion particle is loose, Wall Wall Level meter Cut off Mark in the middle of it please drill another fixing hole nearby.
- Page 23 Note: Note: (1) All wires of indoor unit and outdoor unit should be (1) Add insulating pipe in the indoor drain hose in order to connected by a professional. prevent condensation. (2) If the length of power connection wire is insufficient, please (2) The plastic expansion particles are not provided.
- Page 24 4. Connect Indoor and Outdoor Pipes Outdoor Indoor (1) Remove the screw on the handle and valve cover of outdoor Fig.17 Wall pipe Sealing gum unit and then remove the handle and valve cover.(As show in Fig.21) Upper hook (2) Remove the screw cap of valve and aim the pipe joint at the bellmouth of pipe.(As show in Fig.22) Liquid pipe Pipe joint...
- Page 25 2. Leakage Detection The drain hos (1) With leakage detector: can't raise upwards Check if there is leakage with leakage detector. (2) With soap water: Wall If leakage detector is not available, please use soap water for leakage detection. Apply soap water at the suspected position Fig.25 and keep the soap water for more than 3min.
- Page 26 Model: AWI-53HPDC1C Outline Dimensions Drawing 2017-05-29...
- Page 27 Model: AWO-53HPDC1C Outline Dimensions Drawing 2017-05-29...
- Page 28 Model: AWI-53HPDC1C Wiring Diagram 2017-04-25...
- Page 29 Model: AWO-53HPDC1C Wiring Diagram 2017-04-25...
- Page 30 Model: AWI-70HPDC1C Wiring Diagram 2017-04-25...
- Page 31 Model: AWO-70HPDC1C Wiring Diagram 2017-04-25...
- Page 32 Model: AWI-70HPDC1C Outline Dimensions Drawing 2017-05-29...
- Page 33 Model: AWO-70HPDC1C Outline Dimensions Drawing 2017-05-29...
- Page 34 Model: AWI/AWO-25HPDC1C AWI/AWO-35HPDC1C AWI/AWO-53HPDC1C AWI/AWO-70HPDC1C Installation & Service Space Drawing 2017-03-24...
- Page 35 _______________________________________________________________________________________ WWW.ALPICAIR.COM...
Need help?
Do you have a question about the AWI-25HPDC1C and is the answer not in the manual?
Questions and answers