Table of Contents
Advertisement
Available languages
Available languages
Advertisement
Chapters
Table of Contents

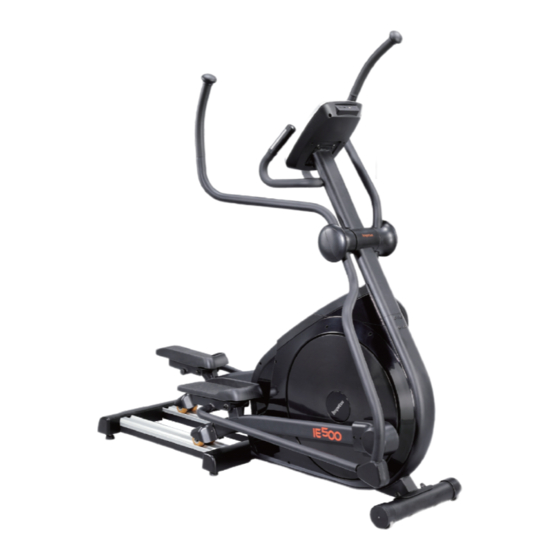
Related Manuals for IMPETUS IE 500


Summary of Contents for IMPETUS IE 500
- Page 1 USER MANUAL...
-
Page 2: Table Of Contents
TABLE OF CONTENTS INTRODUCTION / IMPORTANT INFORMATION PACKING LIST HARDWARE PACK PACKING LIST ASSEMBLY INSTRUCTIONS HOW TO MOVE THE TRAINER HOW TO ADJUST THE BALANCE OF THE TRAINER ADDITIONAL INFORMATION EXPLODED VIEW PART LIST WARM UP / COOL DOWN CLEANING & MAINTENANCE... -
Page 3: Introduction / Important Information
INTRODUCTION / IMPORTANT INFORMATION A. Introduction This user manual contains assembly, operation, maintenance and safety information. Please read and retain this manual for future reference. B. Safety guidelines a. Read the user manual and all accompanying literature. Follow it carefully before using your machine. - Page 4 IMPORTANT: THE MAXIMUM RECOMMENDED WEIGHT CAPACITY FOR YOUR EQUIPMENT IS KGS. WARNING: Before commencing with any exercise program, please consult your family physician. If at any time during exercise you feel faint, dizzy or experience pain, stop and consult your family physician. The safety level of the equipment can be maintained only if it is examined regularly for damaged and wear.
-
Page 5: Packing List
PACKING LIST Handlebar post (#2A) Water bottle holder (#86) Console (#A1) Main frame (#1A) Right handlebar (#7A) Left handlebar (#8A) Lower handlebar cover (49 & 50) Connecting arm (#6A) Connecting arm (#5A) Upper handlebar cover (54 & 55) Post cover (52 & 53) Pedal arm cover (#51) HARDWARE PACK PACKING LIST #84 M4*16mm Screw-8pcs... -
Page 6: Assembly Instructions
ASSEMBLY INSTRUCTIONS STEP 1 1. Attach the PEDAL ARM COVER (#51) to the PEDAL ARM using SCREW (#84). 2. Connect WIRES (#98 & B3) to WIRES (#B1). 3. Attach the HANDLEBAR POST (#2A) to the MAIN FRAME (#1A) using 2 SCREWS (#98), 2 SCREWS (#85) and 2 WASHERS (#99). - Page 7 STEP 2 1. Attach the WATER BOTTLE HOLDER (#86) to the MAIN FRAME (#1A).
- Page 8 STEP 3 1. Remove the pre-installed SCREW (#71), WASHER (#80) and NUT (#76) from the CONNECTING ARM (#5A). 2. Attach the CONNECTING ARM (#5A) to the PEDAL ARM (#4A) using a SCREW (#71), a WASHER (#80) and a NUT (#76) removed earlier. Make sure BUSHING (#29) is attached on the PEDAL ARM (#4A) as the graph shown before the assembly.
- Page 9 STEP 4 !! MAKE SURE THIS SCREW IS TIGHTENED 1. Attach the LEFT HANDLEBAR (#8A) to the HANDLEBAR POST (#2A) using 1 WASHER (#83) and 1 NUT (#75). 2. Connect the lower LEFT HANDLEBAR (#8A) to the UNIVERSAL JOINT (#22) using 2 BUSHING (#30), 1 WASHER (#118), 1 SCREW (#64) and 1 NUT (#75) as the picture shown.
- Page 10 STEP 5 1. Attach the FRONT POST COVER (#52) and REAR POST COVER (#53) to the HANDLEBAR POST (#2A) using 4 SCREWS (#84). 2. Attach the UPPER HANDLEBAR COVER ( #54 7) to the RIGHT HANDLEBAR (#7A). 3. Install the LOWER HANDLEBAR COVER (#49 & #50) at the UNIVERSAL JOINT (#22). 4.
- Page 11 STEP 6 1. Un-screw the top 2 SCREWS at the back of the CONSOLE (#A1), and loosen the bottom 2 SCREWS without removing them. 2. Slide the CONSOLE (#A1) onto the bracket as the graph shown. 3. Adjust the allignment of the CONSOLE (#A1), and tighten 4 SCREWS at the back of the CONSOLE (#A1).
-
Page 12: How To Move The Trainer
HOW TO MOVE THE TRAINER HANDLE TRANSPORT WHEEL 1. Hold the handle and lift the trainer up, so the transport wheels touch the floor. 2. Move the trainer to your designated position while lifting the trainer. 3. Carefully let down the trainer. HOW TO ADJUST THE BALANCE OF THE TRAINER Make sure the trainer is placed on the flat floor, and rotate the leveling foot clockwise or counter-clock wise, so the leveling foot touches the floor. -
Page 13: Exploded View
EXPLODED VIEW... -
Page 14: Part List
PART LIST DESCRIPTION Q'ty DESCRIPTION Q'ty MAIN FRAME MIDDLE STABILIZER COVER HANDLEBAR POST REAR STABILIZER COVER PEDAL ARM ( R ) MOVING WHEEL COVER PEDAL ARM ( L ) PEDAL BASE ( L ) CONNECTING ARM ( L ) PEDAL BASE ( R ) CONNECTING ARM ( R ) HEX BOLT M6*20L HANDLEBAR ( R ) -
Page 15: Warm Up / Cool Down
WARM UP / COOL DOWN Suggested Stretches The following stretches provide a good warm-up and cool-down. Move slowly as you stretch. Ham String Stretch Sit with one leg extended. Bring the sole of the opposite foot toward you, resting it against the extended leg's inner thigh. -
Page 16: Cleaning & Maintenance
CLEANING & MAINTENANCE Inspect and tighten all parts of the exercise trainer regularly. Replace any worn parts immediately. To clean the exercise trainer, use damp cloth and a small amount of mild soap. IMPORTANT: To avoid damage to the console, keep liquids away from the console and keep the console out of direct sunlight. - Page 17 USER MANUAL...
- Page 18 SADRŽAJ UVOD/VAŽNE INFORMACIJE POPIS DIJELOVA POPIS ALATA UPUTE ZA SASTVALJANJE KAKO POMICATI TRENAŽER KAKO PODESITI BALANS TRENAŽERA DODATNE INFORMACIJE EXPANDIRANI POGLED LISTA DIJELOVA ZAGRIJAVANJE/HLAĐENJE ČIŠĆENJE I ODRŽAVANJE...
-
Page 19: Uvod/Važne Informacije
UVOD/VAŽNE INFORMACIJE A. Uvod Ovaj priručnik za korištenje sadrži upute za satavljanje, korištenje, održavanje i sigurnosne mjere B. Sigurnosne mjere a. Pročitajte priručnik za korištenje i svu dodatnu literaturu. b. Ova sprava je namijenjena za korištenje u zatvorenom prostoru (kućna ili komercijalna upotreba) c. - Page 20 VAŽNO: THE MAXIMUM RECOMMENDED WEIGHT CAPACITY FOR YOUR EQUIPMENT IS 150 KGS. UPOZORENJE: Kontaktirajte obiteljskog liječnika prije početka s bilo kojim programom vježbanja. Ako tijekom vježbanja osjećate vrtoglavicu ili bol, prestanite s vježbanjem i kontaktirajte liječnika. Sigurnost vase sprave se može održati na razini tako da se redovito pregledava ima li oštećenja ili potrošenih dijelova.
-
Page 21: Popis Dijelova
POPIS DIJELOVA Stup s ručkama (#2A)v Nosač bidona (#86) Konzol (#A1) Desna ručka (#7A) Glavno kućište (#1A) Lijeva ručka (#8A) Pedala (#6A) Pokrov donjih ručki (49 & 50) Pedala (#5A) Pokrov gornjih ručki (54 & 55)v Pokrov šipke od pedale (#51) Pokrov glavnog stupa (52 &... -
Page 22: Upute Za Sastvaljanje
UPUTE ZA SASTAVLJANJE KORAK 1 1. Spojite POKROV ŠIPKE OD PEDALE (#51) na ŠIPKU OD PEDALE koristeći VIJAK (#84). 2. Spojite KABLOVE (#98 & B3) s KABLOVIMA (#B1). 3. Spojite STUP S RUČKAMA (#2A) na GLAVNO KUĆIŠTE (#1A) pomoći 2 VIJKA (#98), 2 VIJKA (#85) i 2 ŠAJBICE (#99). - Page 23 KORAK 2 1. Spojite NOSAČ BIDONA (#86) na GLAVNO KUĆIŠTE (#1A).
- Page 24 KORAK 3 1. Odvrnite VIJAK (#71), ŠAJBICU (#80) i MATICU (#76) sa ŠIPKE (#5A). 2. Spojite ŠIPKU (#5A) s ŠIPKOM PEDALE (#4A) koristeći VIJAK (#71), ŠAJBICU (#80) i MATICU (#76) koje ste ranije skinuli. Budite sigurni da je (#29) spojen s ŠIPKOM PEDALE (#4A) kao na slici.
- Page 25 KORAK 4 !! OVAJ VIJAK MORA BITI ZATEGNUT 1. Spojite LIJEVU RUČKU (#8A) s (#2A) koristeći 1 ŠAJBICU (#83) i 1 MATICU (#75). 2. Spojite DONJU LIJEVU RUČKU (#8A) s GLAVNIM ZGLOBOM (#22) pomoću 2 (#30), 1 ŠAJBICOM (#118), 1 VIJKOM (#64) i 1 MATICOM (#75) kao na slici.
- Page 26 KORAK 5 1. Pričvrstite prednji dio poklopca (#52) i stražnji dio poklopca (#53) za rukohvat (#2A) koristeći 4 vijka (#84). 2. Pričvrstite poklopac za gornji rukohvat (#54 i #55) na desni rukohvat ( #7A). 3. Montirajte poklopac za donji dio rukohvata (#49 i #50) na donji dio rukohvata.
- Page 27 KORAK 6 1. Odvijte dva gornja vijka na stražnjoj strani konzole (#A1), i olabavite dva donja vijka, 2. Pomaknite konzolu (#A1) na držač konzole ( kao na slici ) 3. Podesite položaj konzole (#A1) i stegnite 4 vijka na poleđini konzole (#A1) 4.
-
Page 28: Kako Pomicati Trenažer
KAKO POMICATI TRENAŽER TRANSPORTNI RUČKA KOTAČ 1. Držite ručku i podignite trenažer,tako da kotačići na dnu trenažera dodiruju površinu. 2. Pomaknite trenažer na određenu lokaciju 3. Oprezno spustite trenažer na tlo KAKO PODESITI BALANS TRENAŽERA Budite sigurni da su stabilizatori i trenažer na ravnoj površini, i da dodiruju pod. -
Page 29: Expandirani Pogled
EXSPANDIRANI POGLED... -
Page 30: Lista Dijelova
LISTA DIJELOVA DESCRIPTION Q'ty DESCRIPTION Q'ty MAIN FRAME MIDDLE STABILIZER COVER HANDLEBAR POST REAR STABILIZER COVER PEDAL ARM ( R ) MOVING WHEEL COVER PEDAL ARM ( L ) PEDAL BASE ( L ) CONNECTING ARM ( L ) PEDAL BASE ( R ) CONNECTING ARM ( R ) HEX BOLT M6*20L HANDLEBAR ( R ) -
Page 31: Zagrijavanje/Hlađenje
ZAGRIJAVANJE/HLAĐENJE Iduće vježbe su odlične za zagrijavanje i istezanje nakon treninga, pokrete izvodite polako i do granice boli. Istezanje zadnje lože: Sjednite sa jednom ispruženom nogom. Stopalo druge noge primaknite prema bedru ispružene noge. Pokušajte rukama dotaknuti prste ispružene noge,ostanite u toj poziciji 15 sekundi i odmorite. -
Page 32: Čišćenje I Održavanje
ČIŠĆENJE I ODRŽAVANJE Pregledajte i učvrstite sve djelove eliptičnog trenažera. Ako prim- jetite da neki dio sprave nije učvršćen zamjenite ga odmah. Za pranje sprave koristite vlažnu tkaninu i malu količinu sredstva za čišćenje. VAŽNO : Da bi izbjegli oštećenje sprave, držite tekućinu podalje od sprave i držite spravu dalje od izravne sunčeve svjetlosti Recikliranje : Ova električna sprava mora biti reciklirana i skladištena u poseb-...
Need help?
Do you have a question about the IE 500 and is the answer not in the manual?
Questions and answers