Table of Contents
Advertisement
Quick Links
Advertisement
Table of Contents

Subscribe to Our Youtube Channel
Related Manuals for Wildgame XC18i20-8


Summary of Contents for Wildgame XC18i20-8
- Page 1 Infrared Digital Scouting Camera User’s Manual Model # XC18i20-8...
- Page 2 Includes Adjustable Strap User Manual Camera Unit page 1...
-
Page 3: Image Resolution
Features RESOLUTION MAX: 18 MP FLASH 42 High Intensity IR LED’s FLASH RANGE up to 90 feet SENSOR Passive Infrared Sensor (PIR) Motion and Heat SENSOR RANGE up to 60 feet IMAGE FORMAT JPEG - Digital Stills / AVI-Digital Video MEMORY up to 32GB SD Card (not included and required) -
Page 4: Installing Batteries
Installing Batteries Open the door at the bottom of the Insert the batteries in the appropri- camera by unlatching the locking ate location corresponding to the tab. +/- shown inside the door and above each battery slot. Locate the battery compartment NOTE: Do not mix old and new bat- and press the “OPEN”... - Page 5 SD Card Push the latch to the left and push IMPORTANT: The camera should always be turned off the door closed to secure the bat- before inserting or removing the SD card. teries in the compartment. If you are using an SD card from another camera, you must format the SD card in your computer prior to installing it in this camera.
-
Page 6: Power On/Off
Power On / Off To turn the camera on: To turn the camera off: Press and release the power but- Press and release the power but- ton on the main control panel. ton to wake up the screen. ENTER ENTER A battery icon on the screen will Once the screen is awake, hold display the charge level. - Page 7 Power Save / Ready Mode After two minutes, all indicator If no buttons are pressed for 30 sec- lights will turn off while the cam- onds after turning on the power, the era continues to operate. To wake screen will turn off and enter Power up the LCD screen from Power Save Save / Ready Mode.
- Page 8 Time / Date The date, time and battery Use the +/- buttons to adjust charge level will display on the to the appropriate value. Press LCD screen by default when it is “ENTER” to save and move on to turned on. To change the date or the next category.
- Page 9 Location To save the location where this Assign the desired letter/number camera is installed, use the +/- for each blank using the +/- but- buttons to navigate to the “Loca- tons, then press “ENTER” to save tion” screen. and move to the next blank. Locationxxxxx Locationxxxxx ENTER...
- Page 10 PIR Mode Once you’ve made your selection, To select the type of media your press “ENTER” to save. camera captures, use the +/- but- tons to navigate to the “PIR Mode” screen. Modexxxxx Still [Video] Modexxxxx [Still ] Video ENTER ENTER Press “ENTER”...
- Page 11 PIR Active To select when the PIR motion Once you’ve made your selection, sensor is active, use the +/- but- press “ENTER” to save. tons to navigate to the “PIR Active” screen. PIR A ctivexxxxx 24Hr[Day]Night PIR A ctivexxxxx [24Hr]Day Night ENTER ENTER Press “ENTER”...
-
Page 12: Pir Sensitivity
PIR Sensitivity Once you’ve made your selection, To select the level of motion de- press “ENTER” to save. tected by the PIR sensor, use the +/- buttons to navigate to the “PIR Sense” screen. Sensexxxxx [Hi] Med Lo Sensexxxxx Hi [Med] Lo ENTER ENTER Press “ENTER”... - Page 13 Exposure To select the exposure setting, use Once you’ve made your selection, the +/- buttons to navigate to the press “ENTER” to save. “EXPOSURE” screen. Exposure Exposurexxxxx [Hi] Med Lo Hi [Med] Lo ENTER ENTER Press “ENTER” then use the +/- buttons to choose between high, medium or low exposure.
- Page 14 Resolution Once you’ve made your selection, To select the image/video resolu- press “ENTER” to save. tion, use the +/- buttons to navi- gate to the “Resolution” screen. Resolutionxxxxx Resolutionxxxxx [Hi] Med Lo Hi [Med] Lo ENTER ENTER Press “ENTER” then use the +/- buttons to choose between high, medium or low resolution.
-
Page 15: Video Length
Video Length To select the length of time video Once you’ve made your selection, records, use the +/- buttons to press “ENTER” to save. navigate to the “Video Length” screen. Video Length 15S [30S] Video Lengthxxxxx 5S [15S] 30S ENTER ENTER Press “ENTER”... - Page 16 Delay Once you’ve made your selection, To select how long the camera press “ENTER” to save. waits before taking another pic- ture/video, use the +/- buttons to navigate to the “Delay” screen. Delayxxxxx 2S 5S [15S] 30S > Delayxxxxx 2S [5S] 15S 30S > ENTER ENTER Press “ENTER”...
- Page 17 Language Once you’ve made your selection, To change the display language, press “ENTER” to save. use the +/- buttons to navigate to the “Language” screen. Languagexxxxx Languagexxxxx [ENGLISH] [ENGLISH] ENTER ENTER Press “ENTER” then use the +/- buttons to choose between Eng- lish, French, German or Spanish.
- Page 18 Picture Count Before going to sleep, the screen To access this information while will show the number of pictures the screen is still awake, use the taken and number of pictures re- +/- buttons to scroll through the maining. menu options. PICTURES 00000 PICTURES...
-
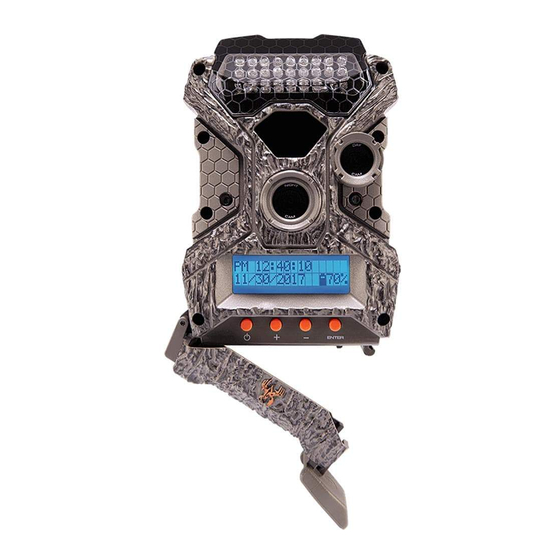
Page 19: Image Stamp
Image Stamp C D E A- Time B- Date C- Moon Phase D- Location E- Photo Count page 18... -
Page 20: Installation
Installation 1. To mount the camera to an object in the field, locate the strap that came supplied with the camera. 2. Remove the clip from one end of the strap and slide that end through the two slats on the back of the camera. -
Page 21: Format Sd Card
Format SD Card If you’re having trouble with your SD card, try these troubleshooting steps. 1. Connect the SD card to your computer. a. If your computer has an SD card slot, insert the SD card directly into the port. b. -
Page 22: Retrieving Images
Retrieving Images NOTE: This camera is not equipped to review images directly on the unit. You will need to use a device that can read and display images from an SD card. These instructions are written for a Microsoft operating system. There will be significant variations if using a Linux or Mac-based system, and likely still some variations even if you have a Microsoft system. - Page 23 4. Select the method that best suits your requirements to view/edit your photos and videos. 5. If your computer does not automatically launch AutoPlay, click the “Start” menu and select “Computer.” A window will open where “Devices with Removable Stor- age”...
-
Page 24: Warranty
Warranty DISCLAIMERS WGI Innovations, LTD is not responsible for damage, expense or injury caused by the unauthorized use of, alterations to, improper connection of and abuse or neglect of the WGI Innovations™ products. WARRANTY For the warranty to be in effect, register your product at wildgameinnovations.com. Follow the onscreen directions to complete the process. - Page 25 FCC STATEMENT Product Name: Digital Game Scouting Camera Trade Name: Wildgame Innovations Model# XC18i20-8 This device complies with Part 15 of the FCC Rules. Operation is subject to the following two criteria: (1) This device may not cause harmful interference, and (2) This device must accept any interference received, including interference that may cause undesired operation.
- Page 26 602 Fountain Parkway Grand Prairie, TX 75050 (800) 847-8269 wildgameinnovations.com “Wildgame Innovations” and the “Button Logo” are trademarks of Wildgame Innovations, LLC.
Need help?
Do you have a question about the XC18i20-8 and is the answer not in the manual?
Questions and answers