Advertisement
- 1 Battery Installation
- 2 Installing SD Card
- 3 Power
- 4 Power Save/Ready Mode/Reset
- 5 Date/Time
- 6 Location
- 7 PIR Mode
- 8 PIR Active
- 9 PIR Sensitivity
- 10 Exposure
- 11 Picture
- 12 Still Resolution
- 13 Delay
- 14 Video Length
- 15 Language
- 16 Picture Count
- 17 Image Stamp
- 18 Tether Installation
- 19 Mounting
- 20 Retrieving Images (SD Card Reader)
- 21 Format SD Card
- 22 Warranty
- 23 FCC
- 24 Documents / Resources
Battery Installation
- Open the door at the side of the camera by pressing the release button.

- Insert the batteries in the appropriate location corresponding to the +/- shown inside the door and above each battery slot.

- Close the door to secure the batteries in the compartment.


Installing SD Card
BEFORE INSTALLING:
If you are using an SD card from another camera, you must format the SD card in your computer prior to installing it in this camera. If you are using a new card, it may go directly into this camera without any formatting.
- With the camera powered off, load the SD card with the label facing up and the grooves inserted first.


Power
ON:
- Press and release the power button on the main control panel.

- Check the battery level icon to ensure the batteries just installed contain the proper charge level. If so, you are ok to proceed with camera use.


OFF:
- Press and release the power button to wake up the screen.

- Press and hold the power button for 5 seconds and release the power button. The camera is now turned off.


Power Save/Ready Mode/Reset
- If no buttons are pressed for 30 seconds after turning on the power, the screen will turn off and enter Power Save / Ready Mode.
- LED Status Light: During the first 30 seconds of the Ready Mode, the red light will illuminate when a PIR event is triggered. After the LCD turns off, the red light will blink 2-3 seconds when photo is taken.

- After two minutes, all indicator lights will turn off while the camera continues to operate. To wake up the LCD screen from Power Save Mode, briefly press the power button. To awaken the screen from Power Save mode, briefly press the power button.
- To awaken the screen from Power Save mode, briefly press the power button.

NOTE:
The screen will not turn on when the camera is writing to memory, and the camera will not take a photo/video if the screen is turned on. Press "ENTER" to reset settings back to factory settings


Press "ENTER" to reset settings back to factory settings.

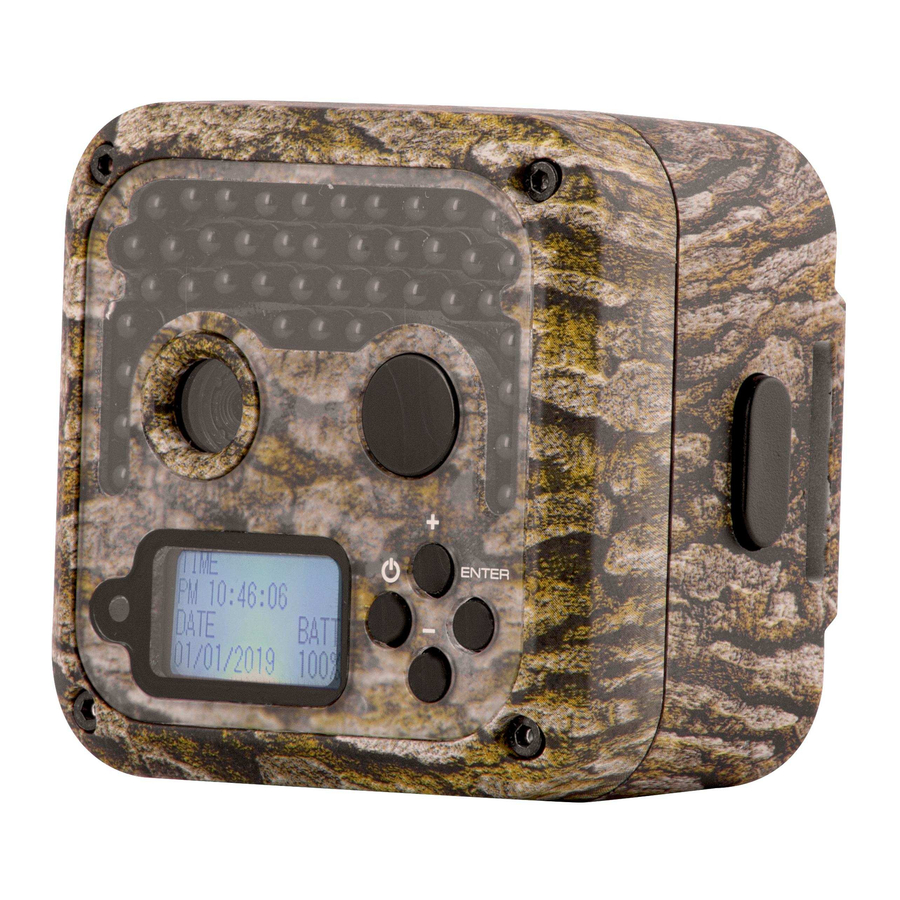
Date/Time
- The date, time and battery charge level will display on the LCD screen by default when it is turned on. To change the date or time, press "ENTER" to scroll to the appropriate item you wish to change (hour, minute, second, day, month and year).

- Use the +/- buttons to adjust to the appropriate value. Press "ENTER" to save and move on to the next category.

- Repeat steps 1 and 2 until all fields have been updated.


Location
You have the option to save the location where this camera is installed. If you do not wish to use this function, please proceed to the next step.
- To save the location where this camera is installed, use the +/- buttons to navigate to the "Location" screen.

- Press "ENTER" to begin assigning the location a name. The name can consist of up to eight letters and/or numbers.

- Assign the desired letter/number for each blank using the +/- buttons, then press "ENTER" to save and move to the next blank.

- When you have finished naming, press "ENTER" until the full name locks in place. (If you are leaving any blanks, this may take a few clicks.)


PIR Mode
- To select the type of media your camera captures, use the +/- buttons to navigate to the "PIR Mode" screen.

- Press "ENTER" then use the +/- buttons to move the cursor between "Still" and "Video."

- Once you've made your selection, press "ENTER" to save.


PIR Active
- To select when the PIR motion sensor is active, use the +/- buttons to navigate to the "PIR Active" screen.

- Press "ENTER" then use the +/- buttons to choose between 24-hour, day or night operation.

- When your preferred method is highlighted, press OK to select.
NOTE:
24-Hr: Both the day and night cameras will be used and the unit will remain active at all times. It will automatically transition between the day and night cameras in complete silence.
Day: Only the day camera will be used during daytime hours.
Night: Only the night camera will be used during nighttime hours.


PIR Sensitivity
To select the level of motion detected by the PIR sensor, use the +/- buttons to navigate to the "PIR Sense" screen.
- To select PIR sensitivity, use the UP/DOWN arrows to scroll to PIR SENSE on the left menu bar and press OK.

- Press "ENTER" then use the +/- buttons to choose between high, medium or low sensitivity.

Hi: Detects smallest movements
Med: Detects common movements
Lo: Detects only large movements


Exposure
- To select the exposure setting, use the +/- buttons to navigate to the "EXPOSURE" screen.

- Press "ENTER" then use the +/- buttons to choose between high, medium or low exposure.

High: Best for target zones at longer distances for greater illumination
Medium: Best for target zones at average distances
Low: Best for target zones at close distances to reduce motion blur


Picture
- To select the picture setting, use the +/- buttons to navigate to the "PICTURE" screen.

- Press "ENTER" then use the +/- buttons to choose between regular or wide.


Still Resolution
- To select the image resolution, use the +/- buttons to navigate to the "Resolution" screen.

- Press "ENTER" then use the +/- buttons to choose between high, medium or low resolution

High: Images will be at the highest resolution possible but take up the most storage space
Medium: Images will be at a standard resolution and take up an average amount of space
Low: Images will be at the lowest resolution possible but take up the least storage space


Delay
- To select how long the camera waits before taking another picture/video, use the +/- buttons to navigate to the "Delay" screen.

- Press "ENTER" then use the +/- buttons to choose between 2 seconds, 5 seconds, 15 seconds, 30 seconds, 1 minute or 5 minutes.


Video Length
- To select the length of time video records, use the +/- buttons to navigate to the "Video Length" screen.

- Press "ENTER" then use the +/- buttons to choose between 5, 15 or 30 seconds.


Language
- To change the display language, use the +/- buttons to navigate to the "Language" screen.

- Press "ENTER" then use the +/- buttons to choose between English, French, German or Spanish.


Picture Count
- Before going to sleep mode, the screen will show the number of pictures taken and number of pictures

- To access this information while the screen is still awake, use the +/- buttons to scroll through the menu options.


Image Stamp

A- Time
B- Date
C- Moon Phase
D- Location
E- Photo Count
Tether Installation
- To secure connection between the camera and magnetic mounting bracket, locate the tether that came supplied with the camera.
- Locate the hole on the side of the camera. Insert one end of the tether through the hole. Push the longer end through the small loop and pull taught to secure.
- Release the buckle before you locate the hole on the side of the magnetic mounting bracket. Insert one end of the tether through the hole. Push the longer end through the small loop and pull taught to secure. Reconnect the buckle to secure installation.
- To disconnect, simply squeeze the buckle and separate from tether.


Mounting
- To secure the magnetic mounting bracket to an object in the field, locate the strap that came supplied with the camera.
- Remove the clip from one end of the strap and slide that end through the two slots on the back of the magnetic mounting bracket.
- Once the magnetic mounting bracket is attached, place the clip back on the strap.
- Wrap the strap around the object at the appropriate height and connect both ends of the clip.
- Pull any excess material on the strap so the magnetic mounting bracket attaches to the object tightly.


TIPS:
- Place the camera 25-30 feet from your target area for optimal image quality.
- Try to avoid mounting the camera directly facing the rising or setting sun so sunlight isn't directly hitting the lenses.
- If mounting to a dusty environment (such as a feeder), regularly clean the camera lens covers, incandescent flash cover and PIR sensor cover.
- Periodically check the camera mounting to ensure it doesn't become loose.
- To keep any water from damaging the unit, the camera door must remain closed with the latch secured tightly while the camera is in use.
- Regularly remove the battery compartment cover to inspect the batteries for any corrosive build-up, as this may harm the camera.
NOTE:
The preferred mounting method is to attach the camera to the magnetic mounting bracket. The builtin ball head allows you to adjust and set its view conveniently and make it rotate by 360 degrees.
- Simply connect the camera to the magnetic mounting bracket. The strong magnet will secure installation.
- Once the camera is attached, rotate and pivot the camera to a desired point of view.


NOTE:
The alternate mounting method is without the magnetic mounting bracket.
- To disconnect the magnetic attachment from the camera, unscrew the attachment on the back of the camera counter clockwise.
- To secure the camera to an object in the field, locate the strap that came supplied with the camera.
- Remove the clip from one end of the strap and slide that end through the two slots on the back of the camera.
- Once the camera is attached, place the clip back on the strap.
- Wrap the strap around the object at the appropriate height and connect both ends of the clip.
- Pull any excess material on the strap so the camera attaches to the object tightly.


Retrieving Images (SD Card Reader)
These instructions are written for a Microsoft operating system. There will be significant variations if using a Linux or Mac-based system, and likely still some variations even if you have a Microsoft system. The steps listed below are basic guidelines and may need to be modified to suit your system and preference.
- Remove the SD card from your camera by lightly pressing on it until it pops out.
- Insert the SD card directly into your computer via the SD card reader.
- Your computer may automatically launch "AutoPlay." If so, you should have several options (including but not limited to the following):
- Import pictures
- View pictures
- Copy disc
- Transfer pictures
- Open folder to view files
- Select the method that best suits your requirements to view/edit your photos and videos.
- If your computer does not automatically launch AutoPlay, click the "Start" menu and select "Computer." A window will open where "Devices with Removable Storage" will be listed.
- Select "Secure Digital Storage Device" (what the computer has recognized your camera as) from the menu.
- This will direct you into the SD card file folder where images will be displayed in the "MEDIA" folder.
- Open this folder to view/edit photos and videos.
![]()
Only delete photos or videos if you are absolutely sure you want to get rid of them. Deleting anything while viewing and editing will permanently delete the file.

Format SD Card
SDXC CARDS ARE NOT SUPPORTED
Having trouble with your SD card? Try this.
- Your SD card can be directly formatted in the camera. Use the +/- buttons to navigate to the "Format SD Card" screen.

The alternate method to format your SD card is with a computer.
- Connect the SD card to your computer. If your computer has an SD card slot you can insert the SD card directly into the port.

NOTE:
If you are using a MicroSD card, you will need an adapter to allow it to fit into standard SD card ports. If your computer does not have an SD card port built-in, you can use an external USB card reader that plugs into any USB port on your computer.
- Click the Start or Windows menu and select Computer (Windows Vista/7) or My Computer (Windows XP). For Windows 8 users, type "computer" and click the Computer icon in the Apps search results.
- Right-click the drive letter associated with your memory device, then select "Format"
- Ensure FAT32 is selected under "File System"
- Ensure "Quick Format" is checked
- Click "Start"
Warranty
DISCLAIMERS
WGI Innovations, LTD is not responsible for damage, expense or injury caused by the unauthorized use of, alterations to, improper connection of and abuse or neglect of the WGI Innovations™ products.
WARRANTY
For the warranty to be in effect, register your product at wildgameinnovations.com. Follow the onscreen directions to complete the process.
WGI Innovations, LTD will replace all workmanship defects free of charge for ONE (1) YEAR after the date of purchase as long as your warranty is in effect. This warranty DOES NOT COVER damage, expense or injury caused by unauthorized repairs, alterations, improper connection, shipping, abuse, theft, accident, neglect or collateral loss. When returning product(s) for service you MUST obtain a Return Merchandise Authorization (RMA) number from WGI Innovations, LTD. Please include name, UPS address (no P.O. Box), telephone number, RMA number and a complete description of the problem on all enclosed correspondence. When possible, pack product carefully in original carton. Customers are responsible for any shipping cost to WGI Innovations™. WGI Innovations™ will pay the shipping cost of replacement product to the customer, but is not responsible for damage incurred in returning items for repair.
For product service send to:
WGI Innovations™
602 Fountain Parkway
Grand Prairie, TX 75050
(800) 847-8269
CUSTOMER SERVICE
WGI Innovations, LTD. stands behind every product we manufacture for a one-year product workmanship warranty and a strong commitment to customer service. If you are in need of customer service for missing parts or need assistance with the operation or assembly of your product, we encourage you to call one of our customer service representatives and let us assist you.
DISCLAIMER
WGI Innovations, LTD reserves the right to make changes to product features, functionality and physical design at its sole discretion. As a result, such changes may not be reflected in this version of the manual.
FCC
FCC STATEMENT
Product Name: Digital Game Scouting Camera
Trade Name: Wildgame Innovations
This device complies with Part 15 of the FCC Rules. Operation is subject to the following two criteria:
- This device may not cause harmful interference, and
- This device must accept any interference received, including interference that may cause undesired operation.

Changes or modifications to this unit not expressly approved by the party responsible for compliance could void the user's authority to operate the equipment.
NOTE:
This equipment has been tested and found to comply with the limits for a Class B digital device, pursuant to Part 15 of the FCC Rules. These limits are designed to provide reasonable protection against harmful interference in a residential installation. This equipment generates, uses and can radiate radio frequency energy and, if not installed and used in accordance with the instructions, may cause harmful interference to radio communications.
However, there is no guarantee that interference will not occur in a particular installation. If this equipment does cause harmful interference to radio or television reception, which can be determined by turning the equipment off and on, the user is encouraged to try to correct the interference by one or more of the following measures:
Reorient or relocate the receiving antenna.
Increase the separation between the equipment and receiver.
Connect the equipment into an outlet on a circuit different from that to which the receiver is connected.
Consult the dealer or an experienced radio/TV technician for help.
This device complies with Industry Canada licence-exempt RSS standard(s). Operation is subject to the following two conditions:
- this device may not cause interference, and
- this device must accept any interference, including interference that may cause undesired operation of the device.
PLANO SYNERGY
602 Fountain Parkway
Grand Prairie, TX 75050
(800) 847-8269 wildgameinnovations.com

Documents / ResourcesDownload manual
Here you can download full pdf version of manual, it may contain additional safety instructions, warranty information, FCC rules, etc.
Advertisement


Need help?
Do you have a question about the Shadow and is the answer not in the manual?
Questions and answers