Advertisement
Quick Links
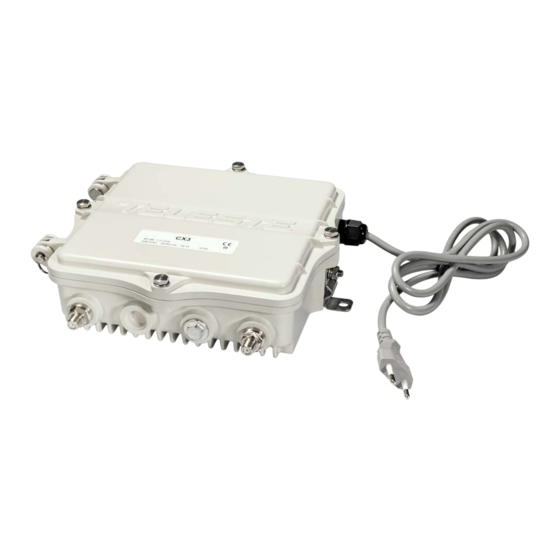
CX3 1.2 GHz Universal amplifier
Installation
Wall mounting
The CX3 is a compact dual output amplifier. It has two gain and slope modes
that makes this product universal. Output performance meets the requirements
of forward and return path DOCSIS 3.1 signals.
Adjustments are using electrical circuits that are controlled with push buttons. A
high gain return amplifier with 85/204 MHz pivot frequencies, variable slope
control is fixed built on the mother board.
Key features include: electrical adjustments, 1.2 GHz forward path, GaN
technology, 65/85/204 MHz return channel, high gain/low gain selection,
flat/sloped output selection, push button and LED indication for adjustments,
cable simulator option at input, and 2 output ports.
Plan the installation with enough clearance to install the cable and cable
connectors. The amplifier should be installed vertically so that the external
cables are facing downwards. The CX3 enclosure classification is IP67. When
installing the amplifier in its final location, make certain that it has adequate
ventilation on all sides. In particular, it is necessary to provide at least 150 mm
of room above and below the node for air circulation.
Drill two mounting holes 233 mm apart in the mounting surface. Figure 1 depicts
the locations of the wall mount brackets (Fig. 1, Pos. B). Select appropriate
length 5 mm mounting bolts (not supplied) and washers. Tighten the mounting
bolts. The amount of torque required depends on the mounting surface.
The lid retaining bolts are fasten with a 10 mm hex nut driver. Use no more than
3 Nm torque. Before closing the lid it should be checked that:
• nothing is trapped between the lid and the case
• all case gaskets are intact and in their correct positions
• lid seats evenly on the rubber gasket
The CX3 housing should be grounded from an approved earth point to the
housing ground lug (Fig. 1, Pos. A).
User Manual
59300625
1.2.2018
CX3
Rev.001
1(4)
Advertisement

Related Manuals for Teleste CX3


Summary of Contents for Teleste CX3
- Page 1 1.2.2018 1(4) CX3 1.2 GHz Universal amplifier The CX3 is a compact dual output amplifier. It has two gain and slope modes that makes this product universal. Output performance meets the requirements of forward and return path DOCSIS 3.1 signals.
- Page 2 CX3 with remote powering: (27...65 V AC) If CX3 is a remotely powered, ensure that the power cord entry port is plugged. The supply voltage of the remote powered CX3 (27...65 V AC) is supplied via coaxial cables.
- Page 3 Fuses (remote powered model only) Local user interface The CX3 amplifier has a local user interface consisting of a 4*7-segment display and 3 buttons. This local UI is used for basic configuration. During the power-up "Teleste" text scrolls through the display. Pressing “Enter” button wakes up the display and activates the first menu item.
- Page 4 Although the information in this document has been reproduced in good faith, the contents of this document are provided “as is”. Teleste makes no warranties of any kind in relation to the accuracy, reliability or contents of this document, except as required by...